Beeper RWEC99X Manual de funcionamiento

professional
RWEC99X
RWEC99X/24
Manuel d’installation & d’utilisation
User and installation manual

professional

Nous vous remercions d’avoir choisi un produit de la gamme BEEPER pour la protection et le confort de votre véhicule. Les produits BEEPER ont
été conçus et produits pour votre satisfaction totale. Nous vous conseillons de faire installer ce produit par un professionnel et la lecture de ce
guide pour une utilisation parfaite du produit.
1. Composition des packs ........................................................................................ P.3
2. Avant l'installation ............................................................................................... P.3
3. Installation de l'écran et de la caméra .................................................................. P.4
4. Connexion écran caméra ....................................................................................... P.5
5. Garanties et assistances ...................................................................................... P.6
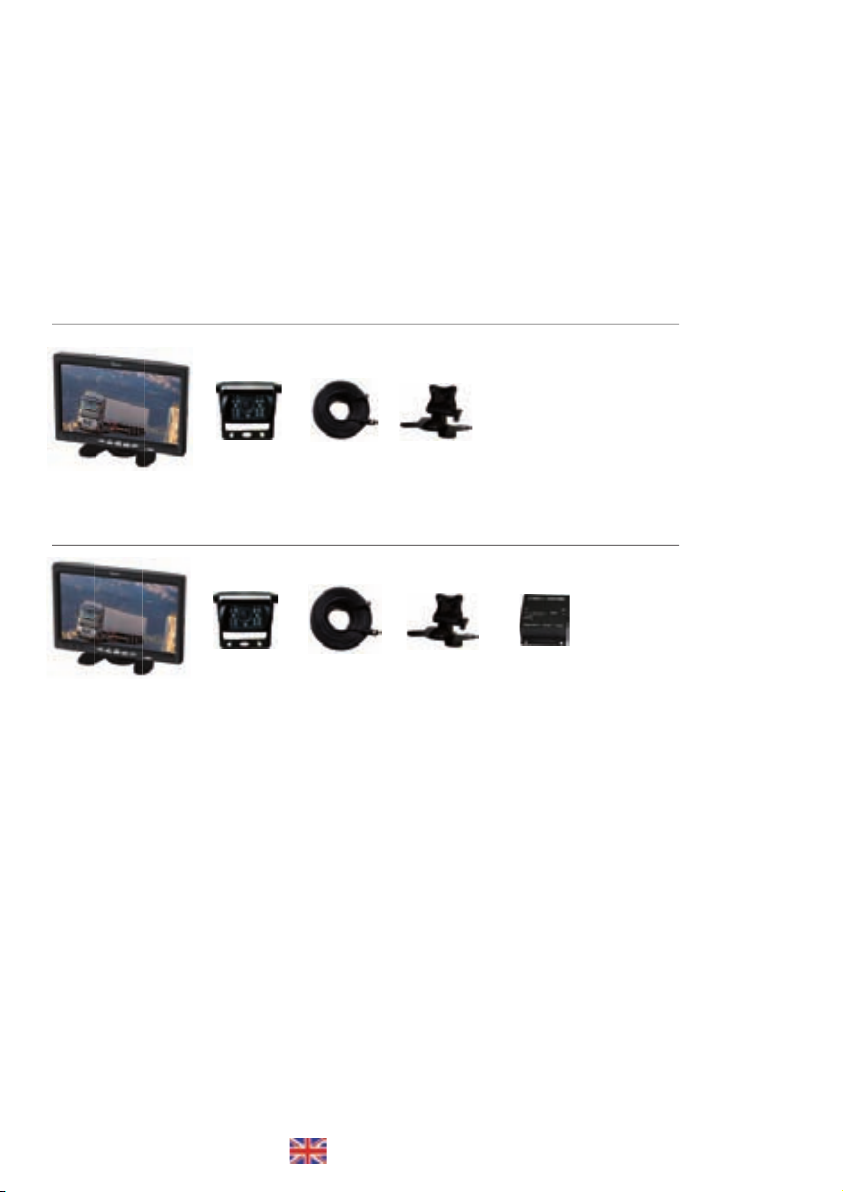
1. COMPOSITION DES PACKS
RWEC99X Vidéo de recul 12V.
Ecran 7" TFT LCD
Caméra Câblage 20 m. Support écran
RWEC99X/24 Vidéo de recul 24V.
Ecran 7" TFT LCD
Caméra Câblage 20 m. Support écran Transfo 24/12V
2. AVANT L'INSTALLATION
Merci d'avoir choisi la marque BEEPER pour votre combiné rétrovision. Avant d'utiliser ce système, veuillez lire attentivement les instructions
qui vont suivre afin de vous guider dans l'installation et l'utilisation future de ce produit.
• Conformez -vous aux règles en vigueur de votre pays
• Pour des raisons de sécurité, il est préférable de ne pas manipuler ou observer le moniteur durant la conduite. Garez votre véhicule dans un
endroit sûr avant d'observer le moniteur et manipuler le système.
• N'insérez pas votre main, doigt ou tout autre objet à l'intérieur du système lorsque le moniteur est en marche. Cela peut provoquer des
dommages et dysfonctionnements du système. Conservez les objets de petite taille hors de portée des enfants.
• Après une longue exposition au soleil, laissez refroidir le système avant réutilisation.
Installation
Nous vous remercions de suivre les conseils suivants avant l’installation du système :
• Pour votre confort et sécurité veuillez respecter les consignes suivantes liées à l'installation de ce produit.
• Le moniteur doit être placé à un emplacement permettant une bonne visibilité pour le conducteur.
• L'emplacement du moniteur ne doit pas altérer l'utilisation des commandes de la voiture, airbags et autres systèmes.
• Le système fonctionne sous tension 12 V continu (ou 24V selon modèle). Soyez sûr de la tension du véhicule et de la polarité de chaque fil.
• Vérifiez avant l’installation si tous les éléments du véhicule fonctionnent correctement tels que contact & démarrage moteur, allumage des
codes, feux et phares, clignotants, chauffage, climatisation, verrouillage des portes, ... Vérifiez après installation que tous ces mêmes éléments
Français ...................... P. 3
Manuel d’installation & d’utilisation
English ....................... P.7
User and installation manual
RWEC99X version FR P. 3

fonctionnent.
• Ne connectez les fils que par épissure / soudure sans utiliser de cosses. Les mauvais contacts peuvent créer de graves dysfonctionnements du
système et du véhicule également.
• Lorsque vous connectez la MASSE générale du système, il est très important que cette masse soit franche et totalement stable (pas de fuites).
• Veillez à ce que tous les fils passant dans des endroits serrés soient protégés par du ruban adhésif pour éviter toute torsion excessive et
dégradation de la protection plastique du fil avec risque de mauvais contacts.
• Veuillez à ce que les fils du système ainsi que tous les accessoires de sécurité soient les mieux dissimulés possible dans le véhicule, n’oubliez
jamais que vous installez un système de sécurité.
• Utilisez un multimètre digital afin de repérer chacune des polarités des fils, utilisez une lampe test pour repérer le fil de Tachymètre (si nécessaire).
• Veuillez à ne pas déconnecter la batterie si le véhicule a un autoradio à code.
• Si le véhicule est équipé d’un AIRBAG, veillez à ne pas déconnecter la batterie du véhicule, ni à connecter sans certitude les fils.
• Retirez le fusible de plafonnier lorsque vous installez le système afin d’éviter de vider la batterie (portes ouvertes).
Humidité et condensation
• Si la température ambiante du moniteur change rapidement, un phénomène de condensation peut apparaître à l'intérieur du moniteur. Le
sytème revient à son état d'origine après un court moment suite à l'évaporation de l'humidité.
Véhicules multiplexés
Le système s'installe sur les véhicules multiplexés. Les seules connexions électriques nécessaires sont :
• + 12V. (permanent, après-contact, feu de recul)
• Masse
Toutes ces informations sont sur des fils à polarité normale (+ ou -) sur lesquels ne transite pas d’information codée (multiplexée BUSCAN, VAN
ou autre codage). Vous ne devez impérativement pas couper ou toucher un fil multiplexé.
DANS TOUS LES CAS, IL EST INUTILE ET DÉCONSEILLÉ DE COUPER UN FIL D’ORIGINE DU VÉHICULE. VOUS DEVEZ UNIQUEMENT FAIRE UNE
ÉPISSURE ET RÉCUPÉRER LE SIGNAL POSITIF OU NÉGATIF TRANSITANT PAR CE FIL.
Les systèmes BEEPER sont totalement compatibles avec l’ensemble du parc automobile européen et leur installation ne peut annuler ou modifier
les conditions de garantie du véhicule. Pour toute information ou conseil, nous vous demandons de contacter nos services techniques (0 892
690 792).
3. INSTALLATION DE L'ÉCRAN ET DE LA CAMÉRA
• Fixation de l'écran & installation du support :
1 • Fixer à l'aide de l'adhésif inférieur
2 • Visser l'écran à la patte de fixation à l'aide de la vis 1
3 • Régler l'angle d'inclinaison de l'écran à votre souhait à l'aide de la vis 2
• Fixation de la caméra
1 • Dévisser les vis latérales pour séparer le support inférieur de la caméra
2 • Fixer le support inférieur à l'arrière du véhicule
3 • Faire passer le fil d'alimentation à l'intérieur du véhicule en utilisant le passe-câble pour assurer l'étanchéité
4 • Revisser la caméra au support en réglant l'angle de vue optimal
VIS 1
VIS 2
ADHESIF
Vis latérales
RWEC99X version FR P. 4

OPTION : RX-ECX2412
Transformateur 24V -> 12V • 5 amp.
Fourni dans le pack RWEC99X/24
4. CONNECTION ÉCRAN • CAMÉRA
1 • Connecter la rallonge de 20 mètres entre l'écran et la caméra
2 • Brancher le faisceau (5 fils) à l'écran
3 • Brancher le fil NOIR à une masse d'origine du véhicule
4 • Brancher le fil ROUGE à une source +12V après contact (+15)
5 • Brancher le fil VERT à la source + Feu de recul 12 Volts
Rallonge
20 mètres
Entrée VIDEO IN 2
Pour caméra optionnelle (non fournie)
Entrée VIDEO IN 1
Connexion de la caméra fournie dans le pack
Caméra
Ecran LCD 7"
ENTRÉE • +24 Volts
APRÈS CONTACT véhicule
ENTRÉE
Masse véhicule
Entrée • + 24 Volts
FEU DE RECUL véhicule
Pour un véhicule alimenté par du 24 volts, vous devez :
- soit choisir le pack RWEC99X/24 fourni avec le
transformateur 24/12 Volts
- soit vous procurer en option le transformateur 24 volts
vers 12 volts de référence RX-EC2412.
Voir connexions du transformateur dans l'encadré
VERT • + 12 Volts Feu de recul
Commutation de la caméra dès
le passage de la marche arrière
ROUGE • + 12 V après contact
Activation écran au contact
NOIR • Masse
Alimentation (-)
RWEC99X version FR P. 5

5. GARANTIES • SERVICE TECHNIQUE
Ce produit est garanti 1 an à compter de sa production (hors dalles LCD et éléments mécaniques)
Si un défaut se présentait durant la période de garantie, nous vous demandons de consulter les conditions de garantie et de service après-vente
disponibles sur notre site intrenet www.beeper.fr.
Pour toute question technique, nous vous prions de contacter notre HOT LINE TECHNIUE.
6. DÉCLARATION DE CONFORMITÉ
Nous IXIT SAS
228 Rue de l’Ancienne Distillerie
69400 GLEIZÉ France
Déclarons sous notre propre responsabilité que les produits
Référence : RWEC99X sous référence initiale de production TM7003A
Type : Vidéo de recul 7"
Auquel cette déclaration s’applique, est conforme aux normes applicables & documents normatifs suivants :
Emark ECE R10 sous le N° d'homologation 10R-02 06182
ROHS Directive 2002/95/EC
REACH
Conformément aux dispositions du 21/09/2007,
Gleizé, le 6 novembre 2010
Thierry Billau
Directeur général
professional
RoHS
E810R-0206182
RWEC99X version FR P. 6

Thank you for choosing a product line BEEPER for protection and comfort of your vehicle. BEEPER products were designed and produced to your
complete satisfaction. We recommend you have this product installed by a professional and read this guide for a perfect use of the product.
1. Composition of sets ............................................. ........................................................... P.7
2. Before installation .............................................. ............................................................. P.7
3. Installation of the screen and camera ......................................... ...................................... P.8
4. Monitor and camera connection ................................................. ...................................... P.9
5. Guarantees & assistance ............................................. ..................................................... P.10
6. Declaration of conformity ................................................. ................................................ P.10
1. COMPOSITION OF SETS
RWEC99X Rear view set 12V.
7" TFT LCD monitor
Camera Cable 20 m. Monitor bracket
RWEC99X/24 Rear view set 24V.
7" TFT LCD monitor
Camera Cable 20 m. Monitor bracket 24V/12V transformer
2. BEFORE INSTALLATION
Thank you for choosing the brand for your BEEPER combined rear vision. Before using this system, please read the instructions that follow to
guide you through the installation and future use of this product.
• Follow the regulation of your country
• For safety reasons, it is best not to handle or see the monitor while driving. Park your car in a safe location to observe the monitor and
manipulate the system.
• Do not insert your hand, finger or other object within the system when the monitor is running. This can cause damage and malfunctions. Keep
small objects out of reach of children.
• After long exposure to the sun, let the system cool before reuse.
Installation
Thank you for the following tips before the installation of the system:
• For your comfort and safety please observe the following link to install this product.
• The monitor should be placed at a location with good visibility for the driver.
• The location of the monitor should not affect the use of operating the car, airbags and other systems.
• The system runs on 12 V DC (or 24V depending on model). Be sure the vehicle voltage and polarity of each wire.
• Before installation, if all vehicle components are working properly such as contact & engine start switch codes, and fog lights, flashing lights,
heating, air conditioning, power door locks, ... Check after installing all these elements.
RWEC99X version EN P. 7

• Do not connect the wire by splicing / soldering without using lugs. The connections may create serious problems with the system and
the vehicle also.
• When you connect the general ground of the system, it is very important that this ground is completely open and stable (no leakage).
• Ensure that every son passing in tight spaces are protected by adhesive tape to avoid excessive twisting and degradation of the plastic
wire with a risk of bad contacts.
• Please ensure that the wire of the system and all safety devices are best possible hidden in the vehicle, always remember that you install
a security system.
• Use a digital multimeter to identify each of the polarities of the wire, using a test light to locate the tach wire (if necessary).
• Please do not disconnect the battery if the vehicle has a radio code.
• If the vehicle is equipped with an airbag, do not disconnect the car battery or to connect without any certainty.
• Remove the fuse when you install the ceiling system to prevent draining the battery.
Humidity and condensation
• If the ambient temperature changes quickly, condensation may appear inside the monitor. The sytem returns to its original state after a
short time due to evaporation of moisture.
Multiplexed vehicles
The system installs on vehicles multiplexed. The only electrical connections required are:
• + 12V. (Permanent, post-contact reversing light)
• Ground
All this information is on regular wire at normal polarity (+ or -) which does not pass information encoded (multiplexed CANBUS, VAN or
other encoding). You should absolutely not cut or touch a coded wire (canbus).
IN ALL CASES, IT IS UNNECESSARY AND RECOMMENDED FOR CUTTING A THREAD OF ORIGIN OF THE VEHICLE. YOU MUST MAKE ONLY
ONE SPLICE AND RECOVER THE POSITIVE OR NEGATIVE SIGNAL PASSING THROUGH THIS THREAD.
BEEPER systems are fully compatible with the entire European car fleet and the installation can not cancel or modify the conditions of
the vehicle warranty. For information or advice, we ask that you contact our Technical Services (0892690792).
3. INSTALLATION OF THE SCREEN AND CAMERA
• Attaching the monitor & bracket :
1 • Attach the bracket with the lower adhesive
2 • Fix the monitor bracket using the screw #1
3 • Adjust the angle of the monitor you wish using the screw #2
• Attaching the Camera
1 • Loosen the side screws to remove the lower bracket of the camera
2 • Secure the bottom bracket to the rear of the vehicle
3 • Run the power wire inside the vehicle using the grommet to seal
4 • Screw the camera to the bracket by adjusting the optimal viewing angle
Screw 1
Screw 2
Paste
Side screws
RWEC99X version EN P. 8

OPTION : RX-ECX2412
Transformer 24V -> 12V • 5 amp.
Supplied in set RWEC99X/24
4. • CAMERA & MONITOR CONNECTION
1 • Connect the extension cable of 20 meters between the monitor and the camera
2 • Connect harness (5 wires) on the monitor
3 • Connect the BLACK wire to the ground of the vehicle
4 • Connect the RED wire to ignition +12 V (+15)
5 • Connect the GREEN wire to reversing light source + 12 Volts
Extension cable
20 meters
Input VIDEO IN 2
Optional camera (not supplied)
Input VIDEO IN 1
Camera connection (in the set)
Camera
Monitor LCD 7"
INPUT • +24 Volts
IGNITION
INPUT (-)
GROUND
Input• + 24 Volts
REVERSE LIGHT
For a vehicle powered by 24 volts, you must:
- Or choose the package that comes with the
RWEC99X/24 transformer 24 to 12 volts
- Or get the optional transformer 24 volts to 12 volts
reference RX-EC2412.
See transformer connections in Box below
GREEN • + 12 Volts Reverse light
Camera comutation when
reverse gear engage
RED • + 12 V Ignition
Monitor operation after ignition
BLACK • Ground
Power (-)
RWEC99X version EN P. 9

5. GUARANTEES • TECHNICAL SERVICE
This product is guaranteed for 1 year from its production (excluding LCD panels and mechanical parts)
If a defect occurs during the warranty period, we ask that you read the warranty and service available on our website www.beeper.fr.
For technical questions, please call our HOT LINE.
6. DECLARATION OF CONFORMITY
We IXIT SAS
228 Rue de l’Ancienne Distillerie
69400 GLEIZÉ France
Declare under our sole responsibility that the products
Reference: RWEC99X under initial production ref TM7003A
Type: Rear view set 7 "
Which this declaration applies, complies with applicable standards & normative documents
:
Emark ECE R10 under the approval number 10R-02 06 182
ROHS Directive 2002/95/EC
REACH
In accordance with the provisions of 21/09/2007,
Gleizé, November 6, 2010
Thierry Billau
CEO
professional
RoHS
E810R-0206182
RWEC99X version EN P.10
Otros manuales para RWEC99X
1
Este manual sirve para los siguientes modelos
1
Tabla de contenidos
Idiomas:
Otros manuales de Accesorios para automóviles de Beeper

Beeper
Beeper AVANT Manual de instrucciones

Beeper
Beeper RE004i Manual de instrucciones

Beeper
Beeper RWEC110X Manual de instrucciones

Beeper
Beeper KMX250 Manual de usuario

Beeper
Beeper RW037-P Manual de instrucciones

Beeper
Beeper RW037-P Manual de instrucciones

Beeper
Beeper MICRO CAMERA RX-32 Manual de usuario

Beeper
Beeper TPM101 Manual

Beeper
Beeper REC110X-N Manual de instrucciones

Beeper
Beeper RW043P Manual de instrucciones


