AmazonBasics B08895Y2CP Manual de usuario

3D Printer Filament
Filament d’Imprimante 3D
3D-Drucker-Faden
Filamento per Stampante 3D
Filamento para Impresora 3D
3D Printerlament
3 D プリンター 用フィラメント
Filament do Drukarki 3D
Filament till 3D-Skrivare
B08895Y2CP, B08895V44X, B088962DCK, B088955JFT, B08894NK7H, B08894SDJ8,
B08896J53G, B08894NK7S, B088972M4Q, B08894TD1C, B08894TD1H

English. . . . . . . . . . . . . . . . . . . . . . . . . . . . . . . . . . . 3
Français . . . . . . . . . . . . . . . . . . . . . . . . . . . . . . . . . . 9
Deutsch . . . . . . . . . . . . . . . . . . . . . . . . . . . . . . . . . 16
Italiano . . . . . . . . . . . . . . . . . . . . . . . . . . . . . . . . . 23
Español . . . . . . . . . . . . . . . . . . . . . . . . . . . . . . . . . 30
Nederlands . . . . . . . . . . . . . . . . . . . . . . . . . . . . . . 38
日本語 . . . . . . . . . . . . . . . . . . . . . . . . . . . . . . . . . . 45
Polski. . . . . . . . . . . . . . . . . . . . . . . . . . . . . . . . . . . 54
Svenska . . . . . . . . . . . . . . . . . . . . . . . . . . . . . . . . . 61

EN
3
1. IMPORTANT
SAFEGUARDS
Read these instructions carefully and keep them
for future use. If this product is passed to a third
party, then these instructions must be included.
When using the product, basic safety precautions should
always be followed to reduce the risk of injury including the
following:
»Thin layers or layers with random dots or holes when
making a print could indicate under-extrusion. This
means that your printer cannot supply the correct
amount of material needed to print a layer. This can be
caused by debris or carbonized plastic that sticks in the
nozzle which may occur if the nozzle has been heating
up without extruding any lament.
»When you insert the lament into the printer, make sure
your hands are not slippery, as this may cause you to let
go of the lament and release the tension.
»When the print is nished, remove the lament from
the printer, but make sure to keep the tension on the
spools so it does not accidentally unwind.
»Should you nd or notice an entanglement or a knot,
hold the spool horizontally and unwind until the knot is
removed. Then rewind the spool using a decent amount
of tension on the lament.
»Always lock the lament in the small holes in the sides
of the spools and make sure that it cannot come loose.
2. Before First Use
DANGER Risk of suocation!
»Keep any packaging materials away from children—
these materials are a potential source of danger,
e.g. suocation.
»Check the product for transport damages.
3. Features
3.1 TPU
Soft texture, high resilience. Fluent printing.
Flexible TPU lament with shore hardness of 95A, easy to
print.
3.2 eSlik-PLA
eSilk-PLA is modied by adding materials with bright
eect materials into PLA to make more shiny appearance.
eSlik-PLA is similar to PLA lament, with good mechanical
properties and good toughness. It is environmentally
friendly and non-toxic. Compared to traditional PLA, the silk
high-gloss material has a bright, silky luster.
4. Use
4.1 Before printing, do a full cold-pull procedure and
follow the below steps
1. Make sure you have good access to the hot end. For
Bowden-type extruders, this might mean that you need
to unplug the guide tube.
2. Heat the nozzle to around 410–446°F (210–230°C).
If you have only printed with PLA, heat the nozzle to
around the 374–428°F (190–220°C).

EN
4
DANGER Risk of burns!
»Do not touch the bed or the tip of the nozzle with your
ngers. Those parts get very hot.
3. Insert a piece of white/bright or a glow-in-the-dark
nylon – a strong lament. Push it down hard by hand.
If there is some lament coming out of the nozzle, then
keep pushing.
176°F
(80°C)
4. Stop the heater and let the printer cool down to around
176°F (80°C) for PLA. Keep pushing until strong
resistance is felt.
5.
When the printer has cooled down, pull back the lament
out of the hot end and inspect the semi-molten end. This
should have some dirt and impurities on it. If you have
diculties, slightly increase the temperature by 9°F (5°C).
6. Cut away the dirty part of the lament and repeat from
step 2 until your lament comes out clean.
5. Bed and Storage Temperature
NOTICE The optimal printing and bed temperatures
are located on the spool label!
Because AmazonBasics lament is known as a low-warping
material, processing does not require a closed pressure
chamber. For more adhesion on the print bed, you can
brush it with an adhesion stick or spray with hair spray.
6. Storage Environment
The product should be stored in a clean, dry, cool,
ventilated, non-corrosive warehouse away from heat. Use
as soon as possible after opening.
7. Troubleshooting
This troubleshooting guide is aimed at optimizing your
printing experience.
Here are listed common issues experienced by new users.

EN
5
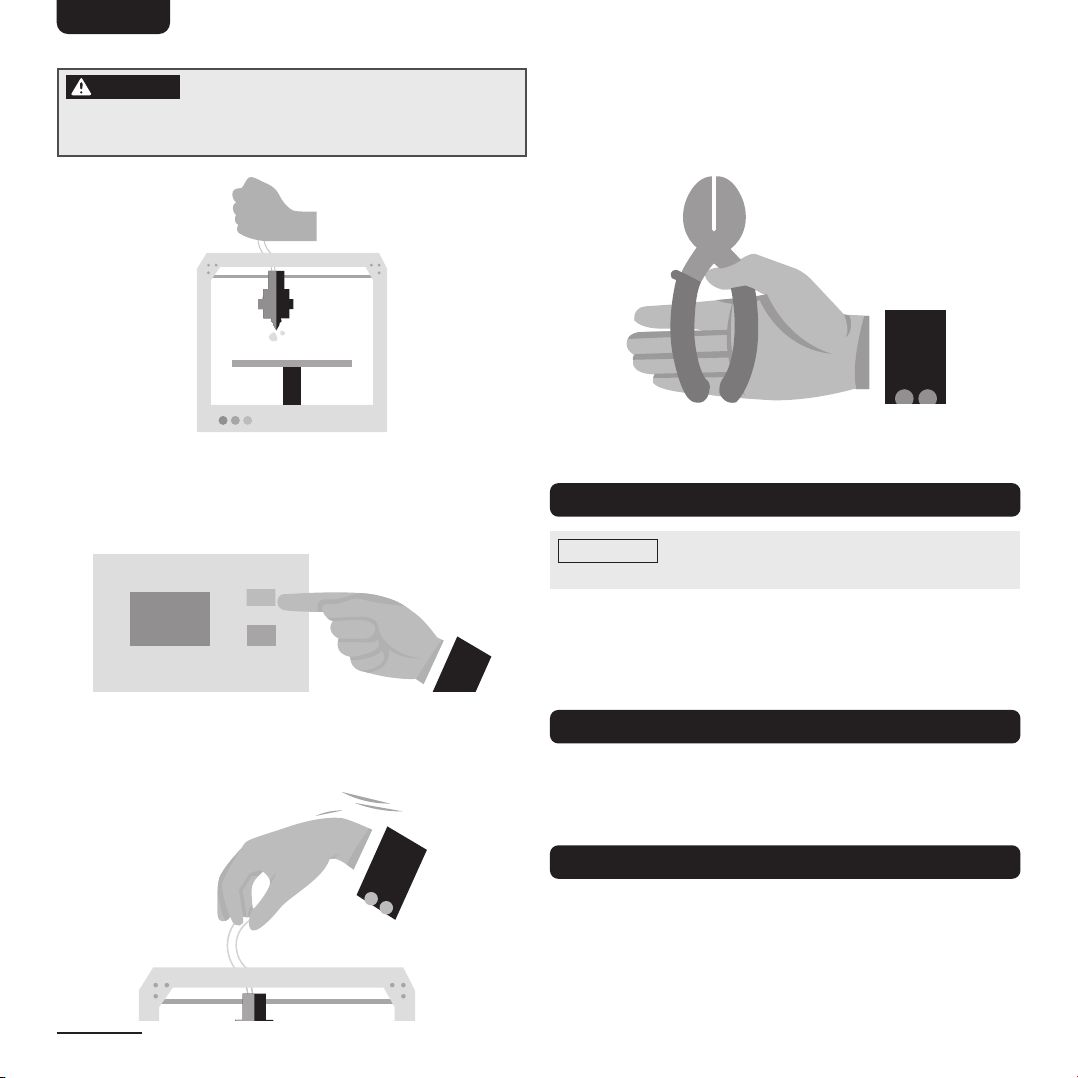
Before you start printing:
»Check whether the printer is working properly, whether
the lament is knotted, and clear of any residual
material in the nozzle.
»The printing temperature varies based on printer and
lament types, so it should not be too high; just make
sure it results in smooth printing.
»Clean the feed gear regularly.
»To solve the problems of excessive ABS shrinkage and
the warping edge cracking caused by cooling too fast,
try to ensure constant temperature in the printing area.
»Some models are too small, and the material cooling in
local areas is too slow, which results in bad molding.
We suggest adding additional fans to accelerate cooling.
»Teon tube is provided for the nozzle of the common
printer, and the printing temperature should not exceed
500 °F (260 °C).
»The printing parameters are related to the performance
of the machine, the size of the model, the degree of
complexity, the characteristics of the material, and
so on. Try to test and nd the best printing parameters
for your printer and laments.
Here are listed some of the most common issues you
may experience while printing
Issue 1: The rst layer is not sticking to the bed
If the rst layer is not sticking to the build platform, try the
below methods to resolve the issue.
»Use tape or glue on the top of the build platform to
help with adhesion. For example, PLA sticks well to blue
painters’ tape, and ABS tends to stick better to
Kapton tape.
»Try reducing the printing speed of the rst layer. If you
print the rst layer too fast, the lament may not have
enough time to stick to the build platform.
»Normally we recommend printing the rst layer at a
lower speed.
»Heat the bed in case the temperature is cooling too fast.
»Check and make sure the build platform is level.
»Use blue painters’ tape to aid adherence.
Issue 2: Filament is not extruding when starting to print
»If the lament is not extruding when you start to print,
check the below points to resolve the issue.
»Prime your extruder right before beginning a print so
that the nozzle is full of plastic and ready to extrude.
»Check and see if the nozzle is too close to the build
platform; if it is too close, there will be not enough
room for lament to come out of the nozzle.
»Check if the extruder is clogged.
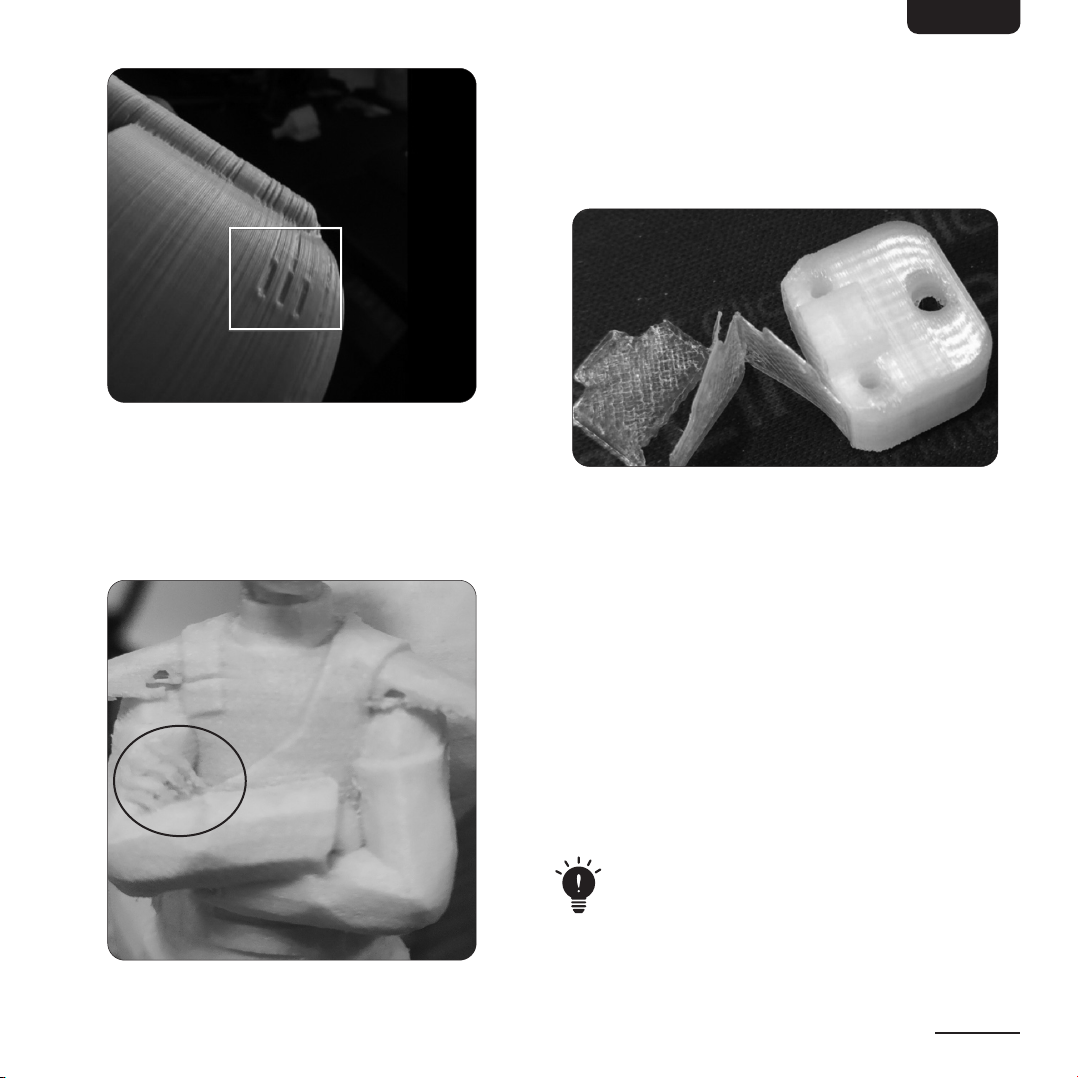
Issue 3: Stringing (hairy prints)
»Stringing or “hairy” prints occur when small strings of
plastic are left behind on a 3D printed model. This is
typically due to plastic oozing out of the nozzle while
the extruder is moving to a new location. Try adjusting
the below print setting to resolve the issue.
»The most important retraction setting is the retraction
distance. The standard retraction distance setting is
0.020" – 0.079" (0.5–2 mm); if you experience stringing
or hairy prints, try to increase the retraction distanceby
0.039" (1 mm) and test again to see if there is any
improvement.
»Adjust the retraction speed; normally we recommend
the retraction speed to be 0.787–3.937 in/s
(20–100 mm/s), but the best retraction speed can vary
depending on dierent lament types.
»Try to increase the moving speed.

EN
6
Issue 4: Filament stops extruding in the middle of
printing
If you can print properly at the beginning, but the printing
suddenly stops later, check the possible causes below.
»When the printing stops, rst try checking if you still
have lament feeding into the nozzle. If lament has
run out, load a new spool to continue.
»Check if the extruder motor driver is overheated.
»Sometimes if there is not enough cooling, the driver
may be overheated and cause it to stop working. Ifthis
happens, try turning o the printer and allow the
extruder motor driver to cool down.
»Check if the extruder is clogged. Sometimes if the
lament is dusty on the spool, it may cause clogging
inside the nozzle.
Issue 5: Warping
»Sometimes if you see warping on the surface when
printing large models, the problem is the fact that
plastic tends to shrink as it cools.
»Heat the bed when printing to keep the bottom layer
warm and prevent it from cooling too fast.
»Disable fan cooling.
»If the gap between the nozzle and the bed build plate is
too big, try adjusting the distance.
»Try increasing the printing temperature by 9–18 °F
(5–10°C) and see if it prints better.
Warping
Issue 6: Black dots in the printed model
»If there are black dots in the printed model, there may
be residual lament in the nozzle. Clear the nozzle
before starting to print.
Black Dots
Issue 7: The printed surface is dented
»The next image shows a printed surface that is dented
or rough.
»Try slowing down the retraction speed.
»Add a raft.
»Use blue tape on the bed build plate.

EN
7
Issue 8: Small parts do not print well or are deformed
»When the lament is hot and cannot cool fast enough,
the prints will be easily deformed.
»If this happens, try to use more fans to speed up
coolling, or print at a lower speed.
»Replace the nozzle with a smaller tip size.
Small details not
printed very well
Issue 9: Layer adhesion is poor, can be separated
»Try increasing the print temperature by 18 °F (10 °C).
»Reduce the printing speed to 1.181 in/s (30 mm/s).
»Try increasing the bottom layer to 3–4 passes and check
the printing result.
Issue 10: The inll is not rm or strong enough
A rm inll is very important; if your print has an inll
problem, you can:
»Try slowing down the printing speed;
»Try increasing the inll extrusion width.
Issue 11: Small holes or gaps on top layer
This issue may be caused by several factors:
»Inll percentage is too Low. Try increasing the inll
percentage and see if you get better printing results.
»There are not enough top solid layers. Try adding
additional top solid layers and compare the printing
results from the last print.
»Under extrusion, increase the extrusion multiplier, and
check if the lament diameter is within tolerance.
The lament should be stored in a clean, dry, cool,
ventilated, non-corrosive space away from heat
sources. Use as soon as possible after opening.

EN
8
8. Specications
TPU
Model number (ASIN): B08895Y2CP, B08895V44X, B088962DCK, B088955JFT, B08894NK7H,
B08894SDJ8
Print temperature: 410–464 °F (210–240 °C)
Bed temperature: No heat
Density (g/cm3): 1.43
Heat distortion temperature (°C, 0.45 MPa): /
Melt ow index: 8.4 / 10 min (190 °C / 2.16 kg)
Tensile strength (MPa): /
Elongation at break (%): 780
eSilk-PLA
Model number (ASIN): B08896J53G, B08894NK7S, B088972M4Q, B08894TD1C, B08894TD1H
Print temperature: 374–428 °F (190–220 °C)
Bed temperature: No heat / 140-176 °F (60–80 °C)
Density (g/cm3): 1.43
Heat distortion temperature (°C, 0.45 MPa): 67
Melt ow index (g/10 min): 2.5 (190 °C / 2.16 kg)
Tensile strength (MPa): 58
Elongation at break (%): 300
9. Feedback and Help
Love it? Hate it? Let us know with a customer review.
AmazonBasics is committed to delivering customer-driven products that live up to your high standards. We encourage you
to write a review sharing your experiences with the product.
US: amazon.com/review/review‑your‑purchases#
UK: amazon.co.uk/review/review‑your‑purchases#
US: amazon.com/gp/help/customer/contact‑us
UK: amazon.co.uk/gp/help/customer/contact‑us
— or —
Contact Customer Service at +1 877‑485‑0385

FR
9
1. MESURES DE
SÉCURITÉ
IMPORTANTES
Veuillez lire attentivement les présentes consignes
et les conserver an de pouvoir vous y reporter
ultérieurement. En cas de cession de ce produit
à un tiers, les présentes instructions doivent
également lui être remises.
Lors de l’utilisation du produit, vous devez toujours prendre
des mesures de sécurité de base an de réduire tout risque
de blessures, parmi lesquelles :
»Lors de la réalisation d'une impression, des couches
minces ou des couches avec des points ou des trous
répartis de manière aléatoire peuvent indiquer une
sous-extrusion. Cela signie que votre imprimante ne
peut pas fournir la quantité appropriée de matériau
nécessaire à l'impression d'une couche. Ceci peut être
causé par des résidus ou du plastique carbonisé qui
adhère à la buse, ce qui peut se produire quand la buse
chaue en n’extrudant aucun lament.
»Lorsque vous insérez le lament dans l'imprimante,
assurez-vous que vos doigts ne soient ni gras ni
glissants, car vous pourriez lâcher le lament et ainsi
relâcher sa tension.
»Lorsque l'impression est terminée, retirez le lament de
l'imprimante en veillant à maintenir sa tension sur les
bobines pour qu'il ne se déroule pas par mégarde.
»Si vous trouvez ou remarquez un emmêlement ou un
nœud, tenez la bobine horizontalement et déroulez-la
jusqu'à ce que le nœud soit éliminé. Enroulez ensuite le
lament autour de la bobine en exerçant une tension
raisonnable sur le lament.
»Fixez toujours le lament dans les petits trous situés
sur les côtés des bobines et assurez-vous qu'il ne se
détache pas.
2. Avant la Première Utilisation
DANGER Risque d’étouement !
»Maintenez tous les matériaux d'emballage hors de la
portée des enfants. Ces matériaux constituent une
source de danger potentiel comme l’étouement.
»Vériez l’état du produit an de déceler des dommages
éventuels dus au transport.
3. Caractéristiques
3.1 TPU
Texture souple, haute résilience. Impression uide.
Filament TPU exible d'une dureté shore de 95A,
facile à imprimer.
3.2 eSilk-PLA
L'eSilk-PLA est modié en ajoutant des substances à eet
de brillance dans le PLA pour lui donner un aspect plus
brillant. L'eSilk-PLA est similaire au lament PLA, avec de
bonnes propriétés mécaniques et une bonne robustesse.
Il est respectueux de l'environnement et non toxique.
Par rapport au PLA traditionnel, le silk haute brillance
présente un lustre brillant et soyeux.

FR
10
4. Utilisation
4.1 Avant d’imprimer, exécutez toujours une
procédure de tirage à froid et suivez les étapes
qui suivent:
1. Assurez-vous d'avoir un accès facile à la tête chauante.
Pour les extrudeurs de type Bowden (déportés), cela
peut signier que vous ayez à débrancher le tube de
guidage.
2. Chauez la buse jusqu'à environ 410-446°F
(210-230°C). Si vous n'avez imprimé qu'avec du
PLAjusque là, chauez la buse à environ 374-428°F
(190-220°C).
DANGER Risque de brûlures !
»Ne touchez ni le lit ni l'extrémité de la buse avec vos
doigts. Ces parties chauent jusqu’à devenir brûlantes.
3. Insérez un morceau de nylon blanc/brillant ou
phosphorescent (un lament résistant). À la main,
poussez bien fort. Si du lament sort de la buse,
continuez de pousser.
176°F
(80°C)
4. Interrompez la chaue et laissez l'imprimante refroidir
jusqu'à environ 176°F (80°C) pour le PLA. Continuez à
pousser jusqu'à sentir une forte résistance.
Este manual sirve para los siguientes modelos
10
Tabla de contenidos
Idiomas:


