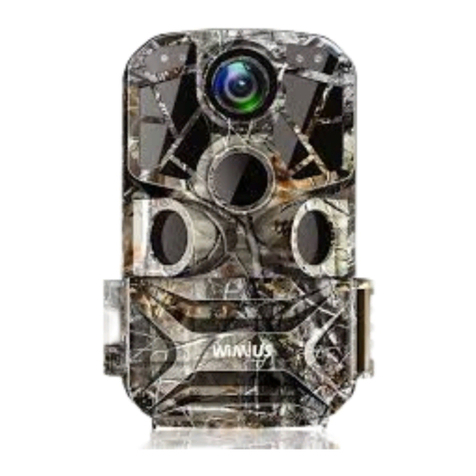
Wimius H7 Manual de usuario
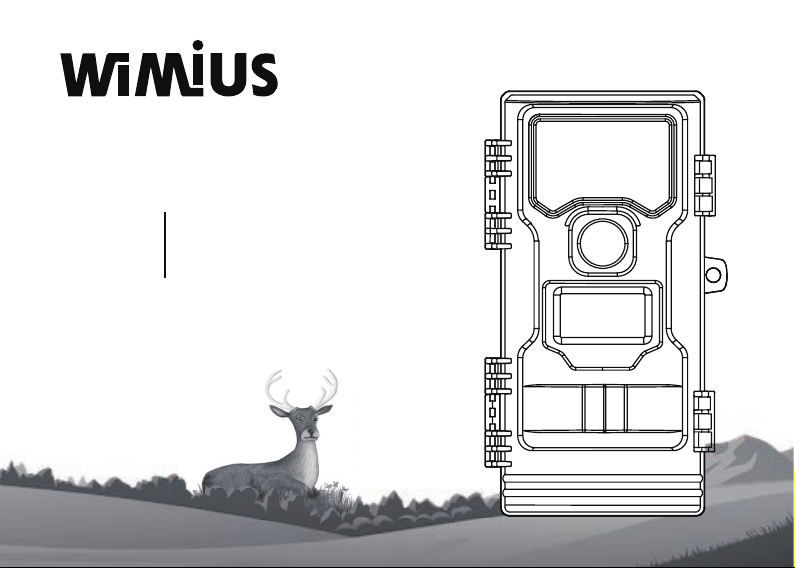
INVISIBLE
TRAIL CAMERA
H7
User Manual


Dear Customer;
Thank you for purchasing WiMiUS H7 Hunting Camera. Please read the user manual carefully before you
start to use the product. Please note that items purchased from WiMiUS are covered by 2 year warranty.
Your package should include:
1. Trail Camera*1
2. Metal bracket *1
3. Long screw of metal bracket *3
4. Plastic expansion tube *3
5. Mini USB cable *1
6. Mounting belt*1
7. User manual *1
Any problem,please feel free to contact us
We look forward to serving for you
Kind Regards,
WiMiUS Team
01 02 03 04 05 06 07 08 09 10 11 12 13 14
15 16 17 18 19 20 21 22 23 24 25 26 27 28
29 30 31 32 33 34 35 36 37 38 39 40 41 42
43 44 45 46 47 48 49 50 51 52 53 54 55 56
57 58 59 60 61 62 63 64 65 66 67 68 69 70
EN

Thank you so much for purchasing our Trail Camera. This device is a special camera for recording and
observing wildlife. For your easy operation, we provide detailed use manual about safety and usage. To
obtain the best performance, please read this manual carefully before using. Only use this product as
described and for the specified areas of application. The information contained in this manual, including
pictures and words, is subject to change without notice.
■ Never repair the camera by yourself unless you are professional in conditions permit.
■ The camera heats up after working for a long time, which is normal.
■ Please use the accessories we provided.
■ Please use 4 or 8 pieces original AA batteries but mix of old and new batteries use is not allowed.
■ When using external power supply, all batteries in the machine must be removed.
■ When the battery runs out of power or the machine does not be used for a long time, the battery must be
removed so as not to damage the machine.
■ Don’t place the machine near the high-temperature object, and prohibit knocking, falling or puncturing the
machine.
■ Don’t use the machine upside down. And when using DC power in the outdoors, it must keep the power
line of the connecting place up to 30cm vertically down to prevent the flow of rainwater.
■ Do not immerse the unit in water. No diving is allowed. Before the machine enter into the working state,
keep waterproof ring clean and dust free, fasten all buckles of the machine and install all rubber plugs.
Otherwise, it may bring rain or dust into the machine, causing the unit damaged.
Preface
Attention
01 02 03 04 05 06 07 08 09 10 11 12 13 14
15 16 17 18 19 20 21 22 23 24 25 26 27 28
29 30 31 32 33 34 35 36 37 38 39 40 41 42
43 44 45 46 47 48 49 50 51 52 53 54 55 56
57 58 59 60 61 62 63 64 65 66 67 68 69 70
EN

Trail Camera*1
Mini USB cable *1
Mounting belt*1
User manual *1
Metal bracket *1
Long screw of metal bracket *3
Plastic expansion tube *3
1. Infrared LEDs
2. Lens
3. Speaker
4. PIR Detector
5. 2.0” Display Screen
6. Mic
7. 1/4” Screw Hole
8. DC Power Input
9. OK Button
10. Down Button / Photo Mode
11. Up Button / Video Mode
12. Menu Button
13. Micro SD / TF Card Slot
14. Power Off
15. Test
16. ON Status
17. Mini USB Port
18. AV Port
1
2
3
4
5
6 7 8
9
10
11
12
13
14
15
16
17
18
Camera and Accessories
Structure
01 02 03 04 05 06 07 08 09 10 11 12 13 14
15 16 17 18 19 20 21 22 23 24 25 26 27 28
29 30 31 32 33 34 35 36 37 38 39 40 41 42
43 44 45 46 47 48 49 50 51 52 53 54 55 56
57 58 59 60 61 62 63 64 65 66 67 68 69 70
EN

Insert batteries before use.
● Open the camera and remove the battery cover. Insert 1.5V AA batteries of 4 or 8 pcs while preventing
some of the anti-access battery polarity.
● Make sure all batteries are in the same battery case when using only 4 pcs. Otherwise the device will
not work and can be damaged.
● When the camera is powered by the AC adapter (Not in the package), you can find the rubber seal at
the bottom of the camera and remove it. Connect one end to the camera with an AC adapter and plug the
other into the power. In this situation, the batteries do not supply power.
● The camera cannot save data without memory
card because of no built-in memory. So you need
to insert a Micro SD/ TF card firstly. Before shot,
format the memory card. It will improve shutter
speed and battery life.
● It supports 32GB Micro SD / TF memory card in
maximum.
● Do not push the memory card forcibly.
Insert it like the picture shown.
Power Supply
Memory Card
01 02 03 04 05 06 07 08 09 10 11 12 13 14
15 16 17 18 19 20 21 22 23 24 25 26 27 28
29 30 31 32 33 34 35 36 37 38 39 40 41 42
43 44 45 46 47 48 49 50 51 52 53 54 55 56
57 58 59 60 61 62 63 64 65 66 67 68 69 70
EN

Format Memory Card
Power on/off
Set mode switch to "TEST"/ "ON", the camera turns on. (The LCD will be closed after 5s in the "ON" mode.)
Switch to the "OFF", and then it turns off.
● ON status: Switch from TEST to ON, the red light will be flash. After the countdown, red light and display
screen will be off and the camera gets into standby mode.
● Test status: Switch from ON/OFF to TEST, the camera screen is on and can be set.
● OFF status: Switch to OFF to turn the camera off.
System Setting
● Press Menu button to enter the menu item. It will return to the last menu or exit the menu when press the
button again.
● Press Up or Down button to navigate submenu. Read more details on each setting by pressing the OK
button.
● Press Up or Down button for browsing options. Press OK to confirm your setting.
Mode
● There are three modes: Photo, Video and PhotoVideo. In the mode of PhotoVideo, the camera will take
a photo firstly and then record video.
● Switch mode between Video and Photo quickly by pressing Up or Down button.
All data on the memory card will be deleted permanently while you format it.You should format the memory
card when you use a new one or the card that other electrical devices have been using. Choose YES and
confirm by pressing OK button. It shows “Waiting” on the screen when the memory card is being format-
ted.“Formatting success” will display after it is done.
Setting & Operation
01 02 03 04 05 06 07 08 09 10 11 12 13 14
15 16 17 18 19 20 21 22 23 24 25 26 27 28
29 30 31 32 33 34 35 36 37 38 39 40 41 42
43 44 45 46 47 48 49 50 51 52 53 54 55 56
57 58 59 60 61 62 63 64 65 66 67 68 69 70
EN

Capture Num
The camera can set to capture 1 photo, 2 photos or 3 photos continuously.
Video Length
Set the length of capturing video (5S / 10S / 20S / 30S / 60S / 3mins / 5mins / 10mins). The system
default is 5 seconds.
Sensitivity
Set the sensitivity of PIR detector. Select “HIGH” for indoor because of low interference. For outdoor in
normal condition, choose “MIDDLE”.If the camera is affected infinitely by environment, you should select
“LOW”. “HIGH” applies to normal environment and “LOW” applies to cold environment.
Timer Setting
The camera will be set to work within a certain time. Press the menu button to find out this setting item
and you will see the start and stop time can be set. Select the “ON” mode. The camera will take photos or
record videos only in the set time interval and be on standby at other times after it is be set.
Security Code
Set the password of power-on. In the mode of TEST, choose the combination of a 4-digit number from 0
to 9 and A to Z. Please do remember the password!
Time Lapse
With this function, the camera will take photos automatically in the selected time interval and all images
will create a consistent video. This is useful for observing cold blooded animals or plants opening up, e.g.
the process of blooming. Select “TEST”, press menu button to find out setting item to set.
01 02 03 04 05 06 07 08 09 10 11 12 13 14
15 16 17 18 19 20 21 22 23 24 25 26 27 28
29 30 31 32 33 34 35 36 37 38 39 40 41 42
43 44 45 46 47 48 49 50 51 52 53 54 55 56
57 58 59 60 61 62 63 64 65 66 67 68 69 70
EN

Aligning the Camera
In the “TEST” mode, you can work out the best possible detection angle and range of the PIR detector.
Steps are as follows:
Attach the camera to a place where about 1m-2m from ground. Adjust the lens angle and move to the other
side slowly to see the trace. The showing of blue LED indicates that the PIR detects objects. So you can
find out the best position for the camera.
Only under the mode of “TEST”, the LED lights up when the PIR has detected movement. The LEDs do not
light up in the live mode.
To prevent incorrect signals and unnecessary photos, it should not be placed at sunny places and check
that no branches are in the active area of the detector. The detection angle of the detector is about 90° from
corner to corner and the recording field for photos and videos is around 58°.
Live Mode
The standard application of the camera is the Live Mode. In this mode, it is triggered by either motion sensor
or at time intervals according to the setting.
To set up the Live mode, switch to ON position. The red LED lights are off after some seconds. Then, the
camera works automatically and enters into the standby mode. As soon as any animals or similar enter the
detection range of the side sensor zone, the camera will activate the camera and detect the motion.
If the animals continue to move into the range of PIR, the camera will take photos or record videos automati-
cally. When the object leaves the detection range, the camera goes back into standby mode.
Night Recording
During the night, the IR LEDs will light up automatically to provide more light taking photos and record
videos. It allows night recording at a distance of 70ft. However, if the reflecting objects shows, it may cause
overexposure within this range.
Please note that photos and videos are all in black and white under this mode. The stability of the camera
will be influenced greatly by low voltage when records video for a long time. So do not record videos in the
low voltage under this mode.
01 02 03 04 05 06 07 08 09 10 11 12 13 14
15 16 17 18 19 20 21 22 23 24 25 26 27 28
29 30 31 32 33 34 35 36 37 38 39 40 41 42
43 44 45 46 47 48 49 50 51 52 53 54 55 56
57 58 59 60 61 62 63 64 65 66 67 68 69 70
EN

Playback
Firstly, remove the camera away from the installation position. Long press the OK button to enter playback
mode after selected“TEST”.
Press Up or Down button to check all photos and videos.
When replay videos, press the OK button to start playing and press it again to pause. Press the Up button
to fast forward and the Down button to fast backward. Exit the current playback by pressing the Menu
button.
The camera can be installed on the wall or in the tree
with the bracket we provide. Please make sure all
screws tighten. The best installing height is about 1m
from the ground.
Installing Bracket
01 02 03 04 05 06 07 08 09 10 11 12 13 14
15 16 17 18 19 20 21 22 23 24 25 26 27 28
29 30 31 32 33 34 35 36 37 38 39 40 41 42
43 44 45 46 47 48 49 50 51 52 53 54 55 56
57 58 59 60 61 62 63 64 65 66 67 68 69 70
EN
Tabla de contenidos
Otros manuales de Cámara de exploración de Wimius