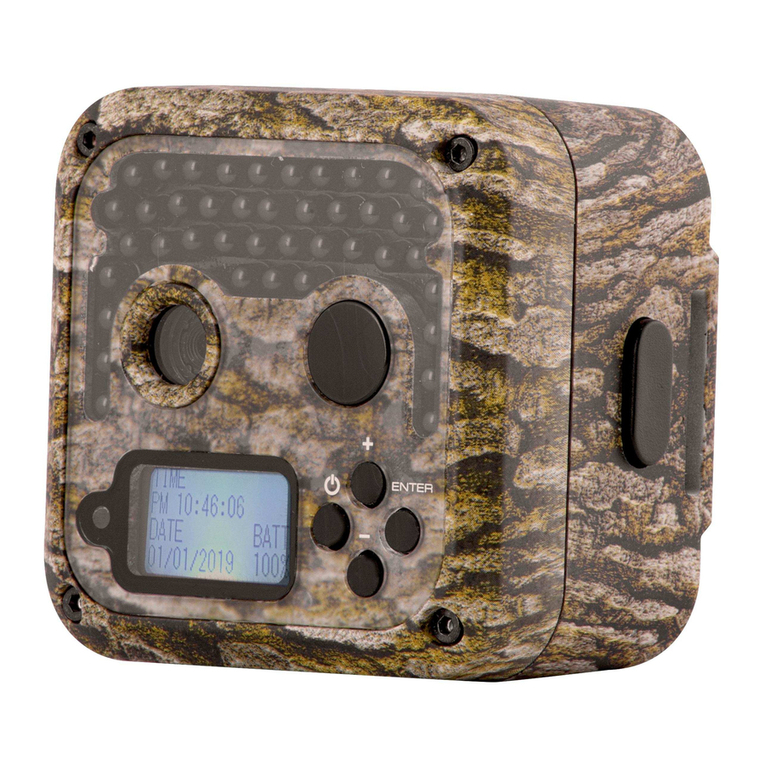
Willfine 2.8C Manual de usuario

USER’S MANUAL
Scouting Trail Camera

Contents
1. Whole View and Details of Camera.......................................................................................- 1 -
Front View of Camera............................................................................................................. - 1 -
Camera Screen Display (Test Mode Main Interface).............................................................. - 2 -
2. Camera Menu List Introduction.............................................................................................- 3 -
3. Quick Start.............................................................................................................................. - 4 -
Power On Camera................................................................................................................... - 4 -
Manual Photographing/ Video Recording..............................................................................- 4 -
Enter Menu for Setup Functions............................................................................................ - 4 -
Power Off Camera...................................................................................................................- 4 -
Camera Operation Flow Chart................................................................................................ - 5 -
4. Detail Setups...........................................................................................................................- 6 -
Camera Modes (Default Settings)...........................................................................................- 6 -
Photo Settings (Default Settings)............................................................................................- 7 -
Video Settings(Default Settings)............................................................................................. - 8 -
Camera Settings (Default Settings)......................................................................................... - 9 -
Software Upgrade................................................................................................................. - 11 -
USB Connection.................................................................................................................... - 12 -
5. MicroSD Card Selection & Battery Life Test Report............................................................- 13 -
MicroSD Card Selection........................................................................................................ - 13 -
Battery Life Test Report for Reference..................................................................................- 13 -
6. Specification......................................................................................................................... - 14 -
7. Warranty............................................................................................................................... - 16 -

- 1 -
1. Whole View and Details of Camera
Front View of Camera
Light Sensor
LCD Screen day/night
Indicator Light
13 IR LEDs
13 IR LEDs PIR Sensor
Lens
Power/Navigation Button Menu/OK Button
USB Port/ DC in
SIM Card Slot
Invalid Currently MicroSD Card Slot
Screw Slot
Battery Slot

- 2 -
Camera Screen Display (Test Mode Main Interface)
Photo Mode Interface
Photographing hour/min/sec
Photo Resolution
Multi Shot Number
0001: recorded file number of photos & video clips
9998: estimated available file number based on left memory space in memory card
Video Recording
Video Mode Interface
Video FPS
Video Resolution
Year/month/date Battery Left Volume
Photo + Video Mode Interface
Note: camera support camera, video, camera + video three different working modes;
screen display will be different based on different working mode.

- 3 -
2. Camera Menu List Introduction
1) First Navigation Menu
2) Second Navigation Menu: Settings:
3) Third Navigation Menu
Photo Settings Video Settings
Back to
Previous Page
Delete
Settings
Photo+Video
Video
Camera ID
Photo
Camera Sound
Stamp
Time Lapse
Video
Photo
SD Cycle
Delay
Timer
PIR Sensitivity
Date/Time
GPRS ON/OFF
Password
Reset
Back to
Previous Page
Multi Shot
Photo Size
Video
Frame
Video
Resolution
Video
Length
Frequency
Video
Sound

- 4 -
3. Quick Start
1. Open back cover to insert MicroSD Card and batteries;
Power On Camera
2. Press and hold Power/Navigation button for 3 sec; camera will enter PIR Auto Working
mode after indicator flashes 5 times;
3. Press Menu/OK button once to wake up camera LCD screen to enter TEST Mode;
Manual Photographing/ Video Recording
4. Test Mode Main Interface, press Power/Navigation button again to shoot photos,
videos, or photo + video based on camera settings; stop video recording by pressing again
Power/Navigation button
Enter Menu for Setup Functions
5. Test Mode Main Interface, press Menu/OK button to enter settings menu; now
button is always for navigation; button is always for OK to save/confirm needed
setup;
6. Press and hold button for 3 seconds to return Test Mode Main Interface (Camera Modes
Menu) after all settings are done;
7. Test Mode Main Interface, press and hold button for 3 seconds to enter PIR Auto
Working Mode; (indicator LED will flash 5 times, Screen will be off.)
Power Off Camera
8. Press and hold button for 5 seconds to turn off camera.

- 5 -
Camera Operation Flow Chart
Press and hold Power / Navigation button for
3 sec; camera will enter PIR Auto Working mode
after indicator flashes 5 times;
In PIR Auto Working Mode, press Menu / OK
button once to wake up camera LCD screen
to enter TEST Mode;
Press and hold Power / Navigation button
for 5 seconds to turn off camera.
In TEST Mode, press Menu/OK button to
enter settings menu; now button is always
for navigation; button is always for OK to
save/confirm needed setup;
Press and hold button for 3 seconds to
return back to First Navigation Menu after all
settings are done
In First Navigation Menu, press and hold button
for 3 seconds to enter PIR Auto Working Mode;
1. Set Camera, or Video, or Camera + Video
First Navigation Menu
,press Menu / OK button ; camera is in camera mode;
, press Menu / OK button ; camera is in video mode;
, press Menu/OK button ; camera is in Cam+Video mode
2. After configuration above, press and hold button for 3
seconds to return back to TEST Mode main interface; then press
Power/Navigation button ; camera now is recording photo/
video/ photo + video;
3. Press Power/Navigation button again to stop video
recording;
Note:
1) To ensure camera functions well; plz adjust camera to be with correct time;
2) Plz don’t turn on Time Lapse and Delay at the same time;
3) Camera can be turned off by pressing and holding button any time.
PIR Auto
Working Mode
TEST Mode
Power Off
ON/OFF Camera
(PIR Auto, TEST, OFF)
Manual Recording
Functions
Setup
Configuration
Return to First
Navigation Menu
Enter PIR Auto Working
Mode from Test Mode

- 6 -
4. Detail Setups
Camera Modes (Default Settings)
Camera ID OFF
Photo 2MP
Video VGA (640*480)
Photo+Video OFF
Settings
Delete
Back to Previous Page
If wanted setting icon is not showing on camera LCD screen, press repeatedly until
it appears.
Camera ID
a. Set up
1)Press to enter configuration page, press to choose
ON; press again to enter configuration page;
2)Press to choose wanted digit/alphabet, press to
confirm and move to the next;
3)Press again to confirm combination to exit.
b. How does this work?
Selected 4 digits/ alphabets will show on the photo stamp.
Such function can help user to identify photos are from where
and which camera.
Photo
a. Set up
Press to enter Photo mode; icon OK appears at right bottom
of interface
b. Take a Photo
Press and hold button for 3 seconds to return back to TEST
Mode
main interface; then press to take a photo
Video
a. Set up
Press to enter Video mode; icon OK appears at right bottom

- 7 -
of interface
b. Start Recording
Press and hold button for 3 seconds to return back to TEST
Mode main interface; then press to take a video
clip; press again to stop recording.
Photo + Video
a. Set up
Press to enter Photo + Video mode; icon OK appears at right
bottom of interface
b. Start Recording; Photo(s) First, then Recording Video
Press and hold button for 3 seconds to return back to TEST
Mode main interface; then press to start
recording; press again to stop recording.
Settings
Press to enter camera detail settings.
Delete
Set up
1) Press to enter configuration page, press to choose
to delete One or All recorded file(s), or Format SD card;
2) Press choose Yes/ No, press again to confirm
deletion/ Format.
Note: 1) Menu will stay in Yes/No interface in deleting One file; plz
press “No” to get back to previous interface.
This is designed to enable user to delete several files together
without pressing more buttons. 2) If all files are deleted, camera will
get back to TEST Mode Main Interface automatically.
Press to get back to TEST Mode main interface
Photo Settings (Default Settings)
Image Size 2M
Multi-shot 1P
If wanted setting icon is not showing on camera LCD screen, press repeatedly until
it appears.
Image Size
Set up
Press to enter configuration page, press to
choose desired Photo Size; press to confirm

- 8 -
setting.
(8MP/5MP/2MP: 3264x2448, 2560x1920,
1920x1080)
Multi-shot
Set up
Press to enter configuration page, press to
choose desired Photo Burst number; press to
confirm setting.
(Support 1~7 photos per burst/ trigger.)
Video Settings(Default Settings)
Video Size VGA
Video Length 5s
Video Frame 30FPS
Frequency 50Hz
Audio Recording ON
If wanted setting icon is not showing on camera LCD screen, press repeatedly until
it appears.
Video Size
Set up
Press to enter configuration page, press to choose
desired Video Size, press to confirm setting.
(720P/VGA/CIF: 1280x720/640x480/320x240)
Video Length
Set up
Press to enter configuration page, press to choose
desired Video Length per Burst/ Trigger; press to confirm
setting.
(Support 5~60 seconds)
Video Frame
Set up
Press to enter configuration page, press to choose
desired Video Frame; press to confirm setting.
(Optional 15FPS and 30FPS)
Frequency
Set up
Press to enter configuration page, press to choose
desired Frequency based on local Country Frequency; press
to confirm setting.
(Optional 50HZ and 60HZ)
Otros manuales para 2.8C
1
Tabla de contenidos
Otros manuales de Cámara de exploración de Willfine