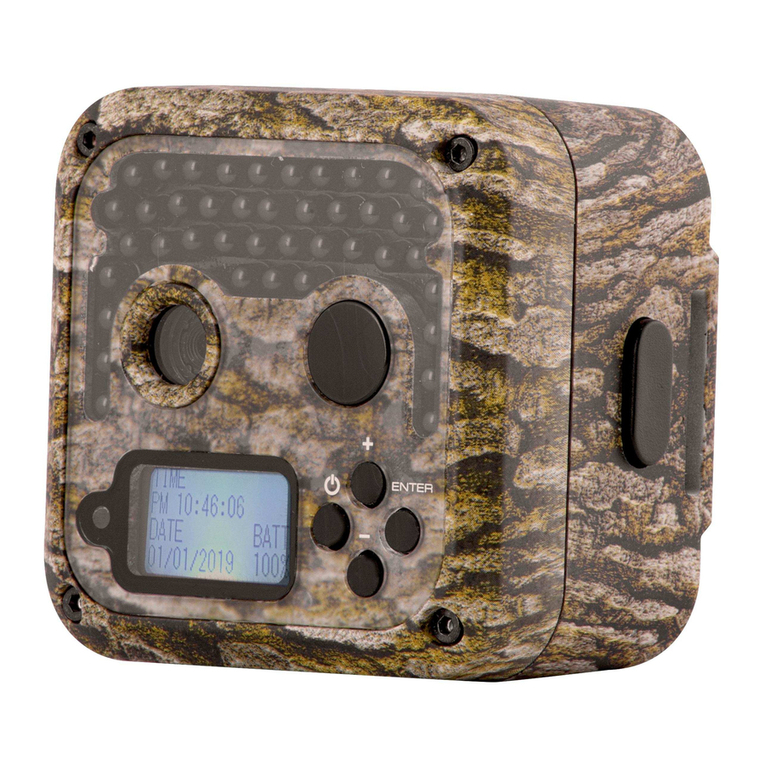
Uovision UM785-HD Manual de usuario

User Manual
UM785
-
HD CELLULAR
(BLACK FLASH / NO GLOW) + built-in viewer

Content
1 General Description..........................................................................................................................................................................1
2 Camera button info diagram.............................................................................................................................................................1
3 Installing batteries.............................................................................................................................................................................2
4 SIM card.............................................................................................................................................................................................3
5 Installing the SIM card and SD card................................................................................................................................................3
6 Customising camera settings...........................................................................................................................................................3
6.1 Formatting the SD card.........................................................................................................................................................3
6.2 Download Tool (U Set.exe)....................................................................................................................................................3
6.3 Setup with PC / laptop............................................................................................................................................................4
6.4 Send a Test Photo.................................................................................................................................................................8
6.5 Camera mode settings..........................................................................................................................................................8
6.5.1 CAM TAB.....................................................................................................................................................................8
6.5.2 Camera Scene............................................................................................................................................................8
6.5.3 Video Mode............................................................................................................................................................10
6.5.4 PIR TAB..................................................................................................................................................................10
6.5.5 Work Time.......................................................................................................................................................................11
6.5.7 SYS TAB.........................................................................................................................................................................12
7 Control Camera byAPP /SMS...................................................................................................................................................13
8 View or Delete photos on the color display...............................................................................................................................16
9 Trouble Shooting.............................................................................................................................................................................16
10 Tricks and tips on field setup.......................................................................................................................................................16
Appendix Ⅰ: Technical Specifications...........................................................................................................................................17
Appendix II: Parts List......................................................................................................................................................................17

Page 1
1 General Description
Main features:
12MPblack flash (no glow IR)camera with 20m+ flash range
1080PH.264 video with audio
0.4s trigger speed
GSM 900/1800/2100MHz networks, faster transmission speeds
Built-in 2.4” LCD colour (front-facing) viewing screen
Video/Full size picture transmission
Remote control via SMS commands / Android App
Support 1-10 burst photos
SupportsWifi-SD card
Camera scene feature, including moving object settings
Weatherproof IP54
2 Camera button info diagram
Figure 2 Operation Interface
Figure 3 Bottom View

Page 2
Operation Panel
MENU: To enter the menu, the power switch should be on SETUP.
▲▼◄►: Navigation arrows. (“▲”is the shortcut to choose “Video”, while “▼”for the “Photo”.)
OK : Save parameter settings. Exchange between playback and preview.
►Shot: To capture a photo or record a video manually. (Click ►again to stop the video.).
Power Switch: OFF: turn off the power; SETUP: change camera settings; ON: enter working mode.
3 Installing batteries
To supply power for the camera, 4, 8 or 12 AAsize ('penlight') batteries are needed.
Confirm that the power switch is on the OFF position; load the fully charged batteries into the pack according to their
correct +/- polarities (shown below).The following batteries can be used:
1. High-density and high-performance AA size alkaline or 1.5v Lithium batteries (Recommended)
2. Rechargeable 6V external SLA battery (Sealed Lead Acid) or solar panel
3. Rechargeable NiMH AA size batteries (at least 2500mAh)
There are 6 battery slots. Slot 1 and 2 form one group and is marked “1”, slot 3 and 4 form the other group and is
marked “2”, while slot 5 and 6 form the other group and is marked “3”. One single “group” of batteries is needed
to supply power to the camera, but using at least 2 "groups" is recommended.
Figure 4 Battery Configuration

Page 3
4 SIM card (AIRTIME / DATA / PIN code OFF)
The camera is designed to instantly transmit triggered footage once the photo or video is taken by using available
cellular network signal and you can choose either of the following;
1. MMS photos to up to 4 different cell phone numbersor (uses AIRTIME);
2. Images / short video clips (max 10 sec length) to up to 4 x different email address (uses DATA).
PLEASE NOTE: SMS commands for remote controlling the camera also require AIRTIME on the SIM.
- Make sure you have a network enabled and registered SIM card and that AIRTIME / DATA are loaded onto it.
-Be sure that the PIN Code is OFF from the SIM card before inserting SIM card to camera. (You can disable the
PIN of a SIM card via your mobile phone.Then reinsert the card into your camera).
5 Installing the SIM card and SD card
The UM785 camera has no internal memory storage space to store pictures / video clips. You need to insert a SD
memory card to let the camerawork correctly. Standard size SD and SDHC (High Capacity) cards up to a maximum
32GB capacity are supported (Micro-SD memory cards with adapters are NOT recommended).
Using high speed SD cards (SanDisk3 Ultra3 or Extreme3 series or similar) is recommended if you will use the
1280x720 or 1920x1080 video settings.
Make sure the power switch is OFF before you insert the SIM card or SD card into camera.
The camera will not turn on
without a SD card inside.
Make sure the write-protect switch on the side of the card is “off” (NOT in the “Lock” position).
NOTE: Every photo taken by this camera will be saved to the SD card even those that have been transmitted to the
recipients. You will always have access to high resolution photos on the SD card. The SD card can be over written
in the MENU settings to ensure continued cycle use.
6 Customising camera settings
6.1 Formatting the SD card
Switch camera to SETUP. Press MENU button, then choose SYS tab. Navigate down by pressing the ▼ button until
the FORMAT option is highlighted and press OK then choose Yes to format.
Figure 5
6.2 Download Tool (U Set.exe)
Select the NET tab and navigate down to the DOWNLOADTOOL and press OK.
Shown as Figure 6 and Figure 7
;
- Turn the camera OFF
- Remove the SD card from your camera and insert into your PC / laptop card reader
- Locate the SD card from your PC / laptop

Figure 6 Download Tool Figure 7 Download successful
Figure 8 U Set.exe
TIP: You can open the program directly from
the SD card but its a good idea to create a folder on your PC / laptop for your
camera trap
and copy this program
into it. It saves you
having to
download it again for future use if you need to change
things.
6.3 Setup with PC / laptop
After you double click the USet.exe program, you may see a warning box like below. ChooseYES to continue.
Figure 9 Warning box Figure 10 SelectArea
You will see the above screen for selecting area (Fig.10). Click 'Others' for South Africa / Africa then setting up window will
shows up (Fig.11 below); Page 4

Page 5
Send Mode:
(a) Instant - Select 'ON' to have the footage immediately transmitted to you or OFF to disable the
transmission feature.
(b) Number of transmissions: You can limit the number of transmissions you receive if required - if not,
select '0' for unlimited.
(c) Daily Report - This option will only send you the last photo taken each day with a report of all the
other activity captured during the day at preset time that you choose.
Operator Parameter (Cellular Network of the inserted SIM card):
(a) Country - From the drop down menu choose 'Auto'
('Operator' will automatically also
change to
'Auto' ).
Note: the advantage of this way is that if you change the SIM card for the camera in the field, you don't need to
bring the camera back home to re-program.
Figure 11
Custom Cellular Network Settings:
(b) From the drop down menu choose 'Customer' in the 'Country' window ('Operator' will automatically
change to 'Customer1').
(c) Click the 'Custom' button and a separate window will open to allow you to manually input custom cellular
network parameters (Fig.12 & 13)
(d) Click 'OK' to save these custom Operator Parameters.
Figure 13 - Custom Network Parameter Settings
Figure 12

Page 6
SOUTH AFRICAN CELL NETWORK PARAMETERS:
Vodacom MTN
CellC Telkom (8ta)
Send To / SMS Control:
(a) Phone: Sends triggered footage as MMS's (images only) to cell phones (up to 4).
(b) Email: Sends triggered footage as Email attachments (images or video clips) to Email addresses
(up to 4)
(c) Input phone numbers with no country prefixes and no spaces.
(d) SMS Control: Here you can set the camera to 'Off' (to not respond to remote SMS Commands) /
'On(24hour') - to always be ready to respond remote SMS Commands / or 'Set' - where you can set
to camera to only respond to remote SMS Commands at a specific time period (user-set).
(e) Command Phone (when SMS Control is enabled): This is the 1st Recipient and also the Cell Phone
# that will be able to remotely control the camera via SMS Commands (more info below)
*
*

Page 7
Gmail EXAMPLE:
SMTP server: smtp.gmail.com
Secure Type: SSL/TLS
SMTP Port: 465
Important! Gmail account settings change:
You have to 'Allow Less Secure Apps Access to your Gmail Account' - otherwise Gmail
will block the footage being transmitted.
When you are logged in to your own Gmail e-mail account (e.g. from your PC), please go
to your Account / Settings page
www.google.com/settings/security/lesssecureapps
Navigate to 'Less Secure App Access' and then click: "enable"
Now your camera is able to use your own Gmail account as a sending e-mail
address and photos/videos can be sent using your own Gmail account.
Sending via Email:
(a) Select the Send To 'Email' option and then click the 'Email Setting' button and a separate window will open
allowing you to input the SENDING parameters for the camera footage.
Some of the main service providers are also
listed here.
(b) Input your SENDING Email parameters and click 'OK' to save.
(c) Now input your RECEIVING Email address (up to 4).
You can input the same SENDING Email address as a RECEIVING Email address too
Figure 14 & 15
Email Parameter Settings
Rename:
(a) Here you can type a name for your camera which will be stamped on each photo and will also be the subject title of
each MMS / Email. This is handy if you have more than 1 camera as you know immediately from which camera the
notification has come from before viewing the footage (max of 8 characters).
CAM Setting:
For efficiency, you can click the 'CAM Setting' button and custom many camera settings to suite your requirements (these can
also be done through the camera Menu Options).

Page 8
1) Switch camera to SETUP mode, press ► button to take a picture, then press OK button to view this picture;
2) Press the MENU button, choose send and press OK. You will see sending progress shows on the LCD screen.
Once you see 'Sent Successfully',check your email account or phone to see if you receive the correct photo.
6.5 Camera mode settings
6.5.1 CAM TAB
Figure 17CAM menu Figure 18 Camera modes
Press menu button, then you will see the screensshown in Fig.17 & Fig.18, press ▲▼ button to highlight the option,
then press OK to select.
There is always a ‘*’ shows up beside the current selected option.
6.5.2 Camera Scene
The UM785 camera has numerous camera scene settings, including moving object and close object, with the help of
camera scenes, you can easily choose different combinations of shutter speedsand exposure timesaccording to
particular setup scenarios.
Figure 16
After you have finished customising all the settings, make sure to save your path directly to the SD card root directory.
Locate your SD card be pressing the '...' button (Fig.16).
•It will then generate a ‘PROFILE.BIN’ file on SD card.
•Put the SD card back into the camera, switch camera to SETUP, then you will see
‘Update Success’ shown on the screen.
TIP: You can also save the 'PROFILE.BIN' file into the folder you created on your PC / laptop (see previous TIP). This will also save you having to
input all the settings again.
6.4Send a Test Photo
Figure 19 Camera scene(A)
Figure 20Camera Scene(B)
Otros manuales para UM785-HD
2
Tabla de contenidos
Otros manuales de Cámara de exploración de Uovision

Uovision
Uovision UM785-4G Manual de usuario

Uovision
Uovision UM595-HD-3GE Manual de usuario

Uovision
Uovision UV785-HD Manual de usuario

Uovision
Uovision UM795-HD Manual de usuario

Uovision
Uovision Illuminator UV567 Manual de usuario

Uovision
Uovision Compact LTE 4G 20MP Cloud Manual de usuario

Uovision
Uovision GLORY LTE CELLULAR Manual de usuario

Uovision
Uovision UV785 Manual de usuario

Uovision
Uovision UM565-SMS 12MP Manual de usuario

Uovision
Uovision GLORY LTE Manual de usuario