Note: According to your installation requirements,
select the Guide Line or the Maximum Limit Guide
Line for the cutout
Nota: Seleccione la Línea Guía para Recorte o la
Línea Guía para Recorte Límite Máximo, de acuerdo
con sus requerimientos ideales de instalación.
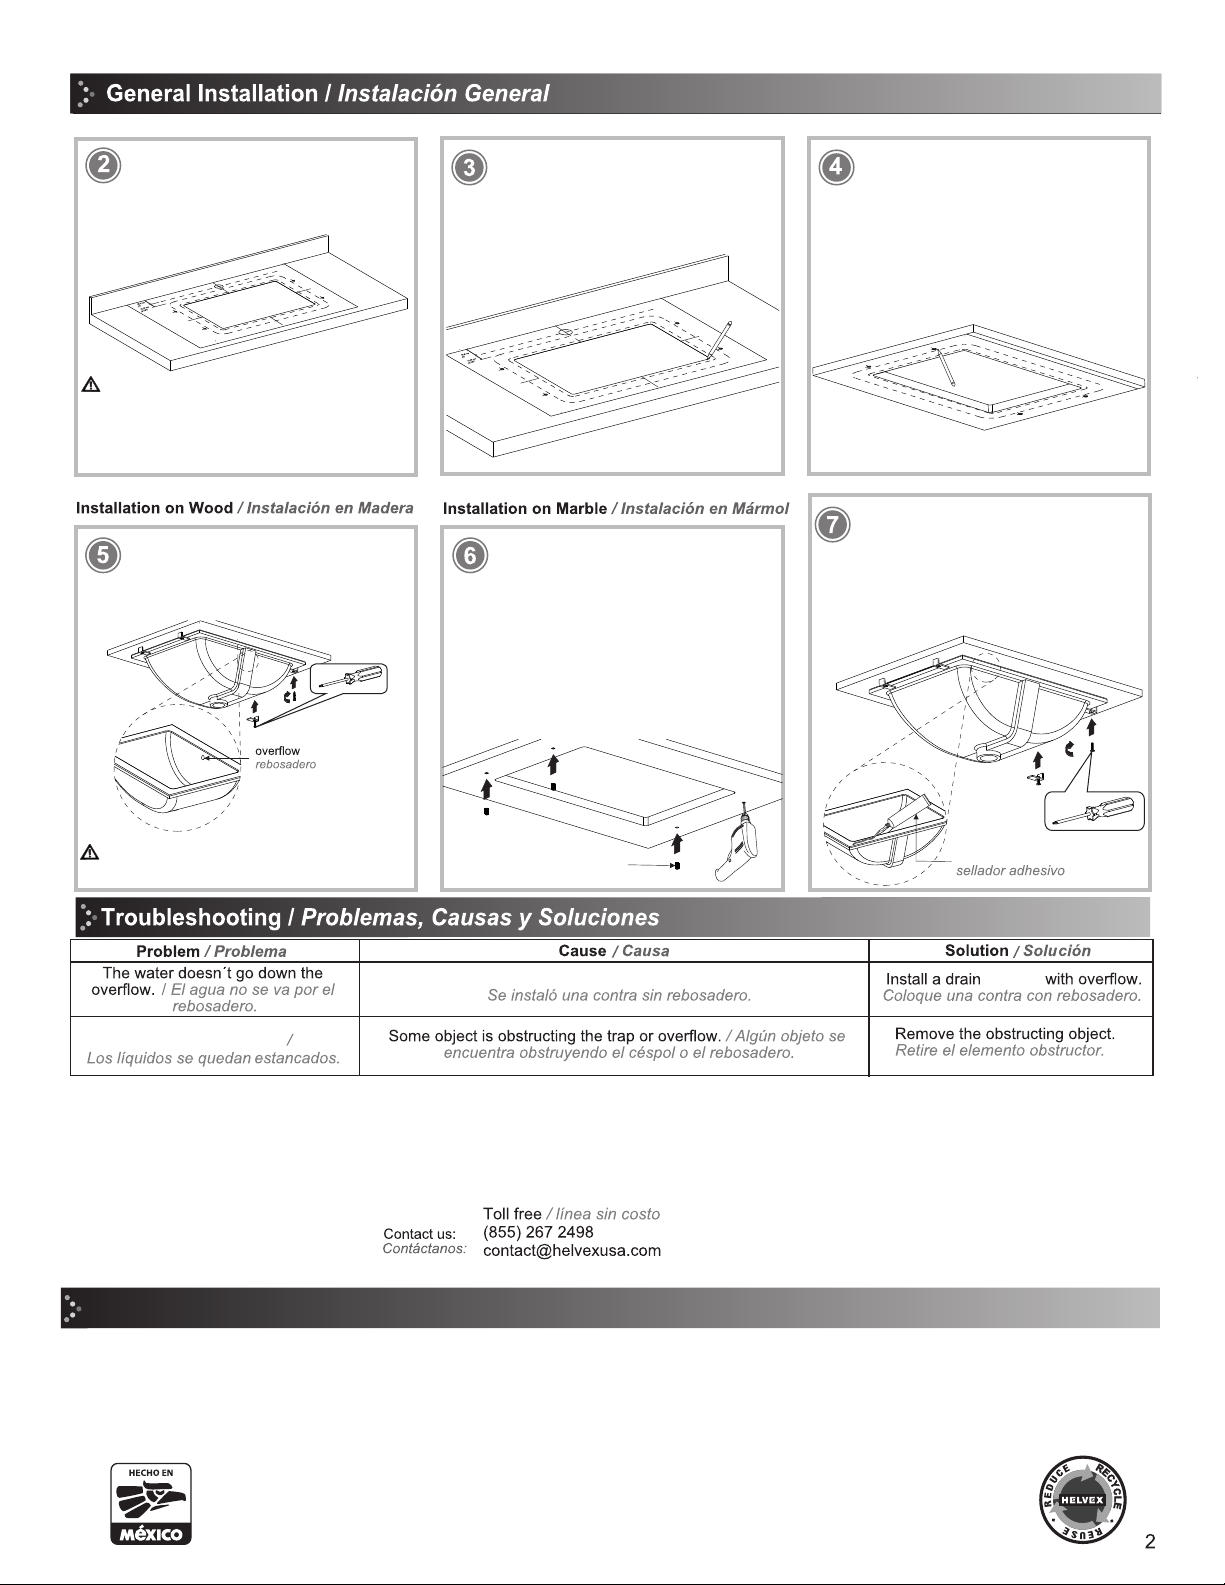
Mark the outline on the surface and cut
along the traced line to form the
opening. / Marque el contorno recortado
en la cubierta y realice el corte,
siguiendo la línea trazada, para formar
la abertura.
On the lower side of the plate or base,
mark the centers for the lag screws
or brass inserts. / Por la parte inferior
de la placa o base, marque los centros
para las pijas o insertos de latón.
brass insert
inserto de latón
On the lower side of the plate or base,
drill with 3/8” drill bit up to ½" deep and
insert the brass insert adding
epoxy adhesive (not included) at the
bottom of the hole. / Por la parte inferior
de la placa o base perfore con broca de
3/8” hasta ½” de profundidad e
introduzca el inserto de latón colocando
adhesivo epóxico (no incluido) al fondo
de la perforación.
adhesive sealant
Cut the guide line on the template and
place it over the surface to install the
sink. / Recorte la línea guía de la
plantilla y colóquela sobre la superficie
a instalar del lavabo.
Place the anchors on the marks, and
screw the lag screws (included) to fix
the sink. / Coloque las anclas a la
distancia de las marcas y enrosque las
pijas (incluidas) para fijar el lavabo.
Note: Place the sink with the overflow hole opposite to the
faucet location.
Note: Coloque el lavabo con el rebosadero al lado opuesto
de la mezcladora o monomando.
Apply adhesive sealant to the sink’s rim,
then place the sink with the anchors and
tighten the screws (included) to fix the
sink in place. / Aplique sellador adhesivo
a la ceja del lavabo, después coloque el
lavabo en posición con las anclas y
enrosque los tornillos (incluidos) para
fijarlo.
A drain stopper without overflow was installed. stopper
Liquids stay stagnant
It is very important to follow the instructions below to preserve HELVEX products
finishings, shiny and in perfect conditions:
1. Use only water and a clean cloth.
2. Do not use fibers, powders, abrasives, or chemicals.
3. Do not use sharp objects to clean the finishings.
4. It is recommended to clean your device daily
Visit our website www.helvexusa.com
Es muy importante seguir las siguientes instrucciones para conservar los
acabados de los productos HELVEX, con brillo y en perfecto estado:
1. Utilice únicamente agua y un paño limpio.
2. No utilice fibras, polvos, abrasivos, ni productos químicos.
3. No utilice objetos punzo-cortantes para limpiar los acabados.
4. Se recomienda realizar la limpieza de su producto diariamente.
Visite nuestra página www.helvexusa.com
Cleaning Recommendations / Recomendaciones de Limpieza


