Harvest TEC 600A Manual de usuario

1
600A-16-OPR-Imp&Metric
5/18
Operation Manual
Model 600A
Moisture Sensor Kit for Large Square Balers
Forage Harvester

2
DECLARATION OF INCORPORATION
MANUFACTURER: Harvest Tec Inc.
2821 Harvey St.
P.O. Box 63
Hudson, WI 54016, U.S.A.
REPRESENTATIVE ESTABLISHED IN COMMUNITY: Profitable Farming Company
Middle Barlington, Roborough
Winkleigh, Devon, EX19 8AG
ENGLAND
The person above certifies and declares that:
VIRTUAL MACHINE: Equipment mounted on a farm press and for the application of innoculants onto
forage crops.
MODEL: 600A-16-OPR-Imp&Metric
BRAND: Harvest Tec
SERIAL NUMBER:
This application preservatives for hay Harvest Tec system meets the Directive 2006/42/EC of the
European Parliment and the Council of 17 May 2006 and other applicable European Directives
including Directive 2004/108/EC on the Electromagnetic compatability.
The application of preservatives for hay Harvest Tec system will be turned on after being installed on
a farm press has been declard in conformity with the Machinery Directive.
Person in the community authorized to provide information on the partly completed machinery and
making this statement:
Richard Snell, President, Profitable Farming Company
Signed on May 21, 2011: Middle Barlington, Roborough
Winkleigh, Devon, EX19 8AG
ENGLAND

3
600A Operations Manual Table of Contents
PAGE
Introduction
4
System Requirements
4
Safety
4
Safety Decals
4
Operation of the 600A Moisture Sensor Kit
5-12
Operations of the ISOBUS Monitor
5
Baler Monitor Setup
5
System Setup
6-9
Adjust the Moisture Alarm
10
Option To Turn OFF/ON All Alarms or Beeps
11-12
Wiring Diagram
13
Pin Outs
14-15
Common Questions
16
Troubleshooting
17
Parts Breakdown
18-21
Star Wheels and Bale Rate Sensors
18
Controls and Harnesses
19
Optional iPad Mini Mounting Kit
20
Optional iPad Display Kit
21
Notes
22
Warranty
23

4
Introduction
Thank you for purchasing a Harvest Tec Model 600A Moisture Monitor System. This 600A Moisture Monitoring
System has been designed to be operated through the baler’s ISOBUS system and/or an Apple iPad (not
included) using the Hay App. The 600A Moisture Monitoring System offers these advantages:
1. Operation coordinated with baler operation
2. Less cab clutter providing better visibility
3. Ease of use with all information on one screen
4. Records kept together
5. The system is ready for future updates
The 600A Moisture Monitor kit includes the following parts: Dual Channel Processor (DCP), Moisture Sensors,
Harnesses, Bluetooth receiver and Miscellaneous Hardware. For your convenience a parts break down for the
600A Moisture Monitoring System is included in the back of this manual. If you do have questions please bring
this manual into the dealership. They can assist you in ordering the correct replacement parts.
Right and Left sides are determined by facing in the direction of forward travel.
System Requirements
The Baler Processor must have Version 3.3 or higher.
C1000 monitor must have Version 3.0.1 or higher
If equipped with the SBM, the SBM must have Version 4.0 or higher.
*iPad Mini or iPad 3rd Generation (2012) or newer, running the current iOS operating system
or one version previous required for iPad option
Safety
Carefully read all safety signs in this manual and on the moisture sensor kit before use. Keep signs clean and
clear of obstruction to view. Replace missing or damaged safety signs. Replacement signs are available from
your local authorized dealer. See your installation manual under the replacement parts section for the correct
part numbers.
Keep your moisture sensor kit in proper working condition. Unauthorized modifications to the moisture sensor
kit may impair the function and/or safety of the machine.
Carefully read and understand all safety signs before installing or servicing.
Safety Decals
Number 1
Disconnect power before servicing.
Part no. DCL-8003
Number 2
Read and understand the operator’s manual
before using or working around the equipment.
Part no. DCL-8000
5
Operation of 600A Moisture Sensor Kit
Operation of the ISOBUS Monitor
The ISOBUS Monitor utilizes a combination of soft keys, number menus, and the scroll wheel on the upper
right side of the actual monitor to make selections. Selections are made by scrolling the Thumb Wheel and
pressing in once the selection is highlighted. All buttons are labeled and color coded.
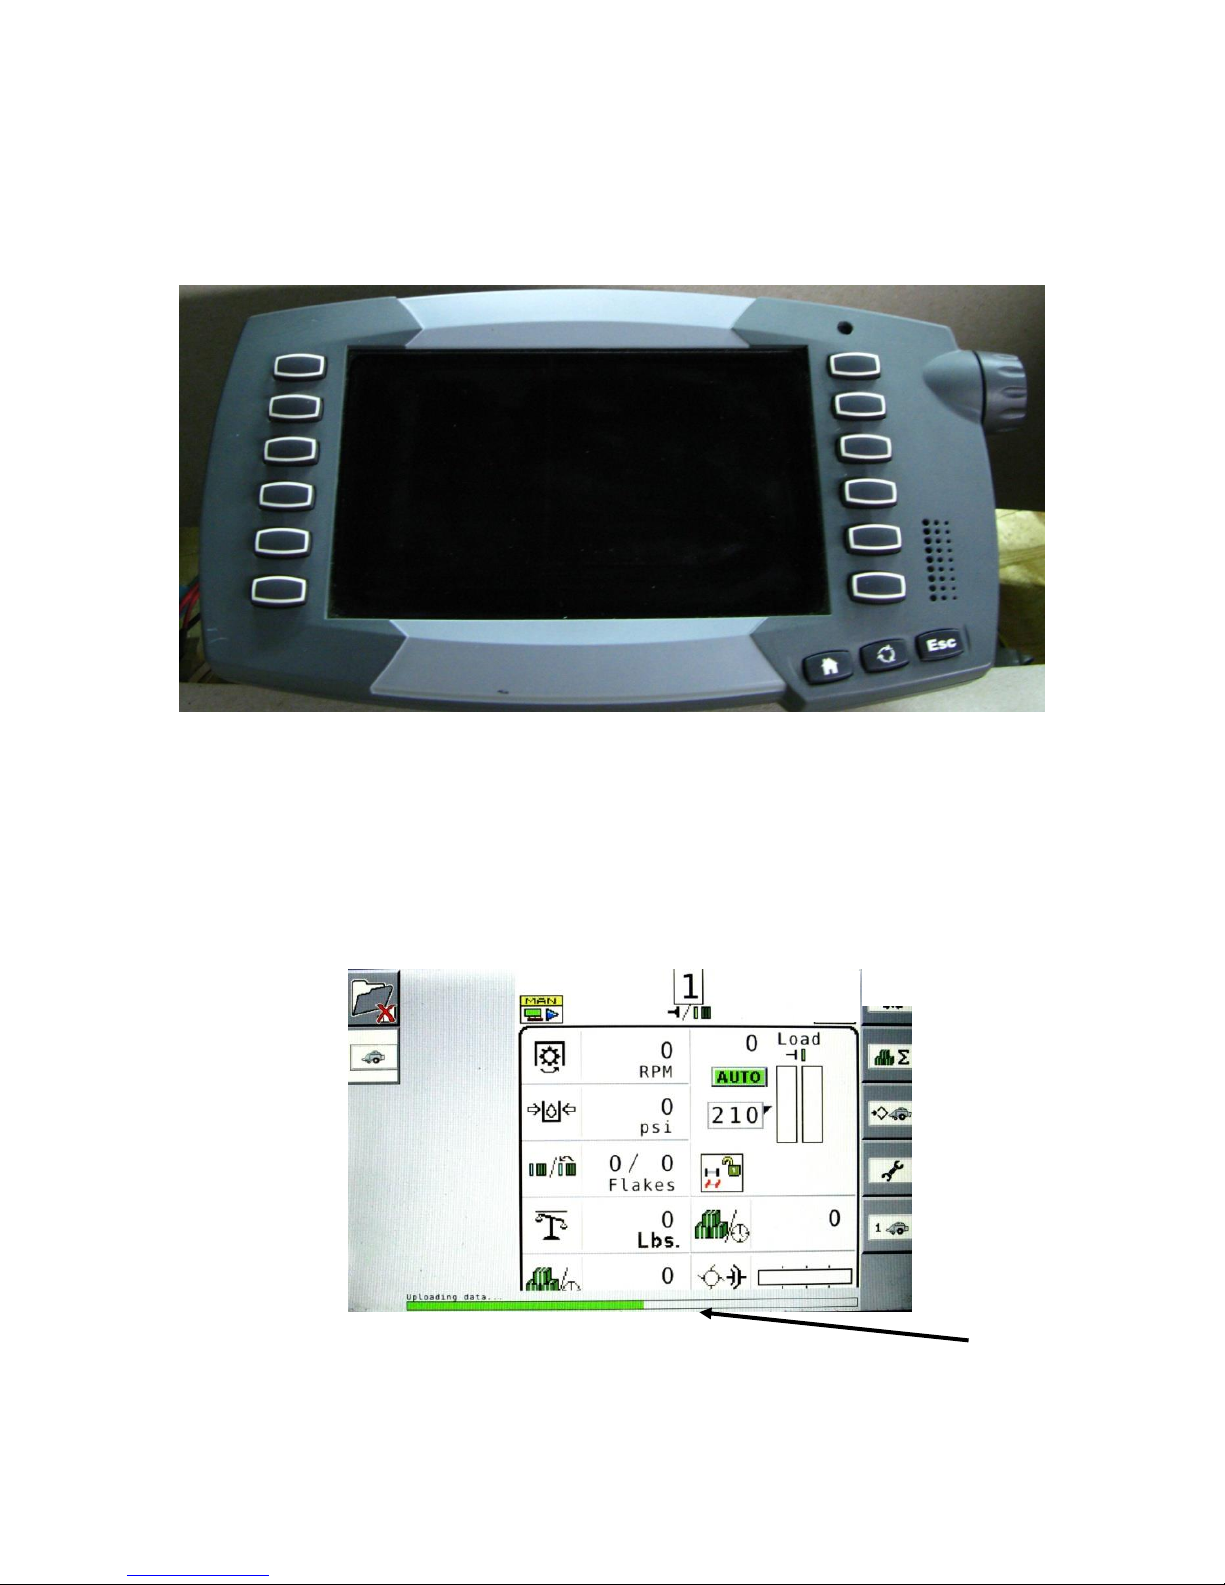
Baler Monitor Setup
After the initial Start Up/Power On the green “uploading data” status bar (arrow A) should begin to fill.
A

6
System Setup
1. To view moisture from the 600A Moisture Sensor begin setup at the main baler screen. Select the
WRENCH icon (arrow A) which is the fourth icon down on the right side of the screen-the right selection
menu.
2. The service screen displayed below should appear. Select the Next Screen icon (arrow B) located at
the bottom of the right selection menu.
A
B

7
3. A similar screen will appear with a different menu options on the right side of the screen. Press the A B
icon (arrow C) located at the top right of the selection menu.
4. The A B screen will appear. Next select the A B 2 (arrow D) icon which is the second from the top on
the far right selection menu.
C
D
C
C

8
5. The A B 2 screen will appear. The Harvest Tec On/Off selection icon can now be selected. To turn the
Harvest Tec Moisture Sensor On (signified by a green check mark) or Off (signified by a red X)
navigate to the box and select (arrow E) by pressing the Scroll Wheel. Once the Harvest Tec Moisture
Sensor has been turned On/Off you can navigate back to the main baler work screen by pressing the
BALER (arrow F) icon on the top right of the selection menu.
6. The main baler work screen will appear. Select the container (arrow G) where you would like to view
the moisture information on the baler run screen. Note: This can be done on the primary or secondary
baler work screen. The screen has been or can be customized for viewing containers or options as you
would like and as guided in the baler manual.
G
F
E

9
7. Once the user has selected the container they would like to change, a drop down list (arrow H) will
appear. The Moisture option (arrow I) should be at the bottom of the drop down selection list.
8. The Moisture container will have a red background until HayBoss G2 system is put in Manual Mode or
Auto Mode. The two values indicated in the moisture option are as follows: current moisture / last
bale average moisture (arrow J).
J
I
H

10
Adjust the Moisture Alarm
1. From the main baler screen, select the third icon down the right selection menu that shows a diamond
beside a baler (arrow K).
2. To adjust the moisture alarm set point select the box option to the right of the moisture droplets
(arrow L) and adjust to the desired moisture limit. To return to the baler work screen, press the baler
icon at the top right of the selection menu (arrow M). When the moisture is higher than the alarm setting
the audible alarm will sound (if turned on) and the moisture values on the screen will display with a red
background.
M
L
K
Tabla de contenidos
Otros manuales de Accesorios de Harvest TEC


