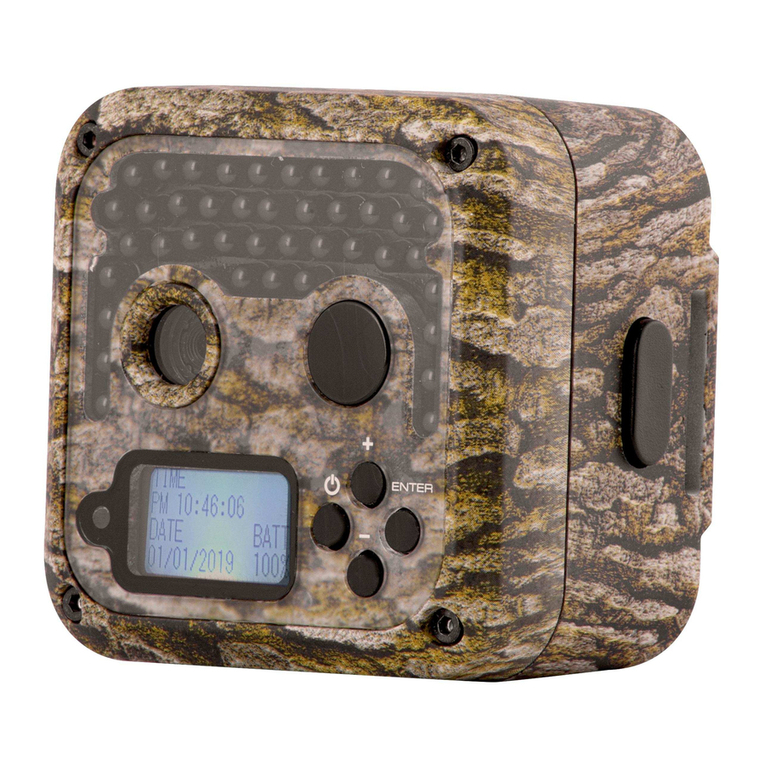
Bestok 8210A Manual de usuario

120°WIDE ANGLE HUNTING CAMERA
8210A User Manual
Thank you for purchasing 8210A Hunting camera, for making best use of all the
functions of this camera, please read this user’s manual carefully before you use
the camera and keep it as handy reference.

- 1 -
Contents
Product Information................................................................................................................- 3 -
1.1 The Introduction of Product.................................................................................- 3 -
1.2 Application.................................................................................... 错误!未定义书签。
1.3 Package Contents................................................................................................... - 3 -
1.4Illustration..................................................................................................................... - 4 -
Quick Start..................................................................................................................................- 6 -
2.1 Installing the Battery................................................................错误!未定义书签。
2.2 Installing the SD Card..............................................................错误!未定义书签。
2.3 Test and Setup Mode................................................................ 错误!未定义书签。
2.4 Enter Live Mode.......................................................................... 错误!未定义书签。
2.5 Review the Photos and Videos..............................................错误!未定义书签。
2.6 Enter Off Mode............................................................................ 错误!未定义书签。
Function and Technical Parameters Setting.................................... 错误!未定义书签。
3.1 Functions Setting....................................................................... 错误!未定义书签。
3.2 Technical Parameters Setting............................................................................- 16 -
Trouble Shooting.................................................................................................................... - 17 -
4.1 Firmware Upgrade................................................................................................. - 17 -
4.2 Update Steps........................................................................................................... - 17 -
4.3 Common Problems and Solutions................................................................... - 17 -
Warranty.................................................................................................................................... - 19 -

- 2 -
Cautions
Be sure the camera’s power is switched off before inserting or removing SD
card or batteries.
It is recommended to use new high-performance alkaline AA batteries or
rechargeable batteries, for prevent the liquid rot the battery depot.
Please make sure that the battery polarity matches that on the battery cover.
Make sure the polarities are correct.
In the SET mode, the camera will shut down automatically after two
minutes if no key is pressed, please turn on the power again if you want to
continue.
Please be sure that no power interrupt occurs during firmware upgrade,
otherwise the upgrade process could be interrupted incorrectly. If any fault
occurs after improper upgrading process and the camera stops function
properly, please return the device to the seller for repair.
When the power switch is ON, please don’t take out the SD card, battery
and remove the external DC power frequently.
When mount the product. In 3 meter region, avoiding temperature and
motion disturbances in front of device such as big leaf, strap and another
heat sources to prevent false triggering.
Avoiding temperature and motion disturbances in front of the device such as
a air-conditioner, air outlet of the chimney and other heat sources and
spotlight to prevent from false triggering.
Battery life will vary with operating temperature and the number of images
taken over time, typically, the trail camera will be able to capture several
thousand images before the batteries die.

- 3 -
Note:This device complies with protection class IP54.This means that the
camera is protect from dust and water spray,and can be used regardless of
the weather condition.However,proper protection from dust and water spray
is only provided if the camera is correctly closed and all seals are intact and
clean.
Product Information
1.1 The Introduction of Product
8210 series are patented product with a 120 wide angle lens, and its monitoring
range is much larger than the non-wide-angle camera.It can be used as
autonomic surveillance device for guarding and recording unexpected intrusion
to homes, warehouse, schools, offices, forest , work sites etc. It can also be
used as trail camera for hunting or monitoring animals by recording the traces
of wild animals. It can be triggered by sudden change of ambient temperature
caused by moving game in a region of interest (ROI), which is detected by a
highly sensitive Passive Infra-Red (PIR) sensor, and then take pictures or video
clips automatically.
1.2 Package Contents
A Digital Camera
A Strap
A USB Cable
A TV Cable
A warranty card
A CD
SD card
(optional )
Solar panel
(optional)
Anti-theft case
(optional)

- 4 -
1.3 Illustration
1.3.1 Front View
1.3.2-1 Internal Structure

- 5 -
1.3.2-2 Internal Structure
1.3.3-1 Bottom View

- 6 -
1.3.3-2 Bottom View
Quick Start
If you are not familiar with the operation of this camera, the following
instructions will help you get a quick overview. Before doing any operation,
please make sure you have loaded batteries and plugged the SD card correctly.
Attention: If the SD card is not inserted correctly or its write-protect is
enabled,the device will turn off automatically.
Power supply
♦To insert batteries in the device, first open the base plate
by pulling down the lock hole.
♦Then press the arrow marking on the battery compartment cover
to open the compartment.
♦Insert 4 x 1.5 V AA batteries into the battery slots .
Please pay close attention to the polarity, which is marked next to
the battery compartment. Otherwise the device will not work and
can be damaged.
♦Close the battery compartment cover and push against the arrow marking

- 7 -
again until the cover clicks audibly into place.
To increase the operating time, you can use an additional 4 x 1.5 V
batteries in the battery compartment of the addtional battery box.
♦To do this, carefully push the lock on the battery compartment cover upwards
and open the cover.
♦Insert 4 x 1.5 V AA batteries into the battery compartment.
Please pay careful attention to the polarity, which is marked on the
inside of the battery compartment cover.Otherwise the device will not
work and can be damaged.
♦Close the battery compartment cover and gently press against it until it clicks
audibly into place.
♦If you operate the device using a mains adapter (not supplied), open the round
rubber seal on the base plate and connect the plug of the adapter cable into the
socket for the external mains adapter, which is now accessible. The mains
adapter must supply a direct-current voltage of 6 V with at least 680 mA.
Operation via a mains adapter is possible with batteries inserted. If one power
source fails, operation will be maintained using the other.
Video connection
The camera can transfer the video signal to an external monitor or the video
input of a television set.
Connect a suitable monitor to the TV out socket using the supplied TV
cable .
Inserting SD Card
►Since the camera has no built-in memory, it can only work if an SD/SDHC
memory card is inserted.
►The device supports SD/SDHC memory cards with a capacity of up to 32 GB.
►To avoid malfunctions, keep the memory card away from moisture and avoid
strong vibration, dust, heat sources and direct sunlight.
►Insert the memory card as indicated by the icon on the slot.
Never force the memory card into the slot. Never bend or twist the
memory card.
►After transport, wait until the memory card has reached ambient temperature
before using it for the first time. Major fluctuations in temperature or humidity
can lead to condensation which could cause an electrical short-circuit. Keep the
memory card in the protective case.
♦To remove an SD/SDHC memory card from the memory card slot of the device,
press the protruding edge of the memory card in a little way until it pops out.
Then remove the card.

- 8 -
♦To insert an SD/SDHC memory card into the memory card slot of the device,
push it into the slot until it clicks into place.The contact surfaces of the memory
card must be facing towards the front of the camera.
♦SD/SDHC memory cards have a locking system to prevent accidental erasure.
To protect the card from write access, slide the switch on the side of the card to
the "LOCK" position. However, the camera can only save data onto the card if
the switch is in the other position.
Handling and operation
In this chapter you will receive important information for the handling
and operation of the device.
Switching on and off, making settings
After connecting a power supply, move the operating mode selector switch to
the "SET" position to make the settings described on the following pages using
the control panel buttons :
Press the button to switch from video to photo mode.
Press the button to switch from photo to video mode.
Press the MENU button to open the settings menu. If you do not select an
option within two minutes, the menu will close automatically. Unconfirmed
changes will not be saved.

- 9 -
Press the buttons to select the desired menu entry which you can
then activate with the OK button. If you change settings, you must always
confirm your changes with "OK".Use the MENU button to navigate one menu
level backwards.
Mode
To select whether photos or videos are to be recorded in motion detection mode.
In "Photo + Video" mode, the camera first takes a photo and then starts filming
video.
Photo Size
Select a photo size: 1 MP, 3 MP, 5 MP (preset), 8 MP or 12 MP.The larger the file
size, the more detailed the image. However, the maximum number of
high-resolution images that can be stored before the memory card is full is
much lower.
Photo No.
Select the number of photos that are to be taken in succession when the camera
is activated in photo mode. In addition to single shot mode (1 photo), you can
take "2 photos in series" or "3 photos in series".
Video Size
Select the screen resolution: 1280 × 720, 720 × 480, 640 × 480 or 320 × 240.
Here too, the higher the resolution, the sooner the capacity limit of the memory
card will be reached.
Video length
Use the buttons to select the length of the video recording (between
1–30 seconds) that is to be made when video recording is activated. The longer
the recording time selected,the shorter the operating time. The preset video
length is 5 seconds.
Tabla de contenidos
Otros manuales de Cámara de exploración de Bestok