6
AA
AA
AA
AA
C
B
A
INSTALLATION &
COMMISSIONING
5
SETTING THE RA IO LINK
FITTING & OPERATING INSTRUCTIONS FOR WORCESTER BOSCH
T20RF PROGRAMMER
8-716-106-659 issue a (08.04) UK
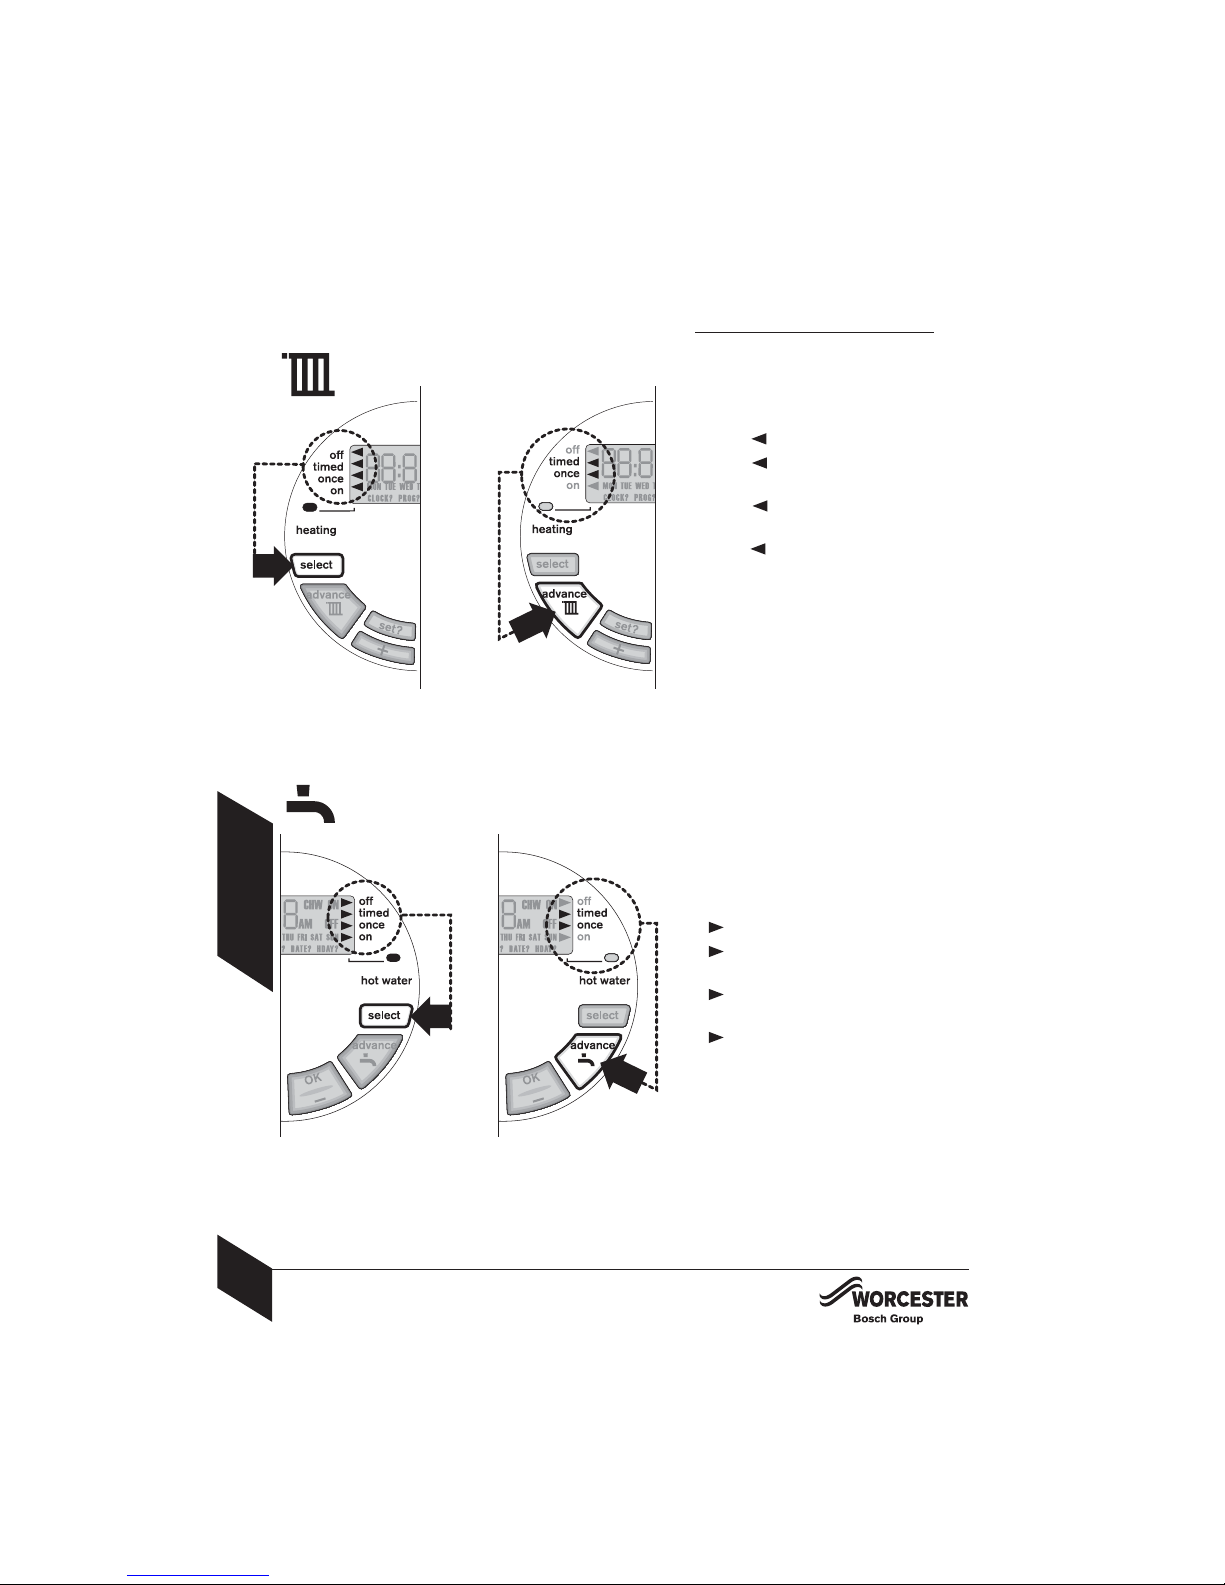
SETTING THE RA IO LINK
Receive set up:
The colon, CH and antenna symbols
should flash on the display
1Press the 'set?' button 4 times
2Press the 'OK' button once
3Press the 'set?' button 4 times; 'Lrn'
and 'OFF' should be displayed
4Press the '+' button so the display
shows 'ON' and a flashing antenna
symbol. The learn mode is now ready
to receive a signal from the transmitter
during the next 2 minutes.
T ansmitte set up:
The transmitter must be at least 1 metre
away from the receiver before starting
this procedure:
5Slide open battery compartments (B)
6Remove insulator strips (C)
7Replace the right hand battery
compartment (B) first followed by
the left hand battery compartment
The display (D) then shows the room
temperature and automatically transmits
a signal to the receiver unit in the boiler
to establish a radio link.
8When a radio link has been
established the display reverts back
to normal operation with the antenna
symbol shown
To re-establish the radio link; open both
battery trays until the transmitter display
goes blank, repeat steps 1 to 4 then
step 7 to transmit a set up signal to the
receiver. Repeat this procedure until a
link has been established.
If the radio link is lost the antenna
colon and CH symbols flash on the
receiver display. The program defaults
to manual mode. Press the 'OK' button
to override and switch the heating ON
press again to switch OFF.
57
4
2
x4 x1
1
3
x4
8