woodmizer LT70 Series Manual de usuario

Wood-Mizer® Sawmill
Remote Operation
LT70 AH Remote rev. A2.02
Operator’s Manual
This manual is to replace the related appropriate
information from the non-remote sawmill
Operator’s Manual
Form #676
!

Table of Contents Section-Page
2 ROdoc121516 Table of Contents
SECTION 1 REMOTE OPERATION 1-1
1.1 Preparing for Remote Operation ............................................................................... 1-2
1.2 Remote Sawmill Operation ....................................................................................... 1-5
1.3 Preparing The Remote Option For Towing............................................................... 1-6
1.4 Cold Weather Operation............................................................................................ 1-7
Recommended Cable Chain deicing Procedure
Recommended Cable Chain Ice Prevention Procedure
1.5 Hydraulic Control Operation..................................................................................... 1-8
SECTION 2 MAINTENANCE & TROUBLESHOOTING 2-1
2.1 Control Pivot Lubrication.......................................................................................... 2-1
2.2 Clean The Cable Chain & Support Tray ................................................................... 2-2
2.3 Cable Chain Repair.................................................................................................... 2-2
2.4 Cable Chain And Support Tray Alignment............................................................... 2-3
SECTION 3 REPLACEMENT PARTS 3-1
3.1 How To Use The Parts List ....................................................................................... 3-2
3.2 Sample Assembly ...................................................................................................... 3-2
3.3 Motor Assembly .................................................................................................... 3-3
3.4 Control Box ............................................................................................................ 3-4
3.5 Mounting Kit .......................................................................................................... 3-6
3.6 Lower Limit Switch Assembly ................................................................................ 3-8
SECTION 4 ELECTRICAL WIRING DIAGRAMS, LT40ME20SRAH4-ST 4-1

Remote Operation
Remote Operation ROdoc121516 1-1
1
SECTION 1 REMOTE OPERATION
The Remote Option provides remote operation for all sawmill functions from a single
location at the front of the sawmill. The option includes all cables with traveling guide
chain, a remote electrical power junction box, a front-mounted sawmill control box, and a
remote clutch mechanism with switch to engage the blade from the remote location.
The Remote Option also includes Wood-Mizer’s Simple Setworks system which allows
automatic, incremental up/down movement of the cutting head.

Remote Operation
Preparing for Remote Operation
1
1-2 ROdoc121516 Remote Operation
1.1 Preparing for Remote Operation
Set up the sawmill as instructed in your sawmill operator’s manual.
CAUTION! Moving the saw carriage before removing the
cable chain support may cause damage to the chain. Also,
moving the saw carriage when the chain is frozen can
damage the chain. See Section 1.4 for recommended chain
deicing procedure.
See Figure 1-1. Before moving the saw carriage, remove the cable chain support
bracket.
1. Disengage the rubber strap holding the cable chain to the support bracket.
2. Loosen the handles and remove the support bracket from the sawmill track rail.
3. Place the support bracket on the storage bracket located on the sawmill frame between
the first and second bed rails. Tighten the handles to secure the support bracket to the
storage bracket and secure the rubber strap in the bracket hole.
FIG. 1-1
Store chain support on
bracket between first
and second bed rails
3H0479
Remove strap
from cable chain Loosen handles
and remove
chain support

Remote Operation
Preparing for Remote Operation
Remote Operation ROdoc121516 1-3
1
Before operating the controls on the control box, you will need to pivot the control from its
travel position to the operating position.
See Figure 1-2.
1. Turn the control pivot locking handle counterclockwise.
2. Pivot the control assembly 180 degrees so the controls face the front of the sawmill.
3. Turn the control pivot locking handle clockwise to lock the control in place. The lock is
FIG. 1-2
3h1126

Remote Operation
Preparing for Remote Operation
1
1-4 ROdoc121516 Remote Operation
designed to loosely hold the control in the operating position. The control can still be
pivoted as needed during the sawing operation. The lock will hold the control firmly in the
traveling position during towing.
See Figure 1-3.
FIG. 1-3
3h1127
Operator’s Position

Remote Operation
Remote Sawmill Operation
Remote Operation ROdoc121516 1-5
1
1.2 Remote Sawmill Operation
See Figure 1-4. All sawmill controls operate exactly as described in your sawmill
operator’s manual except the clutch/brake. Instead of pulling a handle to engage the
blade, push the toggle switch on the control panel up. Hold the switch up until the clutch
motor stops completely. The remote clutch mechanism will disengage the brake, rev the
motor to full throttle, and start the blade spinning.
DANGER! Keep all persons out of the path of moving
equipment and logs when operating sawmill or loading and
turning logs. Failure to do so will result in serious injury.
To stop the blade and engage the blade brake, push the toggle switch down. This will also
return the engine to idle.
NOTE: Be sure the toggle switch stays in the up or down position. The boot on the switch
may spring the switch back to neutral. You may need to hold the switch in position until
the remote clutch motor completes its cycle.
FIG. 1-4
3H0362

Remote Operation
Preparing The Remote Option For Towing
1
1-6 ROdoc121516 Remote Operation
1.3 Preparing The Remote Option For Towing
1. After placing the saw head in its traveling position, engage the remote clutch switch to
engage the drive belts. This will keep the engine from bouncing while towing the sawmill.
2. Turn the locking handle counterclockwise and pivot the control box to its traveling
position. Turn the locking knob clockwise to secure the control box in position.
3. Place the chain support bracket under the cable chain, located between the first and
second bed rails.
See Figure 1-5.
4. Tighten the support handles and secure the chain to the support with the rubber strap.
FIG. 1-5
Install chain support
to top track rail between
first and second bed rails
Clamp support to
rail with handles
3H0480
Secure chain to
support with strap

Remote Operation
Cold Weather Operation
Remote Operation ROdoc121516 1-7
1
1.4 Cold Weather Operation
If the sawmill is operated or stored in freezing conditions, the cable chain may freeze.
Before moving the saw carriage, check to see if the chain is frozen:
1. Remove the chain support bracket (See Section 1.1).
2. Pull the chain up at a few locations to determine if it moves freely. If you detect the chain
is frozen, proceed to the recommended deicing procedure below.
3. If the chain seems to move freely by hand, use the power feed to slowly move the saw
carriage toward the rear of the mill. Since the saw carriage returns only at full speed,
moving the saw carriage forward will allow you to slowly engage the cable chain to be
sure it is not frozen. If you detect the chain is frozen, proceed to the recommended
deicing procedure below.
Recommended Cable Chain deicing Procedure
To de-ice the chain, apply a salt solution (preferably calcium chloride and water) to the
entire length of the chain. Allow the solution to sit until the chain can move freely. The
strength of the solution and time required to free the chain will depend on how cold the
weather is and how much ice has accumulated in the chain.
Before storing the sawmill after using the salt solution, be sure to rinse the salt from any
metal portions of the sawmill frame to prevent corrosion. Refer to the recommended
cold-weather storage procedure below to prevent the chain from freezing.
Recommended Cable Chain Ice Prevention Procedure
Before storing the sawmill in freezing temperatures, apply a 50/50 solution of
environmentally safe antifreeze (Sierra) and water to the cable chain. A garden sprayer
can be used to apply the solution.

Remote Operation
Hydraulic Control Operation
1
1-8 ROdoc121516 Remote Operation
1.5 Hydraulic Control Operation
The hydraulic control levers become operational when the contacts at the bottom of the
carriage touch the power strip on the frame tube. The hydraulic control levers will only
work when the cutting head is close enough to the front end of the mill to touch the power
strip.
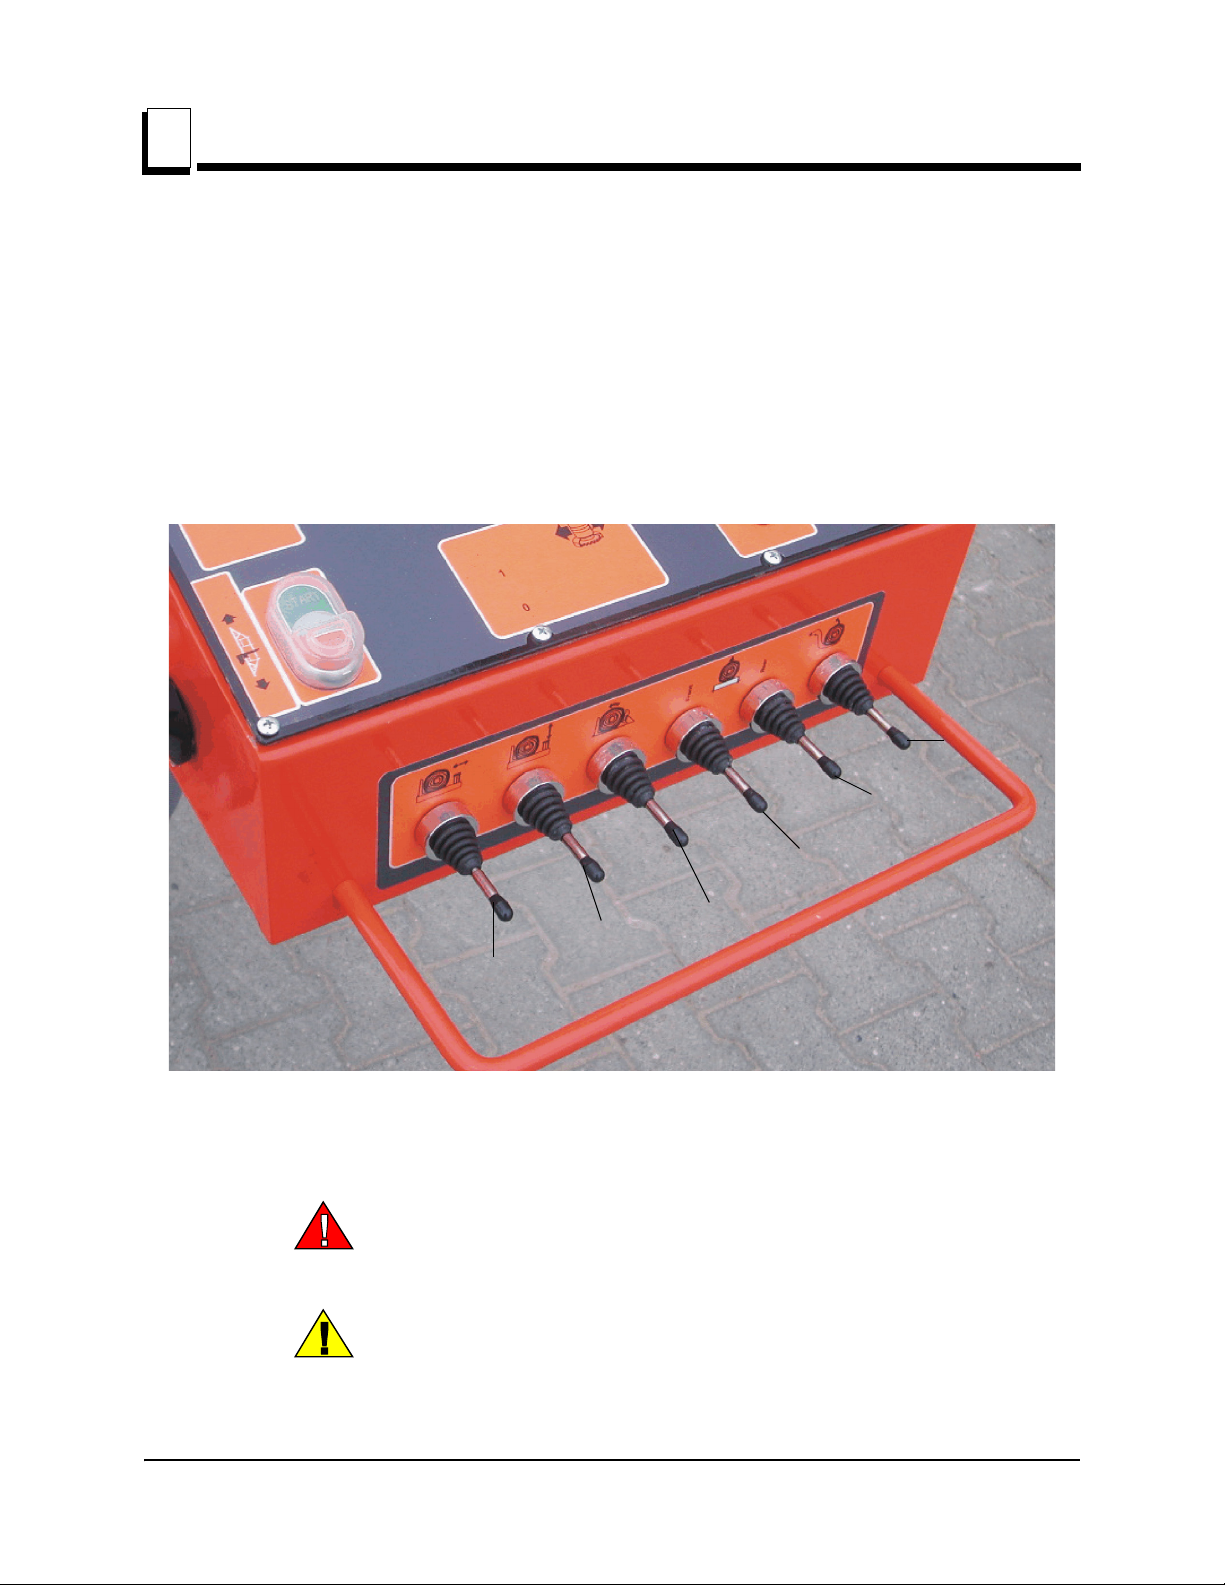
See Figure 1-6. Hydraulic units have eleven control levers to load, clamp, turn and level
logs.
Use the hydraulic control levers to get the mill ready to load a log.
DANGER! Keep all persons out of the path of moving
equipment and logs when operating sawmill or loading and
turning logs. Failure to do so will result in serious injury.
CAUTION! Always make sure the engine is running before
operating the hydraulic controls. Operating the controls
without the engine running will result in power drainage
from the battery.
FIG. 1-6
Clamp
In/Out
Clamp
Up/Down
Turner
Front Toe
Board
Rear Toe
Board
Loader
Otros manuales para LT70 Series
6
Tabla de contenidos
Otros manuales de Equipos de construcción de woodmizer