5
Step 1: Install the Feed Water Adapter (3/8” or 1/2”)
NOTE: The “INPUT” water tubing has been attached to the feed water adapter for easy
installation.
1. Shut off water supply. Turn on the kitchen faucet to release water pressure;
NOTE: Make sure the water has stopped before proceeding to the next step. Get a towel
or bucket to catch any water drips.
2. Disconnect the cold water pipe from cold water supply valve;
3. Twist the feed water adapter onto cold water supply valve (with its washer) and tighten
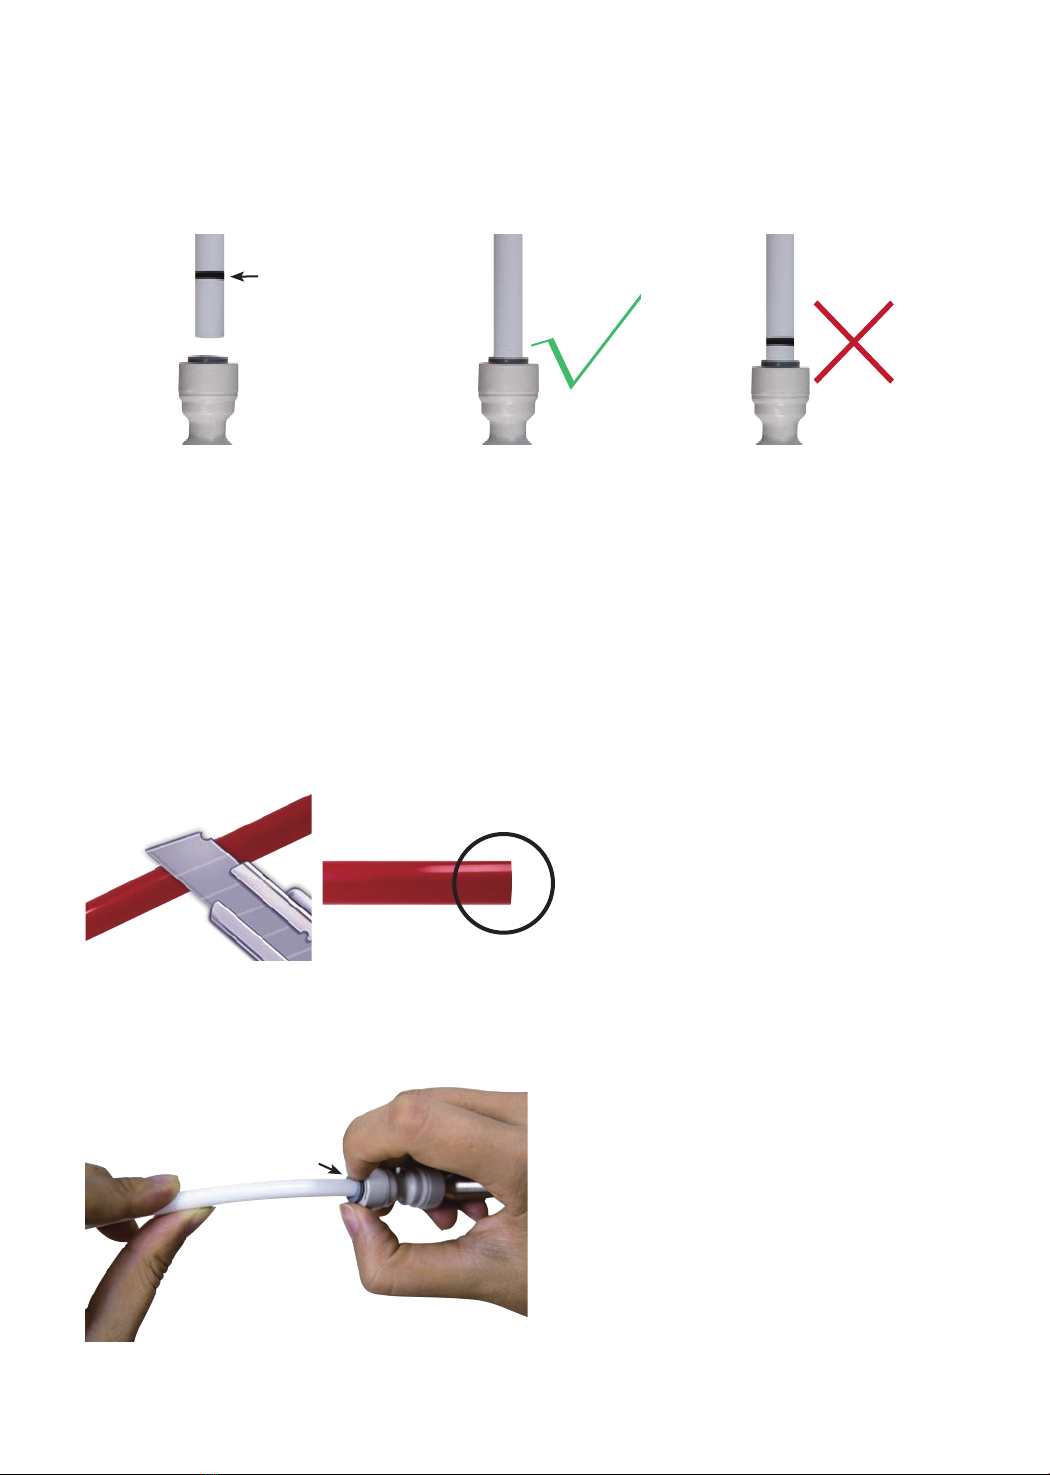
it with an adjustable wrench (Figure 4);
NOTE: If the cold water pipe is 1/2”, unscrew the two converters from the feed water
adapter firstly (Figure 5), then go step 3.
4. Twist cold water pipe (with its washer) onto the feed water adapter and tighten with an
adjustable wrench.
Installation Steps
NOTE:
•The RO system must be connected to the COLD water supply ONLY.
•Do not install the system in exposure to direct sunlight or harmful chemicals, nor any
place where it may be damaged.
•Do not install the system near any heat source.
•Do not install the system outdoors.
How to Drill a Hole on Your Sink or Countertop (Optional)
NOTE: Please confirm if there is an existing hole available to install the RO faucet. If not,
please drill a hole in accordance with the following steps.
It’s highly recommended to watch the YouTube video “How to Drill Faucet Holes” for better
understanding of the process. There is also a sticker for your reference to drill the hole.
Remember to wear safety glasses to protect your eyes while drilling the faucet hole.
1. Choose a diamond core bit for granite, and a carbide drill bit for stainless steel. Do not
use a hammer drill on nature stone, glass or ceramic;
2. Glue the sticker on your sink or countertop, and drill a hole referring to the sticker hole
size (1.38”);
3. Make an indent with a center punch on stainless steel sink before drilling to help guide
the bit;
4. Be careful when drilling on a porcelain sink, as it can be easily chipped. Apply downward
pressure firmly on the bit until breaking through the surface;
5. Starting at lowest speed, hold the drill straight with firm pressure to prevent the bit from
walking on the counter;
6. Once breaking through the surface, swirl the drill a little to apply pressure in a circle
evenly.
Prior to installation, it is highly recommended to watch the video “Waterdrop RO Installation”
on YouTube.