TTikorea TX1000U Manual de usuario

INSTRUCTION MANUAL
www.ttikorea.co.kr
INSTRUCTION MANUAL
TX1000UTX1000U
TX1000UBT
(
Bluetooth Compatible)
TX1000UBT
(
Bluetooth Compatible)
PMR446 TRANSCEIVER
Trim size : 105*142
Cutting margin : 1mm

Trim size : 105*142
Cutting margin : 1mm
Trim size : 105*142
Cutting margin : 1mm

Thank you for purchasing this radio.
All our products are built to offer excellent
value by combining advanced features,
great design and manufacturing quality.
To ensure you are familiar with the operation
and features of your radio, and in order to
obtain the best performance, please read
this manual carefully before operation.
Trim size : 105*142
Cutting margin : 1mm
Trim size : 105*142
Cutting margin : 1mm

Contents
Trim size : 105*142
Cutting margin : 1mm
Caution ..................................................................................
1.Radio Controls ....................................................................
2. Equipment and Accessories Supplied ..............................
3. Fitting the Battery pack .....................................................
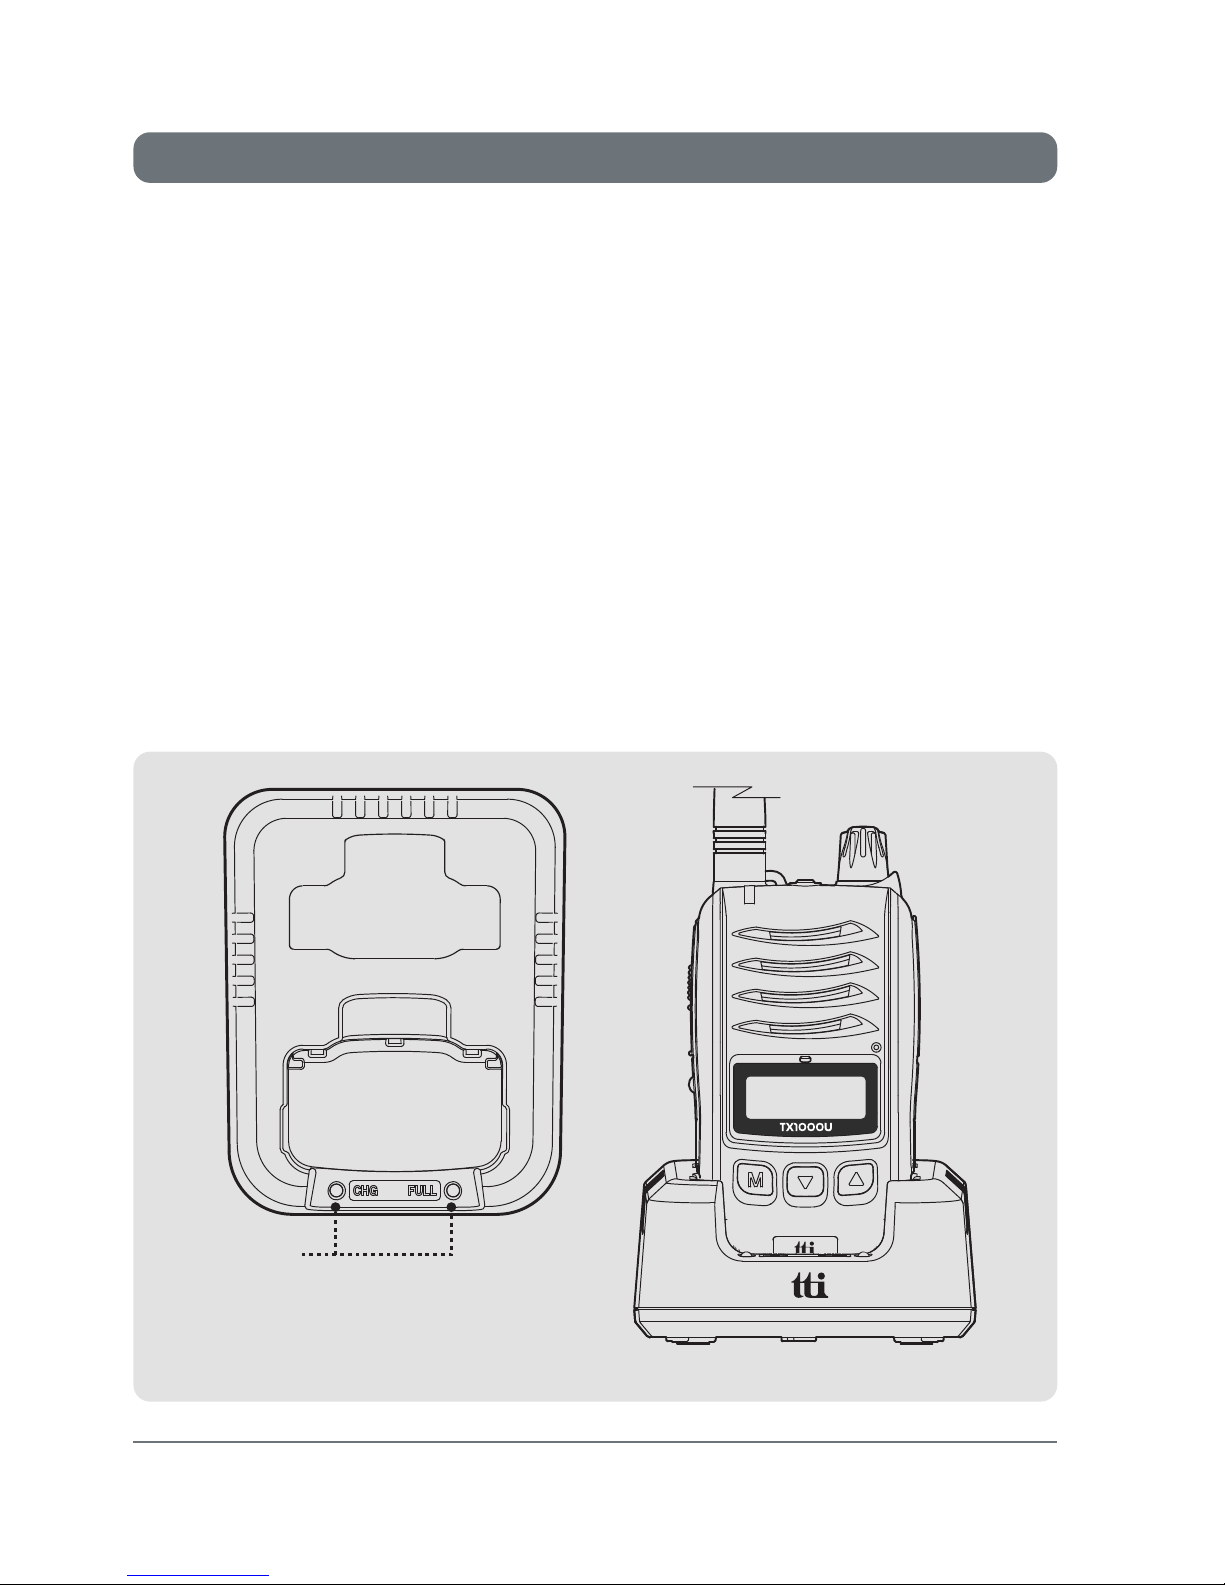
4. Battery Charging ................................................................
5. Radio Controls ...................................................................
1. Power On/Off/Volume Control .....................................
2. Push-To-Talk (PTT) Button ........................................
3. Monitor Momentarily ...................................................
4. Function / Menu(Mode) Button ...................................
5. Dwon Button ...............................................................
6. Up Button .....................................................................
7. Keypad Lock / Scan & Scan Memory Button .............
6. LCD Display ......................................................................
7. Menu mode ......................................................................
8. Basic Radio Operation ......................................................
9. Radio Features Explained ................................................
10. Bluetooth Compatible Operation(Optional) ....................
11. Troubleshooting ..............................................................
12. CE Declaration ................................................................
13. Safety Requirements .....................................................
14. Technical Specifications ...............................................
15. Declaration of Conformity ...............................................
5
6
7
7
8
9
9
9
9
9
10
10
10
11
12
13
14
20
20
21
21
22
25

TX-1000U
5
Caution
IMPORTANT - READ ALL INSTRUCTIONS carefully and completely
before operating your radio and retain this manual for future reference.
NEVER connect the radio to a power source other than the supplied
battery. This may damage your product.
NEVER operate your radio with the antenna less than 5cm from
exposed parts of the body.
NEVER use the radio in or near a mining facility or other area which
uses remotely triggered explosives or an area labelled "Blasting Area".
NEVER
use or charge your radio in a potentially explosive atmosphere.
DO NOT place your radio in front of a vehicle airbag.
DO NOT operate your radio on board an aircraft.
DO NOT use your radio with a damaged antenna.
DO NOT attempt to modify your radio in any way.
ALWAYS charge your radio at normal room temperature.
ALWAYS switch off your radio where notices restrict the use of
two-way radio or mobile telephones.
ALWAYS replace the accessory jack cover (if applicable) when
the jack is not in use.
ONLY use TTI approved rechargeable batteries with the supplied charger.
AVOID charging your radio or battery pack while is it wet.
AVOID storing or charging your radio in direct sunlight.
AVOID storing or using your radio where temperatures are below
-20℃or above +60℃
Trim size : 105*142
Cutting margin : 1mm

①Antenna
② Strap Hole
③TX/RX Indicator
④PTT Button
⑤Monitor Button
⑥Belt Clip
⑦Power ON/Off &
Volume Control Knob
⑧Lock Button
⑨Accessory Jack
⑩Speaker
⑪Microphone
⑫LCD Display
⑬Function / Menu Button
⑭Down Button
⑮ Up Button
9
3
5
6
7
8
10
11
12
13 14 15
1
2
4
Trim size : 105*142
Cutting margin : 1mm
Trim size : 105*142
Cutting margin : 1mm
1.Radio Controls
6
TX-1000U

Fitting
1. Ensure that your radio is switched off.
2. Align the battery pack with the bat tery
guide at the back of the radio.
3. Slide the battery pack up to the top
until you hear the snapping sound.
Removal
1. Ensure that your radio is switched off.
2. Press down on the battery release
catch and separate the battery pack
from the radio.
1.
TX1000U (or TX1000UBT) Radio with Antenna
2. Li-Ion Battery Pack
3. Charging Cradle
4. Power Adaptor
5. Belt Clip
1 Unit
1 Unit
1 Unit
1 Unit
1 Unit
Trim size : 105*142
Cutting margin : 1mm
2. Equipment and Accessories Supplied
3. Fitting the Battery pack
TX-1000U
7

To charge your radio, carefully follow these instructions:
1.
Connect the power adaptor to the mains power supply and
connect the adaptor charger jack to the charging cradle.
2.
Disconnect any radio accessories and ensure the radio is
switched off.
3. Insert the radio into the charging cradle until it 'Clicks' home.
The charger LED will glow red and charging will start. If the charger
LED blinks red or green or the charger LED does not light, re-insert
the radio into the charging cradle.
4. The battery charging time is about 4~5 hours. When the battery
is fully charged the green LED(Full) will be turned on.
Power Adaptor
-Input : 230VAC
-Output : 12VDC 1Ah
Trim size : 105*142
Cutting margin : 1mm
4. Battery Charging
8
TX-1000U
LED

1. Power On/Off/Volume Control
2. Push-To-Talk (PTT) Button
3. Monitor Button
4. Function / Menu(Mode) Button
Trim size : 105*142
Cutting margin : 1mm
5. Radio Controls
TX-1000U
9
Turn the knob clockwise to switch on and increase
the volume and counter-clockwise to decrease the
volume and switch off the radio. The radio will emit a
confirmation tone when it switches on.
Press and hold this button to speak (transmit)
and release the button to hear (receive)
messages. You can only communicate with other
radios when the
channel and privacy code are the
same as that of yours.
The red LED lights during the PTT press.
Momentarily press this button to activate the monitor
function. To deactivate this function, momentarily
press this button again.
Function Momentarily press this button to activate
the function mode. There appears "F" icon on the
display. While "F" icon is on the display, press the
second key to activate or deactivate the functions
(Scan and Scan Memory).
Menu Press and hold for about 2 seconds to enter
the menu mode. Then briefly press to step down
through the menus.
Note : The green or orange LED lights during receive. The green lights on the
basic channels and the orange lights on the channel with privacy codes.

5. Down Button
6. Up Button
Pressing this button will decrease the channel
number. In some modes this button is used to
adjust the function setting.
Pressing this button will increase the channel
number. In some modes this button is used to
adjust the function setting.
7. Keypad Lock / Scan & Scan Memory Button
Keypad Lock :
Scan :
Scan Memory :
Press and hold this button to activate the
Keypad Lock.
Briefly pressing this button following the function button
press will start scanning.
To deactivate press the function button briefly and press
this button again.
As factory default your radio has all channels
memorized for channel scanning.
To delete a certain channel stay on the channel
and press the function button followed by long
press of this button.
The scan icon will disappear on the LCD and the
channel is now deleted from the scanning list.
Trim size : 105*142
Cutting margin : 1mm
10
TX-1000U
Este manual sirve para los siguientes modelos
1
Tabla de contenidos
Otros manuales de Transceptor de TTikorea


