172-65192MA-02 (JA3D) 27 Jan 2009
9
Disassembly / Reassembly
NEVER apply direct heat to the float. The float may explode due to
increased internal pressure, causing accidents leading to serious injury
or damage to property and equipment.
WARNING
When disassembling or removing the product, wait until the internal
pressure equals atmospheric pressure and the surface of the product
has cooled to room temperature. Disassembling or removing the
product when it is hot or under pressure may lead to discharge of fluids,
causing burns, other injuries or damage.
CAUTION
Use the following procedures to remove components. Use the same procedures in
reverse to reassemble. (Installation, inspection, maintenance, repairs, disassembly,
adjustment and valve opening/closing should be carried out only by trained
maintenance personnel.)
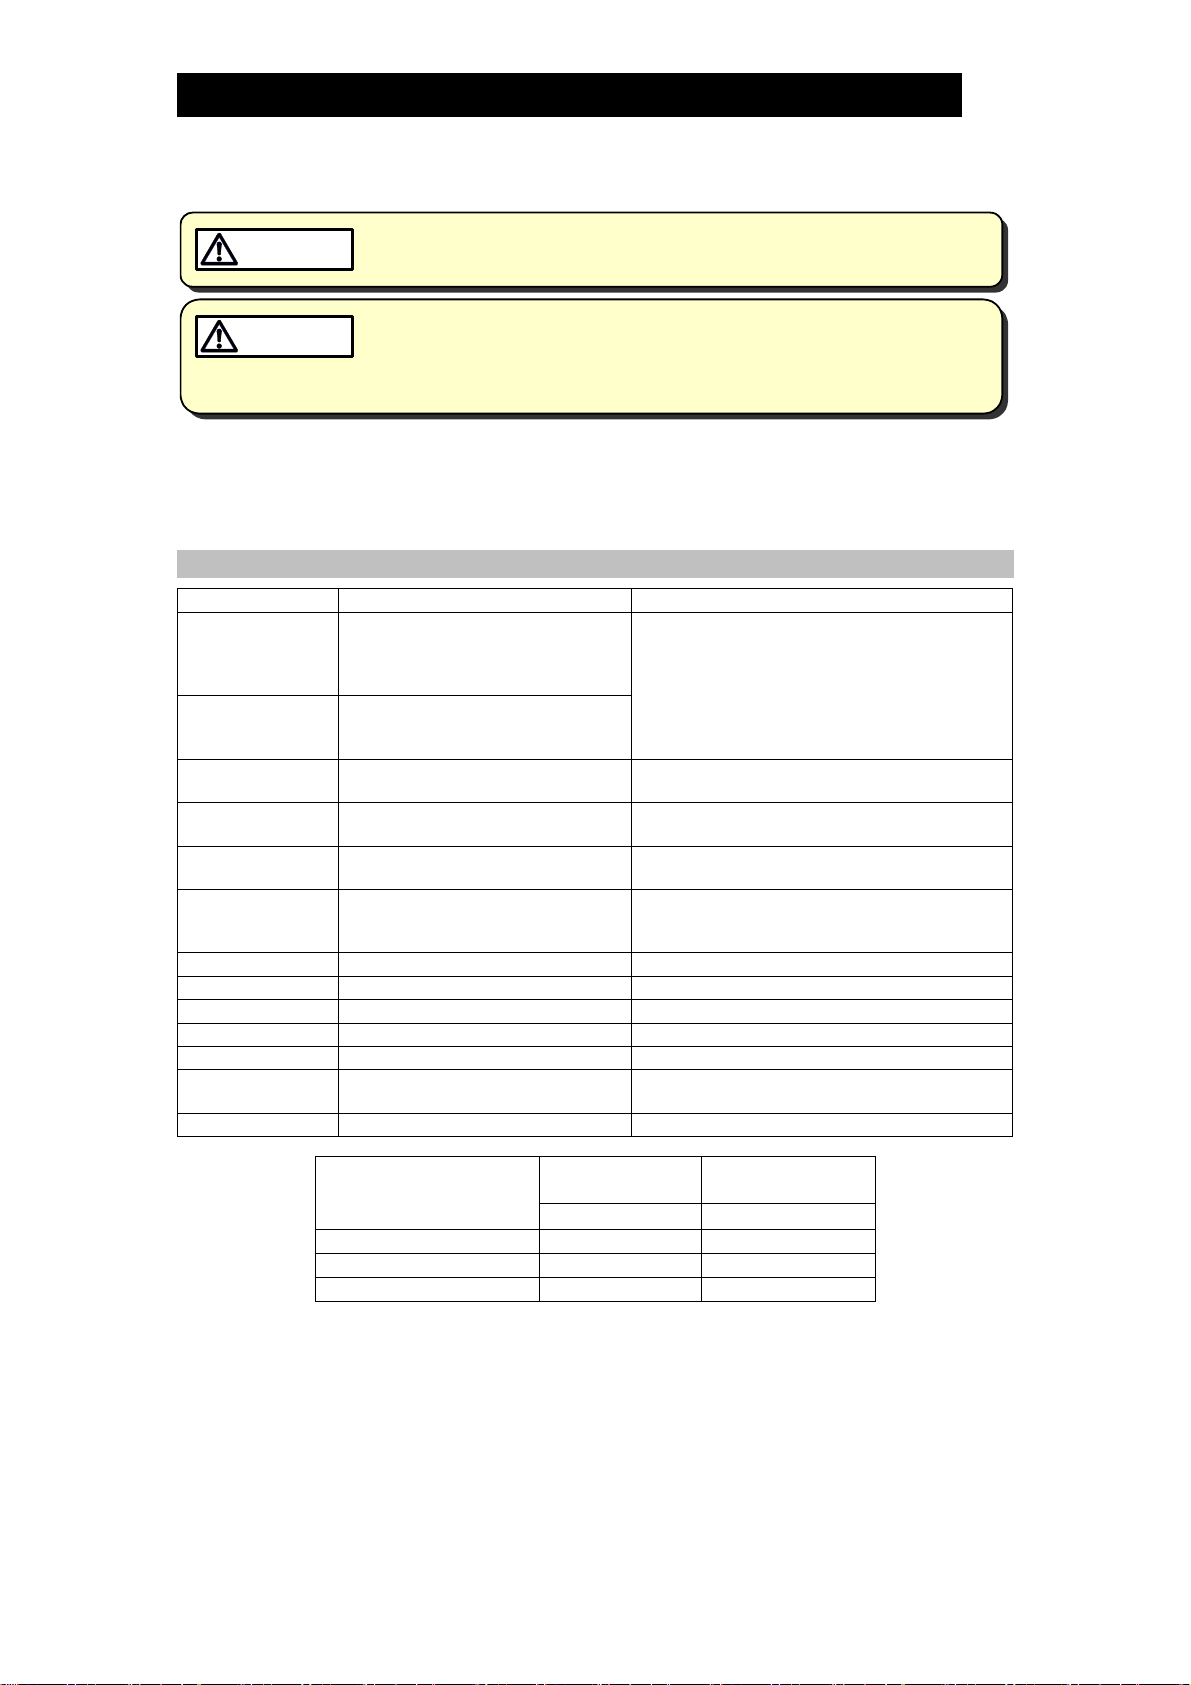
Detaching / Reassembling
Part During Disassembly During Reassembly
Union Nut Hold the trap body with one hand
and unscrew the union nut with a
pipe wrench; remove the body
downward
Cover The cover can be left connected
to the piping if enough space is
available to inspect it from below
Hold the trap body against the cover from
below with one hand and hand tighten the
union nut with the other hand: then tighten it
to the proper torque (see torque table below)
Screen Remove the screen from the body Insert the screen into its groove in the rim on
the body
Cover Gasket Remove the gasket Replace only if found to be deformed or
damaged
Float Remove carefully; do not scratch
its surface Carefully insert the float; do not scratch its
surface
Valve Seat Holder Using a hex wrench, remove the
valve seat holder and the valve
seat together Tighten to the proper torque (see torque
table below)
Holder Gasket Remove the holder gasket Replace only if found to be worn or damaged
Valve Seat Remove from valve seat holder Replace only if found to be worn or damaged
Guard Bushing Unscrew by hand Hand tighten guard bushing
Snap Ring Remove with snap ring pliers Reinstall with snap ring pliers
Plunger Pull out from valve seat holder Insert into valve seat holder
Plunger O-Ring Carefully remove plunger O-ring Replace only if found to be deformed or
damaged; coat with heat-resistant grease
Coil Spring Remove from plunger Reinstall onto plunger
Tightening
Torque Dustance Across
Flats
Part Name N⋅m (lbf⋅ft) mm (in)
Union Nut 20 (15) 80 (33/16)
Valve Seat Holder 5 (3.7) 14 (9/16)
Guard Bushing Hand tighten --
1N⋅m ≈10 kg⋅cm