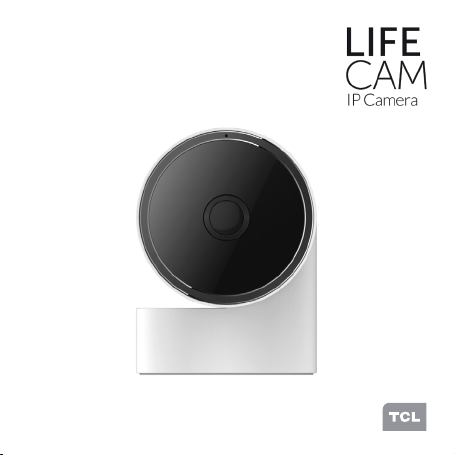
TCL LIFE CAM Manual de usuario
Quick Start Guide
CJB1HC004AAA

2
What's In The Box?
LIFECAM x 1 Charger x 1 Screw x 2
Quick start guide
USB cable x 1 (1.8 meter) Quick start guide x 1 Wall plug x 2
Metal mounng bracket

3
Specicaon
Product name LIFECAM
Model name IC01
Operang frequency 2.4 GHz
Transmied power 17±2dbm (Mode: 11b, Rate: 1Mbps)

4
Geng to Know Your LIFECAM
The LIFECAM is a Wi-Fi IP camera which provides remote viewing
and broadcasng features when used in combinaon with the LIFE
App.
MIC
Light sensor
Lens
LED indictor
Speaker
USB port
Reset hole
SD card slot
Metal mounng
bracket
Note:
You can adjust your LIFECAM angle by manually rotang the camera head.

5
Your LIFECAM: Quick Setup Guide
1. Download the LIFE Applicaon
Download the App using either of the QR codes shown below. Both
QR codes are also printed on the box. Alternavely, you can also
search for “LIFE” in the Apple Store or in Google Play Store.
Apple Store Google Play
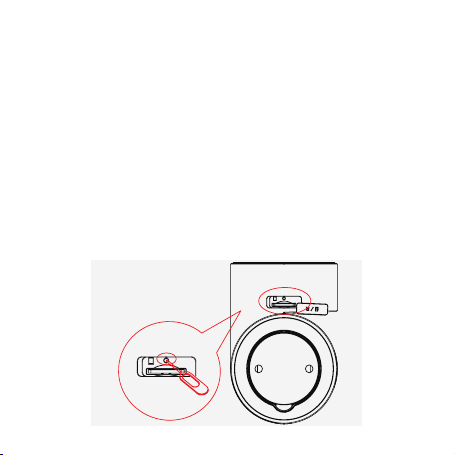
2. Installing a Micro-SD Card
Insert the Micro-SD card
according to the illustraon.
Note: In order to enable video
recording, you will rst need
to insert a Micro-SD card. The
system will automacally save the
video in the SD card when the
alarm is triggered.
SD Card format:
Speed: Class 4 or above
Capacity: 8-32GB
Type: TF Card (Micro-SD
Card)
Format: FAT32

6 7
3. Connecng Your LIFECAM
1) Ensure that your LIFECAM is located in your Wi-Fi signal coverage
zone. For opmal performance, the Wi-Fi uploading bandwidth
should be at least 0.6 Mbps.
2) Ensure that your smartphone and your LIFECAM are in the same
Wi-Fi signal coverage zone.
Note: This device does not support 5GHz Wi-Fi. Please connect to a 2.4GHz
Wi-Fi router.
3) Connect your LIFECAM to the power supply as shown in the
following gure.
Note: When the LIFECAM is connected to the power supply, the LED
indicator light will turn red, and it will take about 20 seconds to boot up.
4) Open the LIFE App, create an account and log in.
7
5) When you hear "Ready to congure LIFECAM" from the audio
prompt and the LED ashes red, select “+” in the LIFE App, and
follow the on-screen instrucons to add and congure your
LIFECAM. Once your LIFECAM connects to the Wi-Fi network
successfully, the LED will turn o.
Note: Please reset your LIFECAM If the LED connues to ash, or you hear
"Sorry, adding LIFECAM failed, please try again" from the audio prompt.
Reseng Your LIFECAM
If you want to change the LIFECAM Wi-Fi sengs, or your LIFECAM
connecon fails, please long press the reset buon using the reset
pin for 5 seconds. An audio guide will nofy you if the reset has
succeeded.
Note: Please add your LIFECAM again in the App aer you reset it.

8 9
Installing Your LIFECAM
You can place your LIFECAM on a desk or install it on a wall.
Note:
• Please place your LIFECAM in an area with an unobstructed
view.
• Please do not place your LIFECAM behind furniture or near a
microwave oven.
• Please do not place your LIFECAM in areas prone to high
humidity or where condensaon might form.
Desktop Installaon
Place your LIFECAM on a desk in an area which is clean and dry, with
an unobstructed view, and which is beyond the reach of children.

9
Wall Installaon
1. Find a suitable place to install your LIFECAM.
2. Separate the metal mounng bracket from the base of your
LIFECAM.
3. Use the metal mounng bracket with its two holes as a template
to mark the mounng posion of your LIFECAM on your wall (the
distance between the two holes is 28 mm). Drill two holes into
the wall.
4. Insert the wall plugs into the holes.
5. Fix the metal mounng bracket onto the wall using the screws.
6. Reaach your LIFECAM to the metal mounng bracket which is
now xed to the wall.
LIFECAM
Note:
• Don't install your LIFECAM
outdoors.
• Avoid direct or strong sunlight.
• Avoid installing your LIFECAM
near water vapour or in areas of
high humidity.
• Please don't install your
LIFECAM in an unstable or
vibraon prone area.
• Please don’t place your
LIFECAM vercal to frequently
moving objects, such as cur-
tains and windows.
Holes in
the wall
Wall plug Metal mounng
bracket
Screw

10
FAQ
1. Q: Which OS version is compable with the App?
A: iOS 7.0 and above versions, Android 4.0 and above versions.
2. Q: What should I do if I am unable to add my LIFECAM?
A: 1) Use the reset pin to reset your LIFECAM. Wait unl you
hear the audio guide and then try to add it again.
2) Please check that you have entered the correct Wi-Fi SSDI
and password, then try again.
3) Please check if your router is appearing in your Wi-Fi black
list or the opon to prevent loitering on your network has been
enabled.
4) Please check if your Wi-Fi router has been set to the 5 GHz
frequency band. Currently, LIFECAM does not support the 5
GHz Wi-Fi frequency, so please set the Wi-Fi router to the 2.4
GHz band.
5) Please check if your smartphone permission sengs are
prevenng the LIFE App from using Wi-Fi and GPS.
6) Please check if your Wi-Fi router has been set to bridge mode.
Bridge mode can cause the Wi-Fi signal to become unstable so
Este manual sirve para los siguientes modelos
1
Tabla de contenidos


