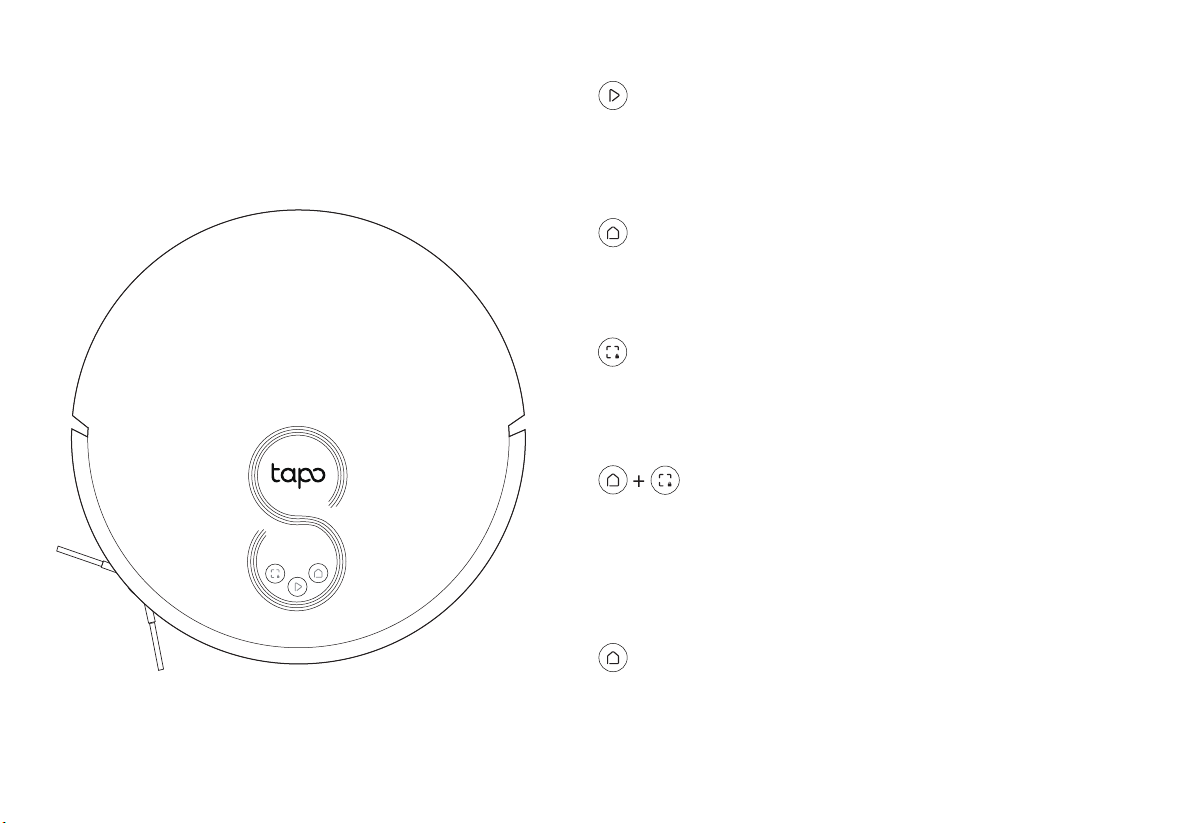
Remove Protective Film
3
Remove Protective Strip
2
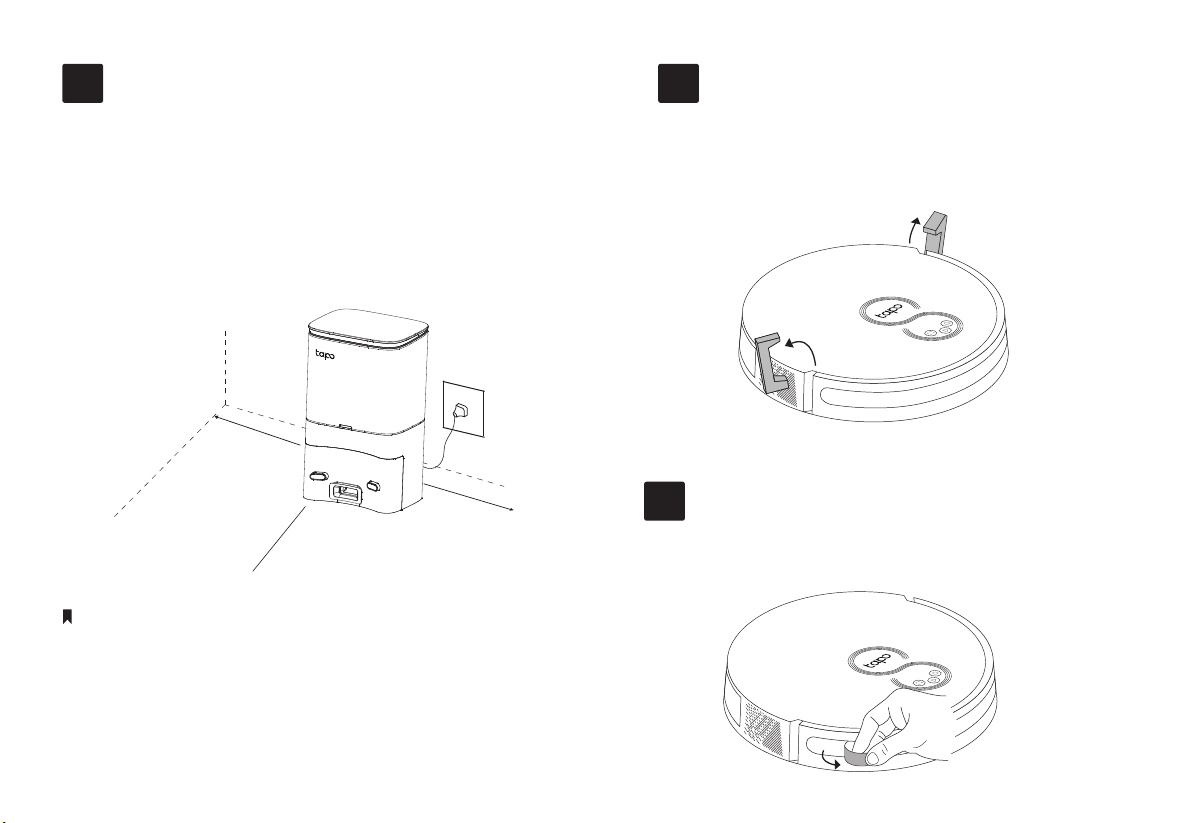
0.5m (1.6ft)
0.5m (1.6ft)
• To ensure a better user experience, make sure the area is with good Wi-Fi signal.
• Do not place it in direct sunlight. Ensure the area around the dock is free of clutter to
improve docking performance.
• To prevent the risk of your robot falling downstairs, ensure that the dock is placed at
least 1.2m (4 ft) away from stairs.
• Always keep the dock powered on, otherwise the robot vacuum will not automatically
return. And do not move the dock frequently.
• Place a waterproof pad to prevent the mop from wetting the oor when the robot
vacuum is being charged.
1. Place the dock on a level surface, at against a wall,
without obstacles within 1.5m (4.9ft) in front and
0.5m (1.6ft) on left and right.
2. Connect the power cord to the dock. Ensure the
cable is kept tidy.
Before use, remove the protective strips on
both sides of the front bumper.
Remove the protective lm on the front bumper.
Notes
1.5m (4.9ft)
Position the Dock
1
5