Sennheiser HE 1 Manual de usuario

HE 1 TUBE SET
EN Instruction manual
DE Bedienungsanleitung
FR Notice d’emploi
ES Instrucciones de manejo
PT Manual de instruções
NL Gebruiksaanwijzing
FI Käyttöohje
JA取扱説明書
KO사용안내서
ZH使用说明
TW 使用說明書
ID Buku petunjuk
RU
Инструкция по эксплуатации
AR

Sennheiser electronic GmbH & Co. KG
Am Labor 1, 30900 Wedemark, Germany
www.sennheiser.com
Printed in Germany, Publ. 02/18, 570792/A01

1
2
4
3
ON
LED off
OFF
I
5
68
7
9
ON
I
I
INPUT
CROSS FEED
OUTPUT
USB COAXIALOPTICAL
BALANCEDUNBALANCED
LOW HIGHOFF
LINEPHONES
BOX CONTROL
BOX 2 O/CBOX 1 O/C
CROSS FEED
OFF LOW HIGH
INPUT
CROSSFEED
OUTPUT
USB COAXIALOPTICAL
BALANCEDUNBALANCED
LOW HIGHOFF
LINEPHONES
BOXCONTROL
BOX2O/CBOX 1 O/C
10 s

1
HE 1 tube replacement set | English
DEFR ENESPTNLFIJAKOZHTWIDRUAR
HE 1 tube replacement set
During operation of the HE 1 amplier, the amplier tubes are
always subject to intrinsic wear, for example due to waste heat,
but also due to external inuences such as shocks.
The HE 1 tube replacement set has been carefully selected by our
audio experts for your Sennheiser HE 1. All 8 tubes have been
tested, measured and selected for perfect functional interaction.
The specic arrangement of the 8 tubes contributes to the
uncompromising sound quality of your HE 1 – now with
unadulterated precision for many more listening sessions.
Information on this manual
This manual describes the replacement of the amplier tubes
of the HVE 1 tube amplier of your Sennheiser HE 1. Please also
observe the instruction manual including the safety instructions
supplied with your HE 1.
The instruction manual can also be found at
www.sennheiser.com/download.
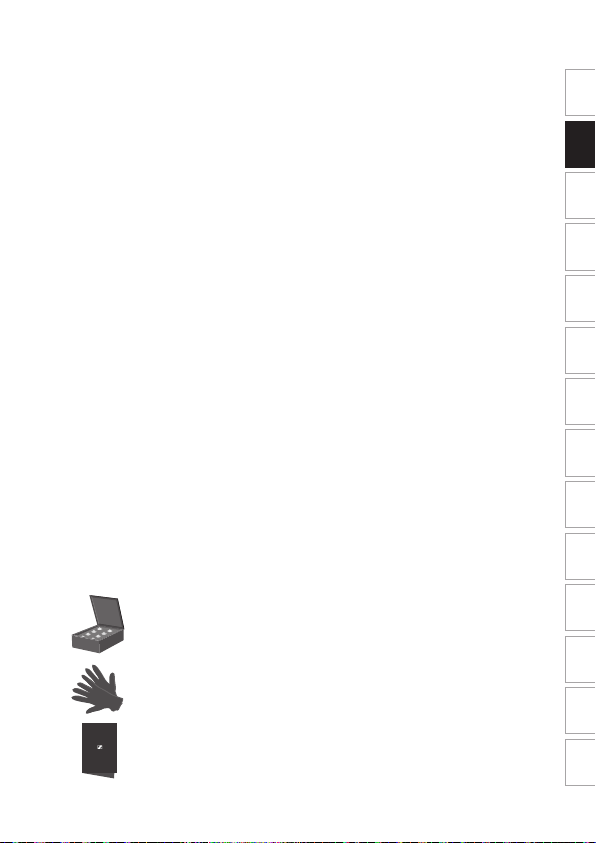
Package contents
8 amplier tubes (the arrangement of the tubes in the
tube set box corresponds to their arrangement in the
amplier)
1 pair of microber gloves
1 instruction manual

2
English | Replacing the amplier tubes
Replacing the amplifier tubes
Illustrations for the instructions can be found
on the fold-out page at the beginning of this
instruction manual.
ATTENTION!
▷Do not use the HE 1 when the protective cylinders of the amp-
lier tubes are removed.
▷When replacing the tubes, wear the supplied gloves so as not
to damage or contaminate the indium tin oxide (ITO) coating
of the protective cylinders and the quartz glass housings of
the tubes.
▷Always replace all 8 tubes with new ones. Arrange the tubes
in the amplier exactly as the tubes were arranged in the box
when delivered.
1. Put on the supplied gloves and switch on the amplier so that
the amplier tubes fully extend.
2. Set the power switch to OFF to switch the HE 1 off and wait
until the status LED goes off (up to 30 seconds).
3. Push and hold the safety pin on the power plug and pull the
power plug from the IEC mains socket.
4. Loosen the quarter turn fastener of the two front protective
cylinders by turning the protective cylinders a quarter turn
counter-clockwise.
5. Remove the old tubes and dispose of them at collection points
for waste electrical and electronic equipment or return them to
your specialist dealer.

3
Replacing the amplier tubes | English
DEFR ENESPTNLFIJAKOZHTWIDRUAR
6. Hold the amplier tube unit by the rear protective cylinders and
carefully insert the new tubes into the holders. Make sure that
the pins on the tubes t properly into the holes of the connec-
tion sockets.
Arrange the tubes in the amplier exactly as the tubes were
arranged in the box when delivered. All 8 tubes have been
carefully selected and perfectly matched to one another and
then placed in a specic arrangement to guarantee uncompro-
mising sound quality.
7. Replace the protective cylinders onto the tubes and tighten
the quarter turn fasteners by turning the protective cylinders
a quarter turn clockwise.
8. Replace the other tubes row by row.
To reset the tube replacement indicator (status LED lights orange
during operation) on the amplier:
▷Connect the power cable to the IEC mains socket of the
amplier.
9. Simultaneously press the CROSS FEED - OFF and HIGH function
buttons on the remote control and then set the power switch
to ON to switch the HE 1 on. Press and hold the buttons on the
remote control for at least 10 seconds.
Make sure to point the remote control at the remote control
sensor located on the front bottom of the HE 1.
The tube replacement indicator is reset. The HE 1 switches off
(standby). The glass cover closes and the amplier tubes and
operating elements retract to the “off” position. Subsequently,
the status LED lights up red. When switching the HE 1 on
again, the status LED lights up white again.
The replacement of the amplier tubes is completed.

4
English | Manufacturer declarations
Manufacturer declarations
In compliance with the following requirements
EU declaration of conformity
• RoHS Directive (2011/65/EU)
The declaration is available at www.sennheiser.com/download.
Notes on disposal
• WEEE Directive (2012/19/EU)
The symbol of the crossed-out wheeled bin on the product, the
battery/rechargeable battery (if applicable) and/or the packaging
indicates that these products must not be disposed of with normal
household waste, but must be disposed of separately at the end of
their operational lifetime.
Further information on the recycling of theses products can be
obtained from your municipal administration, from the municipal
collection points, or from your Sennheiser partner.
The separate collection of waste electrical and electronic equip-
ment, batteries/rechargeable batteries (if applicable) and
packagings is used to promote the reuse and recycling and to
prevent negative effects caused by e.g. potentially hazardous
substances contained in these products. Herewith you make an
important contribution to the protection of the environment and
public health.
1
HE 1 Röhren-Set | Deutsch
HE 1 Röhren-Set
Während des Betriebs des HE 1-Verstärkers unterliegen die Röhren
stets einem immanenten Verschleiß, etwa durch Abwärme aber
auch durch äußere Einüsse wie Erschütterungen.
Das HE 1 Röhren-Austausch-Set wurde von unseren Audioexper-
ten für Ihren Sennheiser HE 1 handverlesen. Alle 8 Röhren sind
auf ein perfektes Zusammenspiel hin geprüft, vermessen und
ausgewählt worden. Die spezische Anordnung der 8 Röhren trägt
zu der kompromisslosen Klangqualität Ihres HE 1 bei – jetzt mit
unverbrauchter Präzision für viele weitere Hörsessions.
Über diese Anleitung
Diese Anleitung beschreibt das Auswechseln der Verstärkerröhren
des Röhrenverstärkers HVE 1 Ihres Sennheiser HE 1. Beachten Sie
auch die Bedienungsanleitung inklusive der Sicherheitshinweise,
die Ihrem HE 1 beiliegt.
Die Bedienungsanleitung nden Sie ebenfalls auf
www.sennheiser.com/download.
Lieferumfang
8 Verstärker-Röhren (die Anordnung in der Röhren-
Set-Box entspricht der Anordnung im Verstärker)
1 Paar Mikrofaserhandschuhe
1 Bedienungsanleitung
DEFR ENESPTNLFIJAKOZHTWIDRUAR

2
Deutsch | Verstärker-Röhren auswechseln
Verstärker-Röhren auswechseln
Abbildungen zu den Beschreibungen nden
Sie als Ausklappseite am Anfang dieser
Bedienungsanleitung.
ACHTUNG!
▷Benutzen Sie den HE 1 nicht, wenn die Schutzzylinder der
Verstärker-Röhren entfernt sind.
▷Tragen Sie zum Auswechseln der Röhren die Handschuhe
(Lieferumfang), um die Indiumzinnoxid-Beschichtung (ITO) der
Schutzzylinder und die Quarzglas-Gehäuse der Röhren nicht zu
beschädigen oder zu verschmutzen.
▷Ersetzen Sie stets alle 8 Röhren mit neuen. Ordnen Sie die
Röhren im Verstärker genau so an, wie die Röhren in der Box
ausgeliefert wurden.
1. Ziehen Sie die Handschuhe an (Lieferumfang) und schalten Sie
den Verstärker ein, sodass die Verstärker-Röhren vollständig
ausfahren.
2. Schalten Sie den HE 1 über den Netzschalter aus (Stellung OFF)
und warten Sie, bis die Status-LED erloschen ist (bis zu 30
Sekunden).
3. Schieben und halten Sie den roten Sicherungsstift am Geräte-
stecker und ziehen Sie den Gerätestecker aus der Netzbuchse.
4. Lösen Sie den Bajonettverschluss der beiden vorderen Schutz-
zylinder, indem Sie die Schutzzylinder der Röhren eine Viertel-
drehung gegen den Uhrzeigersinn drehen.
5. Ziehen Sie die alten Röhren ab und geben Sie sie an Sammel-

3
Verstärker-Röhren auswechseln | Deutsch
stellen für Elektronik-Altgeräte oder bei Ihrem Fachhändler
zurück.
6. Halten Sie die Verstärker-Röhren-Einheit an den hinteren
Schutzzylindern fest und stecken Sie die neuen Röhren vorsich-
tig in die Halterungen. Achten Sie auf die korrekte Ausrichtung
der Steckkontakte.
Ordnen Sie die Röhren im Verstärker genau so an, wie die Röhren
in der Box ausgeliefert wurden. Die spezische Anordnung der
8 Röhren ist handverlesen und aufeinander abgestimmt.
7. Setzen Sie die Schutzzylinder wieder auf die Röhren und schlie-
ßen Sie den Bajonettverschluss, indem Sie den Schutzzylinder
im Uhrzeigersinn eine Vierteldrehung drehen.
8. Wechseln Sie die weiteren Röhren Reihe für Reihe aus.
Um die Anzeige des Röhrenwechsels (Status-LED leuchtet im
Betrieb orangefarben) am Verstärker zurückzusetzen:
▷Verbinden Sie das Netzkabel mit der Netzbuchse des
Verstärkers.
9. Drücken Sie auf der Fernbedienung gleichzeitig die Tasten
CROSS FEED - OFF und HIGH und schalten Sie dann den HE 1
über den Netzschalter ein (Stellung ON). Halten Sie die Tasten
der Fernbedienung für mindestens 10 Sekunden gedrückt.
Achten Sie auf die Ausrichtung der Fernbedienung zum Fern-
bedienungssensor auf der Frontseite des HE 1.
Die Anzeige des Röhrenwechsels wird zurückgesetzt. Der HE 1
schaltet sich aus (Standby). Die Glasabdeckung, Verstärker-
Röhren und Bedienelemente fahren zurück. Im Anschluss
leuchtet die Status-LED rot. Beim erneuten Einschalten
leuchtet die Status-LED wieder weiß.
Das Auswechseln der Verstärker-Röhren ist abgeschlossen.
DEFR ENESPTNLFIJAKOZHTWIDRUAR
Otros manuales para HE 1
1
Tabla de contenidos
Idiomas:


 Manual de usuario")


