Santorossa CRONOS Manual de usuario

1/ 21
ESPRESSO COFFEE MACHINE
INSTRUCTION MANUAL
Item
CRONOS
Power
220 V, 50 Hz
Please read the manual before use and save it for future reference

2/ 21
*IMPORTANT SAFEGUARDS
Before using machine always carefully read and follow below instruction to
operate your machines
1. Check the voltage to make sure it is comply with the voltage on the
name plate.
2. This machine must be connected to a grounded outlet. the person lack
of experience or knowledge to
3. Please don't let use the machine
4. Do not place the machine close to the fire source to avoid damage.
5. Turn off the power when long-term not in use and before cleaning.
6. The appliance should be placed on table or flat surface.
7. The temperature of some parts will be very high when machine is
working, (for example steam pipe, steam nozzle, funnel holder).Do not
touch the surface to avoid the hurt.
8. Do not put the machine or power cord immerse to the water or other
liquid.
9. Do not operate any appliance if machine is damaged, it must find
professional maintenance organizations or qualified service personnel
for examination, repair or adjustment to avoid danger.
10. Do not use the machine in outdoors. any
11. After reading the manual, please save it for future reference.
12. Conditions of use:
Voltage: 220VW, 50HZ Single-phase AC power
Water pressure: 0.1MPAS pressure s0.3MPA
Water type: Can't use pure water or distilled water, must use
softened water. Suggest adding soft water equipment
Environment temperature: > 0 C,<55 °C

3/ 21
* KNOW YOUR MACHINE
2.1 Product outside view
CRONOS outside view (The shape of the product is based on
the real machine)
2.2 Introduction of function interface
2.2.1 Turn on the machine interface (pic 1) : touch the power
button then will enter the interface (pic 2)
Pic 1
10

4/ 21
2.2.2 Standby interface (pic 2)
(Pic. 2)
Button and indicate instruction :
1. Auto coffee button (1 small cup)
2. Auto coffee button (2 small cups)
3. Auto coffee button (1 big cup)
4. Auto coffee button (2 big cups)
5. Manual coffee button
6. Hot water button
7. Setting
2.2.2 Brewing coffee and hot water interface: Touch
“1,2,3,4,5,6” in pic 2, then enter below interface
(pic 3) (pic 4)
8. Abnormal intruction
9. Power button
10.Date
11.Making time
12.Steam temperature
13.Coffee temperature

5/ 21
(pic 5) (pic 6)
(Pic 7) (Pic 8)
2.2.3 Setting interface : Touch “7” in (pic 2), to enter the
setting interface, touch“①”,”②”the interface can be
exchanged
(Pic 9) (Pic 10)

6/ 21
2.2.4 About the machine interface (Pic 11); touch (Pic 9, 10)
in “about the machine”, will enter about the machine
interface
(Pic 12)
2.3 List of basic parameters of this product series
Model No
CRONOS
Rated volltage
220V 50Hz single phase
Rated Power
4200W
Product size
W980×H590×D680
Rated pressure
0.1MPa≤water
pressure≤0.3MPa
Water quality requirement
Soft water, forbidden to use
pure water or distilled water
Primary and secondary
boilers
12L 1.5Bar
Coffee boiler 1
0.8L 9Bar

7/ 21
Coffee boiler 2
0.8L 9Bar
Steam pipe
Stainless steel 1 head
Hot water pipe
Stainless steel 1 head
Pump
9Bar adjusted vane pump
Pressure gauge
Double scale
Decoration light for
brewing head
LED
Operation panel
Touch, double screen
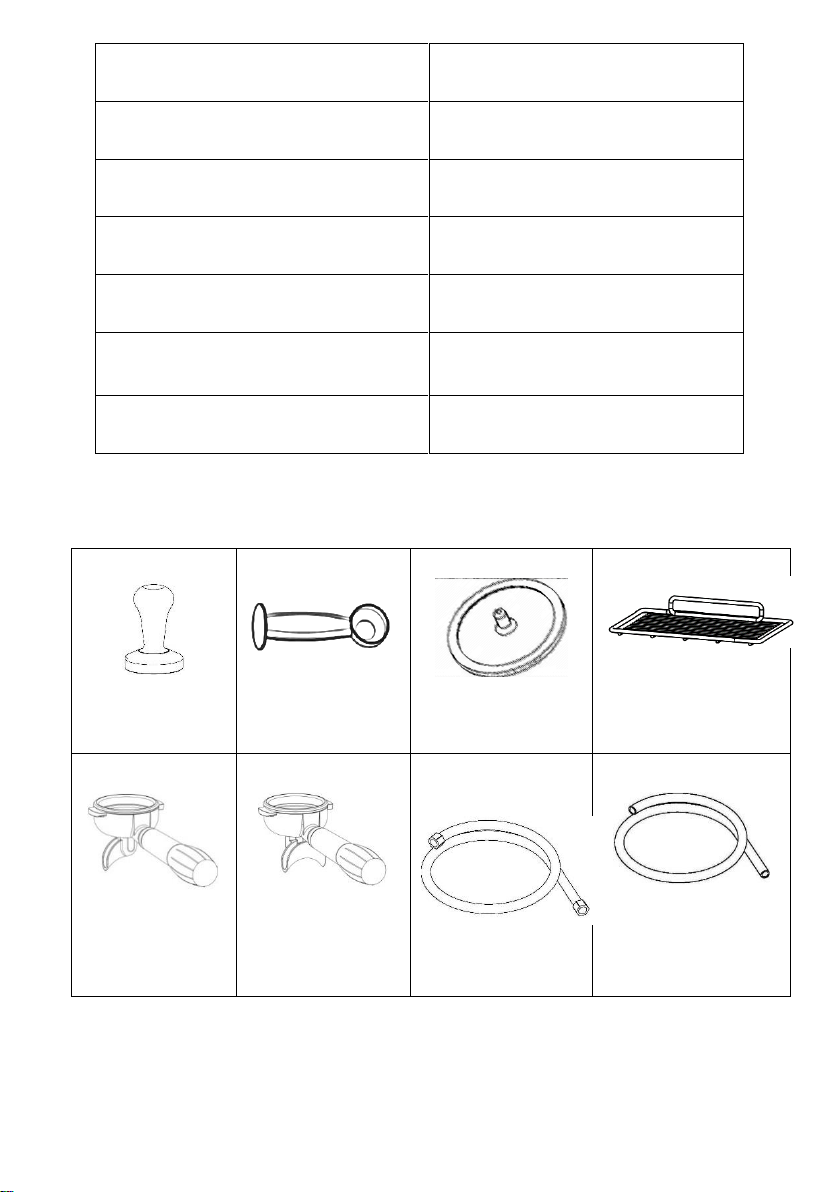
2.4 Accessories
Tamping tool
Spoon
Cleaning mat
Small cup rack
Stainless steel
Single porta
filter
Stainless steel
Double porta
filter
Stainless steel
Inlet pipe
4 joints
Drain pipe
Inner diameter
18-19.5mm

8/ 21
1. Open the package and get the machine out check all the accessories
are together with the machine . remove the protect film in the metal
surface; (pic 12)
2. Take out the water tray; (pic13)
3. You can see the power cord inlet water pipe ,outlet water pipe in the
bottom of the coffee machine; (pic 14)
oConnect the power cord to the earth leakage protect switch earth
protection.
(The electrodecan notbe mistakenly connected, and theleakage
switch must meet the corresponding power requirements. Must
be operated by a professional person); (pic15)
(Pic13) (Pic 12)
(Pic 14)
(Pic 15)
三、First use instruction

9/ 21
oConnect one end of the pipe to drainage outlet ,and the
other end connect with the sewer pipe;
(Pay attention to the pipe , not folded ,.otherwise the water
will be not be flow smooth )
oUse 3 joints water pipe to connect inlet pipe to water tap.
Attention : not to use pure water or distilled water, in order
to protect your machine, please use soften water.
4. Place the water tray back to the machine ,ready to start.
4.1 Turn on the machine
Connect with water.
Turn on the power switch in the bottom of the machine (pic14),
the machine enter opening interface (pic1) ;
Touch power button in the screen (pic1); Enter the standby
interface (pic2), the water will flow into machine automatically,
will hear the sound of pump rotary;
After the water flow into machine the machine will heating
up ,the screen will indicate current coffee boiler / steam boiler's
temperature, the pressure in the pressure gauge will increase
when steam is heating up.
When heating to the pre-setting temperature or pre-setting
pressure, the machine will stop heating;
First use it will take about 5 min to heating the coffee boiler
and 15 min to heating the steam boiler.
Remark: the machine can be used even the heating is not finished,
but the coffee or hot water temperature will be lower.
Steam, brewing head 1, brewing head 2 (CRONOS) can be turn
on or of independently
4.2 making coffee
Remark: if the powder is too fine, it can not brewing coffee and
too much coffee powder can easily cause the filter holder not to
tighten tightly, and the coffee will leak from the rim of the can funnel.
三、Use the coffee machine

10 / 21
To avoid scald ,not to touch the high temperature parts of the
machine during it's working
4.2.1 Making coffee by automatically
Put the coffee powder in funnel, use the tamper to press the
powder; (pic 16)
Swirl the porta filter into coffee machine and rotate and tighten
it; (pic 17)
Put the cups under the spout of the porta filter (pic 18)
Touch the Auto coffee button (pic2), then you can get the coffee,
when the coffee achieve the setting amount, the machine will
stop making coffee automatically and return back to standby
mode.
Turn out the porta filter and clean the coffee grounds for next
use
(pic 16) (pic 17) (pic 18)
Remark: there are 4 auto coffee buttons for each of the
brewing head (pic 2).
Each of the button has save it's own coffee flow, press different
button, the machine will make coffee to you according to it's
settings
4.2.2 Making coffee by manual
Put the coffee powder in funnel, use the tamper to press the
powder; (pic16)
Swirl the porta filter into coffee machine and rotate and tighten
it. (pic 17)
Put the cups under the spout of the porta filter (pic 18)
Otros manuales de Cafetera de Santorossa