QuietCool IT-AF-SMT Manual de usuario

DO NOT THROW AWAY!
OWNER’S GUIDE CONTAINS IMPORTANT INFORMATION.
LEAVE WITH HOMEOWNER
OWNER’S GUIDE
SMART ATTIC FAN CONTROL
IT-AF-SMT
!

1-888-QUIETCOOL2
GENERAL SAFETY INSTRUCTIONS
1. Read Instructions - All safety and operation instructions must be read.
2. Retain Instructions - The safety and operating instructions should be kept for future
reference.
3. Heed Warnings - All warnings should be followed.
4. Follow Instructions - All installation and operating instructions should be followed.
5. Water – The QuietCool system should not be used near water. If you live in a very humid
climate, be sure to cover your damper box with insulation to reduce condensation.
6. Heat - The QuietCool system should be situated away from heat sources.
7. Damage Requiring Service - Only qualied service personnel should service the
QuietCool system. The user should not attempt to service the product.
CONTENTS
1. SYSTEM OVERVIEW..........................................3
1.1 Introduction ............................................3
1.2 Features ...............................................3
1.3 Key Specications .......................................3
2. INSTALLATION ..............................................4
2.1 Installing the Hub........................................4
2.2 Wiring the Hub. . . . . . . . . . . . . . . . . . . . . . . . . . . . . . . . . . . . . . . . . . 4
3. OPERATION ................................................7
3.1 Installing the App .......................................7
3.2 Operating the App ......................................7
3.3 Frequently Asked Questions .............................12
3.4 Fan Hub LED Indicators .................................13
3.5 Safety ................................................13
SMART ATTIC FAN CONTROL WARRANTY.......................14
INCLUDED IN THE BOX
- IT-AF-SMT Control Hub
- QuietCool Owner’s Guide
FCC Regulations
This device complies with Part 15 of the FCC Rules. Operation is subject to the following two conditions: (1)
this device may not cause harmful interference, and (2) this device must accept any interference received,
including interference that may cause undesired operation.
FCC Caution
Changes or modications not expressly approved by the part responsible for compliance could void the
user's authority to operate the equipment.
!!
!!
QC MANUFACTURING, INC.
26040 YNEZ ROAD
TEMECULA, CA 92591
PHONE 1-888-QUIETCOOL
WEBSITE WWW.QUIETCOOLSYSTEMS.COM

QUIETCOOLSYSTEMS.COM 3
STOP! READ ALL INSTRUCTIONS IN THIS GUIDE BEFORE INSTALLING YOUR
QUIETCOOL SYSTEM
Read this guide before proceeding! The manufacturer is NOT responsible for faulty
installation or product damages caused through failure to fully read this guide BEFORE
attempting installation.
1. SYSTEM OVERVIEW
1.1 Introduction
Congratulations on the purchase of your new QuietCool Smart Attic Fan
Control!
The QuietCool Smart Attic Fan Control is the smartest way to control your QuietCool
Advanced Attic Fans!
The QuietCool Smart Attic Fan Control allows users to control their attic fan, activate smart
mode, and adjust the settings of their attic fan from our innovative phone app.
1.2 Features
• Smart Mode with temperature and humidity settings to keep your attic at the optimum
temperature and humiidity level
• Set countdown time for your QuietCool attic fan (up to 12 hours)
• Adjust speed setting for your QuietCool attic fan
• See your attic temperature and humidity levels
1.3 KeySpecications
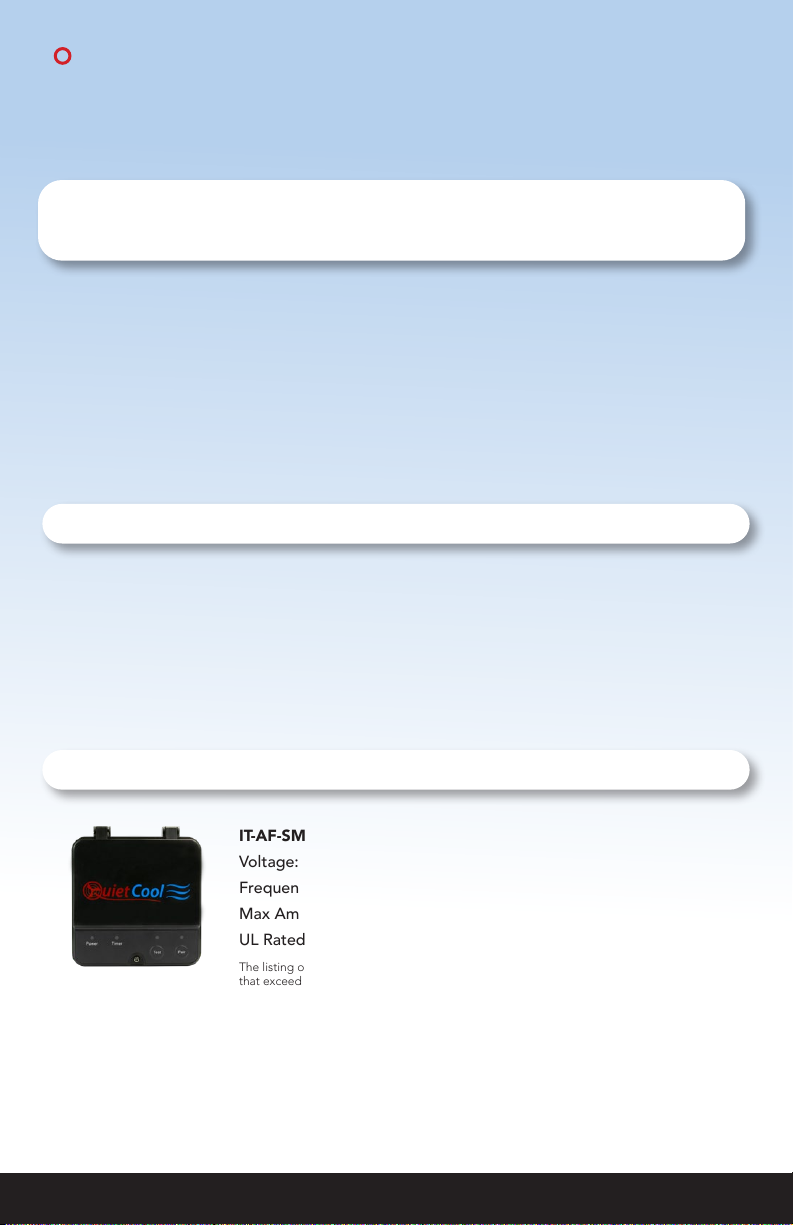
IT-AF-SMT Hub:
Voltage: 120V
Frequency: 60Hz
Max Amperage: 5 Amps
UL Rated Operating Temp 14°F - 149°F
The listing of this product allows it to be installed in conned spaces with temperatures
that exceed 120 degrees.
!!

1-888-QUIETCOOL4
2. INSTALLATION
2.1 Installing the Hub
IMPORTANT: If you are installing the Hub onto an existing QuietCool fan, be sure to shut
off the power before attempting installation. If you are installing the Hub onto a new fan,
perform all installation steps before plugging in the fan.
1. Open up the thermostat on your attic fan. Unwire the power cord and remove the
plastic connector. Unwire the motor wires and remove the metal connector and
ex from the thermostat.
2. Attach the metal connector and ex to one of the knockouts on the IT-AF-SMT
hub. Attach the plastic power cord bushing in another knockout on the hub.
2.2 Wiring the Hub
NOTE: Wiring Diagrams are for examples only. Wiring should be done by a licensed
electrician following local building and electrical codes and/or NEC guidelines. 12 or
14-gauge romex is common. Check your local building code before choosing the wire
type.
NOTE: Ensure the power is disconnected before performing any wiring connections.
NOTE: The wiring diagrams and instructions are shown using the power cord included
with your QuietCool. The installation can also be performed with 2-wire romex and hard
wired.
Single Speed Wiring (see Figure A)
1. Using a wire nut, connect the black wire from the power cord to the black wire
from the Hub.
2. Connect the white wire from the power cord and the white wire on the fan to the
white wire from the Hub. Connect the black wire from the fan to the blue wire on
the Hub. Cap the red wire on the Hub. Cap the yellow wire from the Hub.
3. Ground the green wire from the fan and the green wire from the power cord to
the ground screw in the Hub.
4. Set the dip switch positions inside the Hub as shown in the diagram.
5. Power-on the Hub. The Power LED indicator will be lit.
6. Press the Test button to make sure the fan works. The Test LED indicator will blink
once every two seconds indicating 1-speed and the fan will be on. Press the Test
button again and the fan should shut off and the LED will be off.
7. If the fan doesn’t operate as described in step 6, please check the dip switch
postion.
!!
Installation Video:
Watch the video by scanning the
QR code or visit
www.QuietCoolSystems.com/support
!!
!!
!!

QUIETCOOLSYSTEMS.COM 5
Two Speed Wiring (see Figure B)
1. Using a wire nut, connect the black wire from the power cord to the black wire
from the Hub.
2. Connect the white wire from the power cord and the white wire on the fan to the
white wire from the Hub. Connect the black wire from the fan to the blue wire on
the Hub. Connect the red wire from the fan to the red wire on the Hub. Cap the
yellow wire from the Hub.
3. Ground the green wire from the fan and the green wire from the power cord to
the ground screw in the Hub.
4. Set the dip switch positions inside the Hub as shown in the Figure B.
5. Power-on the Hub. The Power LED indicator will be lit.
6. Press the Test button to make sure the fan works. The Test LED indicator will blink
twice every two seconds indicating 2-speed and the fan will be on high. Press the
Test button again and the fan will switch to low speed. Press the Test button again
and the fan should shut off and the LED will be off.
7. If the fan doesn’t operate as described in step 6, please check the dip switch
postion.
Power
Cord
Attach green ground wires to ground screw
All White Common Wires Together
POWER TIMER PAIRTEST
Set dip switches:
1 - ON
2 - OFF
3 - OFF
Attic Fan
ON
1 2 3
High Speed Wire
Medium Speed Wire
Low Speed Wire
Neutral Wire
Hot Wire
Hub Wiring Legend
Figure A
Power
Cord
Attach green ground wires to ground screw
All White Common Wires Together
POWER TIMER PAIRTEST
Set dip switches:
1 - OFF
2 - ON
3 - OFF
Attic Fan
ON
1 2 3
Figure B

1-888-QUIETCOOL6
Three Speed Wiring (see Figure C)
1. Using a wire nut, connect the black wire from the power cord and the black wire
from the fan to the black wire from the Hub.
2. Connect the white wire from the power cord and the white wire on the fan to the
white wire from the Hub.
3. Connect the red wire from the fan to the red wire on the Hub. Connect the yellow
wire from the fan to the yellow wire on the Hub. Connect the blue wire from the
fan to the blue wire on the Hub
4. Ground the green wire from the fan and the green wire from the power cord to the
ground screw in the Hub.
5. Set the dip switch positions inside the Hub as shown in the diagram below.
6. Power-on the Hub. The Power LED indicator will be lit.
7. Press the Test button to make sure the fan works. The Test LED indicator will blink
three times every two seconds indicating 3-speed and the fan will be on high.
Press the Test button again and the fan will switch to medium speed. Press the
Test button again and the fan will switch to low speed. Press the Test button again
and the fan should shut off and the LED will be off.
8. If the fan doesn’t operate as described in step 7, please check the dip switch.
postion.
Attach green ground wires to ground screw
POWER TIMER PAIRTEST
Set dip switches:
1 - OFF
2 - OFF
3 - ON
Power
Cord
All White Common Wires Together
Attic Fan
ON
1 2 3
Figure C

QUIETCOOLSYSTEMS.COM 7
3. OPERATION
3.1 Installing the App
Download the QuietCool Smart Control App onto your iOS
on Android device.
Scan the QR code above or visit our website at
QuietCoolSystems.com/smart-control-support/ and click the
link to download the app to your device.
3.2 Operating the App
HOME PAGE
This is the home page of the app and is presented as soon as
the app is opened.
If you have not yet paired your phone to your Hub, it will state
SETUP REQUIRED.
If you have paired your phone to your Hub, it will show a picture
of the fan as well as the name of your fan.
FAN SETUP PAGE
This page is used to setup the fan for the rst time.
You can quickly change the Fan Name, check if the speeds are
set properly, change the Fan Model, enter the Serial Number
and adjust the Climate Settings & Presets.
These settings can be accessed again after setup is done by
clicking the Settings button on the Fan Control Page.
FAN CONTROL PAGE
This page is accessed when you tap on your fan from the Home
Page.
On this page you can see the current conditions in your attic,
activate the different modes of the fan, and get to the Fan
Settings page.
Installing the app:
Download the QuietCool Smart Control App onto your iOS
or Android device by scanning the QR code or visiting
www.QuietCoolSystems.com/support

1-888-QUIETCOOL8
SETTING UP YOUR FAN
Once your attic fan has power, open up the QuietCool
Smart Control app. You will be taken to the Home
Page. You should see your attic fan show up in the list
of available fans.
A message indicates that setup is required. Press and
hold the Pair button on the Hub until the LED indicator
begins to blink.
NOTE: You will need to initiate this Pairing process
on each device you want to use to control your attic
fan. Once the initial device is paired, you can use the
“Enter Pair Mode” function from the app described
on page 11. This will prevent you from having to
access the Hub physically in the attic in order to
perform pairing operations.
Tap on the fan to start the setup process. Once you
tap on the fan, you will be taken to the Fan Setup
page.
On this page, you will be able to change the following
settings:
• Fan Name
• Fan Model
• Serial Number
The Speeds Available section will tell you if you have
connected the fan and set your dip switch properly.
Make sure that this number matches the specication
of the fan you purchased.
In this example, we are setting up an AFG SMT PRO-
2.0 which is a 2-speed fan.
The QuietCool Smart Attic Fan Control has an
innovative Smart mode that allows the fan to adjust
the speed based on the temperature and humidity
conditions in your attic.
Tap Climate Settings & Presets to adjust these
settings.

QUIETCOOLSYSTEMS.COM 9
CLIMATE SETTINGS & PRESETS
Within Smart Mode there are two standard presets,
Summer and Winter. You can modify these presets and
add your own custom presets to allow quick setting
changes on the y.
TEMPERATURE
• The settings you choose in this section will change
what temperature the fan will come on at each set
speed.
• Tap on any speed to adjust the temperature for
each speed.
HUMIDITY
• Turn Fan Off: This is the humidity percentage that
will cause the fan to turn off. For example, the
factory setting is set at 90%, meaning the fan will
turn off if the humidity in the attic is 90% or higher.
Tap this setting if you would like to adjust the
percentage. If you do not want this feature, you can
select OFF at the top of the list.
• Turn Fan On: This is the humidity percentage
that will cause the fan to turn on, regardless if the
temperature settings are not met. For example,
the factory setting is set at 70%, meaning the fan
will turn on if the humidity in the attic is higher than
70%, even if the temperature in the attic is below
the temperature settings in the app. If you do not
want this feature, you can select OFF at the top of
the list.
• Desired Speed: This is the speed the fan will use if
the humidity causes the fan to turn on.
These settings will be saved into the memory of
the Hub meaning all settings will sync between any
additional devices you pair to the Hub.
Click Done to complete Fan Setup. You can always
access these settings again from the Settings option
on the Fan Control Page.

1-888-QUIETCOOL10
SMART MODE
Smart Mode will automatically change the speed
based on the attic temperature and humidity.
To activate Smart Mode, simply tap Activate Smart
Mode.
In Smart Mode, the rst paramater that is checked
is the Turn Fan Off humidity level. Regardless of the
temperature in the attic, if the Humidity level in the
attic is above the Turn Fan Off humidity setting, the
fan will not turn on, or if it is already running, the fan
will shut off.
If the humidity in the attic is below the Turn Fan
Off humidity setting, the second paramater that is
checked is the Attic Temperature. If the temperature
inside the attic is within the set parameters in the
app, the fan will turn on at the appropriate speed.
If the temperature in the attic is below any of the
temperature paramaters, the last paramater that
is checked is the Turn Fan On humidity level. If the
humidity level in the attic is above the Turn Fan
On humidity paramater but below the Turn Fan
Off humidity paramater, the fan will turn on at the
Desired Speed.
TIMER MODE
Timer Mode is a simple way to turn your attic fan
on for a set amount of time at a set speed.
To activate Timer Mode, simply tap Activate
Timer Mode. Once activated, you can select your
speed by tapping Set Speed. You can also select
your runtime by tapping Set Time.
When Timer Mode is active, you will see your
remaining time left on the timer at the top of the
screen.
Otros manuales para IT-AF-SMT
3
Tabla de contenidos
Otros manuales de Cambiar de QuietCool