KEXT300 User Manual Rev 1.3
- -
7
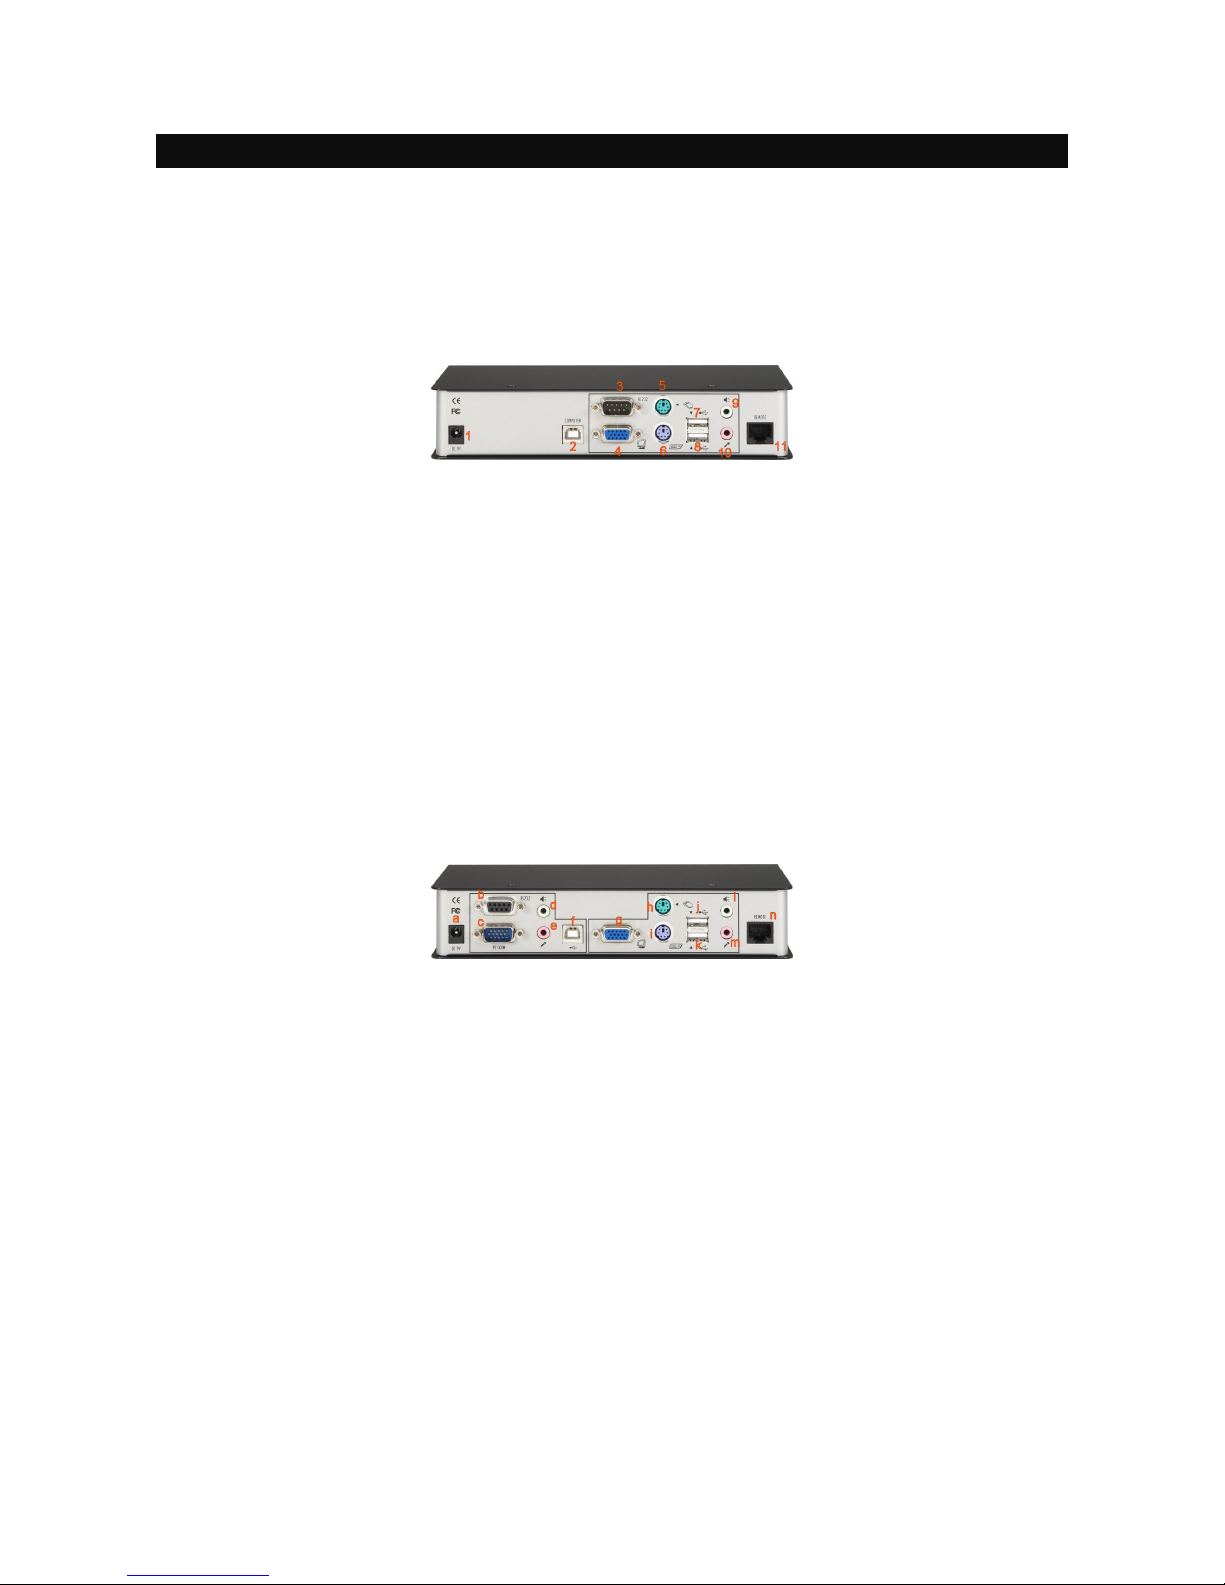
Configure the K5CMLC (Local)
Step 3. Connect one end of the UTP cable to the CAT5 Extension port of the K5CMLC. (Connector n)
Step 4. Connect the power adapter to the K5CMLC to power it up before connecting any computer or cables
to it. (connector a)
Step 5. Connect the K5CMLC to the computer, using the Slim 3-in-1 PS/2 KVM cable (connector c) and/or
the USB cable (connector f). (Note that if you need to connect with the USB interface, you should
connect the USB cable to the computer since the Slim 3-in-1 PS/2 KVM cable supports only the
PS/2 interface.)
Step 6. Set up Console 1: Connect a set of keyboard, mouse, monitor as well as a set of speakers and
microphone to the K5CMLC Console ports (connectors g, h, I, I, k, l, m).
Step 7. Power on the computer, and check the keyboard, mouse, video and audio output and mic input on
Local Console 1 to see if it works fine. If should work fine before you proceed to next steps.
Configure the K5LC (Console2)
Step 8. Connect the other end of the UTP cable to the CAT5 Extension port of the K5LC (connector 11).
Step 9. Connect the power adapter to the K5LC (connector 1) to power it up before connecting any devices
to it.
Step 10. Set up Console 2: Connect a set of keyboard, mouse, monitor (connector 4, 5, 6, 7, 8) as well as a
set of speakers and microphone (connector 9, 10) to the K5LC Console ports. If serial extension is
used, you may also connect a serial device to the serial port (connector 3).
Step 11. Check the keyboard, mouse, video, audio output and mic input on the Local Console 2 to see if it
works fine. At this time, the video might be blurred since it is not yet adjusted and optimized.
Step 12. Adjust the video parameters to optimize the display output (Refer to OSD Menu/Video page for
details).