
Phistek P080VG Instrucciones de instalación y funcionamiento

1
User Manual / Installation Guide
Model No. P080VG / P080VR / P080VP
Warning! It will cause malfunction if the monitor is operating with unspecified power supply adaptor
or incorrect power voltage. Do not expose this unit in the rain or moisture environment to reduce the
risk of fire or electric shock.
PRECAUTIONS
Do not use the monitor near water.
Do not place the monitor on an unstable cart, stand, or table. If the monitor falls, it can injure a
person and cause serious damage to the appliance. Use only a cart or stand recommended by the
manufacturer or sold with the monitor. If you mount the monitor on a wall or shelf, use a mounting
kit approved by the manufacturer and follows the kit instructions.
The monitor should be operated with type of power adaptor indicated on the label.
Normally it is packed with monitor, or using an adaptor approved by the manufacturer.
Unplug the unit during a lightning storm or when it will not be used for long periods of time. This will
protect the monitor from being damaged due to power surges.
Never spill liquids on the monitor.
Do not attempt to service the monitor yourself; opening or removing covers can damage to the
monitor or panel. Please refer all servicing to qualified service personnel.
For Wall mount adaptor, wall socket shall be installed near the equipment and shall be easily
accessible.

2
Index:
I. Introduction --------------------------------------------------------------------------------------------------- 3
Features--------------------------------------------------------------------------------------------------------- 3
Unpack the monitor------------------------------------------------------------------------------------------ 3
Check Accessories-------------------------------------------------------------------------------------------- 3
II. Installation----------------------------------------------------------------------------------------------------- 4
Power Supply & Signal connection ---------------------------------------------------------------------- 4
Function Touch Key Control ------------------------------------------------------------------------------ 4
OSD Lock/ Unlock -------------------------------------------------------------------------------------------- 5
Structure of OSD settings----------------------------------------------------------------------------------- 5
III. For your safety------------------------------------------------------------------------------------------------ 6
IV. Support timing chart ---------------------------------------------------------------------------------------- 6
V. 5 Wires Resistive Touch Panel -----------------------------------------------------------------------------6
VI. Projected Capacitive Touch Panel ------------------------------------------------------------------------14
VII. Mechanical dimension-------------------------------------------------------------------------------------- 15
VIII. EMC Warning Statement----------------------------------------------------------------------------------- 16
FCC Class A Warning ---------------------------------------------------------------------------------------- 16
CISPR 22 class A Warning --------------------------------------------------------------------------------- 16
IX. Product General Specification---------------------------------------------------------------------------- 17

3
I. Introduction
- This monitor is color TFT LCD monitor, with compact and ecological design.
- On Screen Display provide flexibility with simple & user-friendly controls.
- USB interface Projected Capacitive Touch Panel and Resistive Touch (for touch model only)
Features
- 8 inch diagonal screen with native display resolution 800 * 600.
- Full flat front panel with high quality touch panel or cover lens.
- Fully Glossy surface throughout monitor’s appearance.
- Rimless front bezel design, spill & dust proof.
- Cable management down routing through the mounting stand.
- Light weight.
- Mitsubishi PMMA cover lens for P080VG.
- 5 wires resistive touch screen panel for P080VR.
- Projected Capacitive Touch panel for P080VP.
Unpack the monitor
- Put the monitor on a clean surface, make sure the box in upright position.
- Remove packing materials from inside of box.
Check accessory
Please make sure the entire accessory is included:
Power Adaptor, the plug
type could be modified
by order.
1.8meter VGA 15 pin
D-sub video cable
USB cable for Touch
control
(For touch model only).

4
II. Installation:
Power Supply & Signal connection:
Power supply: Use attached Wall-mount Power adaptor to get 12Vdc power.
VGA signal: Use attached 1.8 meter 15pin D-sub VGA cable to connect System PC.
Function Key Control:
Power
( )
Use the power switch to turn the power ON or OFF. We recommend turning
your system power on first, then the LCD monitor.
Auto Adjust
(AUTO)
a. Pressing to execute AUTO-Adjusting function. This function will optimize the
display image.
b. Sometimes this function can't achieve the optimal effects. Please follow the
manual adjusting procedure.
c. After OSD menu is activated, press this key can turn off the OSD menu.

5
Menu
(MENU)
a. Press Menu key to activate OSD Menu.
b.
This key also means “OK”.
- Press “Up” or “Down” key to move the indicator to the desired item, then
press Menu key to select and read to adjust.
- After adjustment, press this key to return to previous Menu.
Up
( ▲)
a. When OSD mode is activated (When “MENU” key is pressed). These two
keys are used to select the adjustment items.
b. When adjustment item is selected, these
two keys are defined to decrease or
increase the value of each selected item.
Down
( ▼)
Structure of OSD settings:
Item Level 1 Level 2 Level 3 Operating Procedure
Main
Menu
Auto Adjust −−Press “UP” or “DOWN” to adjust H-phase & H-position & V-
position clock automatically.
Luminance
Brightness −Press “UP” key to increase brightness, “DOWN” key to d
ecrease
brightness.
Contrast −Press “UP” key to increase contrast, “DOWN” key to decrease
contrast.
Black levels −Press “UP” key to increase background brightness, “DOWN”
key to decrease background brightness.
Sharpness −Press “UP” key to increase image sharpness, “DOWN” key to
decrease image sharpness.
Exit −Exit to previous Menu.
Management
H. Position Press “UP” key to shift screen left, “DOWN” key to shift screen
right.
V. Position −Press “UP” key to shift picture upward, “DOWN” key to shift
picture downward.
Pixel Clock −
To reduce any vertical bars or strips visible on the screen
background. Adjusting the Clock will also change the horizontal
screen image width.
Phase −To remove any horizontal noise and clear or sharpen the image
of characters.
Exit −Exit to previous Menu.
Color
9300K −Press “UP” or “DOWN” to choose three types of color
temperature 9300°k, 6500°k, sRGB and user define.
6500K −
User Preset
Red
Select User Preset to enter Color Adjust Menu, and select
desired color to adjust.
Green
Blue
Exit
Exit −Exit to Main Menu.
OSD
H. Position −Adjust OSD Menu horizontal position, press “UP” key to shift
Menu right, “DOWN” key to shift Menu left.
V. Position −Adjust OSD Menu vertical position, press “UP” key to shift
Menu upward, “DOWN” key to shift Menu downward.
OSD Time −Sets the time duration in seconds that the OSD is visible after
the last button is pressed.
Exit −Exit to previous Menu.

6
Main
Menu
Language
English −
Press Up/Down key to move OSD bar to desired language, then
press to confirm. The OSD Menu will change to desired
language and return to Main Menu.
Francais −
Deutsch −
Italino −
Espanol −
日本語 −
繁體中文 −
简体中文 −
Recall
Recall Color Yes No Press ”Yes” to reset Color to factory setting.
Recall All Yes No Press “Yes” to rest all settings back to factory setting, except
language.
Exit −Press “Exit” to return to Main Menu.
Information
Display
Information −Press Display information to display resolution and refresh rate.
Exit −Press “Exit” to return to Main Men.
Exit −−Press “Exit” key will close OSD Menu and save the settings.
III. For your safety
1. When move the monitor, always switch off power and disconnect all cables to avoid any danger.
2. Please use the power and signal cables correctly when install it.
3. In case of notice any abnormal smell or noise, please stop operation and call the nearest dealer or
service center.
IV. Support timing chart
Timing
Mode
Reference
Standard
Resolution Pixel
MHz
FH KHz FV Hz Interlace H
Polarity
V
Polarity
Mode 1 VESA 800×600 36.000 35.156 56.250 NO + +
Mode 2 VESA 800×600 40.000 37.879 60.317 NO + +
Mode 3 VESA 800×600 50.000 48.077 72.188 NO + +
Mode 4 VGA 640 x 480 25.17 31.47 59.94 NO −
−
Mode 5 VGA 720 x 400 28.32 31.47 70.08 NO
−
+
Mode 6 VGA 1024 x 768 65.000 48.363 60.004 NO
−
−
V. 5 Wires Resistive Touch Panel (For Resistive Touch Model only):
Resistive Touch panel:
Type : 5 Wires Resistive Touch
Touch Control Type : USB
Transmission : 80%
7
Touch Driver installation:
Please go to the EETI website to get Touch Driver
https://www.eeti.com/drivers.html
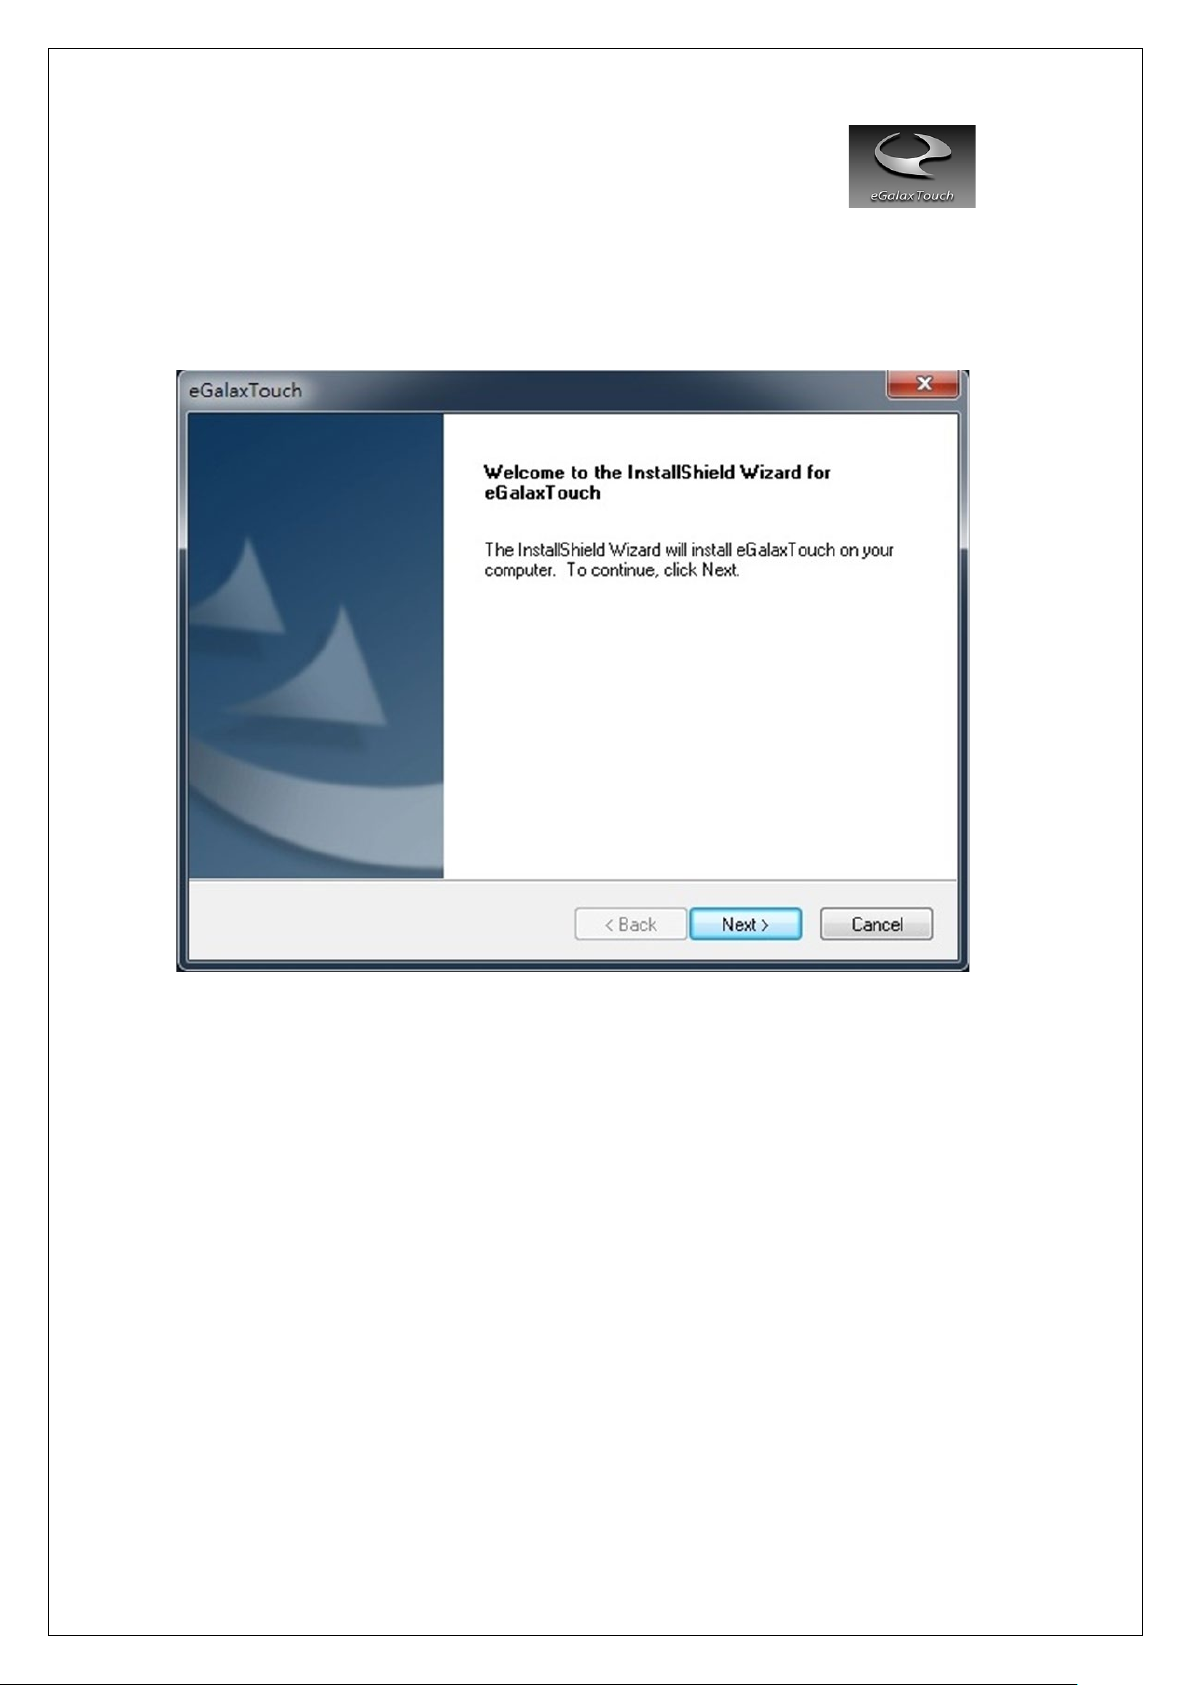
1.0 Download driver and run the installation. Screen display as below, please click Next>.

8
2.0 Select the setup type, don’t tick the box if PS2 interface is not required, Click “Next>
.
3.0 RS232 interface driver installed is default, please click Next>

9
4.0 You can select to do Touch screen calibration after system boot up or not.
Default setting is” None”
5.0 Select to use Multi-Monitor system, then press Next>

10
6.0 Choose destination location, default folder location shown as below. Press Next>
7.0 Figure shown below, please press Next> to complete installation.
Este manual sirve para los siguientes modelos
2
Tabla de contenidos
Otros manuales de Terminal táctil de Phistek

Phistek
Phistek P121VG Instrucciones de instalación y funcionamiento

Phistek
Phistek P150VG Instrucciones de instalación y funcionamiento

Phistek
Phistek P104VG Instrucciones de instalación y funcionamiento

Phistek
Phistek P101VG Instrucciones de instalación y funcionamiento

Phistek
Phistek P156VG Instrucciones de instalación y funcionamiento

Phistek
Phistek P150VR Instrucciones de instalación y funcionamiento


