4NookBox Installation Guide Mini Door Contact MDC-1
Features
LED Indicator
In Normal operation mode, the LED indicator remains o except in the following situations when:
• When Door Contact’s Tamper switch is triggered.
• When the Door Contact is activated with either Tamper or Low battery condition.
• When the Door Contact is activated and transmitting the signal under the Test mode.
Supervision
• The Door Contact will automatically transmit Supervisory signals periodically to the Control Panel at random intervals of 30 to 50 minu
tes in Normal Operation Mode.
• If the Control Panel has not received the signal from the Door Contact for a preset period time, the Control Panel will indicate that parti
cular Door Contact is experiencing an out-of-signal problem.
Tamper Switch
• It is designed to protect against unauthorized, cover opening. When the tamper is triggered, Door Contact will emit a signal to the
Cotrol Panel for reporting, the LED will also light up.
Battery
The MDC-1 uses one 3V CR2032 Lithium battery as its power source,
The Door Contact is also capable of detecting low battery. When the battery is low, a low battery signal will be sent to the Control Panel along
with regular transmission. The LED will light up when the Door Contact is activated under low battery status.
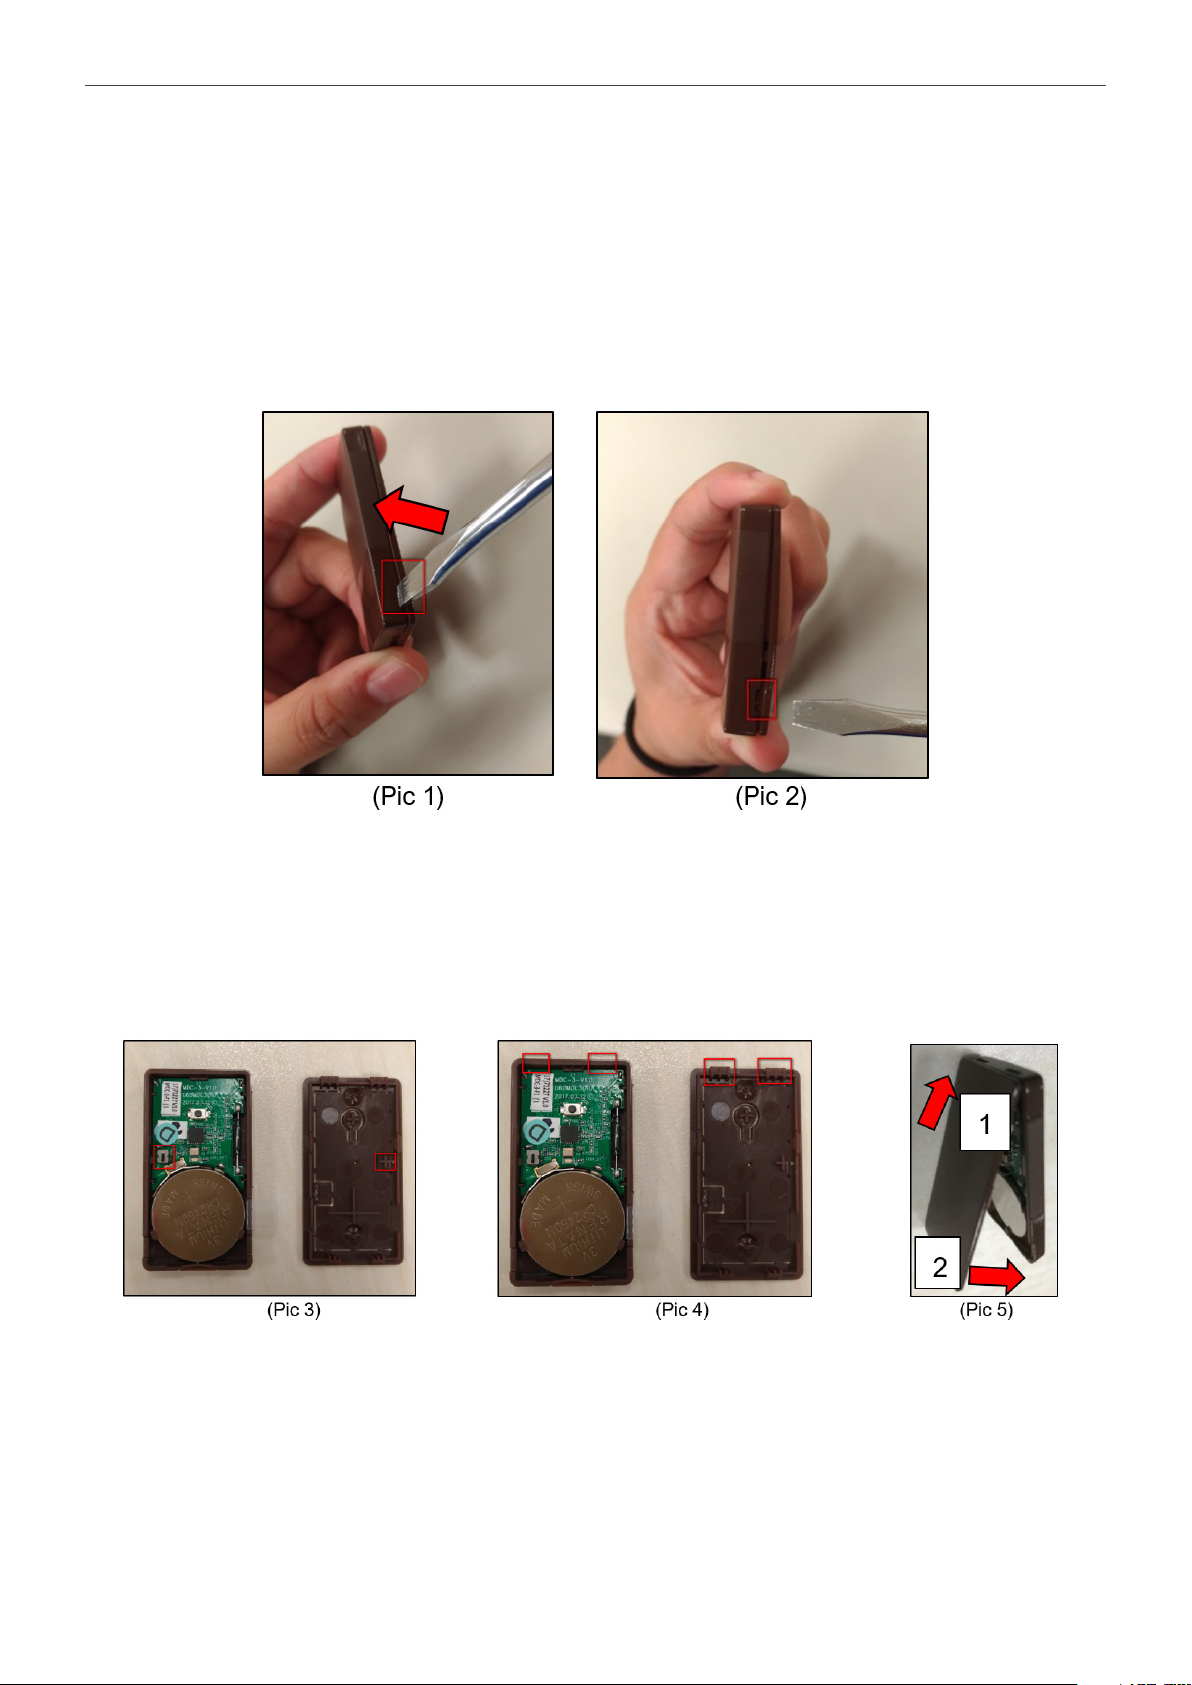
• Changing Battery
You need to open the cover to insert/remove the battery
After the battery has been removed, press the Learn / Test button 5-6 times to fully discharge before inserting the new battery.
NOTE:
• Make sure the battery mark with the positive side (+) is faced upwards when inserting the battery.
• Make sure to insert or place the battery from the top right angle in the Front Cover (Back) view:
Test Mode
The Door Contact can be put into Test mode for 3 minutes by pressing the Test Button on the front cover (back) once. During Test mode, the
LED indicator will turn on upon triggering. Each press on the Test Button, the Door Contact will transmit a test signal to the Control Panel for
radio range test and resets the test mode back to the 3-minute duration. It will exit Test Mode automatically after the 3 minutes and returns to
Normal Operation mode.
Getting Started
Step 1: Remove the battery insulator located at the rear side of the Door Contact.
Step 2: Put the Control Panel into learning mode, refer to Control Panel manual for detail.
Step 3: Press the Learn/Test Button on Door Contact to send signal to the Control Panel.
Step 4: If the Control Panel successfully receives the signal, the Control Panel should respond (e.g. emitting beeps).
Refer to your Control Panel manual to complete the learning process.
Step 5: After the Door Contact is learnt-in, put the Control Panel into “Walk Test” mode, hold the Door Contact at the desired location,
and press the Test button to conrm if this location is within signal range of the Control Panel.
Step 6: When you are satised with the Door Contact at the chosen location, proceed to installation.