Nesuniq IPC-P405A Manual de usuario
1 / 3
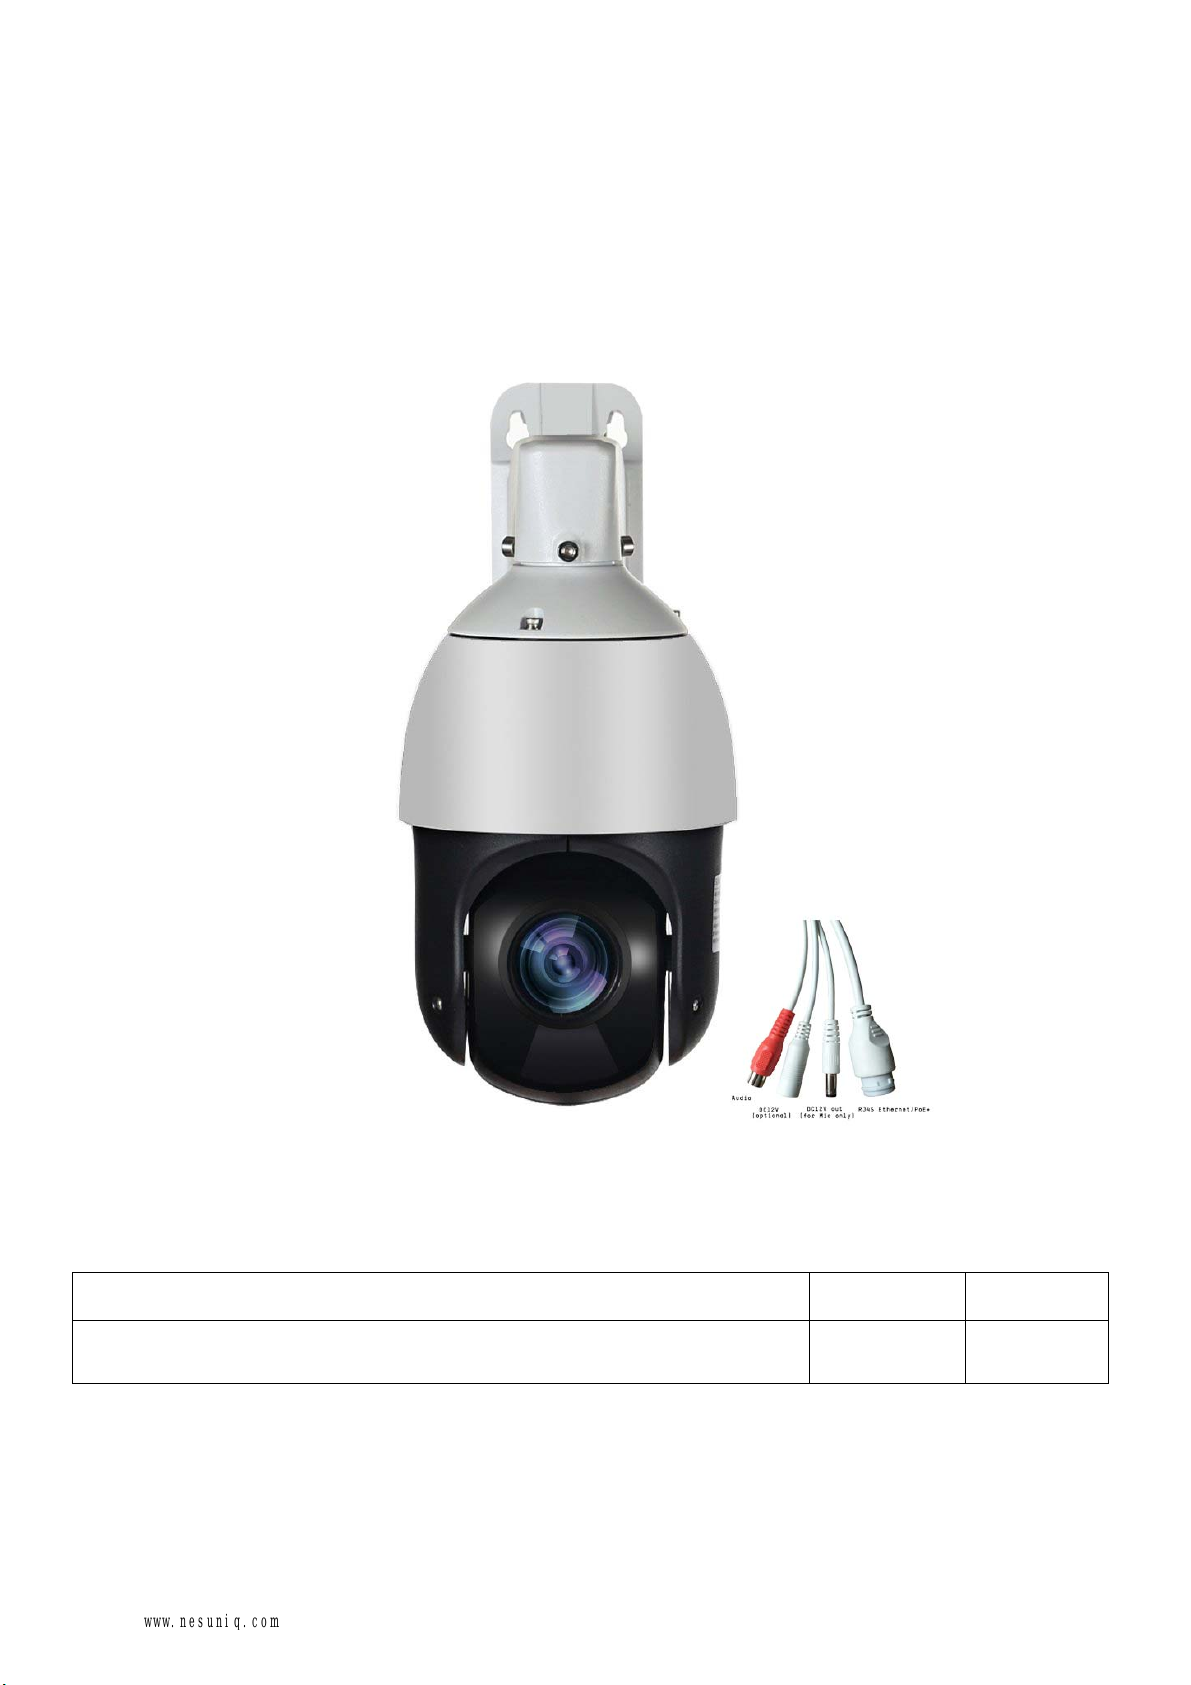
Mini POE PTZ Camera
Quick Start Guide
V1.1.0
Model: IPC-P405A
Issue: 01
Part Number: 20190415V1
Copyright © Nesuniq. 2019
Default Login IP address User Name Password
DHCP(your router will automatically assign IP address to this
camera after you follow the below connection & installation step) admin 123456
www.nesuniq.com

2 / 3
Content
Packing List and Qualification Card--------------------------------------------------------------------3
Interface Description---------------------------------------------------------------------------------------3
Prepare for Installation Tools-----------------------------------------------------------------------------4
Connection & Installation----------------------------------------------------------------------------------5
Step 1: Make The Connection----------------------------------------------------------------------5
Via Normal Power Supply----------------------------------------------------------------------5
Via POE Adapter----------------------------------------------------------------------------------6
Via POE Switch-----------------------------------------------------------------------------------6
Step 2: Check Your Camera’s IP Address, Modify If Needed------------------------------7
Install the “Device Tool” from the U-disk, then run it-------------------------------------7
Find the camera's IP address------------------------------------------------------------------8
Modify IP Address---------------------------------------------------------------------------------9
Step 3: Test POE PTZ Camera--------------------------------------------------------------------10
Via PC-----------------------------------------------------------------------------------------------11
Via Free APP “Danale”-------------------------------------------------------------------------12
Via Client Management Software “LMS”---------------------------------------------------14
Installation Verification-------------------------------------------------------------------------------------16
Web Operations---------------------------------------------------------------------------------------------16
Troubleshooting---------------------------------------------------------------------------------------------17
Presets & Tours----------------------------------------------------------------------------------------------17
Get More Support-------------------------------------------------------------------------------------------18
www.nesuniq.com

3 / 4
Packing List and Qualification Card
Component PCS Component PCS
5MP Mini POE Camera 1 Drilling Sticker 1
Power Supply 1 Expansion Tube 1
Ethernet Cable 1 Tapping Screw 1
Quick Star Guide 1 U-disk with Product Instruction 1
Interface Description
www.nesuniq.com

4 / 5
Prepare for Installation Tools
#2 Phillips screwdriver Measuring tape Marker
10 mm hammer drill for ceiling-or wall-mounted installation Wire stripper
RJ-45 connector crimping tool Diagonal cutting pliers
www.nesuniq.com

5 / 6
Connection & Installation
Step 1: Make The Connection
We have 3-way to make the connection:
① Via Normal DC12V 2A Power Supply;
② Via POE Adapter(support IEEE 802af/at 10/100/1000M bps, I/P: AC 100-240V 50-60Hz 0.6A; O/P: DC 48V,
0.5A);
③ Via POE Switch(IEEE: IEEE802.3af/at 1/2+3/6-; PSE Output: +52V-2.3A 120W, Power in: AC110-240V);
Note:
PoE+ injector/switch required (802.3at) 24W;
Conventional PoE (802.3af) only delivers 15.4W and will cause underpower!
① Connect the AC Adaptor
INPUT: 100-240V-50-60Hz 0.65A
OUTPUT: 12V 4A
www.nesuniq.com

6 / 7
② Connect the POE Adapter
a) The camera’s LAN port must connect to the adapter’s “POE” port, the adapter’s LAN port muct connect
to your router; b) The POE adapter output power at least should be 24W (48V 0.5A or 48V 1A)
③ Connect the POE Switch
a) The camera’s LAN port much connect to the “POE Link” port and the POE switch’s “Up Link”
Port must connect to your router; b) Each output power of POE switch port must at least 15.4w
www.nesuniq.com

7 / 8
Connection & Installation
Step 2: Check Your Camera’s IP Address, Modify If Needed
① Install the “Device Tool” from the U-disk, then run it
② Click 【Start Search】to find the IP address
The default IP address of this camera is DHCP. but we are not sure what is your router’s IP address, some are
192.168.1.1, some are 192.168.0.1, so we can use this tool to find out what exactly the camera’s IP address is.
③ Right click on the camera’s IP address and select "Modify IP Address" to modify the IP address of
this camera.
Check the IP camera’s IP address is very important, The camera must be configured with the correct IP address
to connect to the Internet. if you don't understand. recommended to select the "DHCP" option and make sure
your router has DHCP enabled.
www.nesuniq.com

8 / 9
www.nesuniq.com

9 / 10
Note: This is for advanced user
If you want to modify the IP address, then first you should make sure the after-modify IP address will not cause
IP conflict with your other IP devices. Second, you should make sure they are in the same IP segment.
What is DHCP?
→For example, you have 5 IP cameras, and all have connect to your router, and your router will assign 5 different
IP address to these 5 camera, but when you connect one more, like this ptz camera, your modified IP address
can not be the same as other 5.
What is same IP segment?
→A IP address, the first three strings are the same.
For example:
192.168.1.22 and 192.168.1.33 are in the same IP segment.
But 192.168.1.22 and 192.168.0.22 are not in the same IP segment.
www.nesuniq.com

10 / 11
Connection & Installation
Step 3: Test POE PTZ Camera
We have 3-way to test this camera. Via Web Broswer, Via Free APP Danale and Via CMS Software
① Via PC
In step 2, we have got the POE PTZ camera’s final IP address.
1) Right click on the camera information and select 【Goto Web】
2) (Recommend) OR open your Internet Explorer, input the IP address to the link visit bar.
3) Input default user name 【admin】 and password 【123456】to login.
See the pictures below:
4) Access to the camera through IE browser on windows PC, In IE browser you can view image and configure
all parameters of camera.
② Via Free APP “Danale”
Very important: when you first use the APP to test the camera, you must make sure that your smartphone
or your tablet PC must have connected to your home router’s WIFI, do not use 4G or 5G signal. After you
add this camera to the APP, then you can both use your home wifi and 4G/5G singnal.
Below are the steps
www.nesuniq.com
Otros manuales para IPC-P405A
1
Tabla de contenidos
Otros manuales de Cámara de seguridad de Nesuniq


