MyBinding Formax FD 300 Manual de usuario


1
Hopper Capacity Up to 200 sheets 20#
Speed: Up to 7,400 sheets per hour
Paper Size: Up to 8.5” x 14”
Fold Types: C, Z, V, Double Parallel
Dimensions: 24” L x 14” W x 16.5” H
Machine weight 25 lb.
Power supply 120V, 50/60 Hz .6A
DESCRIPTION
Control Panel
Back Cover
Infeed Tray
Front Cover
Paper Guides
Outfeed Conveyor
Lower Fold Plate
Upper Fold Plate
Outfeed Tires
FUNCTION
The Formax FD 300 Low-Volume Document Folder is designed to fold various paper sizes. The fold plates are
manually adjusted for C, V, Z and double parallel folds.
SPECIFICATIONS
• The FD 300 is designed only to fold paper.
• Use the FD 300 in indoor locations only.
• Discontinue use if power cord is frayed or damaged. Contact Formax for assistance.
• Discontinue use if the machine makes unusual noise. Contact Formax for assistance.
• Use only the voltage specied, 120V. Do not attempt to alter this.
• Before using the machine, read all instructions carefully.
• To reduce the possibility of injury, children should not be allowed to operate the machine.
• Keep ngers, hands, loose sleeves, jewelry, hair away from the machine.
• If paper is jammed, switch off power and unplug from outlet. Remove fold plates from the machine and
remove jammed paper.
• When replacing the fuse, use the same type specied. Disconnect machine from power supply then replace
fuse. (Remove the front cover to access the fuse).
SAFETY GUIDELINES
MyBinding.com
5500 NE Moore Court
Hillsboro, OR 97124
Toll Free: 1-800-944-4573
Local: 503-640-5920

3. Place the FD 300 on a sturdy, level surface. Lower the output conveyor into its fully open position.
4. Open the paper infeed tray
1. Inspect package for damage.
2. Inspect packing to ensure all components are included: FD 300, upper & lower fold plates, power cord.
UNPACKING & SETUP
2
Upper Fold Plate
Lower Fold Plate
Power Cord
5. Attach power cable to receptacle, and plug into appropriate wall outlet.
MyBinding.com
5500 NE Moore Court
Hillsboro, OR 97124
Toll Free: 1-800-944-4573
Local: 503-640-5920

INSTALLING FOLD PLATES
Half fold diverter
Fold stop Fold stop knobs
Upper Fold Plate Lower Fold Plate
Fold stop
Upper Fold Plate
Install the upper fold plate at an angle, as shown. Align the notches on each side of the fold plate with the pins
on each side of the machine body. Push gently on the fold plate to lock it into position.
Upper fold plate pinsUpper fold plate notches
3
Upper fold plate
Upper fold plate seated on pins
MyBinding.com
5500 NE Moore Court
Hillsboro, OR 97124
Toll Free: 1-800-944-4573
Local: 503-640-5920

4
Install the lower fold plate at an angle, as shown. Align the notches on the fold plate with the lower fold plate
pins. Push gently on the fold plate to lock it into position.
1. Determine the fold type and paper size.
2. Refer to the chart on the infeed table for fold plate settings based on the fold type and paper size. For
example, if you are folding an 8.5” x 11” sheet (LT) into an accordion fold (Z) set the upper fold plate stop
to “G” and the lower fold plate stop to “J”.
3. To adjust the fold stops loosen the two thumbscrews, slide the fold stop up or down to the correct position
and tighten the thumbscrews.
Note: To process a Half Fold, Set the upper fold plate stop to the proper position and then remove the
lower fold plate, rotate it 180o and re-install it.
To set custom folds, refer to the chart on page 6.
Lower fold plate notches
Lower Fold Plate
Setting Fold Plates
Fold stop position decal on infeed
table.
Loosen the thumbscrews to adjust
the fold stop position.
Align the fold stop notch
with the matching letter.
Lower fold plate pins
Lower fold plate
Lower fold plate seated on pins

5
1. A zip tie is used to hold the outfeed wheels in place during shipping. Cut and remove the tie before
proceeding. Adjust outfeed wheels to match the fold type and paper size. NOTE: This is important for
proper outfeeding. Loosen the thumbscrew and slide the tires up or down to the correct position.
Refer to the guide at right for the correct position. Tighten the thumbscrew to hold the tires in place.
1. Load the paper by pressing down on the spring-loaded infeed guide. Be sure the leading edge of the
paper is under the feed tires.
2. After loading the paper, adjust the side guides by gently pinching them and sliding them inward toward
the paper stack. Be sure they are snug against the paper stack, then loosen slightly to leave a gap of
approximately 1mm on each side. The paper should lie at.
Setting Outfeed Stacker Wheels
Loading Paper and Adjusting Side Guides
Stacker Wheel Position
Fold Type LT (11”) LGA (14”)
Letter “C” 3 2
Accordion “Z” 3 2
Double Parallel 4 3
Half “V” 1 0
Zip Tie
MyBinding.com
5500 NE Moore Court
Hillsboro, OR 97124
Toll Free: 1-800-944-4573
Local: 503-640-5920

6
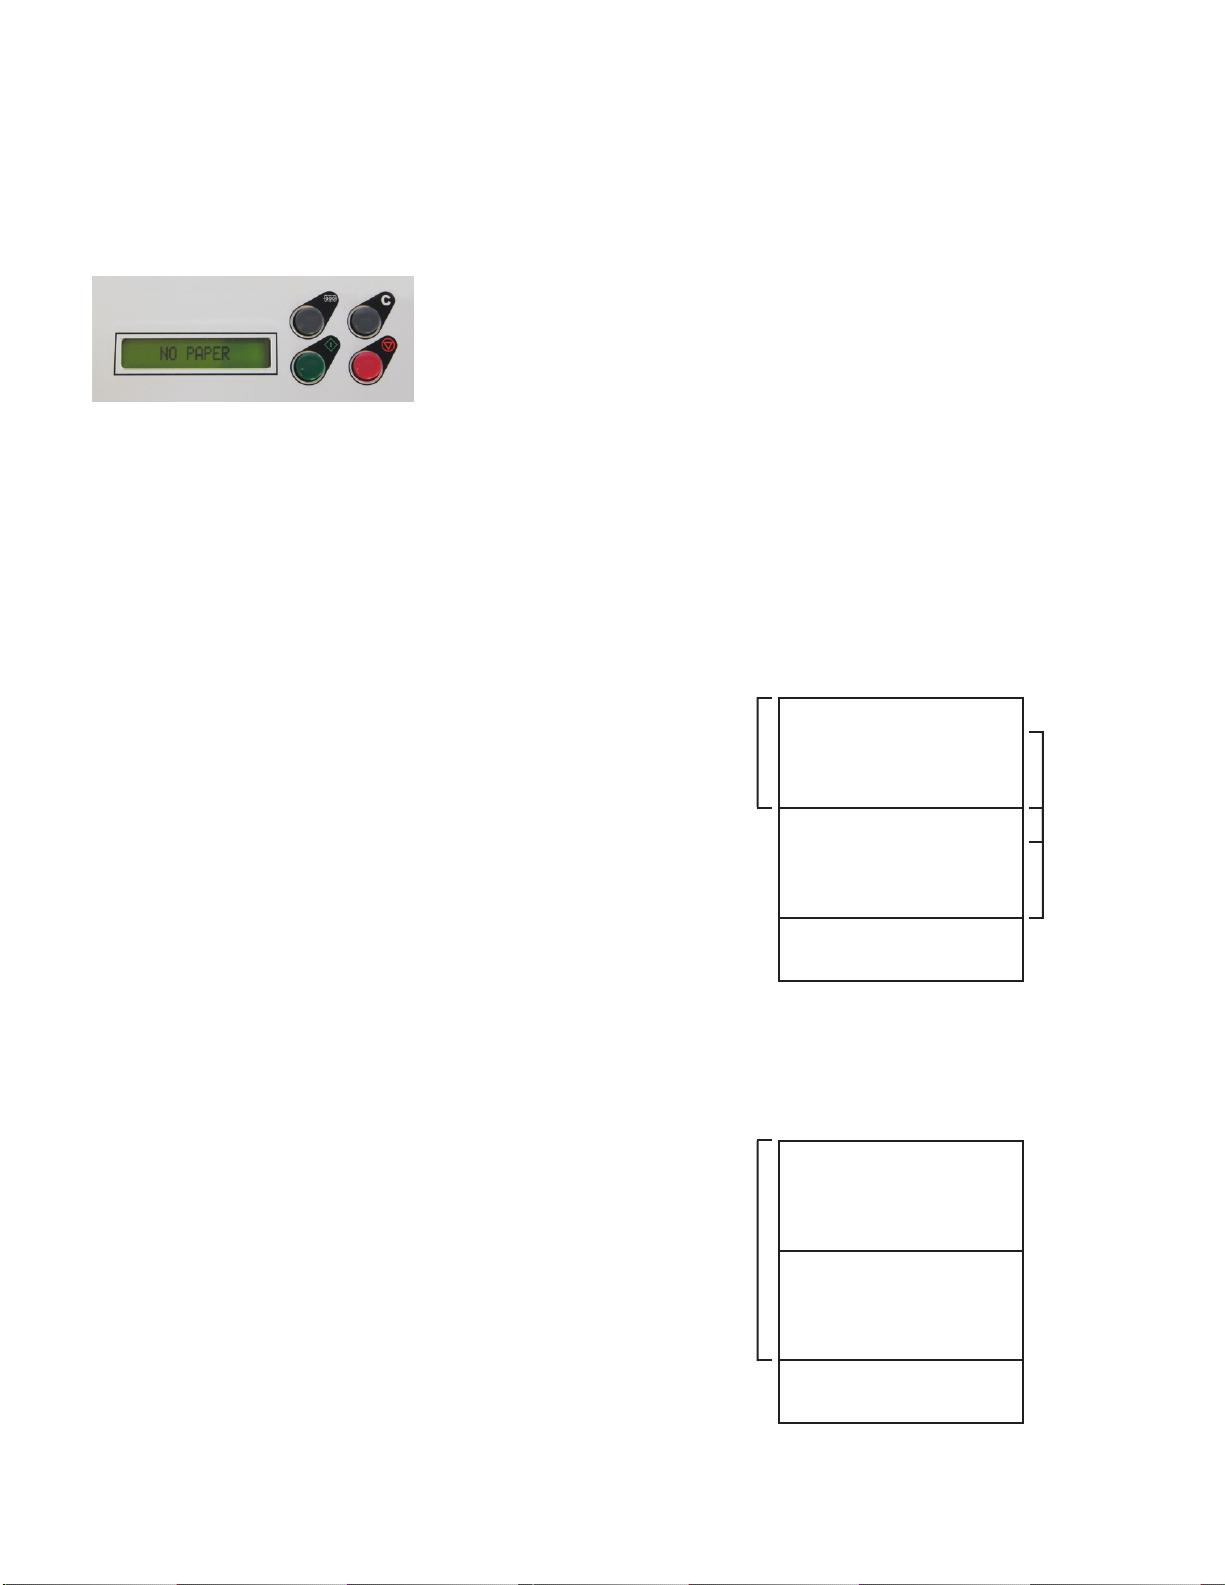
1 LCD Screen Displays status, counter, batch counter, any faults
2 START Button Press to start operation
3 STOP Button Press to stop operation
4 BATCH Button Press to change batch counting quantity and interval
5 CLEAR/RESET Button Press to clear counter 123
54
Control Panel
Counter:
The FD 300 has a 3 digit resettable counter that will count up as the paper is folded. To reset the counter,
press and hold the “C” button for 3 seconds.
AutoBatch Counting:
To fold a set number of sheets with a pause between sets, use the AutoBatch Counter. Press the Batch
button repeatedly to set the number of sheets to be folded, then press the red Stop button to set
the number of seconds between each set (up to 30 seconds). Press the Batch button to adjust the time
delay (the delay will cycle up to 30 seconds and then go back to 0).
AutoBatch Last Form Adjustment:
The speed of the last three forms can be adjusted when using AutoBatch for accurate sets. For example, if 10
sheets are programmed in AutoBatch and 11 are pulled, the speed of the last three forms needs to be reduced,
if only 9 sheets are pulled the speed of the last three forms needs to be increased. To enter the last form adjust-
ment mode press and hold the Stop button for 3 seconds, the screen will read “M_Count: ### MS”, note
the number shown, then press the Batch button to adjust the speed (the speed will cycle up to 495 MS and
then go back to 005). To increase the speed, set to a higher number and to decrease the speed, set to a lower
number. To exit press the Stop button one time. MyBinding.com
5500 NE Moore Court
Hillsboro, OR 97124
Toll Free: 1-800-944-4573
Local: 503-640-5920
Setting Custom Folds
Example 1: Uneven “C”
1. Measure the length of panel “A”
2. Adjust the upper fold plate so that the stop plate lines
up with the measurements of the panel “A” i.e. if panel
“A” is 5 1/4” long slide the stop plate up or down so that
it lines up with the 5 1/4” mark on the fold plate.
3. Measure the length of panel “B”
4. Adjust the lower fold plate so that the stop plate lines
up with the measurement of panel “B”
5. Load forms and press test. If folds are too long or too
short adjust accordingly.
1. Measure the length of panel “A” & “B”
2. Adjust the upper fold plate so that the stop plate lines up
with the measurements of panel “A” & “B”. i.e. if panel
“A” & “B” are 9” long slide the stop plate up or down so
that it lines up with the 9” mark on the fold plate.
3. Measure the length of panel “B”
4. Adjust the lower fold plate so that the stop plate lines up
with the measurement of panel “B
5. Load forms and press test. If folds are too long or too
short adjust accordingly.
Example 2: Uneven “Z”
Panel A
Panel B
Panel A
Panel B
7
Paper Out:
If the control panel reads “NO PAPER”, check the infeed tray and reload paper. The screen will reset when
paper is loaded.
MyBinding.com
5500 NE Moore Court
Hillsboro, OR 97124
Toll Free: 1-800-944-4573
Local: 503-640-5920
Tabla de contenidos
Otros manuales de Máquina plegadora de MyBinding


Manuales populares de Máquina plegadora de otras marcas

Mathias Bauerle
Mathias Bauerle Multipli 35 Manual de usuario

Intelli-Fold
Intelli-Fold DF-304C Manual de usuario

Pitney Bowes
Pitney Bowes DI425 FastPac Manual

Hwasung
Hwasung COMPODIS HMK-830 Series Manual de usuario

KRUG+PRIESTER
KRUG+PRIESTER IDEAL 8306 Manual de usuario

XPOtool
XPOtool 61574 Manual de usuario


