
MrCool Olympus Series Manual de usuario

Please read this manual carefully before installation and keep it for future reference.
Please keep this manual where the operator can easily find it. Inside, you
will find helpful hints on how to use and maintain your unit properly.
For more info visit www.mrcool.com
If used as MULTI unit, please refer to the Installation & operation manuals packed with outdoor unit.
Installation Manual
Olympus Series
Cassette Air Handlers

Contents
Page 1 mrcool.com
Safety Precautions
Warnings ............................................................................................................................... 2
Cautions ................................................................................................................................ 3
Installation Summary ............................................................................................ 4
Accessories ...................................................................................................................... 5
Indoor Unit Installation ....................................................................................... 7
Outdoor Unit Installation ................................................................................... 10
Refrigerant Piping Installation ........................................................................ 12
Connecting the Drain Pipe .................................................................................. 16
Electrical Wiring Work ............................................................................................ 18
Decorative Panel Installation ........................................................................... 20
Test Operation .............................................................................................................. 21
EU Disposal Guidelines ........................................................................................... 22
!
1
2
3
4
5
6
7
8
9
10

Page 2
Safety Precautions
mrcool.com
Read Before Using
Incorrect usage may cause serious damage or injury.
The seriousness of potential damage or injuries is classified as either a WARNING or CAUTION.
WARNING
CAUTION
WARNING
• Installation must be performed in accordance with the requirement of NEC and CEC by authorized
personnel only.
• Be sure only trained and qualified service personnel install, repair or service the equipment.
• Improper installation, repair, and maintenance may result in electric shocks, short-circuit, leaks, personal
injury, loss of life, fire or other damage to the equipment.
• Install according to this installation instructions strictly. If installation is defective, it will cause water
leakage, electrical shock and fire.
• When installing the unit in a small room, take measures against to keep refrigerant concentration from
exceeding allowable safety limits in the event of refrigerant leakage. Contact the place of purchase for
more information. Excessive refrigerant in a closed ambient can lead to oxygen deficiency.
• Use the attached accessories parts and specified parts for installation. Otherwise, it will cause the set to
fall, leak water, cause electrical shock, or produce fire.
• Install at a strong and firm location which is able to withstand the set' s weight. If the strength is not
enough or installation is not properly done, the set will drop causing injury.
• The appliance must be installed 8.2 ft/2.5m above floor.
• The appliance shall not be installed in the laundry room.
• Before obtaining access to terminals, all supply circuits must be disconnected.
• The appliance must be positioned so that the plug is accessible.
• The enclosure of the appliance shall be marked by word, or by symbols, with the direction of the fluid
flow.
• Read this manual attentively before starting up the units.
• For electrical work, follow the local national wiring standard, regulation and these installation instructions.
An independent circuit and single outlet must be used. If electrical circuit capacity is not enough or defect
in electrical work, it will cause electrical shock or fire.
• Use the specified cable and connect tightly and clamp the cable so that no external force will be acted on
the terminal. If connection or fixing is not perfect, it will cause heat-up or fire at the connection.
This symbol indicates that ignoring instructions may cause death or serious injury.
This symbol indicates that ignoring instructions may cause moderate injury
to your person, damage to your unit, or other property.
This symbol indicates that you should NEVER perform the indicated action.
!
Safety Precautions

WARNING
CAUTION
• Wiring routing must be properly arranged so that control board cover is fixed properly. If control board
cover is not fixed perfectly, it will cause heat-up at connection point of terminal, fire or electrical shock.
• If the supply cord is damaged, it must be replaced by the manufacture or its service agent or a similarly
qualified person in order to avoid a hazard.
• An all-pole disconnection switch having a contact separation of at least 0.12in in all poles should be
connected in fixed wiring.
• When carrying out piping connection, take care to not let air substances go into refrigeration cycle.
Otherwise, it will cause lower capacity, abnormally high pressure in the refrigeration cycle, explosion and
injury.
• Do not modify the length of the power supply cord or use an extension cord, and do not share the single
outlet with other electrical appliances. Otherwise, it will cause fire or electrical shock.
• If the refrigerant leaks during installation, ventilate the area immediately. Toxic gas may be produced if
the refrigerant comes in contact with fire.
• The temperature of refrigerant circuit will be high, please keep the interconnection cable away from the
copper tube.
• After completing the installation work, check that the refrigerant does not leak. Toxic gas may be
produced if the refrigerant leaks into the room and comes into contact with a source of fire, such as a fan
heater, stove or cooker.
• After completing the installation, make sure that the unit operates properly during the start-up operation.
Please instruct the customer on how to operate the unit and keep it maintained. Also, inform customers
that they should store this installation manual along with the owner's manual for future reference.
Safety Precautions
Page 3 mrcool.com
DO NOT connect the ground wire to gas or water pipes, lightning rod or a telephone ground wire.
Inappropriate grounding may result in electric shocks.
DO NOT connect the air conditioner with the power supply until the wiring and piping is done.
DO NOT operate your air conditioner in a wet room such as a bathroom or laundry room.
DO NOT install the air conditioner in the following circumstance:
• There is petrolatum existing.
• There is salty air surrounding (near the coast).
• There is caustic gas (the sulfide, for example) existing in the air (near a hot spring).
• The Volt vibrates violently (in the factories).
• In buses or cabinets.
• In kitchen where it is full of oil gas.
• There is strong electromagnetic waves existing.
• There are inflammable materials or gas.
• There is acid or alkaline liquid evaporating.
• Other special conditions.
• Ground the air conditioner.
• Be sure to install an earth leakage breaker. Failure to install an earth leakage breaker may result in
electric shocks.
• Connect the outdoor unit wires, then connect the indoor unit wires.

Installation Summary
Page 4mrcool.com
1
Installation Summary
• To install properly, please read this "installation manual" at first.
• The air conditioner must be installed by qualified persons.
• When installing the indoor unit or its tubing, please follow this manual as strictly as possible.
• If the air conditioner is installed on a metal part of the building, it must be electrically insulated according to the
relevant standards to electrical appliances.
• When all the installation work is finished, please turn on the power only after a thorough check.
• Regret for no further announcement if there is any change of this manual caused by product improvement.
1. Indoor unit installation
2. Outdoor unit installation
3. Install the refrigerant pipe
4. Connect the drain pipe
5. Electric wiring work
6. Installation of the decoration panel
7. Test operation
INSTALLATION INFORMATION
INSTALLATION ORDER
Is the indoor unit fixed firmly?
The unit may drop,vibrate or make noise.
Is the gas leak test finished?
It may result in insufficient cooling or heating.
Is the unit fully insulated?
Condensate water may drip.
Does drainage flow smoothly?
Condensate water may drip.
Does the power supply voltage correspond to that
shown on the name plate?
The unit may malfunction or components may burn out.
Are wiring and piping correct?
The unit may malfunction or components may burn out.
Is the unit safely grounded?
Dangerous at electric leakage.
Is the wiring size in accordance with specifications?
The unit may malfunction or components may burn out.
Is anything blocking the air outlet or inlet of either the
indoor or outdoor units?
It may result in insufficient cooling or heating.
Are refrigerant piping length and additional refrigerant
charge noted down?
The refrigerant charge in the system might not be clear.
CHECK OFF WHEN COMPLETED

Accessories
Page 5 mrcool.com
2
4
4
1
1
1
2
1
Expansible hooks
(on some models)
Installation hooks
(on some models)
Throttle
(on some models)
Anti-shock rubber
(on some models)
Tapping screws
(M3X10mm)
(on some models)
Remote control
Fixing screw for remote
control holder
ST2.9 x 10
Remote control holder
Batteries
Metal champ
(on some models)
Drain hose
(on some models)
2
1
Optional
Parts
2
1
PART LOOKS LIKE... QUANTITY
The air conditioning system includes the following accessories. Use all of the
installation parts and accessories to install the air conditioner. Improper installation may result in water
leakage, electrical shock, fire, or equipment failure.
Accessories
Page 6mrcool.com
1
1
1
1
1
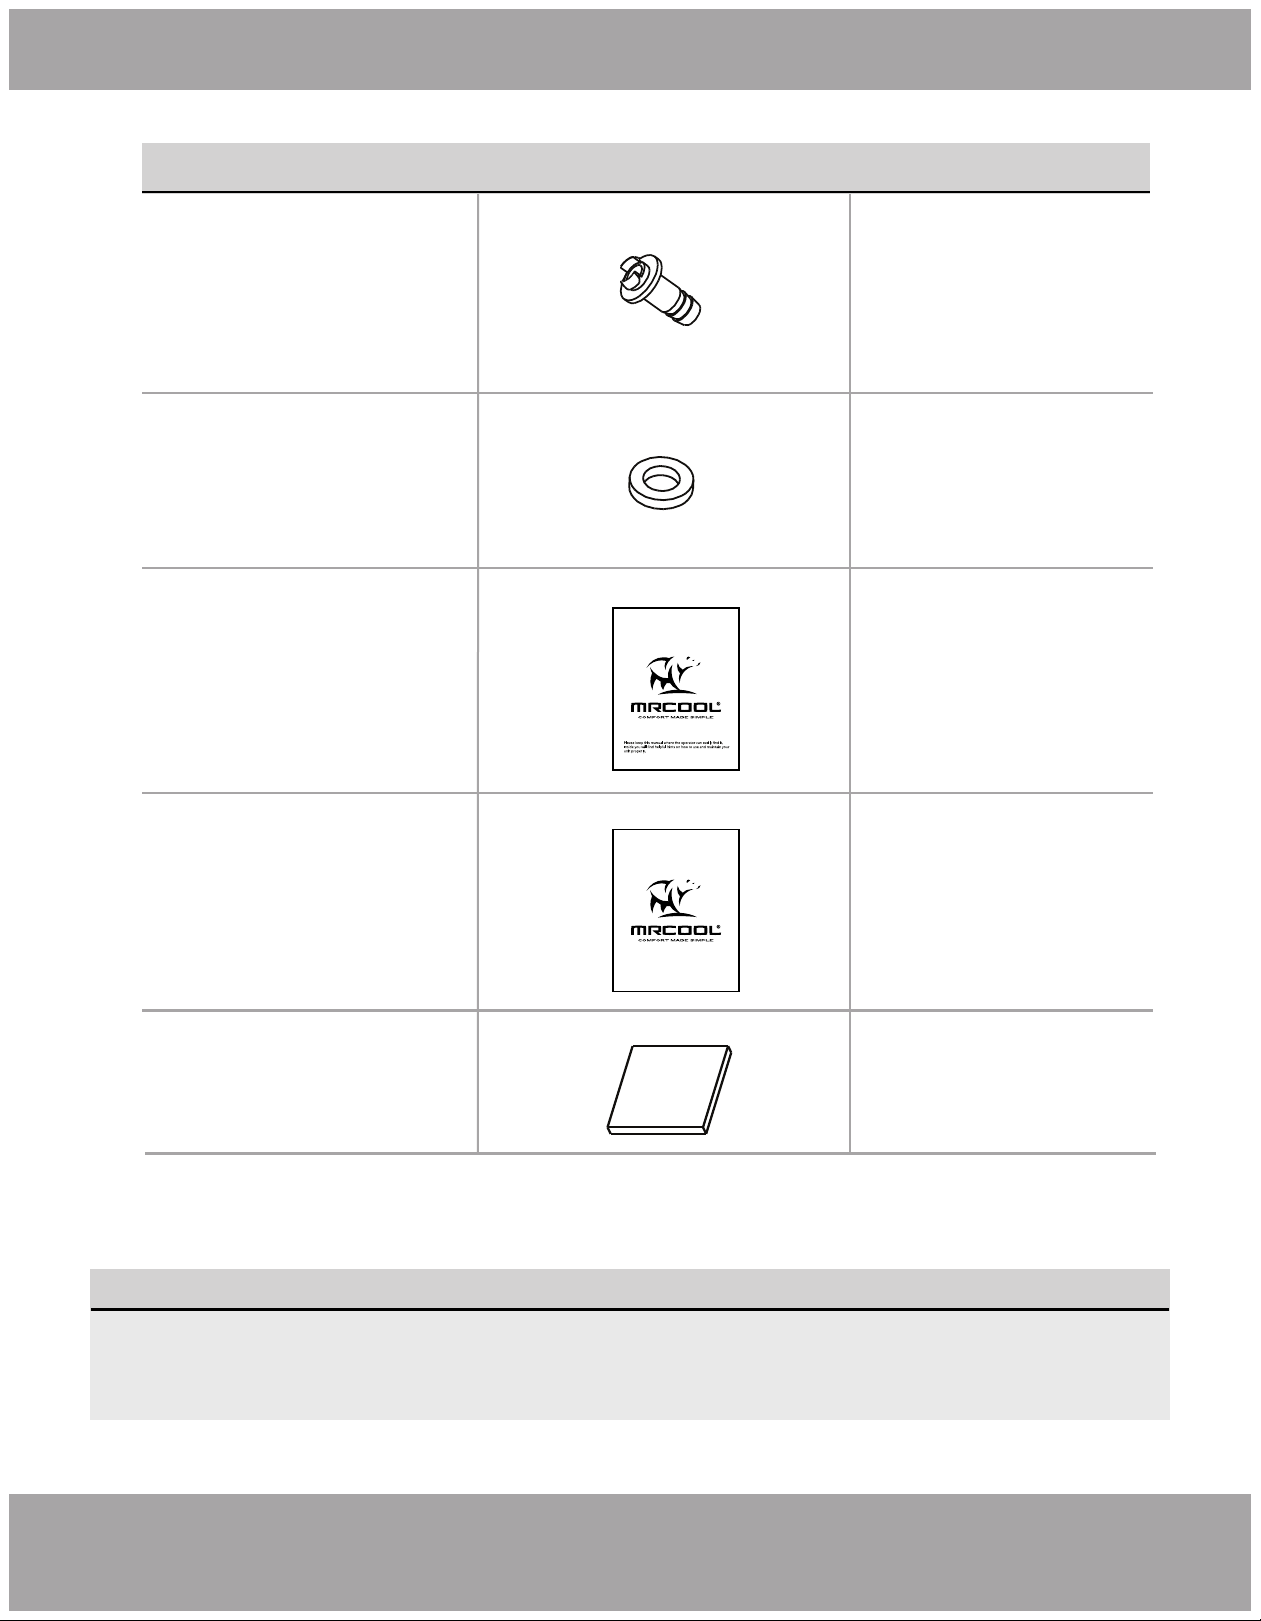
Owner’s Manual
Drain plug
(only heat pump models)
(with the outdoor unit)
Seal ring
(only heat pump models)
(with the outdoor unit)
Installation Manual
Paper pattern for
installation (on some
models)
PART LOOKS LIKE... QUANTITY
Please read this manual carefully before installation and keep it for future reference.
Owner’s Manual
Olympus Series
Cassette Air Handlers
For more details visit www.MrCool.com
Please read this manual carefully before installation and keep it for future reference.
Please read this manual carefully before installation and keep it for future reference.
Installation Manual
Olympus Series
Cassette Air Handlers
NOTE
All the pictures in this manual are for explanation purpose only. There may be slightly different from
the air conditioner you purchased ( depend on model ). The actual shape may vary.
This indoor unit requires installation of an optional decoration panel.

Indoor Unit Installation
Page 7 mrcool.com
3
22
1
1000/39.4in
1000/39.4in
1000/39.4in
1000/39.4in
1000/39.4in
1000/39.4in
2500/98.4in
260/10.2in
290/11.4in
1 Air inlet
2 Air outlet
Unit: mm
Selecting Installation Site
When the conditions in the ceiling are exceeding 30°C / 86°F and
a relative humidity of 80%, or when fresh air is inducted into the
ceiling, an additional insulation is required (minimum 0.4in /
10mm thickness, polyethylene foam).
1. Select an installation site where the following conditions are
fulfilled and that meets your customer's approval.
• Where optimum air distribution can be ensured.
• Where nothing blocks air passage.
• Where condensate water can be properly drained.
• Where the false ceiling is not noticeably on an incline.
• Where sufficient clearance for maintenance and service can be
ensured.
• Where there is no risk of flammable gas leaking.
• The equipment is not intended for use in a potentially explosive
atmosphere.
• Where piping between indoor and outdoor units is possible
within the allowable limit. (Refer to the installation manual of the
outdoor unit.)
• Keep indoor unit, outdoor unit, inter unit wiring and remote
control wiring at least 3.3 feet (1Meter) away from televisions
and radios. This is to prevent image interference and noise in
those electrical appliances. (Noise may be generated depending
on the conditions under which the electric wave is generated,
even if proper distance is kept.)
• When installing the wireless remote control kit, the distance
between wireless remote control and indoor unit might be
shorter if there are fluorescent lights that are electrically started
in the room. The indoor unit must be installed as far away as
possible from fluorescent lights.
WARNING
Do not install the unit in an area where flammable materials are present due to risk of explosion resulting in
serious injury or death.
If the basis underneath the unit is not strong enough to support the weight of the unit, the unit could be fall out
of place and cause serious injury.
2. Ceiling height
Install this unit where the height of bottom panel is
more than 8.2 ft / 2.5m so that the user cannot
easily touch.
3. Use installation hooks
Use installation hooks for installation. Check
whether the ceiling is strong enough to
support the weight of the indoor unit. If there
is a risk, reinforce the ceiling before installing
the unit. Space required for installation. See
Fig. 3.4 on the next page for details.
Fig. 3.1

Indoor Unit Installation
Page 8mrcool.com
Preparations before installation
1. Relation of ceiling opening to unit and suspension bolt position.
2. Create the ceiling opening needed for indoor
installation where applicable. (For existing
ceilings.)
• Create the ceiling opening required for installation. From
the side of the opening to the casing outlet, implement the
refrigerant and drain piping and wiring for remote control
(unnecessary for wireless type). Refer to each piping or
wiring section.
• After making an opening in the ceiling, it may be necessary
to reinforce ceiling beams to keep the ceiling level and to
prevent it from vibrating. Consult the builder for details.
3. Install the installation hooks. (Use either a M8 or
M10 size bolt.)
• Use expansible hooks, sunken anchors or other field
supplied parts to reinforce the ceiling in order to bear the
weight of the unit.
• Adjust clearance from the ceiling before proceeding
further. See Fig. 3.4 for Installation example.
Installation is possible with a ceiling dimension of 23.6in /
600mm (marked with*). However, to achieve a ceiling-panel
overlapping dimension of 0.6in / 15mm, the spacing
between the ceiling and the unit should be 0.8in / 20mm or
less. If the spacing between ceiling and the unit is over
0.8in / 20mm, attach sealing material in the part or recover
the ceiling.
For other installation other than standard installation,
contact your dealer for details.
1 Ceiling slab
2 Expansible hook (optional)
3 Installation hook (optional)
4 False ceiling
30~35mm
1.2~1.4in
1
2
3
4
Fig. 3.4
1
1
2
2
3
3
545/21.5in
523/20.6in
570/22.4in
570/22.4in
647/25.5in
647/25.5in
45
70/2.8in
15/0.6in15/0.6in600/23.6in6
7
8
20/0.8in20/0.8in
Unit: mm
Fig. 3.2
1. Installation hook pitch dimensions
2. Indoor unit dimensions
3. Decoration panel dimensions
4. Refrigerant piping
5. Installation hook
6. Ceiling opening dimensions
7. Hanger bracket
8. False ceiling
1 Indoor unit
2 False ceiling
1
2
24mm
0.9in
Fig. 3.3
Adjust the position to ensure the gaps between the
indoor unit and the four sides of false ceiling are even.
The indoor unit's lower part should sink into the false
ceiling for 24mm / 0.9in. See Fig. 3.3.
NOTE

Indoor Unit Installation
Page 9 mrcool.com
Install the indoor unit
When installing optional accessories, read also the
installation manual of the optional accessories.
Depending on the field conditions, it may be easier to
install optional accessories before the indoor unit is
installed (except for the decoration panel). However, for
existing ceiling, install fresh air inlet component kit and
branch duct before installing the unit.
1. Install the indoor unit temporarily.
• Attach the hanger bracket to the suspension bolt. Be
sure to fix it securely by using a nut and washer from
the upper and lower sides of the hanger bracket.
• Securing the hanger bracket see figure below.
2. Fix the paper pattern for installation.
(For new ceilings only)
• The paper pattern for installation corresponds with
the measurements of the ceiling opening. Consult the
builder for details.
• The center of the ceiling opening is indicated on the
paper pattern for installation.
•After removing the packaging material from the paper
patten for installation, attach the paper pattern for
installation to the unit with the attached screws as
shown in figure below.
3. Adjust the unit to the right position for
installation.
(Refer to the chapter "Preparations before
installation").
4. Check if the unit is horizontally leveled.
• Do not install the unit tilted. The indoor unit is
equipped with a built-in drain pump and float switch.
(If the unit is tilted against the direction of the
condensate flow (the drain piping side is raised), the
float switch may malfunction and cause water to
drip.)
• Check if the unit is leveled at all four corners with a
water level or a water-filled vinyl tube as shown in
figure below.
5. Remove the paper pattern for installation.
(For new ceilings only)
Water
Level
Water
Level
Vinyl
Tube
Vinyl
Tube
Paper pattern for installation
(on some models)
Center of the ceiling opening
Screws(supplied with
the decoration panel)
Nut (field supply)
Washer
(field supply)
Hanger
bracket
Double nuts
(field supply,
tighten)
Fig. 3.5
Fig. 3.7
Fig. 3.6
Otros manuales para Olympus Series
8
Tabla de contenidos
Otros manuales de Manejador de aire de MrCool

MrCool
MrCool Universal Series Manual de usuario

MrCool
MrCool Signature MAHM CTA Series Guía de inicio rápido

MrCool
MrCool Signature Series Guía de inicio rápido

MrCool
MrCool PRODIRECT Series Instrucciones de funcionamiento

MrCool
MrCool Universal MDUI180 E Series Manual de usuario

MrCool
MrCool Olympus Series Manual de usuario

MrCool
MrCool Olympus Series Manual de usuario

MrCool
MrCool DIY Instrucciones de funcionamiento

MrCool
MrCool Olympus Series Instrucciones de funcionamiento

MrCool
MrCool Signature Series Guía de inicio rápido


