Mio C250 Manual de usuario


R00
Trademarks
All brand and product names are trademarks or registered trademarks of their
respective companies.
Note
The information in this manual is subject to change without notice.

Table of Contents
Warnings and Notices............................................................................iii
1Getting Started..................................................................................1
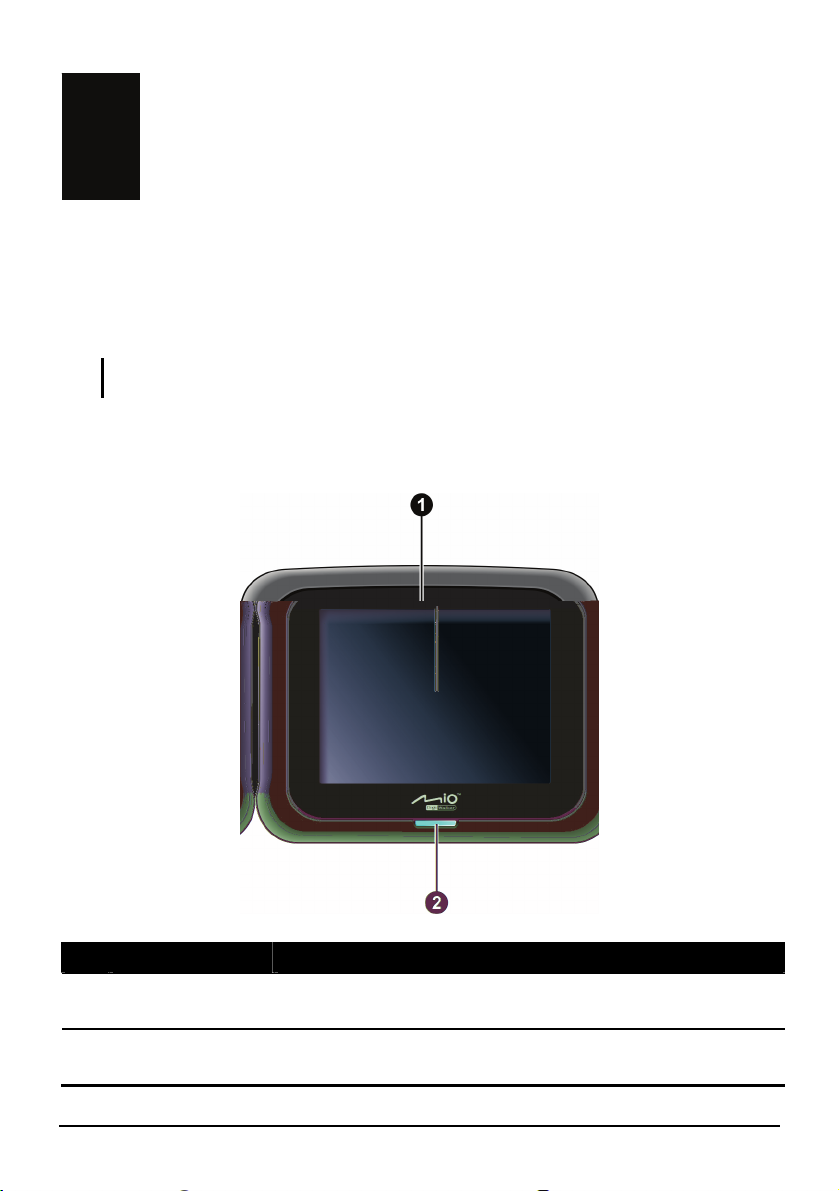
1.1 Understanding Hardware Components................................................ 1
Front Components ............................................................................... 1
Back Components................................................................................ 2
Right-Side Components ....................................................................... 2
Top Components.................................................................................. 3
Bottom Components ............................................................................ 3
1.2 Performing the Initial Start Up.............................................................. 4
1.3 Using Your Device in a Vehicle............................................................ 6
Using the Device Holder ...................................................................... 6
Connecting the Car Charger ................................................................ 6
1.4 Operating Basics.................................................................................. 7
Turning Off ........................................................................................... 7
Navigating on the Screen..................................................................... 8
Home Screen ....................................................................................... 8
1.5 Inserting a SD/MMC Card.................................................................... 9
2MP3 ..................................................................................................11
2.1 Starting and Exiting MP3 Player ........................................................ 11
2.2 Preparing the MP3 Files for You Device............................................ 12
2.3 Playing MP3 Files .............................................................................. 12
2.4 MP3 Playback Controls...................................................................... 13
2.5 Using the Play Lists............................................................................ 14
Creating a Play List ............................................................................ 14
Opening a Play List ............................................................................ 15
2.6 Equalizer ............................................................................................ 16
3Settings............................................................................................17
3.1 Starting and Exiting Settings.............................................................. 17
3.2 Backlight............................................................................................. 18
i

Warnings and Notices
zFor your safety, do not operate the controls of the product while driving.
zUse this product with caution. The product is a navigation aid. It does not
provide exact measurements of direction, distance, location or topography.
zThe calculated route is for reference only. Always follow the posted traffic
signs, speed limits and road restrictions.
zWhen you leave your car, do not leave your device on the dashboard in direct
sunlight. This can cause the battery to overheat and malfunction.
zThe Global Positioning System (GPS) is operated by the United States
government, which is solely responsible for its performance. Any change to
the GPS system can affect the accuracy of all GPS equipment world-wide.
zGPS satellite signals cannot typically pass through solid materials (except
glass). GPS location information is not typically available inside buildings,
tunnels, or underground parking lots.
zA minimum of 4 GPS satellite signals is needed to calculate your GPS
position. Signal reception can be affected by weather events or overhead
obstacles (e.g. dense foliage and tall buildings).
zOther wireless devices in the vehicle may interfere with the reception of
satellite signals and cause the reception to be unstable.
iii

zA device holder is needed when using the device in a car. Be sure to place the
device in an appropriate place, so as not to obstruct the driver’s view, or
deployment of airbags.
Do not mount where the driver’s
field of vision is blocked. Do not place on the
dashboard unsecured.
Do not mount in front of
airbag panels.
Do not mount in front of an
airbag field of deployment.
iv

1 Getting Started
1.1 Understanding Hardware Components
NOTE: Depending upon the specific model purchased, the color of your device may not
exactly match the device shown in this manual.
Front Components
Ref Component Description
Displays the output of your device. Tap the screen with your
nTouch Screen
stylus to select menu commands or enter information.
oCharge Indicator charging,
and turns green when the battery is fully charged.
Flashes bright amber to indicate that the battery is
1

Back Components
Ref Component Description
nSpeaker Sends out music, sounds and voice.
Right-Side Components
2

Ref Component Description
nSD/MMC Slot Accepts a SD (Secure Digital) or MMC (MultiMediaCard)
card for accessing data such as MP3 music.
oHeadphone
Connector
Connects to stereo headphones.
Top Components
Ref Component Description
nExternal
Antenna
Connector
This connector (under rubber dust cover) allows use of an
optional external GPS antenna with magnetic mount, which may
be positioned on top of the car for better GPS signal reception in
areas with poor reception.
oPower Button Turns on and off the device.
Bottom Components
Ref Component Description
nMini-USB Connector Connects to the USB cable or in-car power cable.
3

1.2 Performing the Initial Start Up
1. Make sure that power is supplied to your device. (See the next section.)
2. For the initial start up, press the power button for 6 seconds to turn on your
device.
NOTE: For normal operation, briefly press the power button to turn on and off your device.
3. The “Change Language” screen appears. Tap the left/right arrow button to
select the desired language. Then, tap the button.
4. The “Date&Time” screen appears. Tap the appropriate arrow button to select
the time zone, date, and time. Then, tap the button.
4
Este manual sirve para los siguientes modelos
1
Tabla de contenidos


