Midea MES30S2AST Manual de usuario

(Pictures are for reference only and may not
accurately represent all models covered by this manual.)
Installation Instructions
version A - 3 - 2020
MODEL NUMBERS
MES30S2AST
MES30S4AST
www.midea.com
Note:
Before using this product, please
read this manual carefully and
keep it for future reference.
Contact Midea Customer Service
at 1-866-646-4332 or visit
assistance.
EN
WiFi Connectivity with Smart
Device App
5-Element Glass Ceramic
Cooktop
6.3 Cubic F
Capacity
Glass Touch Controls
"Built In" Appearance
midea.com/us/support for
30" Slide-In Electric Range
oot Total Oven

Dear User
Thank you for letting Midea help you "make yourself at home."
This manual is part of our commitment to your total satisfaction.
Please read this manual carefully before use and keep it in a
convenient place for future reference.
To help us serve you better, please consider registering your
product using our convenient Midea app, by visiting
http://www.midea.com, or by texting a picture of your proof of
purchase to 1-844-224-1614.
By using the text option you will earn an additional 3 month
warranty extension immediately following the completion of the
product’s original warranty.
Safety Definitions .............................................................................4
Important Safety Instructions.........................................................
Before Starting Installation
Parts Included with Product..................................................................8
Materials Needed.......................................................................................8
Tools Needed .............................................................................................9
Remove Old Appliance..........................................................................10
Electrical Supply Requirements.........................................................10
Clearances and Dimensions ..................................................................11
Product Specifications...........................................................................13
Range Overview........................................................................................14
Rating Plate Label Location.................................................................15
Installation Procedure
Packaging Removal ................................................................................16
Door Removal and Reinstallation ......................................................17
Drawer Removal and Reinstallation .................................................18
Anti-Tip Bracket Installation ...............................................................19
Rear Filler Trim Installation.................................................................20
Electrical Supply Connection ..............................................................21
Placement and Leveling .......................................................................24
5

Confirm Operation
Cooktop Operation ..............................................................................27
Oven Operation .....................................................................................27
Control Settings ....................................................................................28
Final Installation Checklist ................................................................28
Troubleshooting
Cooktop ...................................................................................................29
Oven ..........................................................................................................30

SAFETY DEFINITIONS
Warnings and safety instructions in this manual do not cover all possible
conditions and situations that may occur. It is your responsibility to use
common sense, caution, and care when installing, maintaining, and
operating your oven. Known hazards and their severity are identified in
this manual with the following symbols:
IMPORTANT
SAFETY
INSTRUCTIONS
BEFORE
STARTING
INSTALLATION
INSTALLATION
PROCEDURE
CONFIRM
OPERATION
TROUBLESHOOTING
SAFETY
DEFINITIONS
WARNING
CAUTION
NOTICE
NOTE
This symbol indicates the presence of a
hazard which may result in death or serious
injury if not avoided.
This symbol indicates the presence of a
hazard which may result in minor or
moderate personal injury if not avoided.
This symbol indicates the presence of a
hazard which may result in minor property
damage if not avoided.
This alerts the user to information that will
help avoid confusion or common cooking
mistakes and obtain the best possible user
experience.
IMPORTANT SAFETY INSTRUCTIONS
READ ALL INSTRUCTIONS BEFORE USING THE APPLIANCE
READ AND SAVE THESE INSTRUCTIONS FOR FUTURE REFERENCE
4

IMPORTANT
SAFETY
INSTRUCTIONS
BEFORE
STARTING
INSTALLATION
INSTALLATION
PROCEDURE
CONFIRM
OPERATION
TROUBLESHOOTING
SAFETY
DEFINITIONS
IMPORTANT SAFETY INSTRUCTIONS
To confirm the anti-tip bracket is properly installed, look underneath
the range to confirm rear leveling leg is engaged in bracket. If visual
inspection is not possible:
• Slide range forward
• Confirm anti-tip bracket is securely attached to floor or wall in correct
position according to installation instructions.
• Fully slide the range back against the wall so that leveling leg engages
with anti-tip bracket.
If range is removed from service, secure door closed or remove door to
minimize tip over risk. (See "Door Removal and Installation" section in
this manual or under "Cleaning and Maintenance" in the User's Manual
for instructions on how to remove door.)
Do not operate the range without the anti-tip device
in place and engaged. Failure to do so can result in
death or serious burns to children or adults. Do not
remove the leveling legs. Doing so will prevent the
range from being secured by the anti-tip device.
A child or adult can tip the range and be killed.
Verify the anti-tip device has been properly installed
and engaged per installation instructions. Ensure
the anti-tip device is re-engaged when the range is
moved.
• This appliance is intended for normal residential use. It is not
approved for commercial use, outdoor installation, or any other
application not specifically allowed by this manual.
• Be sure your appliance is properly installed and grounded by a
qualified service provider.
Anti-Tip Bracket
Leveling Leg
INSTALLATION AND MAINTENANCE
WARNING
TIP OVER HAZARD
WARNING
IMPORTANT SAFETY INSTRUCTIONS
READ ALL INSTRUCTIONS BEFORE USING THE APPLIANCE
READ AND SAVE THESE INSTRUCTIONS FOR FUTURE REFERENCE
5

IMPORTANT
SAFETY
INSTRUCTIONS
BEFORE
STARTING
INSTALLATION
INSTALLATION
PROCEDURE
CONFIRM
OPERATION
TROUBLESHOOTING
SAFETY
DEFINITIONS
• Installer shall leave all instructions, including this manual and anti-tip
bracket instructions, with the owner/resident, with directions to retain
for future reference.
• Do not operate this appliance if it has been damaged or is not working
properly. Contact a qualified service provider for repairs.
• Do not repair or replace any part of the appliance unless specifically
recommended in the manual. All other servicing should be referred to
a qualified service provider.
• Do not use oven cleaners. No commercial oven cleaner or oven liner
protective coating of any kind should be used with any part of this
appliance.
• This appliance requires connection to a 3-prong or 4-prong, 240VAC
split-phase, 60Hz grounded electrical source. When installed,
appliance must be electrically grounded in accordance with local
codes or, in the absence of local codes, with the National Electrical
Code, NFPA 70 or the Canadian Electric Code, CSA C22.1-02.
• This appliance is configurable to allow remote operation at any time.
Do not store any flammable materials or temperature sensitive items
inside oven, in storage drawer, or on top or near cooktop heating
elements of the appliance.
• Do not allow anyone to climb, stand, lean, sit, or hang on any part of
an appliance, especially a door or drawer.
• This appliance has not been evaluated for use with any 3rd party
after-market systems. Do not attempt to use this appliance with a
wok ring or any other after-market device.
• Do not cook on a broken glass cooktop – If cooktop should break,
cleaning solutions and spillovers may penetrate the broken cooktop
and create a risk of electric shock. Contact a qualified service provider
immediately for repairs.
• In the event that personal clothing or hair catches fire, drop and roll
immediately to extinguish flames.
WARNING
GENERAL USAGE
COOKTOP HAZARDS
WARNING
IMPORTANT SAFETY INSTRUCTIONS
READ ALL INSTRUCTIONS BEFORE USING THE APPLIANCE
READ AND SAVE THESE INSTRUCTIONS FOR FUTURE REFERENCE
6

IMPORTANT
SAFETY
INSTRUCTIONS
BEFORE
STARTING
INSTALLATION
INSTALLATION
PROCEDURE
CONFIRM
OPERATION
TROUBLESHOOTING
SAFETY
DEFINITIONS
• Never place anything (aluminum foil, spill mat, baking stone,
cookware, etc.) on the bottom of the oven cavity. These items can
trap heat or melt, resulting in damage to the appliance and risk of
electric shock, smoke, or fire.
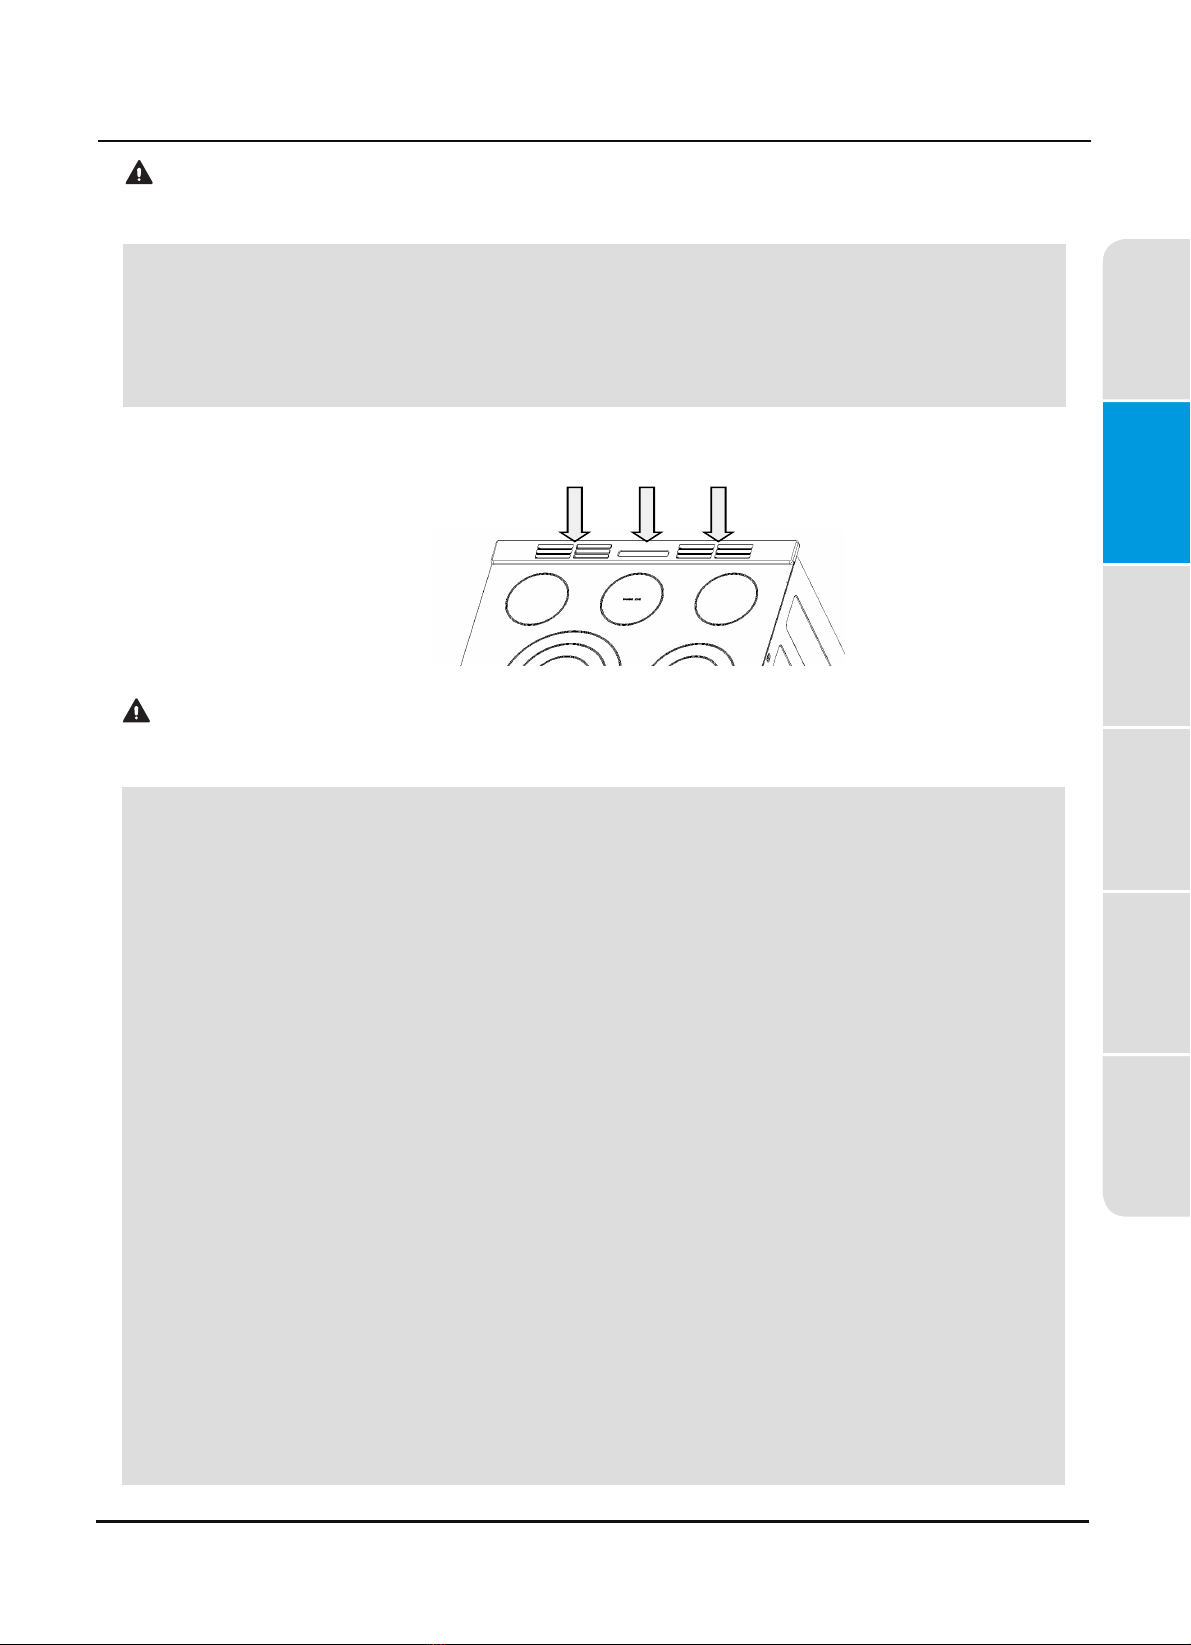
• Do not obstruct oven vents or any other slots or openings on the unit.
• According to Federal Communication Commission requirements, this
equipment has been tested and found to comply with the limits for a
Class B digital device, pursuant to part 15 of the FCC Rules. These
limits are designed to provide reasonable protection against harmful
interference in a residential installation. This equipment generates,
uses and can radiate radio frequency energy and, if not installed and
used in accordance with the instructions, may cause harmful
interference to radio communications. However, there is no guarantee
that interference will not occur in a particular installation. If this
equipment does cause harmful interference to radio or television
reception, which can be determined by turning the equipment off and
on, the user is encouraged to try to correct the interference by one or
more of the following measures:
oReorient or relocate the receiving antenna.
Increase the separation between the equipment and receiver.
Connect the equipment into an outlet on a circuit different from that
to which the receiver is connected.
Consult the dealer or an experienced radio/TV technician for help.
• This device complies with part 15 of the FCC Rules. Operation is
IMPORTANT SAFETY INSTRUCTIONS
READ ALL INSTRUCTIONS BEFORE USING THE APPLIANCE
READ AND SAVE THESE INSTRUCTIONS FOR FUTURE REFERENCE
subject to the following two conditions: (1) This device may not cause
harmful interference, and (2) this device must accept any interference
received, including interference that may cause undesired operation.
OVEN HAZARDS
WARNING
FCC NOTICE
CAUTION
Oven and cooling Vents
Do not obstruct oven vents
o
o
o
7

IMPORTANT
SAFETY
INSTRUCTIONS
BEFORE
STARTING
INSTALLATION
INSTALLATION
PROCEDURE
CONFIRM
OPERATION
TROUBLESHOOTING
SAFETY
DEFINITIONS
Parts Included with Product
Packed with the product are the following oven components and
accessories. When product is first unpacked, verify that all these
components are present. If anything is missing, check the
packaging materials carefully for missing items. If items cannot
be located, contact Midea customer service at 1-866-646-4332
BEFORE STARTING INSTALLATION
Anti-Tip Bracket Kit Oven Probe Wire Rack
Extension Rack
(some models)
Owner's Manual 4-prong 240VAC Power
Cord, Rated 50A (Products
sold in Canada only)
Materials Needed:
The utility connection and house structure at each home may be
different, so the specific parts required for connection to the house
are not included with the product. The parts identified below are
or may be required to complete the installation. Always use new
components - never use an old part for new range installation.
(not applicable to products
sold in Canada
- these are provided
with power cord)
Strain Relief for
Power Cord (supplied
with cord kit)
5/16" OD Sleeve Anchor
(with 1/4" bolt) - 2 pcs
(for concrete floors only)
Optional Rear
Trim Kit
Warning:
Before using this product,
please read this manual carefully
and keep it for future reference.
The design and specifications
are subject to change without
prior notice for product
improvement. Consult with your
dealer or manufacturer for
details.
version A - 4 - 2020
www.midea.co
Installation Instructions
Power
Circuit:
Frequency:
Capacity:
supply:
MODEL NUMBERS
(Picturesare for reference only and may not
accuratelyrepresent all models covered by this manual.)
30" Slide-In Electric Range
oven
en
14-50P GETWIREDUSA FX359
or visit midea.com/us/support for assistance.
8

IMPORTANT
SAFETY
INSTRUCTIONS
BEFORE
STARTING
INSTALLATION
INSTALLATION
PROCEDURE
CONFIRM
OPERATION
TROUBLESHOOTING
SAFETY
DEFINITIONS
Tools Needed:
To complete the installation, have the following tools readily available:
Cut Resistant Gloves,
Safety Glasses or Goggles,
and Steel-Toed Shoes
(for your safety and
protection)
Drop Cloth or
Cardboard (optional
- to protect floor)
Tape Measure
(to confirm
installation space)
Phillips Screwdriver
(to access serviceable
covers)
Nut Driver
(for electrical connections)
Pencil and Ruler
(for anti-tip bracket
installation)
Drill and 1/8" Drill Bit
(for anti-tip bracket
installation)
Level
(for leveling product)
Masonry Drill Bit
(for anti-tip bracket
installation - concrete
floors only)
Adjustable Groove
-Joint or Gooseneck Pliers
(for leveling product)
9

IMPORTANT
SAFETY
INSTRUCTIONS
BEFORE
STARTING
INSTALLATION
INSTALLATION
PROCEDURE
CONFIRM
OPERATION
TROUBLESHOOTING
SAFETY
DEFINITIONS
• Installation and service must be performed by a qualified installer or
service agency.
Remove Old Appliance
• When installing, moving, or servicing any appliance, wear proper
protective equipment, including cut resistant gloves, steel-toed shoes,
and safety glasses.
If the new range is replacing an existing installation, first remove the old
appliance.
Directions:
• Shut off the electrical supply to the range at the breaker box or fuse
box. Leave it off until the installation has been completed.
• Move appliance to access the electrical connections.
• Disconnect electrical connections and move appliance out of and
away from installation space.
Electrical Supply Requirements
• Installation must be electrically grounded in accordance with local
codes or, in the absence of local codes, with the National Electrical
Code, NFPA 70 or the Canadian Electric Code, CSA C22.1-02.
FIRE,EXPLOSION HAZARD
WARNING
LACERATION, FOREIGN OBJECT, CRUSH HAZARD
CAUTION
ELECTRICAL SHOCK HAZARD
WARNING
10
Otros manuales para MES30S2AST
1
Este manual sirve para los siguientes modelos
1
Tabla de contenidos
Idiomas:
Otros manuales de Rango de Midea

Midea
Midea FP-63GSR060MMG0-T1 Manual de usuario

Midea
Midea MES30S2AST Manual de usuario

Midea
Midea FP-63GSR050MMGO-B1 Manual de usuario

Midea
Midea MY-CS5039 Manual de usuario

Midea
Midea MER30B12AWWC Manual de usuario

Midea
Midea MGS30S2AST Manual de usuario

Midea
Midea FP-63GSR050MMGE-T1 Manual de usuario

Midea
Midea MGS30S2AST Manual de usuario