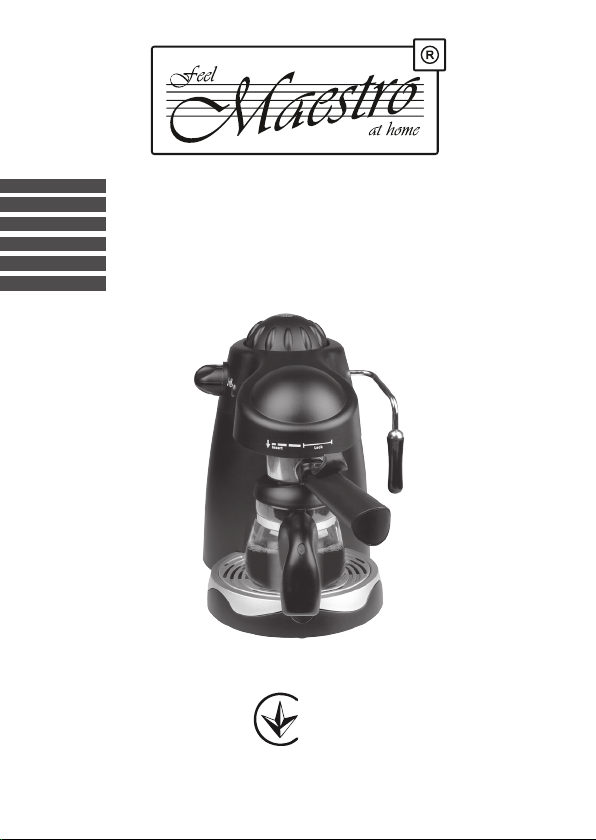
Maestro MR410 Manual de usuario

Model/Модель: MR410
076
Сerticated in Ukraine
Виріб сертифіковано в Україні
Owners manual. Espresso maker
Eksploatavimo vadovas. Espreso kavos virimo aparatas
Instrukcji obsługi. Ekspres do kawy cisnieniowy
Manualul proprietarului. Cafetieră espresso
Руководство по эксплуатации. Кофеварка эспрессо
Керівництво з експлуатації. Кавоварка еспресо
EN
LT
RO
PL
UA
RU

2 3
Pictures/ Paveikslai/ Rysunki/ Figuri/ Рисунки/ Малюнки 1
Dear customer, we thank you for purchase of goods
Functionality, design and conformity to the quality standards
guarantee to you reliability and convenience in use of this device.
Please read and comply with these original instructions prior to the
initial operation of your appliance and store them for later use
of subsequent owners.
Coffee Maker is designed only for coffee «espresso» making in the
household (home) environment.
Under condition of observance of user regulations and a special-
purpose designation, a parts of appliance do not contain unhealthy
substances.
Technical specications
Model MR410
Electrical supply:
Alternating current- AC;
Rated voltage 220-240V;
Rated frequency 50Hz;
Power consumption 800W
Protective class I
Protection class IPX0
EN

4 5
Description of the appliance
Picture1 (page 2)
1. Lid of water tank
2. Steam nozzle
3. Detachable lter holder
4. Detachable plate
5. Glass carafe
6. Body
7. Indicator light
8. Control knob
Switch Positions:
- Off
- Coffee making
- Steam supply into the steam nozzle
9. Brew head with the established grid (secured with screws).
Safety instructions
When using your appliance, basic safety precautions should
always be followed, including the following:
SPECIAL INSTRUCTIONS
ATTENTION!
- Do not allow the ingress of water and moisture on the internal
electric parts of the device located outside the container for water.
- Always unplug the coffee maker from the mains for lling with
water, cleaning.
- Do not take the appliance with wet hands.
- Only plug the appliance into an outlet with an earthed (ground)
contact.
Failure to observe these rules may result in electric shock!
- DO NOT let children or untrained persons use the
appliance without supervision.
- DO NOT leave the appliance unnecessarily plugged in. Disconnect
the plug from the mains when the appliance is not being used.
- DO NOT use the power cord or the appliance in order to pull the
plug out of the socket.
- DO NOT leave the appliance exposed to the weather (rain, sun,
etc.).
- DO NOT leave the appliance without supervision when it is
connected to the power supply.
- Close supervision is necessary when the appliance is used near
children.
- Always use the appliance on a dry, level surface.
- Always unplug from the plug socket when not in use and before
cleaning.
- Do not operate the appliance if damaged, after an appliance
malfunctions or it has been damaged in any manner, return to at
authorized service engineer for repair.
- In the interest of safety, regular periodic close checks should be
carried out on the supply cord to ensure no damage is evident.
Should there be any signs that the cord is damaged in the slightest
degree, the entire appliance should be returned be authorized
service engineer.
- Do not let the cord hang over the edge of a table or counter or
touch hot surfaces. Allow unit to cool before storage.
- Do not touch any hot surfaces, do not store or cover the appliance
until it has full cooled down.
- Do not use harsh abrasives, caustic cleaners or oven cleaners
when cleaning this appliance.
- This appliance is not intended for use by persons (including
children) with reduced physical, sensory or mental capabilities, or
EN

6 7
lack of experience and knowledge, unless they have been given
supervision or instruction concerning use of the appliance by a
person responsible for their safety.
- Children should be supervised to ensure that they do not play with
the appliance.
ATTENTION!
- Do not open the lid during operation. Wait until the working cycle
of the machine is nished, all the steam will come out. Before
opening the cover in order to reset the nal pressure in the basin
turn off the Coffee Maker from electric supply and briey
change the switch into the position . Cover needs to open
carefully.
- Unplug the coffeemaker and let it cool for at least 5 minutes to
rell water and change coffee powder.
- Do not carry the device while it is operating.
- Do not ll the machine with water above the maximum level
(300ml).
- Set the appliance on a dry, stable, at, non-slip surface.
- Carry the ask with a hot drink only by a handle.
- Do not touch metal surfaces of the lter, and the lter during
operation or immediately after operation.
In case of failure to observe the above mentioned rules there
arises the danger of burning!
- Do not place the appliance on heating devices.
- Do not switch the appliance on without water.
- Turn on the machine only when the bulb holder and lter are in
place.
- Before making each new portion of the drink, unplug the Coffee
Maker and allow it to cool for at least 5 minutes.
- Treat the bulb carefully; do not pour in cold water into if a ask is
not chilled. Do not place hot ask on a wet or cold surface.
- THIS APPLIANCE IS FOR HOUSEHOLD USE ONLY.
DO NOT USE THE APPLIANCE FOR ANYTHING OTHER THAN
INTENDED USE.
Purchase industrial devices for commercial use.
Actions in extreme situations:
- If a device tumbled into water, immediately, unplug the device, not
touching to the device or water.
- In case of appearance from appliance of smoke, sparkling, strong
smell of a burn isolation, immediately stop use the device, unplug
the device, appeal to the nearest service center.
Operation
Before the rst use:
- Remove packing and advertising materials and stickers.
- Inspect the appliance and make sure that there are no damages
appliance, power line cord and plug.
- Unwind the power line cord completely.
- Place the appliance on a dry, even, stable surface.
CAUTION! Is required on surfaces where heat may cause a
problem – an insulated heat pad is recommended.
It is recommended for the preparation of coffee to use well-roasted,
freshly ground coffee and cold puried water.
ATTENTION Coffee Maker during operation maintains pressure
in the basin automatically, which can cause valve actuation and
discharge of the lid overpressure. If the response came after some
time of operation, and became frequent, do the cleaning of the
cooking grid and internal parts from the scale.
EN

8 9
MAKING ESPRESSO COFFEE
The preparation of espresso coffee involves hot water being
forced through ne coffee grounds under high pressure, This giver
espresso coffee its aromatic and strong taste ,it is essential to use a
good roasted bean with the correct grinding.
1. Place the coffee lter cone on the detachable lter holder;
2. Make sure the switch is in « » position.
3. Add the required amount of espresso coffee powder using the
coffee scoop provided with the machine (follow the marking inside
the coffee lter)
4. Locate the detachable lter holder in «LOCK» position;
5. Open the lid of water tank; ll the glass carafe with required
amount of water and pour the water into the water tank, Do not pour
in more than 300ml of water and no less than 130ml of water;
6. Close the lid of water tank ensure that it is on tight;
7. Place the glass carafe under the detachable lter holder;The
glass carafe must be positioned such that the opening of the glass
carafe lid faces the spout of the detachable lter holder;
8. Plug in the machine;
9. Set the control knob to the « »position, thus the indicator
light should be light up and espresso coffee will start the operation;
10. When all the water has run through the lter into the glass
carafe, wait until all the water in the boiler has been used, set the
control knob to the « »position and unplug from power supply.
CAUTION:
Do not unscrew the lid of water tank while the machine is in
operation.
You can stop working cycle by turning the control knob to the « »
position any time.
Wait until brewing cycle is completed and steam has been used
up (You can set the control knob to the « »position for
eliminating the remaining pressure);
Before re-using the espresso machine switch it off and allow it to
cool down for about 5 minutes.
MAKING CAPPUCCINO COFFEE
A cappuccino is an espresso coffee with a froth topping made by
heating milk.
1. Fill the jug with the required amount of milk; The jug should
be large enough to allow the milk to expand to around treble its
volume;
2. According to the directions from step 4 to 10 in section “
Making Espresso coffee” ,
3. As soon as the water reaches the “2” symbol on the glass carafe
« », Set the control knob to the « »position. At this time, the
unit has created enough pressure and steam to start frothing the
milk;
4. When sufcient milk froth has been produced, Set the control
knob to the « »position, wait until all the water in the boiler has
been used, set the control knob to the « » position and unplug
from power supply;
5. Pour the coffee into the cups and place the milk froth on the
surface.
Scale removal
When using the device, the so-called «scale», lime deposits
are formed in its inner parts. Regular cleaning improves the
performance of the device.
The quantity and the speed of forming the scale, and consequently,
the necessity of cleaning depend on the water hardness in your
region and the intensity of the device usage.
EN

10 11
If the Coffee Maker is used 1-2 times a day, depending on the water
quality, it is recommended to clean the instrument at least:
- Soft water – I time every 6 months;
- Medium self-scaling - 1 time / 2-3 months;
- Hard - 1 time / 6-8 weeks.
Regular descaling will only improve the device performance.
For cleaning you can use a ready means for cleaning coffee
makers, or use natural products such as citric or tartaric acid.
Before descaling, unscrew the screw and remove the cooking grid
from the brew head.
Remove any scum and residues of coffee cooking grid and the brew
head.
Fill the reservoir with 300ml solution consisting of water and 2
tablespoons of citric acid.
Turn on the Coffee Maker and do one or two cycles without lters
and coffee.
After washing with a solution, do 2 cycles of clean water.
Set the cooking grid into the brew head. Remove and wash the
basin cover with warm water.
Cleaning and maintenance
ATTENTION!
- Never clean the appliance connected to mains.
- Before cleaning, disconnect the appliance and let it cool down.
- Do not use abrasive and aggressive detergents.
- Never submerge the appliance, power line cord and plug in water
or other liquids.
- Do not clean the basin in the dishwasher.
For regular cleaning of the device wash all removable parts with
water (lter, holder, stand) using a soap solution or a mild
detergent, rinse it carefully under running water.
Clean the lter from residues of coffee thoroughly. The purication is
conveniently performed using a small brush.
Clean and dry all parts of the device prior to assembly and use.
Storage
- Switch off the appliance and let it completely cool before storage.
- Wipe and dry the appliance before storage.
- Store the appliance in a cool, dry and clean place beyond the
access of children and people with limited physical and mental
abilities.
Environmental protection
Old appliances contain valuable materials that can be recycled.
Please arrange for the proper recycling of old appliances. Please
dispose your old appliances using appropriate collection systems.
Subject to technical modications!
Possible problems and their solutions
EN
Problem Possible cause Solution
Coffee ows
through the lter
of outer wall
Filter holder is not correctly
installed.
Next time install the
lter properly.
Edge lter is not cleaned
from ground coffee residues
Before lter installing
clean the edge and
the gasket.
After prolonged use, gasket
has lost elasticity and needs
to be replaced.
Replace the gasket

12 13
Coffee does not
ow at all
No water in the basin Pour water in.
Coffee lter is too thickly
packed.
Do not pack coffee
too thick.
Cooking grid is overfull. To
check turn the coffee maker
with water, move the switch
to the mode . Water
should ow out of the brew
head. If not, the grid must
be removed and cleaned.
After cooling and
release of pressure,
remove and clean
the mesh.
Too much scale. Perform descaling
(See Descaling).
During operation
depres-
surization valve
of pressure
relief frequently
actuates in the
cap of the basin.
See above. Causes of no
coffee ows (except for the
absence of water).
See above Solution
if coffee does not
ow.
Too much water in the basin Do not overfull the
basin with water.
When foaming,
too little milk or
there is no foam
at all
No water in the basin Pour water in
Steam nozzle tube is
clogged.
Clean or seek
the assistance of
Service experts.
Milk is too warm Cool it.
Milk is not fresh Use only fresh
products.
Not suitable quality of milk
(too much fat).
Use milk with lower
fat containment.
Not suitable vessel The optimum form
is the jar-like.
Dėkojame, kad nusipirkote
Funkcionalumas, dizainas ir kokybės standartų atitikimas
garantuoja Jums šio prietaiso patikimumą bei naudojimo patogumą.
Prašome atidžiai perskaityti šį eksploatavimo vadovą ir išsaugoti jį
kaip žinyną, kuriuo naudositės prietaiso eksploatavimo metu.
Kavos virimo aparatas skirtas tik espreso kavos paruošimui
buitinėmis (namų) sąlygomis.
Su sąlyga, kad laikysitės eksploatavimo taisyklių ir naudosite
prietaisą tik pagal paskirtį, gaminio dalyse nėra sveikatai
kenksmingų medžiagų.
Techninės charakteristikos
Modelis: MR410
Elektros maitinimas:
Srovės rūšis – kintamoji;
Nominalus dažnis 50 Hz;
Nominali įtampa (diapazonas) 220-240 V;
Nominalus galingumas 800W;
Elektros saugos klasė I;
Korpuso apsauga nuo drėgmės - paprastoji, atitinka IPХ0;
LT

14 15
Prietaiso dalys
Paveikslas 1 (2 puslapis)
1. Vandens rezervuaro dangtis
2. Garų antgalis pieno putų paruošimui
3. Nuimamas ltro laikiklis
4. Kolbos stovas (nuimamas)
5. Kolba iš karščiui atsparaus stiklo
6. Korpusas
7. Šviesos indikatorius
8. Išjungiklis/režimų jungiklis
Jungiklio pozicijos:
-išjungta
-kavos virimas
-garai patenka į garų antgalį
9. Kaušelis kavai su įtaisytu tinkleliu (pritvirtinta varžtu)
Saugos priemonės
Gerbiamas naudotojau, laikydamiesi bendrųjų saugos
reikalavimų ir šiame vadove pateiktų taisyklių Jūs užtikrinsite
šio prietaiso naudojimo saugumą.
DĖMESIO!
- Niekada nemerkite elektros prietaiso, jo laido ir kištuko į vandenį
ar kitą skystį.
- Neimkite prietaiso šlapiomis rankomis;
- Prieš pilant vandenį ar prieš valant visuomet išjunkite kavos virimo
aparatą iš elektros lizdo.
Nesilaikant šių taisyklių, kyla pavojus nukentėti nuo elektros
srovės!
- Niekada nepalikite įjungto elektros prietaiso be priežiūros!
- Visuomet ištraukite kištuką iš lizdo, kai baigiate naudotis
prietaisu, taip pat prieš valant ir saugant. Prieš išjungdami iš
tinklo, perjunkite jungiklį, kad jis būtų padėtyje OFF – išjungta.
- Draudžiama išjungti prietaisą iš elektros tinklo (lizdo) traukimo
metu laikant už laido.
- Prieš pradėdami naudotis prietaisu, įsitikinkite, kad ant prietaiso
nurodyta maitinimo įtampa atitinka Jūsų namų elektros tinklo
įtampą.
Prietaisą galima įjungti tik į įžemintą elektros lizdą. Įsitikinkite, kad
Jūsų namuose esantis lizdas atitinka prietaiso vartojamą galingumą.
Elektrinių ilgiklių arba tinklo kištuko adapterių naudojimas gali tapti
elektros prietaiso sugadinimo ir gaisro priežastimi.
- Niekuomet nenaudokite prietaiso, jei pažeistas laidas arba
kištukas, jeigu prietaisas neveikia tinkamai, jei prietaisas
yra pažeistas arba pateko į vandenį. Netaisykite prietaiso
savarankiškai, kreipkitės į artimiausią aptarnavimo centrą.
- Šis prietaisas neskirtas vaikams ir žmonėms su zine ar protine
negalia, taip pat žmonėms, neturintiems žinių ir darbo su buitiniais
prietaisais patirties, jei jų naudojimas tokiais prietaisais nėra
kontroliuojamas, arba jie neišklausė už jų saugumą atsakingo
asmens instruktažo.
- Neleiskite vaikams žaisti su prietaisu ir pakuotės medžiagomis.
- Neleiskite, kad maitinimo laidas liestųsi su įkaitintais ar aštriais
paviršiais.
- Neleiskite maitinimo laidui stipriai įsitempti, kabėti nuo stalo krašto,
venkite jo sulenkimų ir susisukimų.
- Saugokite prietaisą, kad jis nenukristų.
- Nenaudokite prietaiso lauke.
- Nenaudokite prietaiso perkūnijos, audros metu. Esant tokioms oro
sąlygoms, galimi tinklo įtampos šuoliai.
LT

16 17
DĖMESIO!
- Neatidarinėkite dangčio prietaisui veikiant. Palaukite, kol
pasibaigs aparato darbo ciklas ir išeis visi garai. Prieš atidarydami
dangtį, tam, kad rezervuare nusileistų likęs slėgis, rekomenduojame
išjungti kavos virimo aparatą iš elektros tinklo ir trumpam perjungti
jungiklį į poziciją .
- Atidarinėkite dangtį lėtai.
- Norėdami įpilti vandens ar pakeisti kavą, išjunkite kavos virimo
aparatą ir leiskite jam ataušti ne mažiau kaip 5 min.
- Neneškite įjungto veikiančio prietaiso į kitą vietą.
- Nepilkite į prietaisą vandens daugiau nei iki maksimalaus lygio
žymės.
- Statykite prietaisą tik ant sauso, stabilaus, lygaus, neslidaus
paviršiaus.
- Neškite kolbą su karštu gėrimu laikydami ją tik už rankenos.
- Atsargiai elkitės su kolba, nepilkite į neatvėsusią kolbą šalto
vandens. Nestatykite karštos kolbos ant drėgno arba šalto
paviršiaus.
- Naudojimo metu ir iš kart po jo nelieskite metalinių ltro laikiklių ir
ltro paviršių.
Nesilaikant aukščiau nurodytų taisyklių kyla nudegimų pavojus!
- Nenaudokite savo prietaiso kitiems tikslams, išskyrus nurodytus
šiame vadove.
Norėdami naudoti komercijos tikslais, įsigykite pramoninės
paskirties techniką.
Veiksmai ekstremaliose situacijose:
- Jei įrenginys įkrito į vandenį, nedelsiant ištraukite kištuką iš lizdo,
nelieskite paties įrenginio ar vandens.
- Jei iš elektros prietaiso pradeda eiti dūmai, žiežirbos, stiprus
degančios izoliacijos kvapas, nedelsiant nustokite naudotis
prietaisu, ištraukite kištuką iš lizdo, kreipkitės į artimiausią
aptarnavimo centrą.
Prietaiso naudojimas
Parengimas darbui
Prieš naudojant pirmą kartą pašalinkite pakuotės elementus,
įsitikinkite, kad nei viena prietaiso dalis nepažeista.
Kavos paruošimo proceso esmė yra ta, kad karšto vandens lašai ir
garų dalelės spaudžiamos rezervuare esančiu slėgiu prasiskverbia
pro sumaltą kavą.
DĖMESIO! Kavos virimo aparato veikimo metu rezervuare
automatiškai palaikomas tam tikras slėgis, dėl kurio gali suveikti
dangtyje esantis vožtuvas ir tuomet perteklinis slėgis bus
išleidžiamas. Jeigu vožtuvas pradeda veikti eksploatavimo metu ir
suveikia dažnai, pašalinkite kalkių nuosėdas nuo virimo tinklelio ir
kitų vidinių dalių.
Espreso kavos paruošimas
1. pastatykite kavos virimo aparatą ant lygaus stabilaus paviršiaus;
2. Įsitikinkite, kad kavos virimo aparato jungiklis yra padėtyje « ».
3. Naudojant šaukštą, kuris yra šiame rinkinyje, į ltrą (pagal ltro
viduje esančias žymes) įberkite reikiamą sumaltos kavos kiekį.
Nespauskite ir nepresuokite kavos, nubraukite jos likučius nuo ltro
kraštų.
4. Laikiklį su ltru įstatykite ant kavos virimo aparato ir užksuokite
sukdami, kol žymė ant laikiklio sutaps su ant kavos virimo aparato
korpuso esančiu užrašu «LOCK».
5. Išjunkite ir nuimkite dangtį. Į kolbą įpilkite švaraus šalto vandens
ne daugiau kaip 300 ml ir ne mažiau kaip 130 ml vandens. Tuomet
pripildykite prietaiso rezervuarą. Norėdami įpilti vandens į kavos
virimo aparatą, nekiškite jo po vandens čiaupu;
LT

18 19
6. Užsukite dangtį;
7. Pastatykite kolbą ant stovo taip, kad kolbos dangtyje esanti anga
būtų po ltro laikikliu;
8. Įkiškite kištuką į lizdą;
9. Įjunkite kavos aparatą nustatydami jungiklio padėtį ties « » .
Įsijungs šviesos diodas, prietaisas pradės veikti. Po kurio laiko į
kolbą pradės sunktis kava (švilpimo ir burbuliavimo garsai – tai
normalu).
10. Kai rezervuare neliks vandens, išjunkite kavos virimo aparatą
jungikliu, nustatydami jo padėtį ties « » – išjungta. Šviesos
diodas ir prietaisas išsijungs. Ištraukite kavos virimo aparato
kištuką iš elektros lizdo.
DĖMESIO! Nustačius jungiklio padėtį į « », vandens šildymą
galima sustabdyti bet kuriuo metu. Prašome atkreipti dėmesį, kad
rezervuare slėgis gali likti. Tam, kad jis išeitų, prieš atidarydami
dangtį išjunkite kavos virimo aparatą iš elektros tinklo ir trumpam
nustatykite jungiklio padėtį į .
Norėdami iš naujo paruošti kavos, nuimkite ir kruopščiai išvalykite
ltrą, po to įberkite šviežios maltos kavos.
Kapučino paruošimas
Kapučino arba espreso kava su putomis ruošiama į kavą įdedant
pieno putų.
Į tinkamą indą (pageidautina siaurą, panašų į ąsotėlį) įpilkite
reikiamą kiekį pieno. Indas turi būti pakankamai didelis, kad jame
tilptų pagamintos pieno putos, kadangi pieno tūris padidėja 3 kartus.
Atlikite veiksmus 4 – 9, nurodytus „Espreso kavos paruošimas“
skyriuje.
Kai tik vanduo stiklinėje kolboje « » pasieks «2», nustatykite
jungiklį ties « ». Tuo metu aparatas parūpins pakankamą garų
slėgį. Jei norite pradėti gaminti pieno putas, panardinkite garų
antgalį į pieną taip, kad jis atsiremtų į indo dugną. Nustatykite
jungiklį ties ir pienas pradės putoti.
Kai pieno putų bus pakankamai, nustatykite valdymo jungiklį
ties « », palaukite, kol bus sunaudotas visas vanduo, po to
nustatykite valdymo jungiklį ties « »ir ištraukite kištuką iš lizdo.
Įpilkite kavą į puodelius, o ant viršaus uždėkite pieno putų.
Po to, kai baigsite naudotis antgaliu, nuvalykite jį drėgna šluoste
Nuosėdų pašalinimas
Prietaiso naudojimo metu ant jo vidinių dalių atsiranda kalkių
nuosėdų, vadinamų „nuoviromis“. Nuovirų atsiradimas ir jų kiekis,
o tai reiškia ir būtinybė jas šalinti, priklauso nuo vandens kietumo
Jūsų regione ir prietaiso naudojimo intensyvumo.
Jei kavos virimo aparatas naudojamas 1-2 kartus per dieną,
priklausomai nuo vandens kokybės, rekomenduojame valyti
prietaisą ne rečiau nei:
Minkštas vanduo – 1 kartą per 6 mėn.;
Vidutinis vandens kietumas – 1 kartą per 2-3 mėnesius;
Kietas vanduo - 1 kartą per 6-8 savaites.
Reguliarus kalkių nuosėdų šalinimas tik pagerins prietaiso savybes.
Norėdami pašalinti nuosėdas Jūs galite naudoti paruoštus kavos
virimo aparatų valiklius, arba natūralias priemones, tokias kaip
citrinos arba vyno rūgštis.
Prieš valant nuosėdas atsukite varžtą ir nuimkite virimo tinklelį nuo
kaušelio kavai.
Pašalinkite nuosėdas ir kavos likučius nuo virimo tinklelio ir kaušelio
kavai.
Įpilkite į rezervuarą 300 ml tirpalo, kurį sudaro vanduo ir 2-ų
valgomieji šaukštai citrinos rūgšties.
Įjunkite kavos virimo aparatą ir atlikite vieną arba du ciklus be ltro
ir kavos.
LT
Tabla de contenidos
Idiomas:
Otros manuales de Cafetera de Maestro

Maestro
Maestro MR402W Manual de usuario

Maestro
Maestro MR401 Manual de usuario

Maestro
Maestro MR400 Manual de usuario

Maestro
Maestro MR403 Manual de usuario

Maestro
Maestro MR-415 Manual de usuario

Maestro
Maestro MR406 Manual de usuario

Maestro
Maestro MR-402B Manual de usuario

Maestro
Maestro MR453 Manual de usuario

Maestro
Maestro MR402 Manual de usuario


