Maclean Energy MCE502 Manual de usuario

EN I Electric Glass Panel Heater
with WiFi Control
Instruction Manual
MCE502
Please read the manual carefully prior to use

Safety Instructions
Read the manual before you use the heater. Keep the manual and ensure it
stays with the heater if you give it to a new owner.
Before use, check that the heater and all supplied accessories are complete and
intact.
he heater must be installed as per installation instructions. he heater must be
plugged into a socket that meets the following requirements: AC 230V,
frequency 50/60Hz.
he heater is only suitable for indoor use. Do not use it outdoors!
Do not leave the heater unattended during use. Keep the heater out of the reach
of children: risk of burns.
Do not use an external controller with the heater. he heater must not be set to
switch on when it will be unattended.
Do not use the heater near flammable or explosive materials: risk of fire or
explosion.
Inserting items into the protective grill of the heater is strictly prohibited: risk of
electric shock.
Do not touch the metal housing as it will get hot when the heater is in use: risk of
burns. Set aside some time to let the heater cool before you turn it off and store
it.
Unplug the heater if it is going to be out of use for a long time.
Prior to each use of the electric heater, make sure it is in a good condition and
intact. Do not plug in or use the heater if the casing, wire or plug are damaged.
he heating element may be damaged if the heater is dropped or hit. Check that
the element is not damaged prior to each use. Do not use the heater if the
element is broken.
Disconnect the plug from the socket when moving or cleaning the heater. When
disconnecting, first turn off the switch, then unplug the plug. Do not yank the
cable.
Demolition of the electric heater without authorization is strictly prohibited.
Please look for professional service personnel if the heater is damaged.
he product is limited to home use only.
During use, do not let bare skin touch the surface of the appliance: risk of burns.
Do not share the heater’s socket with other appliances: risk of fire due to
excessive load.
CAU ION: never cover the heater. Covering the heater risks overheating and
fire.
he heater must not be located immediately below an electrical socket-outlet.
If the supply cord is damaged, it must be replaced by the manufacturer, its
service agent or a similarly qualified person to avoid a hazard.
Avoid the use of an extension cord as this may overheat and cause a fire risk.
his heater is not intended for use in bathrooms, laundry areas or similar
locations where there may be moisture. Never place the heater where it may
fallinto a bathtub or other water receptacle

Do not use the heater in the immediate surroundings of a bath, shower or
swimming pool.
Children of less than 3 years should be kept away unless continuously
supervised.
Children aged from 3 years to 8 years shall only switch on/off the appliance
provided that it has been placed or installed in its intended normal operating
position and they have been given supervision or instruction concerning use of
the appliance in a safe way and understand the hazards involved. Children aged
from 3 years and less than 8 years shall not plug in, regulate and clean the
appliance or perform maintenance.
his appliance can be used by children aged 8 years and above and persons
with reduced physical, sensory or mental capabilities or lack of experience and
knowledge if they have been given supervision or instruction concerning use of
the appliance in a safe way and understand the hazards involved. Children shall
not play with the appliance. Cleaning and user maintenance shall not be made
by children without supervision.
CAU ION: some parts of this product can become very hot and cause burns.
Particular attention must be given where children and vulnerable people are
present.
Installation Instructions
Before installing, check that all parts are complete and the product is intact.
If you want to use the electric heater freestanding, please fit with the feet
provided with the heater, following the instructions below. Make sure the heater
is mounted on a level, stable and clean surface.
Freestanding Installation
1. Put the product upside down on a
soft cotton cloth or carpet.
2. Fix the feet to the base of the
heater using the screws provided.
Line up the holes in the base with
the holes in feet, put the screws
through the holes and tighten with
a screwdriver.

Wall Mounted Installation
4 Hoo Type Brac et
1. ake out 4 brackets, 6 expansion screws and 6 screws out from the box, and fix 2 brackets
onto the wall according to the distances between holes of the bracket, as depicted in the
picture below.
2. Fix 2 brackets onto the bottom of productst, as depicted in the picture below.

3. Hold the side of the product, look at the position of the wall hole of the rear cover, and slide the
wall to the top of the slot, that is, the installation of the wall is completed, as depicted in the picture
below.
Note: Prior to the drilling, make sure there is no cable or other pipelines on the wall to avoid damage.
Remember that the screws on the wall shall be fixed and firm to ensure the safety installation of the
electric heater on the wall. Please note the safe distance mentioned below.
During installation, the heater must be maintained sufficiently safe distance from combustible
materials and gas and away from water.
During wall-hanging installation, keep the installation height from the ground greater than 15 cm.
Hanging-type heater shall be no less than 50 cm away from the ceiling.

Using the Heater
Control Pad
Display Screen
WiFi Connection Keyboard Lock
Comfort Mode
Eco Mode
Current emperature
imer
Working Status –
Anti-Frost Mode
Displays temperature or
timer settings
heating if icon
displayed, not
heating if not
displayed

Heater Control Panel
• he heater will beep as it power on. he heater starts on standby mode, displaying the
WiFi icon and the current temperature of the room in
• press the ON/OFF button. You will see the heating icon and the ECO mode icon
. his means the device is in the ECO mode state.
• o change heating mode, press the MODE button to cycle through the modes: ECO
mode ,Comfort mode and anti-frost mode . he mode icons will flash as you
cycle through them. After a few seconds the mode icon will stop flashing and the heater will heat in
that mode.
• o adjust the set temperature of any of the modes, You can then use the UP and DOWN
buttons to adjust the temperature. emperature range is from 5°C –50°C.
• o set the timer, press the IME button while the heater is in heating mode. imer range
is 1 – 24 hours. he digits will flash while setting and then the screen will return to heating mode.
he timer icon on the screen will show that the timer has been set. he heater will heat until
the time has elapsed.
• o schedule your heater to switch on later, press the IME button while on standby
mode. U. Delay range is 1 – 24hours. he digits will flash while setting and then the screen will
return to heating mode. he timer icon on the screen will show that the timer has been
set. he heater will switch on when the delay has elapsed.
• o set the child lock, press and hold the UP button. he padlock icon will appear on
the screen and the control panel will be locked out. o release, press and hold the down
button. he padlock icon will disappear, indicating that all the buttons can be used again.
• he remote control button and function all same heater control panel ,but the remote control
without hold press function ,the more use distance is 2M.
•long press the time button can turn off all the display lights and press any key to light up the
display screen of the product. the product enters the low light mode after pressing the stop press
the button for 30 seconds.In the low light mode, control the product through the APP, the product
will not sound!

Connecting to WiFi
1. o connect your heater to the WiFi, the first step is to download the Smart Life
app onto your smart phone or tablet. You can find the app by scanning the QR
code below or searching “Smart Life” in the Google Play or Apple app store.
2. Download and install the app. Unless you already have a Smart Life account, you
will need to create an account by tapping Register.
he device will automatically determine your country, although you can
change this if necessary. Enter your phone number or email address. If you
enter a phone number, a verification number will be sent to your phone:
enter this number to verify, then create a password. If you enter your email
address, you’ll just need to create a password.
3. o add your heater to the app, first put the heater in WiFi connection mode. he
heater is in WiFi connection mode when the WiFi icon is flashing. If the wifi
icon is not flashing, go to standby mode and hold down the button for three
seconds.
4. Once the icon is flashing, go to the app and press Add a Device. Select the
device type (Small Appliances > Heater) and confirm that the indicator is
flashing. You will then be prompted to enter your WiFi password. his allows
the app to find your heater using your WiFi.

5. he app will then display its connecting screen.
NOTE if the heater is failing to connect, press and
hold the button for three further seconds.
It will then switch to its secondary connection
mode. he heater has two connection
modes: one where the
icon flashes slowly (once per second) and one
where the icon flashes fast (three times per
second). Most devices will connect on the fast
flashing mode.
6. he heater will beep and display a solid icon when the device is connected.
he app will confirm that the heater has been added. You can now name
the device, share it with family members, or proceed to scheduling your
heating.
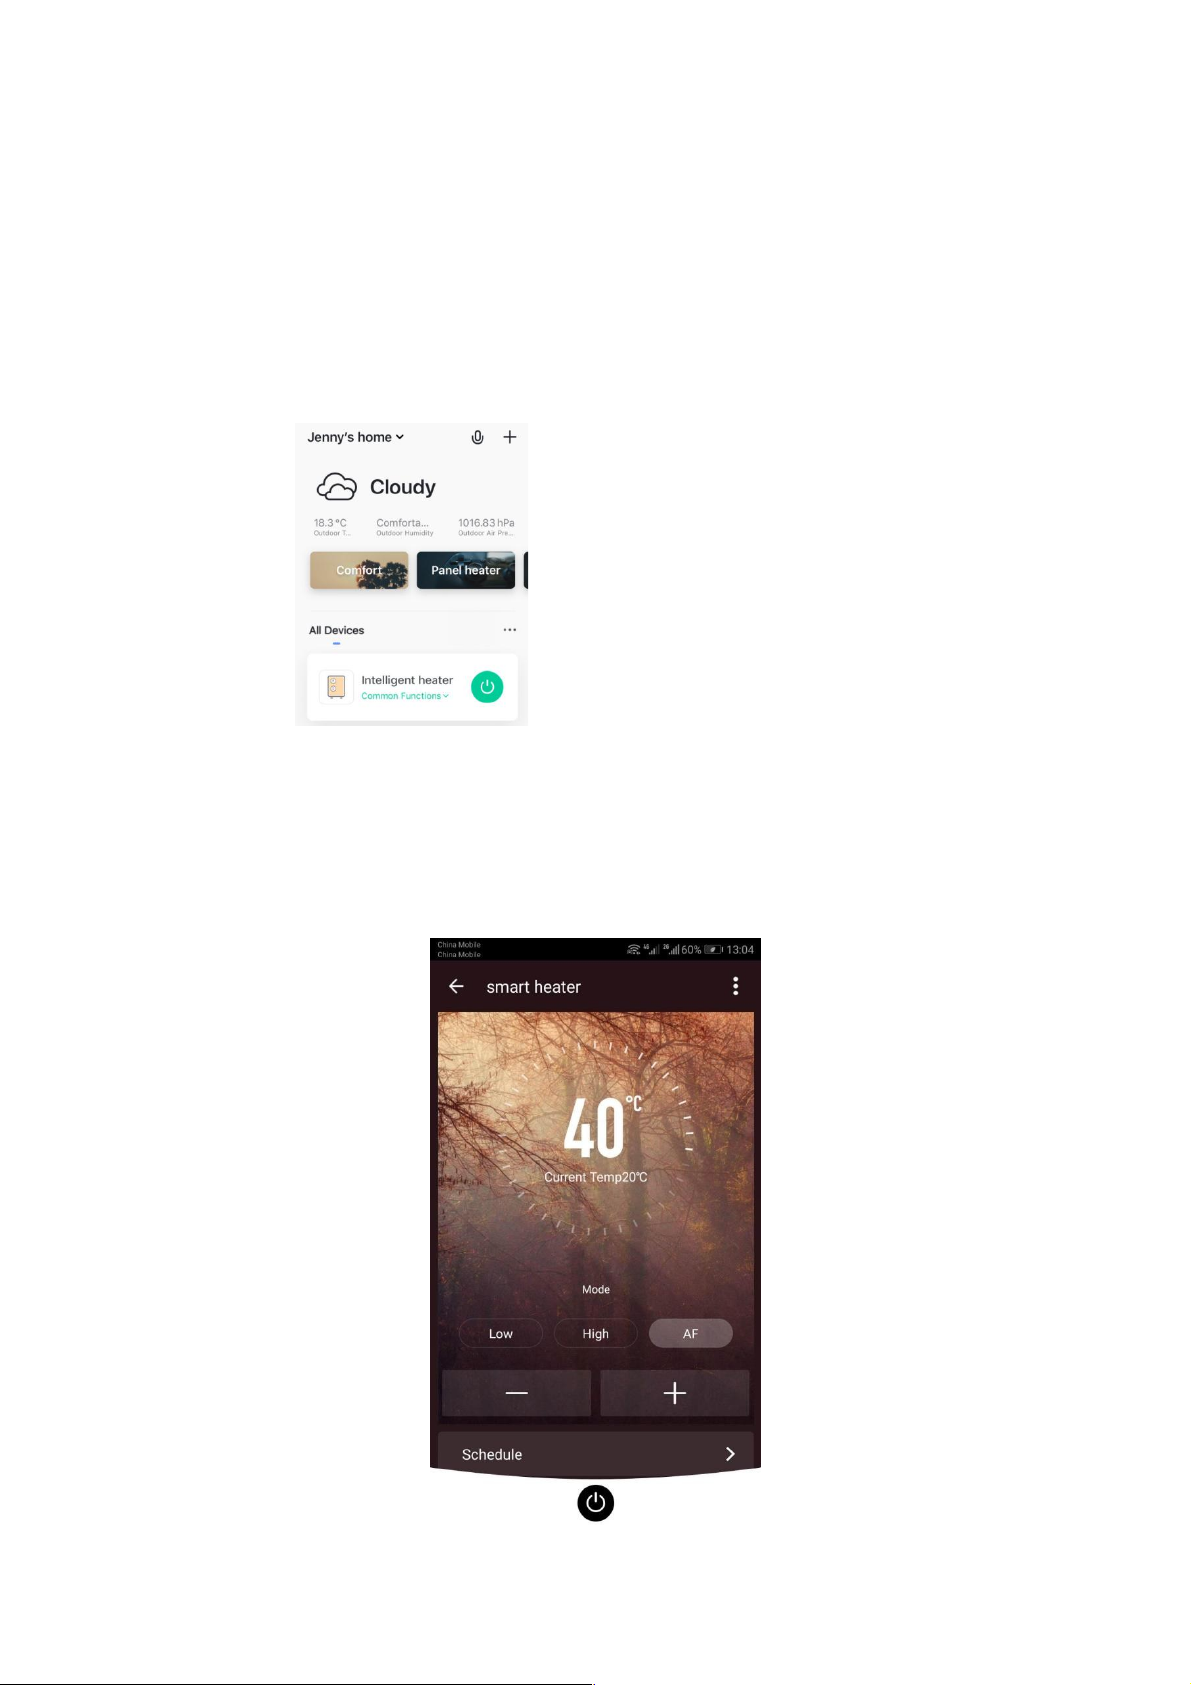
Using the Smart Life App
You can use the app to control multiple devices. he status of your devices is shown
on the device list:
Offline (device is turned off at wall / rocker switch)
urned Off (device is in standby mode)
urned On (device is in heating mode)
When the heater is online, tap the device name to go to the control interface. Note:
when the heater is offline, you will not be able to control it with the app.
Controlling the Heater
Set emperature
emperature
Adjust
Programming
ON / OFF
Current
emperature
Select Mode
Tabla de contenidos
Otros manuales de Calentador de Maclean Energy


Manuales populares de Calentador de otras marcas


Empire Heating Systems
Empire Heating Systems WCC65 Manual de usuario

Wetekom
Wetekom 92 86 43 Manual de usuario

Desa
Desa SPC170-F Manual de usuario

Watlow
Watlow Watrod Electric Tubular Heaters Manual de usuario

Haverland
Haverland ECO-DRY GPS Series Manual de lista de piezas

Stelpro
Stelpro ASILVC2060 Series Manual de usuario