Leckey Mygo Manual de usuario
User Instructions
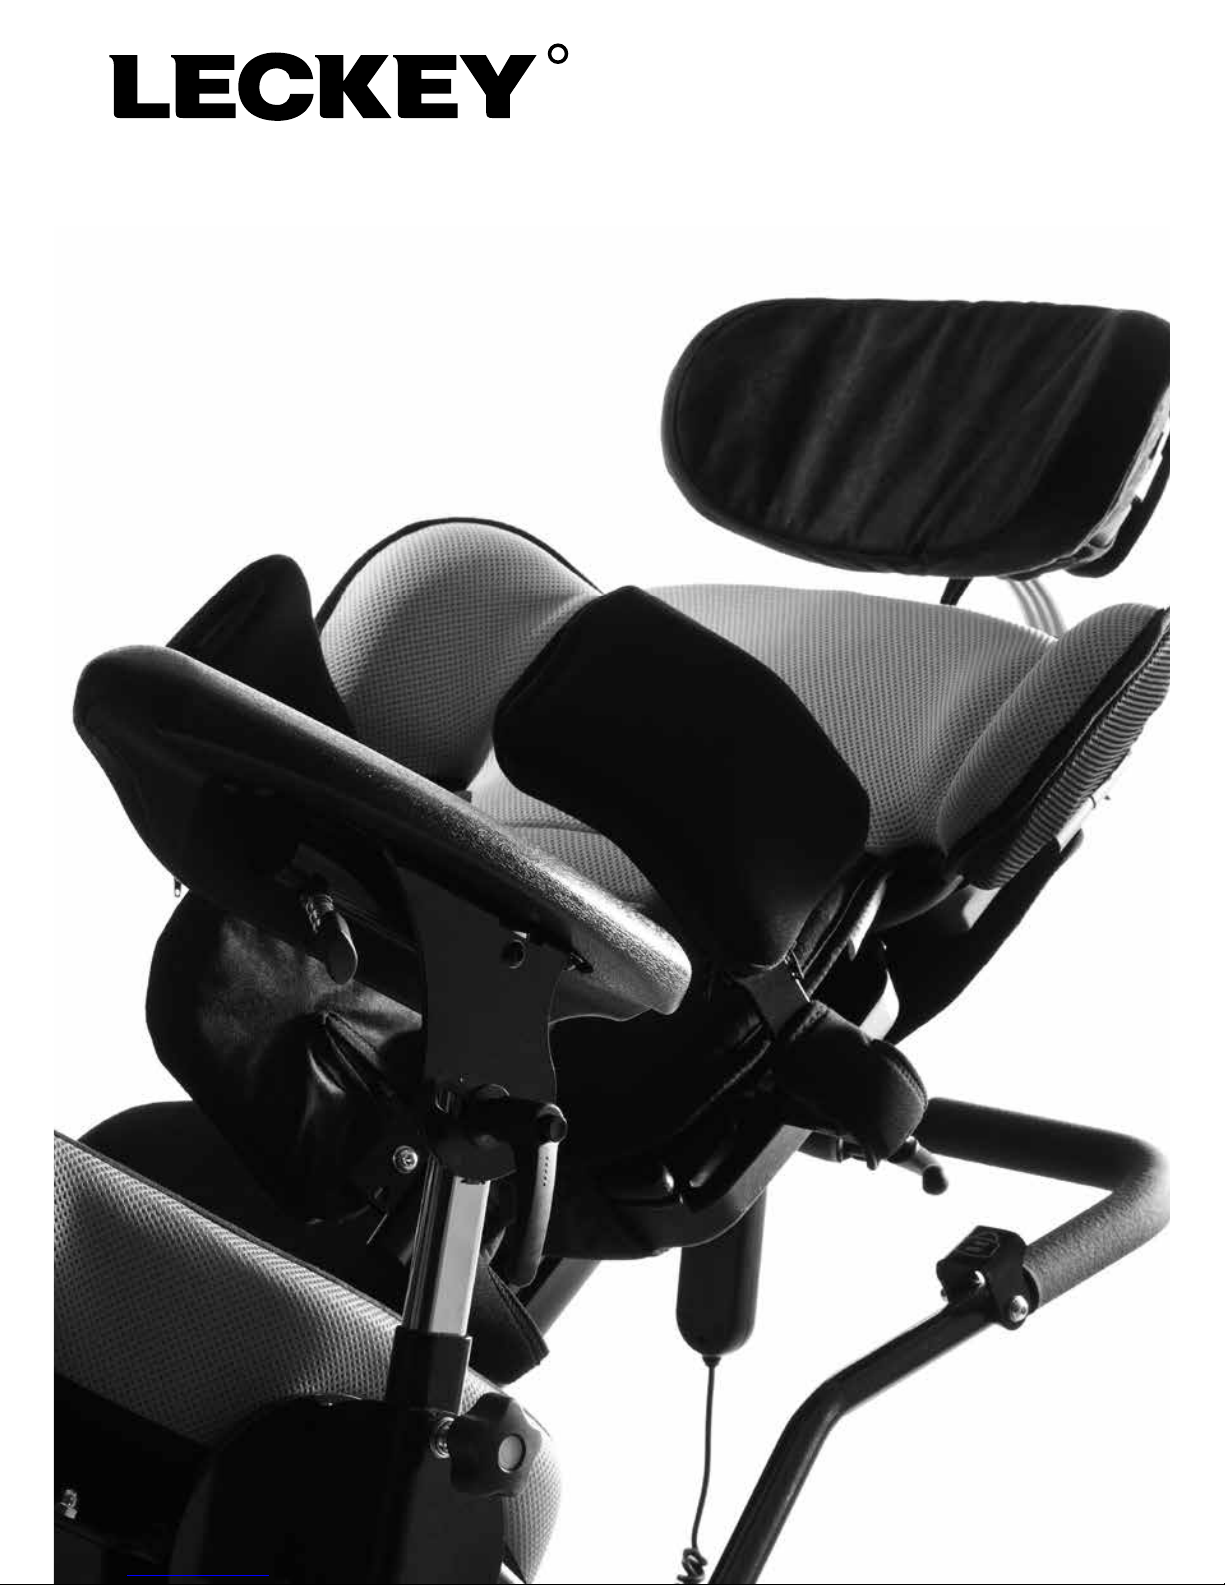
Mygo Max

The Mygo Max has been designed to
offer a high level of postural positioning
while enabling function and mobility.
This manual shows how you can
quickly, easily and safely make use of
all of the functions. The instructions on
safety and maintenance will ensure that
you will enjoy the use of the product for
a long time.
Contents
01 Intended Use
02 Declaration of Conformity
03 Terms of Warranty
04 Product History Record
05 Product Training
06 Safety Information
07 How to Unpack and Assemble
08 Fitting the Covers
09 Clinical Setup for Postural Management
10 Frequent Adjustments for Daily Use
11 Cleaning and Care Information
12 Daily Product Inspections
13 Annual Product Inspections
14 Reissuing Leckey Products
15 Product Servicing
16 Technical Information
17 Accessories

1. Intended Use
The Mygo Max is an activity chair which
has been designed for children and young
adults with disabilities for use at home or
in the school environment. It is suitable
for clients aged 12 -18 years. The seating
system has a maximum user weight of
85kg. The seating system is modular
and can be used with a choice of indoor
or outdoor chassis. The Hi-low chassis
has been designed for use indoors but
can also be used outdoors on a level
surface. The Hi-low chassis should never
be exposed to the elements as this may
corrode the metal components.
2. Declaration of Conformity
James Leckey Design Ltd as manufacturer
with sole responsibility declares that the
Mygo Max conforms to the requirements
of the 93/42/EEC Guidelines, Medical
Device Regulations 2002 and EN12182
Technical aids for disabled persons and
test methods.
3. Terms of Warranty
The warranty applies only when the
product is used according to the
specified conditions and for the intended
purposes, following all manufacturers’
recommendations (also see general terms
of sales, delivery and payment). A two
year warranty is provided on all Leckey
manufactured products and components.
4. Product History Record
Your Leckey product is classified as
a Class 1 Medical device and as such
should only be prescribed, set up
or reissued for use by a technically
competent person who has been trained
in the use of this product. Leckey
recommend that a written record is
maintained to provide details of all
setups, reissue inspections and annual
inspections of this product.
6.1 Always read instructions fully before
use.
6.2 To improve safety we recommend
that users should not be left unattended
at any time whilst using Leckey
equipment.
6.3 Only use Leckey approved
components with your product. Never
modify the product in any way. Failure
to follow instructions may put the user
or carer at risk and will invalidate the
warranty on the product.
6.4 If in any doubt to the continued safe
use of your Leckey product or if any
parts should fail, please cease using
the product and contact our customer
services department or your local
dealer as soon as possible.
6.5 Carry out all positional adjustments
and ensure that they are securely
fastened before you put the user into
the product. Some adjustments may
require the use of a tool which is
provided with each product. Keep all
tools out of reach of children.
6.6 When putting the user into a seating
system, both for positional and safety
reasons, always secure the Leeway
Pelvic Cradle first.
6.7 When the product is stationary
ensure that all castors are locked and
facing away from the base, as this
will improve product stability. This is
especially important when the tilt in
space or back recline facility is in use.
6.8 When the seat is in use on a Hi-low
chassis please ensure that the height
adjustment pedal and tilt in space lever
are locked off and cannot be adjusted
accidentally by other children.
6.9 When the Leckey seating systems
are used on the Hi-low chassis we do not
recommend that users are moved over
uneven surfaces when in the equipment.
All due care and attention should be
taken if transporting in and out of the
seat.
6.10 Never leave the product on a
sloping surface, greater than 5 degrees.
Always remember to lock all the castors.
6.11 Only use the push handle to steer
and move the seat from one area to
another. Never use the tray for this
purpose.
6.12 The product contains components
which could present a choking hazard
to small children. Always check that
locking knobs and bolts within the
child’s reach are tightened and secure
at all times.
6.13 Leckey products comply with fire
saftey regulations in accordance with
EN12182. However the product contains
plastic components and therefore should
be kept away from all direct sources of
heat including naked flames, cigarettes
and gas heaters.
6.14 Do not place objects hotter than
40oC on the tray.t is in use on a Hi-low
chassis please ensure that the height
adjustment pedal and tilt in space lever
are locked off and cannot be adjusted
accidentally by other children.
5. Product Training Record
(Parents, Teachers & Carers)
Your Leckey product is a prescribed Class
1 Medical Device and as such Leckey
recommend that parents, teachers and
carers using the equipment should be
made aware of the following sections
of this user manual by a technically
competent person:
Section 6
Safety Information
Section 11
Frequent Adjustments for Daily use
Section 12
Cleaning and Care
Section 13
Daily Product Inspection
Leckey recommend that a written record
is maintained of all those who have been
trained in the correct use of this product.
6 Safety Information

6.15 Clean the product regularly. Do
not use abrasive cleaners. Carry out
maintenence checks on a regular
basis to ensure your product is in good
working condition.
6.16 The product is designed for
indoor use and when not in use should
be stored in a dry place that is not
subjected to extremes of temperature.
The safe operating temperature range
of the product is +5 to +40 deg Celsius.
6.17 Always check the plastic hand
knobs on the push handle are tightened
securely before you move the seat unit.
6.18 Before using the seating system
always check that the interface handle
on the seat unit is fully engaged
with the chassis. If the handle is not
engaged properly the seat unit may
come loose and could cause serious
injury to the child or carer.
How to
unpack and
assemble
the seating
system
7

Check parts
Congratulations on purchasing your
Mygo Max System. All of the parts will be
contained in polythene bags with each one
clearly labelled. Carefully remove them from
the boxes and check all the parts you have
ordered.
Keep polythene bags away from
children.
Some of the accessories will need to be
assembled before you attach the seat to the
base you have purchased.
Multi-tool
A number of adjustments will require the use
of the multi-tool, which is supplied with each
seat and can be found in the back pocket of
the seat.
Open up the angle of the leg supports by
unscrewing the knobs (A), shown, and set to
the maximum width. Open the socket caps
(B) and slide in the calf supports. Set to the
desired position, with the footplates facing
forward and retighten the socket cap bolts
with the multi-tool.
Always make sure the foot plate is
attached firmly.
7.1 Setting the
footrests
Adjust the height of the chassis to its
maximum to reduce risk of back strain while
attaching the seat unit. Refer to Section 11
on how to adjust the height of the chassis
you have purchased.
First release the safety locking pin at the
front of the seat. To do this pull the pin out
and rotate through 90 degrees. Carefully lift
the seat and place it into the chassis. At the
rear of the underside of the seat you will see
a receiving channel. Place this securely over
the tube towards the back of the chassis.
Pull the handle at the front of the seat unit up
and then pivot the seat forward and down.
7.2 Attaching the
seating system to the
Hi-low chassis
A
B

The push handle is attached to the seatbase
by inserting the two lower stems into the
receiving tubes as shown. Secure the handle
in place by tightening the locking knobs (a).
Check these regularly to make sure the
knobs are tight, particularly if you are
moving the product unit along corridors
that may have uneven or sloping
surfaces.
Once the front of the seat is lowered fully,
release the handle and push it forward to
ensure it has fully engaged on the front tube.
Rotate the safety locking pin so it engages in
front of the handle. If it hits the handle then
the seat is not inserted properly. Remove
and repeat process outlined above.
Always check the handle and locking
pin are fully engaged before you place
the child in the seating system. If the
handle is not engaged properly the seat
unit can come loose and could cause
serious injury to the child or carer.
To attach the head support slide the stem
into the receiving bracket. Set to the desired
position and secure using the hand lever (a).
While holding the components together,
remove the screw and washer. Align the
plastic angle adjuster mouldings and lateral
bracket with the slot in the backrest and refit
the washer and plastic screw.
7.3 Attaching the
push handle
7.4 Attaching the
headrest
7.5 Attaching the
lateral supports
A

Fasten the front buckle and side.Velcro tabs
of the Leeway Pelvic Cradle. Attach the four
side release buckles (a), two at the back of
the seatbase and two at the side.
If sandals are required they can be attached
to the footplates with a single fixing bolt.
To position the sandals simply loosen the
knob (a) under the footplate, select the
position you require and re-fasten the knob.
Slide the armrest into the receiving bracket.
Adjust to the required height and retighten
the knob.
The tray is attached to the seat by inserting
the tray tubes through the centre of each
armrest. Once the tray is located in the
position the knob (a) should be tightened
securely.
7.6 Attaching the
Leeway Pelvic Cradle
7.7 Attaching the sandals 7.8 Attaching the
armrests
7.9 Attaching the Tray
A
A
A

To attach the protraction pads, remove
screw (a) from metal bracket on the standard
lateral. Place the protraction pad on top of
the bracket and replace with the new longer
screws which are included. Retighten using
the allen key. Attach to the seat as per 7.5.
7.12 Attaching the
protraction pads
A
Slide the webbing through the slot in the
sandal. Loop the webbing back up and
through the bottom of the triglide. Then pass
the webbing through the top of the triglide.
Finally to lock the webbing in place, pass it
through the bottom of the triglide again.
Trim strap to required length.
7.11 Attaching the
ankle huggers
To attach the hip laterals to the sacral
support, loosen screw (a) and insert the bar
of the hip lateral into the hole on the side
of the sacral support. Tighten the screw to
secure.
7.10 Attaching the
Hip Laterals
A
1
2
3
4

Fitting
the
cushions
8
Slide a femoral cushion onto each of the
femoral supports and secure them by
pressing down on the poppers on either side.
The seat base cushion can be attached by
simply setting it in place and securing the
two popper tabs (a) at the back of the seat
base. To secure further hook the elastic tabs
to the hooks (b) underneath the seat base.
Always check the seat base cushion is
secure before placing the child in the seat.
8.1 Femoral cushions 8.2 Seat base cushion
A
B

First of all loosen the shoulder support
laterals with the allen key provided. Slide the
cushion over the laterals and secure using
the two snap fasteners. Slide the flaps over
the top of the backrest and underneath the
bottom of the backrest and secure with the
snap fasteners.
Fasten the Leeway Pelvic Cradle and place
on the seat base cushion. Press Velcro onto
the seat base cushion and attach four straps
(a) to secure. There are two camlocks at the
back of the seat and one on either side.
8.3 Backrest Cushion 8.4 Leeway Pelvic Cradle
Fit the sacral cushion over the hardware and
fasten at the back with the snap fasteners.
The standard sacral support should be
attached with the double flaps at the top.
Slide the cushion covers over the hip lateral
with the open zip on the outside. Close the
zip and secure the Velcro flap.
8.5 Sacral Cushion 8.6 Hip Laterals
Otros manuales para Mygo
4
Tabla de contenidos
Otros manuales de Silla de ruedas de Leckey

Leckey
Leckey leeway Manual de usuario

Leckey
Leckey KIT Manual de usuario

Leckey
Leckey Tour Mobility Base Manual de usuario

Leckey
Leckey Leeway Pelvic Cradle Manual de usuario

Leckey
Leckey Mygo Manual de usuario

Leckey
Leckey KIT Manual de usuario

Leckey
Leckey firefly splashy BIG Manual de usuario

Leckey
Leckey Everyday Activity Seat Manual de usuario

Leckey
Leckey Mygo+ Manual de usuario

Leckey
Leckey Comfee Seat Manual de usuario


