JLab SUPRA FIT Eclipse Manual de usuario
MP3 +VIDEO PLAYER
USER MANUAL
SUPRA FIT
Need
Help?
Visit us at:
eclipsemp3.com/
mp3support/

CONTENTS
FOREWORD 2
SAFETY & USAGE 4
FEATURES 5
APPEARANCE 6
BASIC OPERATION 7
CONNECTING TO PC 9
MAIN MENU 12
MUSIC 13
VIDEO 15
PICTURES 17
eBOOK 20
PHOTO CAMERA 22
VIDEO CAMERA 24
PC CAMERA 25
CALENDAR 25
CALCULATOR 25
RECORDER 26
APPLICATION 27
SETTINGS 28
VIDEO CONVERSION 31
CONTACT US 33
FCC INFORMATION 33
LIMITED MANUFACTURER’S WARRANTY 34

2
Congratulations on purchasing
your Eclipse by JLab Product! To
get the most out of your purchase,
please take the time to carefully read
through this manual.
FOREWORD
If any problems occur during while using your Eclipse by JLab
product, please feel free to contact JLab Audio technical
support at 1-866-358-6640, or send an email to
and cooperation!
JLab Audio bears no responsibility for any damage or loss of
personal data due to misuse of software and/or hardware,
damage to the player caused by human factors, replacement
of battery, or other unforeseen circumstances. To prevent loss
of your data, please backup your data regularly.
Information in the manual is subject to change without notice
and is subject to copyright protection. Copying or otherwise
reproducing this material without prior written consent is
prohibited.
Due to rmware changes, some of the pictures and functions
described in this manual may not be the same as are included
with your player.

3
NOTES
1. The playback times listed refer to the maximum playback
times possible, using the best power savings. The actual
playback time may differ as adjustments to screen brightness,
power savings modes, volume, etc. are made.
2. There are many brands of microSD cards on the market
using different quality and speed standards. Therefore, we are
unable to guarantee that our product will be compatible with
all types or brands of microSD cards, but it will be compatible
with those microSD cards with mainstream specications on
the market, and we will constantly strive to provide the largest
selection of cards possible.
3. As parameters such as formats, bitrate, codecs, framerates,
and resolutions differ, the player will not be compatible with all
les of the listed types. If you are experiencing issues playing
your les on this player, we recommend using a supported
conversion tool to reconvert your le to the specications of
the device.

4
SAFETY & USAGE
• Do not use the player in exceptionally cold or hot, dusty,
damp or dry environments.
• Do not drop, strike, or throw your player. Physical damage
to your player will void ALL warranties.
• Please charge your battery when:
> Battery power icon shows an empty icon;
> The system automatically shuts down and the power is
soon off when you switch on the unit once again;
> There is no response if you operate on any key
• Please always follow the correct disconnect procedures for
your operating system. Do not disconnect power abruptly
when the player is being formatted or in the process of
uploading or downloading les. Otherwise it may lead to le
corruption, rmware failure, and even hardware damage.
• We are not liable for any loss of data stored on this device.
• Please do not dismantle this player. Any disassembly not
done by an authorized technician will void ALL warranties.
• Do not listen to your device at high volume for extended
periods of time. Doing so can cause permanent hearing
loss. Protect yourself by using the lowest volume setting
that you can hear comfortably and take frequent breaks by
removing your earphones or headphones.
• This product and manual are subject to change without
notice.

5
FEATURES
• Touch screen operating system for ease of use
• 240x320, 26K color high speed TFT screen
• Built-in 1.3MP digital camera
• Music player: compatible with MP3 and WAV formats
• Picture browser: compatible with JPEG, BMP, GIF, PNG
and TIF formats
• Video player: compatible with AVI, 3GP and FLV formats
• High Speed USB 2.0 interface

6
APPEARANCE

7
BASIC OPERATION
Power On/Off
To power the player on/off, press and hold the Power button
until the device powers on or off.
Volume Adjustment
In Music or FM Radio mode, touch the dot above and if
using your nger, keep touching to the right of the dot to
increase volume. Touch to the left of the dot to decrease
volume (Or, with the stylus, drag the volume icon). In Video
mode touch the to enter, and then do the same steps as
Music or FM Radio, above.
Charging
When battery power is low, the player will prompt you, power
off, and enter Standby mode automatically. Do not try to turn
on the unit. You must charge again before using. Charger
current specication recommended: 400-500mA. To charge
the player, simply connect it to a powered USB port, or
external AC adapter.
Note: If you choose to use a third party adapter, please ensure
that it is 5V and between 350 and 1000mA, or 1amp.

8
Inserting & Removing the microSD Card
Inserting
Ensure that the player is powered off, and disconnected from
the computer. Hold the microSD card face up (side with words
aligned in the opposite direction of the display screen), and
slide the card into the socket on the player, slightly past ush.
When you hear the card click into place, you can access it.
Removing
Ensure that the player is powered off, and push the SD card
just past ush. When you hear the click, release pressure, and
the card will slide out.
Caution: Please ensure that the power is off when you
connect or disconnect your SD card, or damage may
occur to the player or your card.
9
CONNECTING TO PC
Loading Files: Copy & Paste
Note: This alternate method is used to load videos, pictures,
and eBook les as well as audio les.
1. Connect the MP3 player to a working USB port.
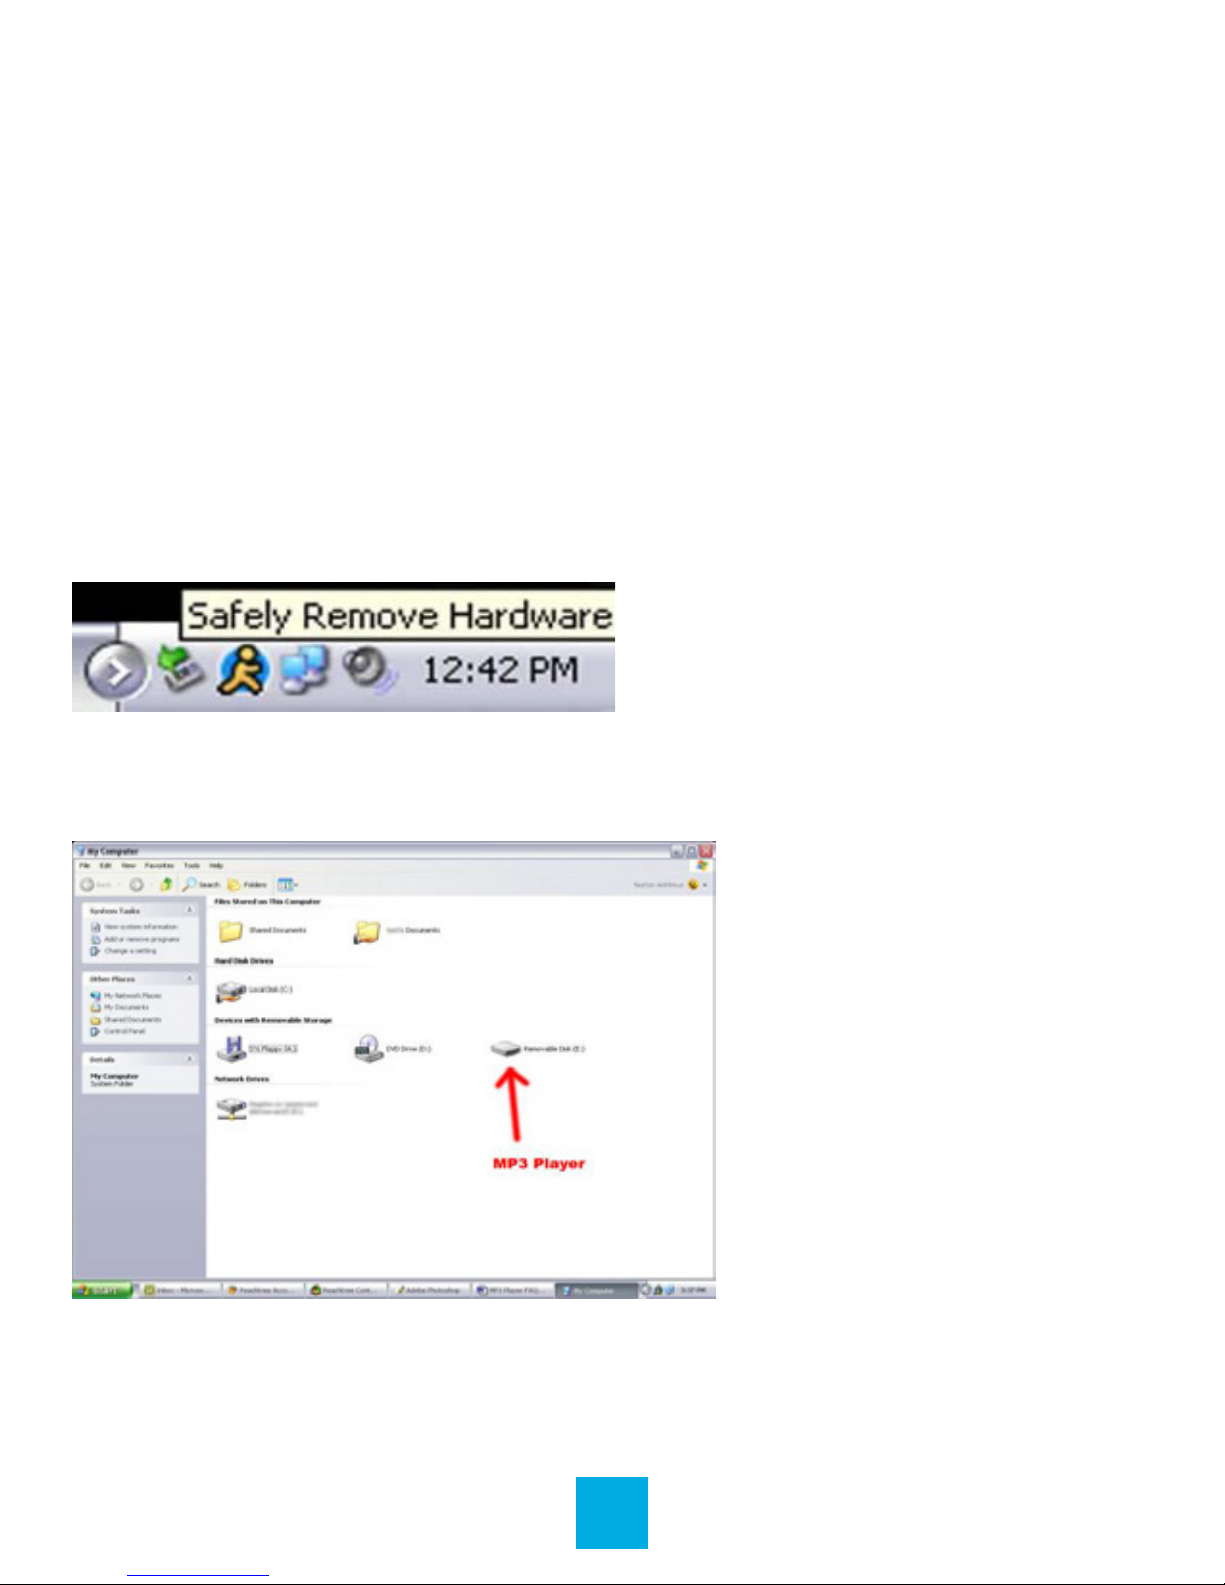
2. When the unit is connected to your computer, it will create a
gray and green icon in the system tray (lower right hand corner
of your desktop) called Safely Remove Hardware.
3. Go to the My Computer section of your computer. In there
you will nd a section called Devices with Removable Storage.
4. Locate the drive created by the unit, generally just called
Removable Disk with a letter in parentheses. Drive letters vary
depending on your system conguration.
Tabla de contenidos


