Javes ADX-525 Manual de usuario
www.javesprojector.com
Projector & Screen
ADX-525 / ADS-523 / ADS-513
DLP Front Projector
User Guide

FCC Warning
This equipment has been tested and found to comply with the limits for a
Class A digital device, pursuant to part 15 of the FCC Rules. These limits are
designed to provide reasonable protection against harmful interference when
the equipment is operated in a commercial environment. This equipment
generates, uses, and can radiate radio frequency energy and, if not installed
and used in accordance with the instruction manual, may cause harmful
interference to radio communications. Operation of this equipment in a
residential area is likely to cause harmful interference in which case the user
will be required to correct the interference on his own expense.
Safety Certificated
Other standards authorized by the state may be suitable for our products as
well, please refer to the product authentification label for more details.
EMC Electromagnetism Compatibility EN 55022
EN 55024
EN 61000-3-2
EN 61000-3-3
Low Voltage Directive 73/23/EEC, Amended by 93/68/EEC
Safety EN 60950-1:2001
1
Front Projector
Front Projector
DLP
DLP

Warning, Certification, Declaration 1
Content 2
Note 3
Introduction 5
Image Resolution 5
Compatibility 5
Package Unfolding Notice 5
Usage Guide 8
Help 8
Maintenance 8
Installing Projector 9
Connecting a Computer 11
Connecting a video device 12
Turning on the Projector Power Supply 14
Turning off the Projector power supply 17
Using the Projector 18
Adjusting the projector 19
Using the remote control 20
Using the control panel and keypad buttons 21
Using the menus 22
Maintenance and Error Solutions 28
Cleaning the lens 28
Cleaning the lamp filter 28
Replacing the projection lamp 29
Replacing the remote control batteries 31
Using the security lock 31
Error Solutions 32
Appendix 36
Accessories 36
Projection image size 37
Content
2
Front Projector
Front Projector
DLP
DLP
Operating Considerations for Safety
Please read and conform to the operating considerations strictly before attempting to operate
the projector. Otherwise, fire, thunder damage or person injure may be caused and the
equipment protection may be destroyed or weaken as well.Please preserve all security introduc-
tions well.
Security Definition:
Warning: explanation for the operation that may hurt person
Caution: explanation for the operation that may damage the equipment.
Security Tag:
Note: please refer to User’s Guide for the usage explanations of diversified functions.
Warning:the surface is very hot, please don’t touch!
The arrow, used to point to the lamp door on projector.
Warning: turn off the projector and unplug the power cable, and turn on the lamp
module after 60 minutes.
Security Considerations:
Warning: please don’t look the lens with the direct-vision after the projector’s power supply
is turned on.
Warning: when the projector lamp need to be replaced, please turn off the projector
and unplug the power cable, for avoiding burn hurt, after 60 minutes to turn on the
power switch. The considerations mentioned in the User’s Guide should be conformed.
Warning: use the power supply cable offered specially, and connects it to the safety
earthing protected socket.
Warning: the projector should be maintained by special service workers when the error
occurs, individual maintenance will disable the service guarantee.
Caution: the ventilation hole shouldn’t be covered.Caution: liquid substance putting on the
projector is forbidden, the spills may damage the projector.
Caution: the projector laying on the hot one is forbidden, exposure under the sun neither.
Caution: preventing the projector from falling, the approved cases (Listed as page 37)
must be covered.
3
Front Projector
Front Projector
DLP
DLP
Place the projector in a horizontal position no greater than 15 degrees off axis
Locate the projector in a well-ventilated area without any obstructions to intake or
exhaust vents. Do not place the projector on a tablecloth or other soft covering that
may block the vents.
Locate the projector at least 4' (1.2 m) away from any heating or cooling vents.
Refer to this guide for proper startup and shutdown procedures.
In the unlikely event of the lamp rupturing, discard any edible items placed in the
surrounding area and thoroughly clean the area along all sides of the projector. Wash
hands after cleaning the area and handling the ruptured lamp. This product has a lamp
which contains a very small amount of mercury. Dispose of it as required by local, state
or federal ordinances and regulations. For more information, please login
www.eiae.org..
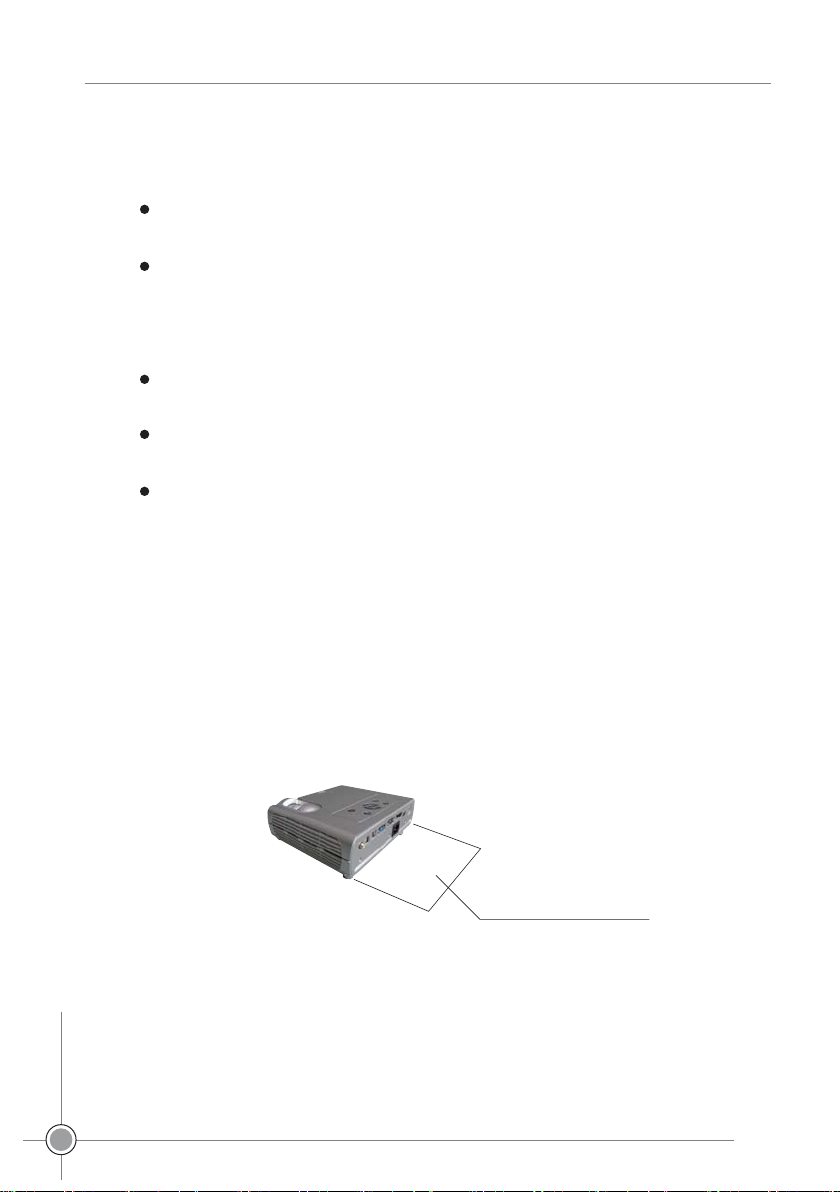
Important Operating Considerations for Safety
To ensure the image quality and lamp life, please follow the instructions. Otherwise, the
product maintenance guarantee may be affected.
0.6m?2ft?
Don’t place objects in the range
of 2' (.6m) after the projector.
4
Front Projector
Front Projector
DLP
DLP

Introduction
The new-designed projector has the advantages of convenient taking
away, simple connection and harmonious coordination, which is not only
easy to connect, easy to use, but also easy to maintain.
Image Resolution
The resolution of the projection image (XGA) is 1024*768, compatible
with the projector screen with the resolution of 1280*1024 at most. The
computer resolution should be adjusted to be lower while it is higher
than 1280*1024 before connecting to the projector.
Compatibility
The projector supports diversified computers and video equipments
compatible, which include:
Computers with IBM compatible (desktop included, resolution
1280*1024 permitted mostly).
Apple Macintosh and PowerBook computers (resolution 12*1024
permitted mostly)
Most VCR, DVD player, Video camera, digital camera and laser CD
player complied with the common standards.
Package Unfolding Notice
The projector items as shown on Fig.1. Please make sure all lists are
included. Otherwise, contact the seller for missing immediately.
If you are experienced in setting up prese Remote Control and
Batteriesntation systems, use the included Quick Set Up card. For
complete details on connecting and operating the projector, refer to this
User’s Guide.
Note: the projector
can extend the image
with the resolution
from 640*480 or
800*600 to 1024*768
automatically.
5
Front Projector
Front Projector
DLP
DLP
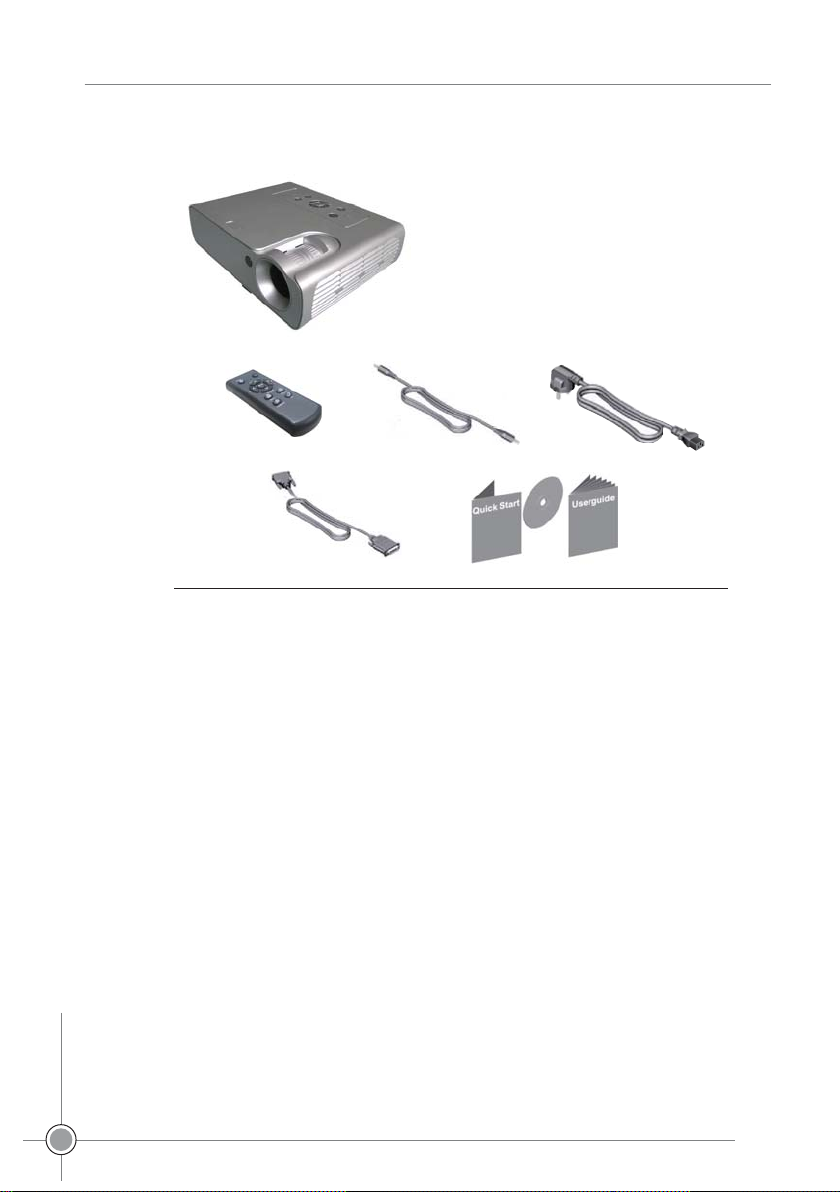
The items included in the package
1Projector 2Remote Control and Batteries
3Audio/Video Cable 4Power Cable
5Computer Cable
6《User’s Guide》and 《Quick Set Up card》
*The item with * may be vary in different countries.
Fig.1
1
234
56
6
Front Projector
Front Projector
DLP
DLP
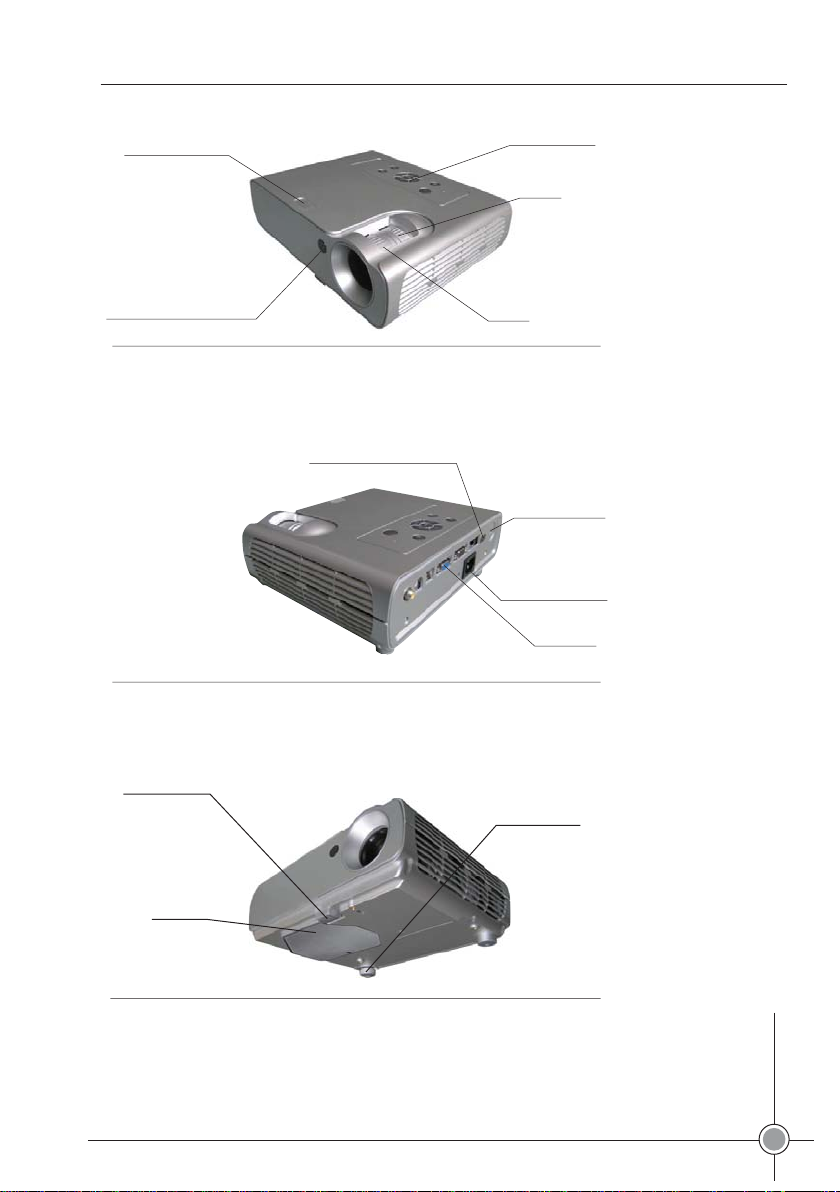
Projector Former Vision
Projector Rear Vision
Projector Bottom Vision
Control Panel
Remote control receiver (IR)
Remote control receiver (IR)
Zoom
Focus
Fig.2
Fig.3
Fig.4
Power Connector
Security lock
Elevator foot release
Lamp Door
Leveling foot
Adjustable foot
7
Front Projector
Front Projector
DLP
DLP
Connector

Please don’t look the lens with the direct-vision after the projector’s
power supply is turned on, the glare may burn your eyes.
Make sure vents aren’t blocked, the airflow-prevented may cause the
projector to shut down because over heat. If it occurs, please remain
the projector to cool for one minute and then turn on.
Like moving the glass structures, be extremely careful when removing
the projector, prevent from being fall off.
Avoid the projector from exposing under the sun or extreme low
temperature, if it occurs, which can only be used until it reach the
temperature of surrounding
When moving the projector, the case covered must be approved by
the manufacture.
Usage Guide
Help
If you need a help, please look up the User’s Guide in advance, the
consideration of “Error solutions” listed on Page 33 should be viewed, or
login our website “http?//www.amt-prc.com” for more information.
Maintenance
The maintenance guarantee we offered are limited, the prolonged service
can be purchased from the seller.
When the projector need to be maintained, the coverage used originally is
recommended, or packed well by the specialized package company, and
please purchase the full coverage.
8
Front Projector
Front Projector
DLP
DLP
Installing Projector
1Level off the projector.
The distance between the projector and power supply, or computer
can’t be over 6' (1.8m).
The projector should be put behind the screen when it is
semitransparent, please refer to the “Rear Projection Installation”
on page 24 to master how to reverse the image.
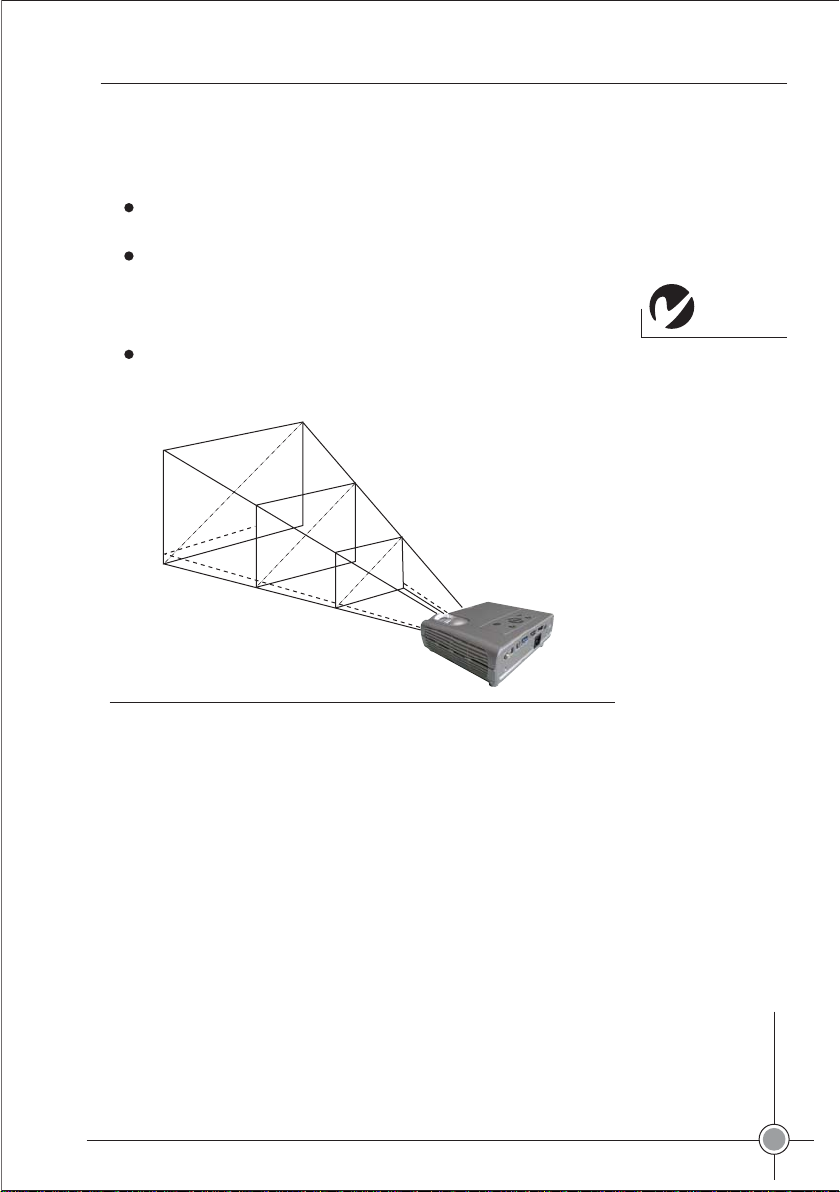
2Adjust the projector to suit the screen.
Adjust the zoom when the image is not suitable, or move the
projector forwardly or backwardly. As it is shown on Fig.5, lists the
three projection images.
Make sure the power supply of projector and computer are all shut down.
Note: the distance
between projector and
screen must be no less
than 4.9'(1.5m).
Fig.5
Projection Image Size
59'(1.5m)
154'(3.9m)
394' (10m)
39'(1m)
100'(2.5m)
240'(6.1m)
9
Front Projector
Front Projector
DLP
DLP
Este manual sirve para los siguientes modelos
2
Tabla de contenidos
Otros manuales de Proyector de Javes

Javes
Javes LSE-530 Manual de usuario

Javes
Javes JCD-720P Manual de usuario

Javes
Javes XPL-520 Manual de usuario

Javes
Javes IMD-440 Manual de usuario

Javes
Javes HLT-102 Manual de usuario

Javes
Javes HDX-520 Manual de usuario

Javes
Javes BTS-M420 Manual de usuario

Javes
Javes TOY-550 Manual de usuario

Javes
Javes PMP-N70 Manual de usuario

Javes
Javes HLT-102 Manual de usuario


