IKEA VINDRUM Manual de usuario

VINDRUM
AU


ENGLISH 4

ENGLISH 4
Before rst use
Your safety and that of others is paramount.
Remove cardboard protection pieces,
protective lm and adhesive labels from
accessories.
Check the appliance for any transport
damage.
To avoid any damage do not place any
weights on the appliance. Do not expose
the appliance to atmospheric agents.
This manual and the appliance itself provide
important safety warnings, to be read and
observed at all times.
This is the attention symbol, pertaining
to safety, which alerts users to potential
risks to themselves and others.
All safety warnings are preceded by the
attention symbol and the following terms:
DANGER: indicates a hazardous
situation which, if not avoided, will
cause serious injury.
WARNING: Indicates a hazardous
situation which, if not avoided, could
cause serious injury.
All safety warnings give specic details
of the potential danger/warning present
and indicate how to reduce risk of injury,
damage and electric shock resulting from
improper use of the appliance. Carefully
observe the following instructions.
Precautions and general
recommendations
• The electrical installation and the
electrical connection must be carried
out by a qualied technician according
to the manufacturer’s instructions and
in compliance with the local safety
regulations. Do not repair or replace any
part of the appliance unless specically
stated in the user manual.
• The appliance must be disconnected
from the power supply before carrying
out any installation work.
• Earthing of the appliance is compulsory.
(required only for class I).
• The power cable must be long enough
for connecting the appliance, once
tted in its housing, to the power supply
socket.
• Do not pull the power supply cable in
order to unplug the appliance.
• The electrical components must not be
accessible to the user after installation.
• Do not touch the appliance with any wet
part of the body and do not operate it
when barefoot.
• The appliance is not intended for use
by persons (including children) with any
physical, sensory or mental impairment,
or without experience and knowledge
of the appliance, unless supervised or
previously instructed in its use by those
responsible for their safety.
• Do not repair or replace any part of the
appliance unless specically indicated
in the manual. All other maintenance
services must be carried out by a
specialised technician.
• Children must be supervised to ensure
they do not play with the appliance.
• When drilling through the wall pay
attention not to damage electric
connections and/or pipes.
• Air vents must always discharge to the
outside.
Safety information 4
Product description 7
Control panel 7
Cleaning and maintenance 7
What to do if ... 9
Technical table 10
Technical data 11
Electrical connection for Australia 11
Environmental concerns 12
IKEA GUARANTEE 13
Safety Information
Contents

ENGLISH 5
• The manufacturer rejects all
responsibilities for any damage caused
by improper use or wrong settings.
• Appropriate maintenance and cleaning
ensure the good working order and
the best performance of the appliance.
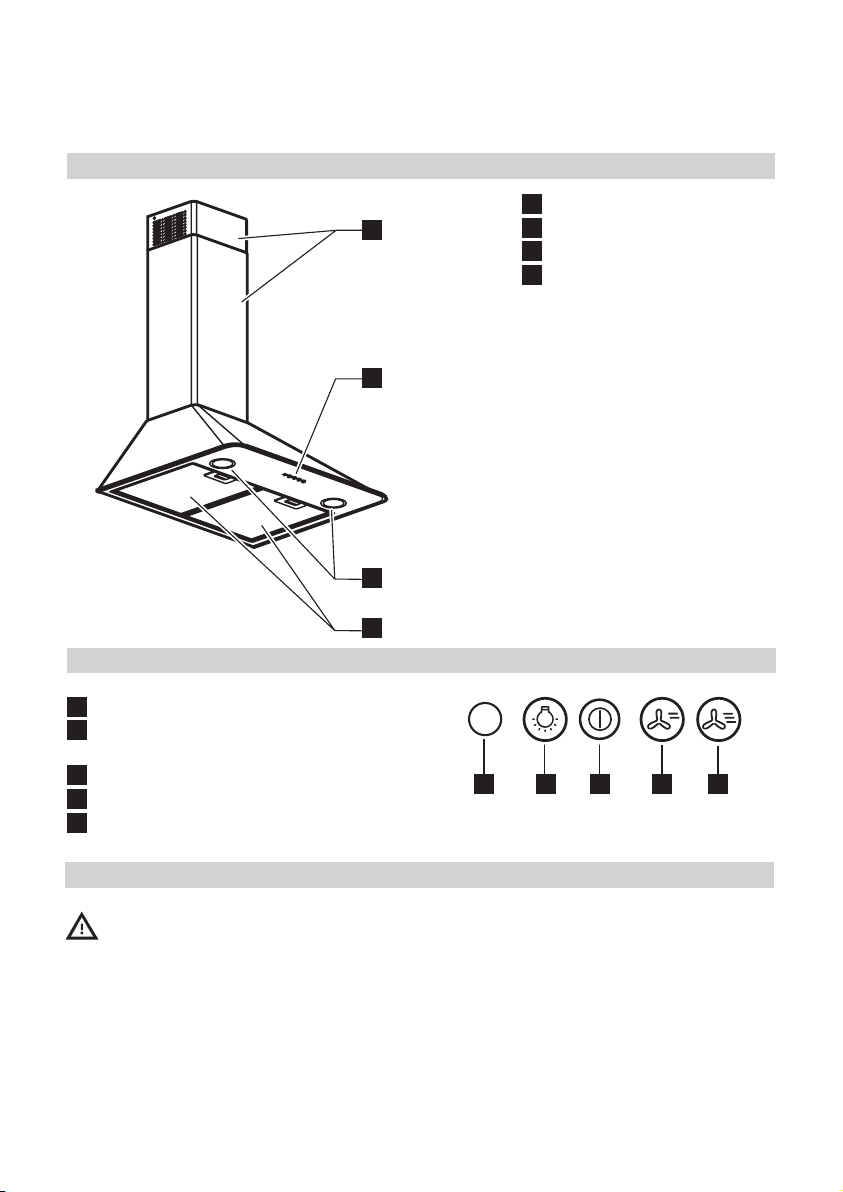
Regularly clean all stubborn surface dirt
to avoid grease build up. Remove and
clean or change the lter regularly.
• Never ame cook food (ambé) under
the appliance. Using free ames might
cause re.
• Failure to observe the instructions for
cleaning the hood and replacing the
lters may result in a re.
• Exhaust air must not be vented through
a ue used for removal of fumes
produced by gas combustion appliances
or other combustible materials, but must
have a separate outlet. All national
regulations governing extraction of
fumes must be observed.
• There shall be adequate ventilation if
the hood is being used at the same time
as other appliances using gas or other
combustible materials. The negative
pressure of the room must not exceed 4
Pa (4x 10⁻⁵ bars). For this reason ensure
that the room is well ventilated.
• Do not leave frying pans unattended
when frying, as the frying oil may catch
re.
• Before touching the light bulbs, ensure
that they are cold.
• Do not use or leave the hood without
the light bulb correctly tted, as this may
cause electric shock.
• The hood is not a work surface, therefore
do not place any objects on top of it or
overload it.
• During all installation and maintenance
operations wear appropriate working
gloves.
• This appliance is not suitable for outdoor
use.
WARNING: when the hob is in use,
accessible parts of the hood may
become hot.
Installation and connection
After unpacking the appliance, check for
any transport damage. In the event of
problems, contact the Authorized Service
Centre. To prevent any damage, only
remove the appliance from its polystyrene
foam packaging at the time of installation.
Preparing for installation
WARNING: this is a heavy product; the
hood should only be lifted and
installed by two or more people.
The minimum distance between the hob and
the bottom part of the hood must not be less
than 65 cm for burning gas or other fuels
and 50 cm for electric cookers.
Before installation also check the minimum
distances stated in the manual of the cooker.
If the installation instructions for the cooker
specify a greater distance between cooker
and hood, this distance must be observed.
Electrical connection
Make sure the power voltage specied on
the appliance rating plate is the same as
the mains voltage.
This information can be found on the inside
of the hood, under the grease lter.
Power cable replacement (type H05
VV-F) must be carried out by a qualied
electrician. Contact an authorized service
centre.
If the hood is tted with an electric plug,
connect the plug to a socket complying with
current regulations, located in an accessible
place.
If no plug is tted (direct wiring to the
mains), or if the socket is not located in an
accessible place, a qualied electrician
should install a standardised double pole
power switch that will enable complete
isolation from the mains in case of category

ENGLISH 6
III overvoltage conditions, in accordance
with wiring rules.
Use
The hood has been designed to be installed
and used either as a “Exhausted model”, or
as a “Recirculation model”.
Exhausted model (see symbol in
installation booklet)
Cooking steam is sucked and channelled
outside the house through a discharge duct
(not supplied), tted to the hood steam
outlet.
Ensure that the discharge duct is correctly
tted to the air outlet, unit using an
appropriate connection system.
Important: If already installed, remove the
charcoal lter/s.
Where xing or mounting screws or other
xing devices are used, that penetrates into
the range hood with a accessible metallic
enclosure or class II construction, to attach
an accessory, the instructions shall indicate
the required location of these screws or
xing devices and include the substance of
the following warning.
Failure to install the screws or xing device
in accordance with these instructions may
results in electrical hazard.
Recirculation model (see symbol in
installation booklet)
The air is ltered through one or more the
charcoal lters, and then resent into room.
Important: Ensure appropriate air
circulation around the hood.
Important: If the hood is supplied without
charcoal lters, these must be tted before
the hood can be used. Filters are available
in shops.
The hood should be installed away from
particularly dirty areas, windows, doors and
heat sources.
The accessories for wall xing are not
included because walls made of different
materials require different types of xing
accessories. Use xing systems suitable for
the walls of your home and the weight of
the appliance. For more details, contact a
specialized dealer.
Keep this booklet for future consultation.

ENGLISH 7
Product description
1Chimney.
2 Control Panel.
3 Halogen light.
4 Grease lter.
Control panel
A Light ON/OFF button.
B Motor ON/OFF button / Extraction
power 1 selection button
C Extraction power 2 selection button
D Extraction power 3 selection button
ELamp indicator
3
1
2
4
WARNING: - Never use steam
cleaning equipment.
- Disconnect the appliance from the power
supply.
IMPORTANT: do not use corrosive or
abrasive detergents. If any of these products
accidentally comes into contact with the
appliance, clean immediately with a damp
cloth.
• Clean the surfaces with a damp cloth.
If it is very dirty, add a few drops of
washing up detergent to the water.
Finish off with a dry cloth.
IMPORTANT: do not use abrasive sponges
or metallic scrapers or scourers. Over time,
these can ruin the surface.
• Use detergents specically designed for
cleaning the appliance and follow the
manufacturer instructions.
IMPORTANT: clean the lters at least
monthly to remove any oil or grease
residuals.
Cleaning and maintenance
E A CB D

ENGLISH 8
To clean the grease lter
The metal grease lter has an unlimited life
and must be washed once a month by hand
or dishwasher at low temperature and with
a short cycle. With cleaning in a dishwasher
the grease lter may become dull; this does
not effect its ltering capacity.
Grease lter maintenance:
1. Disconnect the hood from the electric
power supply.
2 Remove the grease lters: pull the spring
release handle downwards, then remove
the lter.
3. After cleaning the grease lter, remount
in reverse order ensuring the entire
extraction surface is covered.
Charcoal lter maintenance (if the hood is
installed in recirculation mode)
1. Remove the grease lters.
2. Fit (bayonet attachment) 1 charcoal lter
each conveyour side.
3. Reverse the above procedure to remove
the charcoal lter.
4. Ret the grease lters,
Charcaol lter is neither lavable nor
regenerable.
Replace it every 4 months.
Lamp maintenance
Disconnect the hood from the electricity.
Warning
Prior to touching the light bulbs ensure they
are cooled down.
1. Use a small screwdriver or other suitable
tool to prise off the cover.
2. Snap-t the cover back on.
3. Use only max 12V-10W- G4 halogen
bulbs.
Important: make sure you don’t touch the
lamp with your bare hands.

ENGLISH 9
Problem Possible cause Solution
The appliance does not work There is no mains
electrical power
Check for the presence of
mains electrical power.
Turn off the appliance and
restart it to see if the faults
persists.
The appliance is not
connected to the
electrical supply
Check if the appliance is
connected to the electrical
supply.
Turn off the appliance and
restart it to see if the faults
persists.
The hood’s suction level is not
enough
The suction speed is too
low
Check the suction speed and
adjust as necessary.
The metal lters are
dirty
Check that the lters are clean
If not, clean the lters in the
dishwasher.
The air vents are
obstructed
Check the air vents for any
obstructions and remove as
necessary.
The light does not work The light bulb is broken Check the light bulb and
replace it if necessary.
The light bulb is not
correctly tted
Check that the light bulb has
been correctly tted.
If not, t the light bulb in right
way.
What to do if ...
Before contacting the Authorized Service
Centre:
Switch the appliance on again to see if the
problem has disappeared. If not, switch it
off again and repeat the operation after an
hour.
If your appliance still does not work properly
after carrying out the checks listed in the
troubleshooting guide and switching the
appliance on again, contact the Authorized
Service Centre, clearly explaining the
problem and specifying:
• the type of fault;
• the model;
• the type and serial number of the
appliance (given on the rating plate);
• the Service number (the number after the
word SERVICE on the rating plate inside
the appliance).

ENGLISH 10
Technical Table
Type of product Wall mounted hood
Dimensions
Width mm 600
Depth mm 515
Height min mm 745
Height max mm 113 2
Total power W220
Lamps info
Type Halogen
Number & Power W2x10W
Socket Spotlight
Installation minimum height - gas hob mm 650
Installation minimum height - elec hob mm 500
Product Weight kg 10,8
Product Fiche compliant to commission delegated regulation (EU) No 65/2014
Supplier's name or trade mark IKEA
Model identier
VINDRUM 60322154
VINDRUM 80322153
VINDRUM 80348935
Annual Energy Consumption kWh/a 57,1
Energy Efciency Class B
Fluid Dynamic Efciency %31,1
Fluid Dynamic Efciency class A
Light Efciency lux/W 9
Lighting Efciency Class lux E
Grease Filtering Efciency %76
Grease Filtering Efciency class C
Minimum Air Flow in normal use m³/h 272
Maximum Air Flow in normal use m³/h 625
Air Flow at intensive/boost setting m³/h NA
A-waighted Sound Power Emission at minimum speed dB(A) 47
A-waighted Sound Power Emission at maximum speed dB(A) 66
A-waighted Sound Power Emission at intensive or boost speed dB(A) NA
Power consumption off mode W 0
Power consumption in standby mode W 0
Additional Product Information compliant to commission regulation (EU) No 66/2014
Time increase factor 0,9
Energy Efciency Index 58,6
Measured air ow rate at best efciency point m³/h 368
Measured air pressure at best efciency point Pa 394
Maximum air ow m³/h 625
Measured electric power input at best efciency point W129,5
Nominal power of the lighting system W20
Average illumination of the lighting system on the cooking surface lux 10 0
Otros manuales para VINDRUM
2
Tabla de contenidos


