Howell Technology NZ02 Manual de usuario


Quick start guide
Before Setting Up
1. Make sure the DHCP function of your router is turned on and supports 2.4GHz band for your
clock-cam to connect to. (5GHz is not supported for this device)
2. Make sure your smartphone is connected to the same 2.4GHz network that you're connecting
your clock-cam to.
3. Please make sure Location Services is turned on. For iPhone, go to Settings => Privacy =>
Location Services to enable it.
4. MrCam will prompt for permission to use "your location for obtaining the WI-FI name", please
select Allow While Using App.
5. Please set your phone to ring mode, and allow the app to access your microphone and to send
notifications.
Install APP
1. Scan the QR code below to install the APP.
2. Alternatively, search and download "MrCam"
in Google Play or Apple App Store.
Android/iOS

How to Use Method 1:Connect to Your Network
The First Step:Press Power Key and hold for 3 seconds to power on the device. Wait for audio
prompt" Welcome to use", after 8 seconds, another audio prompt" Please connect to network".
The Second Step:Launch the MrCam app. Select Add Device and then select Connect to Wi-Fi.
The Third Step:Wait for audio prompt, “Please connect the network" and then select NEXT.
The Fourth Step:In the next screen, please enter your Wi-Fi password and select NEXT.(Make
sure your phone is within 10 feet of the clock-cam)
The Fifth Step:Your phone will start sending out a configuration sound wave to the clock-cam.
Wait for a voice prompt from the clock-cam to confirm "connection success.'”
The Sixth Step:Next, select the Add button next to the IPCAM:
The Seventh Step:Congratulations, your clock-cam is now ready for use! For security and privacy,
please change your username and password when prompted.
How to Use Method 2:AP Connection
The First Step:Press Power Key and hold for 3 seconds to power on the device. Wait for audio
prompt" Welcome to use", after 8 seconds, another audio prompt" Please connect to network".
The Second Step:Start APP MrCam,select add device,then select AP connection
The Third Step:Click “NEXT”,will pop out message:the password of hot spot has beed
copied(password is 168168168 in default),then go to WiFi list,select the device with the
beginning of HOW.

The Fourth Step:Click OK,then go to WiFi list automatically,then connect the hot
spot of device with the beginning HOW,then press Enter Password position,paste
it,the password will be appeared,the password of hot spot is 168168168 in
default,see the Picture 1,Picture 2 and Picture 3.

The Fifth Step:After connection the devices with the beginning of HOW,then this device be
added to devices list directly,please see Picture 6(Remark:Android phone,please click return key
as below,switch to devices list,please see Picture 5)

Functions Description
1.Video Interface
A. Enables 2-way audio. This allows you to receive and transmit audio through the device.
B. Saves a snapshot within the MrCam APP (not inside the phone's camera roll).
C. Records video within the MrCam App (not inside the phone's camera roll).
D. Toggle between standard definition (SD 720p) or high definition (HD 1080p).
E. Infrared (IR) night vision. Auto mode enables IR in low-light environments. Select Close to keep
IR off at all time.
F. Flip video image horizontally.
G. Flip video image vertically
H. Split view. This function is useful if you have multiple units of this clock-cam device.
I. Toggle between landscape (full screen) or portrait live stream mode.

2.Motion & Sound Alert
This clock-cam an send a push-notification to your phone whenever it detects motion or sound.
To access alert settings, select the icon and select Alarm Settings.
1. Motion Alarm: Turn on to access sensitivity sub-menu, which can be set to low, mid or high.
2. Voice Alarm (sound detection): Turn this option on to adjust sensitivity.
3. Select Done to save settings.
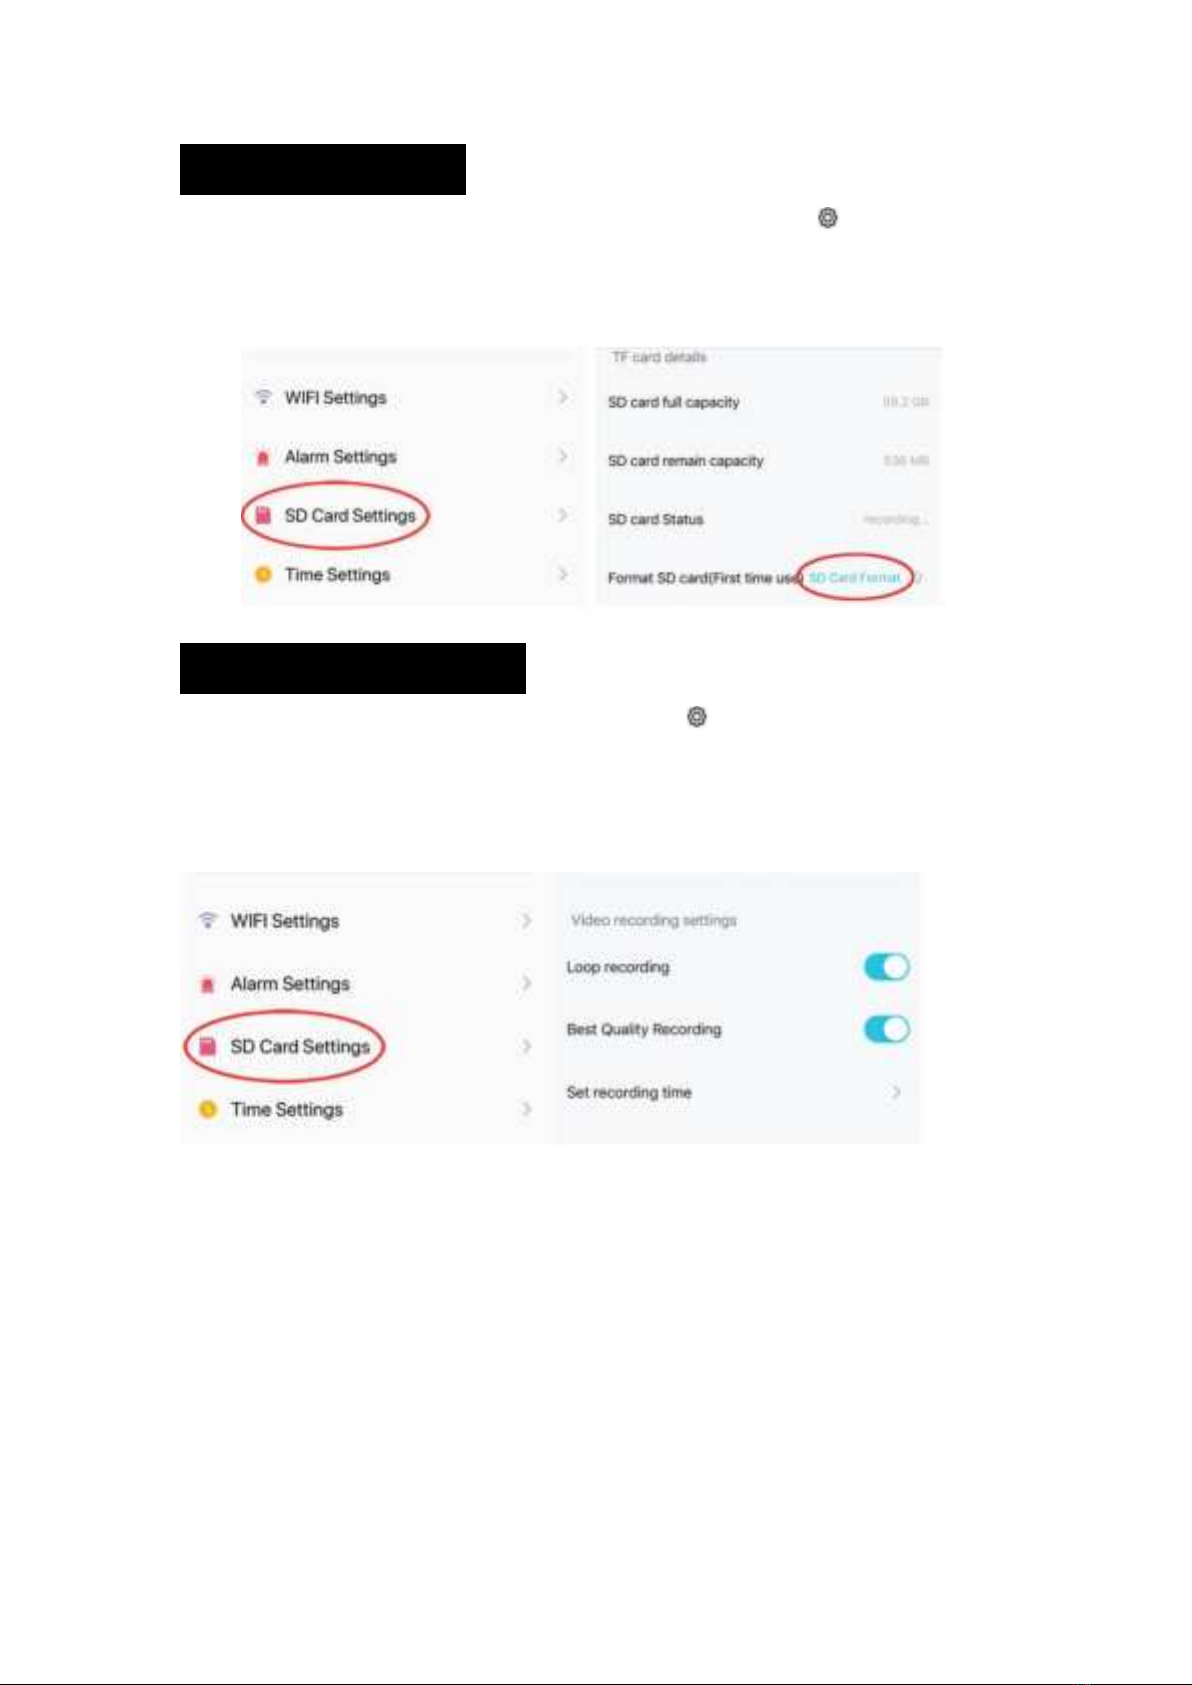
3.SD/TF Card Settings
1. When a new Micro SD or TF Card is inserted, select the settings gear icon and select SD
Card Settings.
2. The new card must be formatted before it con be used. Select SD Card Format and select OK
on the confirmation pop-up window.
Video Recording Schedule
1. To set video recording schedule, select the settings gear icon and select SD Card Settings.
2. A Micro SD (TF) Card must be inserted for recording to work. 64gb of capacity can yield .about
a week of continuous loop-recording.
3. Turn on Loop Recording to record in a continuous loop, tick Best Quality Recording to record
in high-definition, or Set Recording Time to select the dates of the week and time to record.
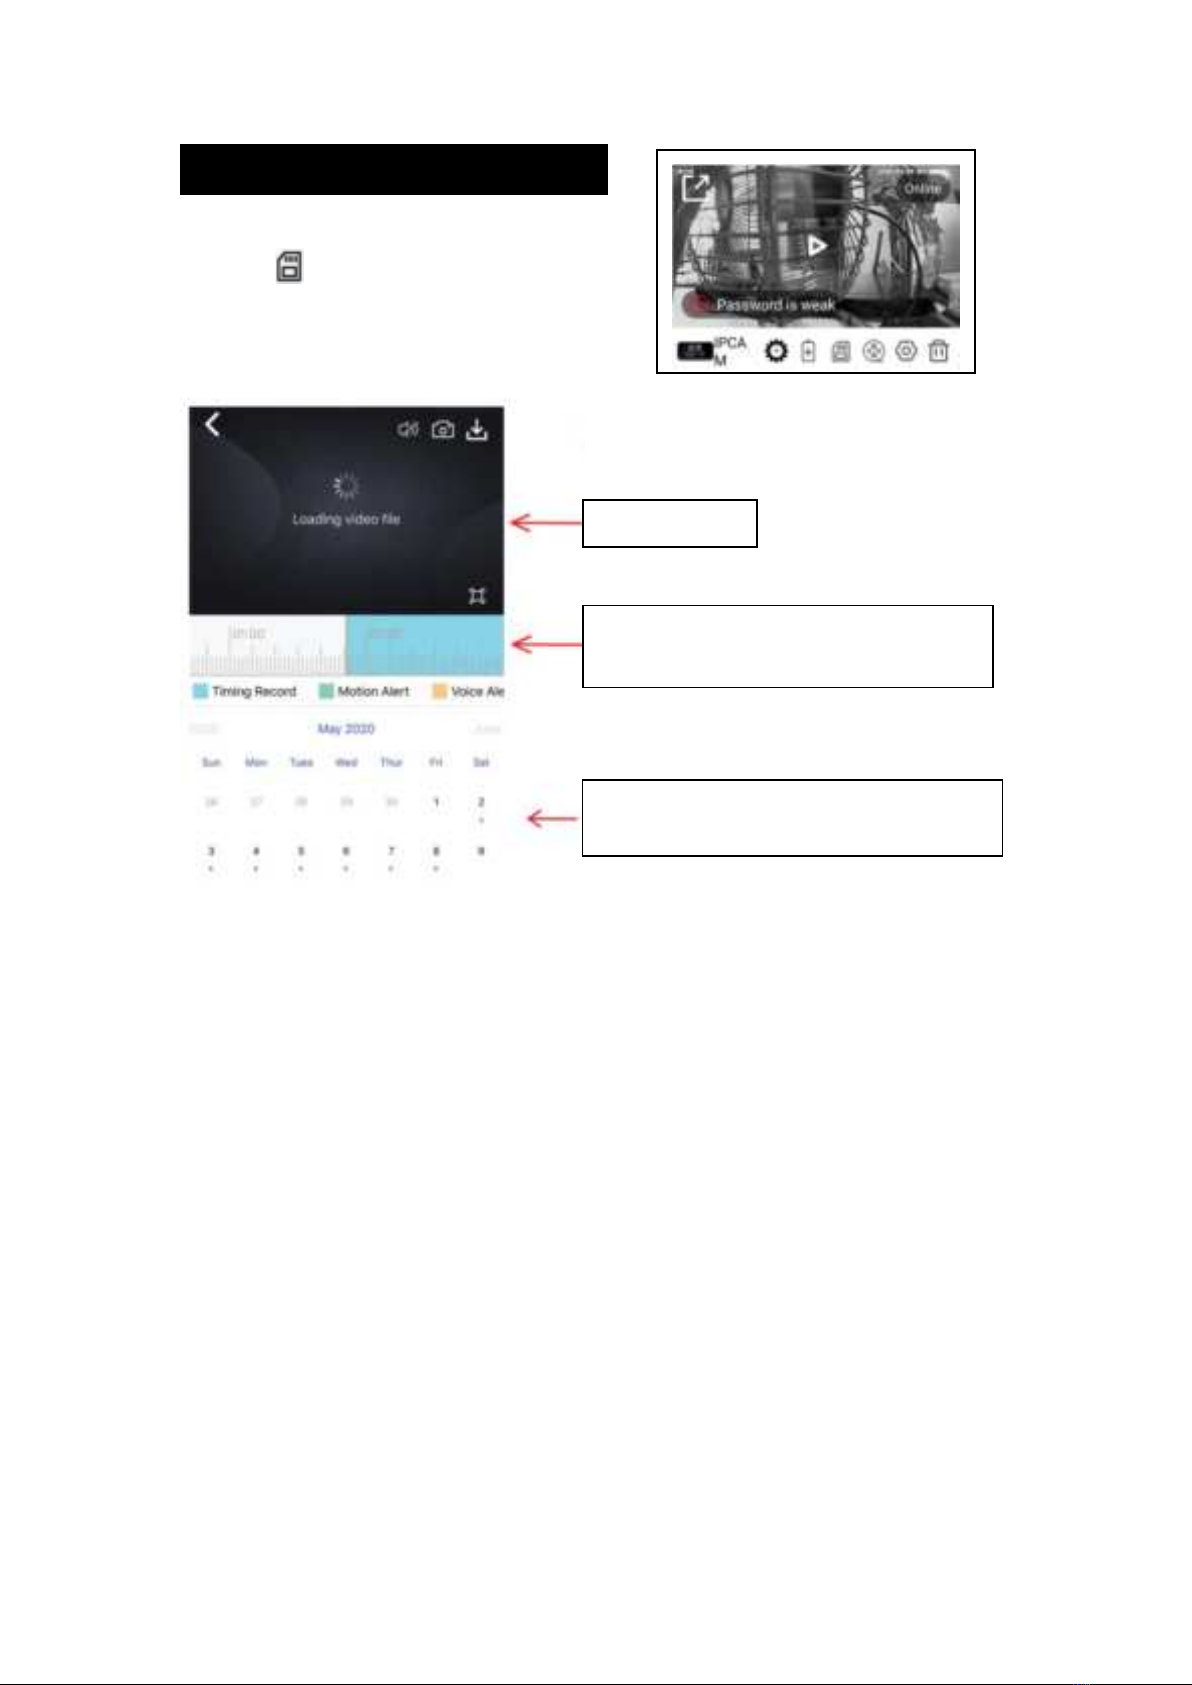
4.Viewing Scheduled Recordings
To access and view your scheduled recordings,
Select the icon. From here, you'll be
able to view or download the recording from
your selected date and time.
Video playback
Time scroll-bar. Blue highlighted time range
means scheduled recording is available
The blue dot underneath the date indicates
scheduled recording is available for that date
Tabla de contenidos


