Genius Smartcam 220 Manual de usuario

User Manuel
SmartCam 220
V1.6.20

目录

3
Product Overview
Product OverviewProduct Overview
Product Overview
Network Camera is a new generation of product which combines the traditional camera and
network video technology. In addition to have all the conventional cameras features, the machine also
comes with a digital video compression controller, and network connection, etc. The video can be
viewed from Browser via the LAN and smart phones via the Internet. Users can use mobile phone to
view the video remotely and control the camera. It enables the target site monitoring and the video data
stored in real-time to achieve the all-round monitoring.
Easy to install and use
The installation only requires plugging the network cable directly into the machine's network port
(RJ45). Then you can see the Camera via Windows Explorer and use it by
double-clicking directly.
High quality video resolution
The machine adopts the H.264 video compression technology; the video resolution is 720p. The
video is distributed real-time via Ethernet to do video streaming job.
An standard network protocol
The video transfer is via RTSP/P2P network protocol which is the most suitable for network video
transmission.
Applications
The machine transmits real-time video through the network environment; this feature greatly
enhances the performance of traditional closed-circuit monitoring system. Users can access the
camera from anywhere at any time to watch real-time video or manage the camera. According to
this feature the machine can be widely used on: product demonstrations and broadcasting, traffic
monitoring, bank monitoring, parking lot control, factory monitoring, video security systems,
home security, medical monitoring, etc. It also allows the picture to be sent to the specified E-mail
account or FTP server for a pre-defined time or event occurred.

4
Model:HC8802;GS-130007
Front side :
1 Camera 4 Speaker
2 Light Sensor 5 Microphone
3 Power indicator 6 Tripod
Button :
1 Network connector 3 Power connector(5V)
2 Tripod socket
Right

5
1 WIFi Antenna 2 TF card slot
3 Reset switch hole

6
Mobil phone/Pad Operation:
Download and Install the "Yes icam" APK to smart phone or Pad.
1. If you use Android phone/Pad, please use Google Play to download the APP.
2. If you use Apple phone/Pad, please use Apple store to download the APP.
Click the application icon of “Yes iCam” to run this app in smartphone or Pad..
The following picture shows the cameras that were installed already.
1. When you see the status like “online”, this camera is available to connect.
2. When you see the status like “connecting”, APP still try to find the camera.
3. When you see the status like “Offline”, sorry, camera is offline. Please check your
camera.

7
Add new camera :
Add new camera :Add new camera :
Add new camera :
Click the icon "Add New Camera". The app will search all the cameras on the LAN automatically.
If it finds cameras, the screen will be shown as following picture. You can click the camera which
you want to add directly, then input the user name and password. (Both user name and password
are set to "admin" by default which is case sensitive.)
Add new camera which is in Internet:
Add new camera which is in Internet:Add new camera which is in Internet:
Add new camera which is in Internet:
Click the "Add Remote Camera" icon to add new camera. Fill the 20 characters of UID number into the
UID frame and password (the default value is "admin")
Another method to fill in the UID number is by clicking the "QR Code" icon, then scanning the QR Code
directly. (The mobile phone should have installed the QR code scanning software already. If not, please
install it.)

8
If the camera is on-line right now, you can watch the video and hear the sound by clicking the camera
icon. By disable the speaker, you can talk to the camera now (it requires the camera to have the
capability to support this feature.)
There have three buttons: "folder", "snapshot" and "voice".
Click the "folder" to show the thumbnail list:
Click the thumbnail to display the picture.
9
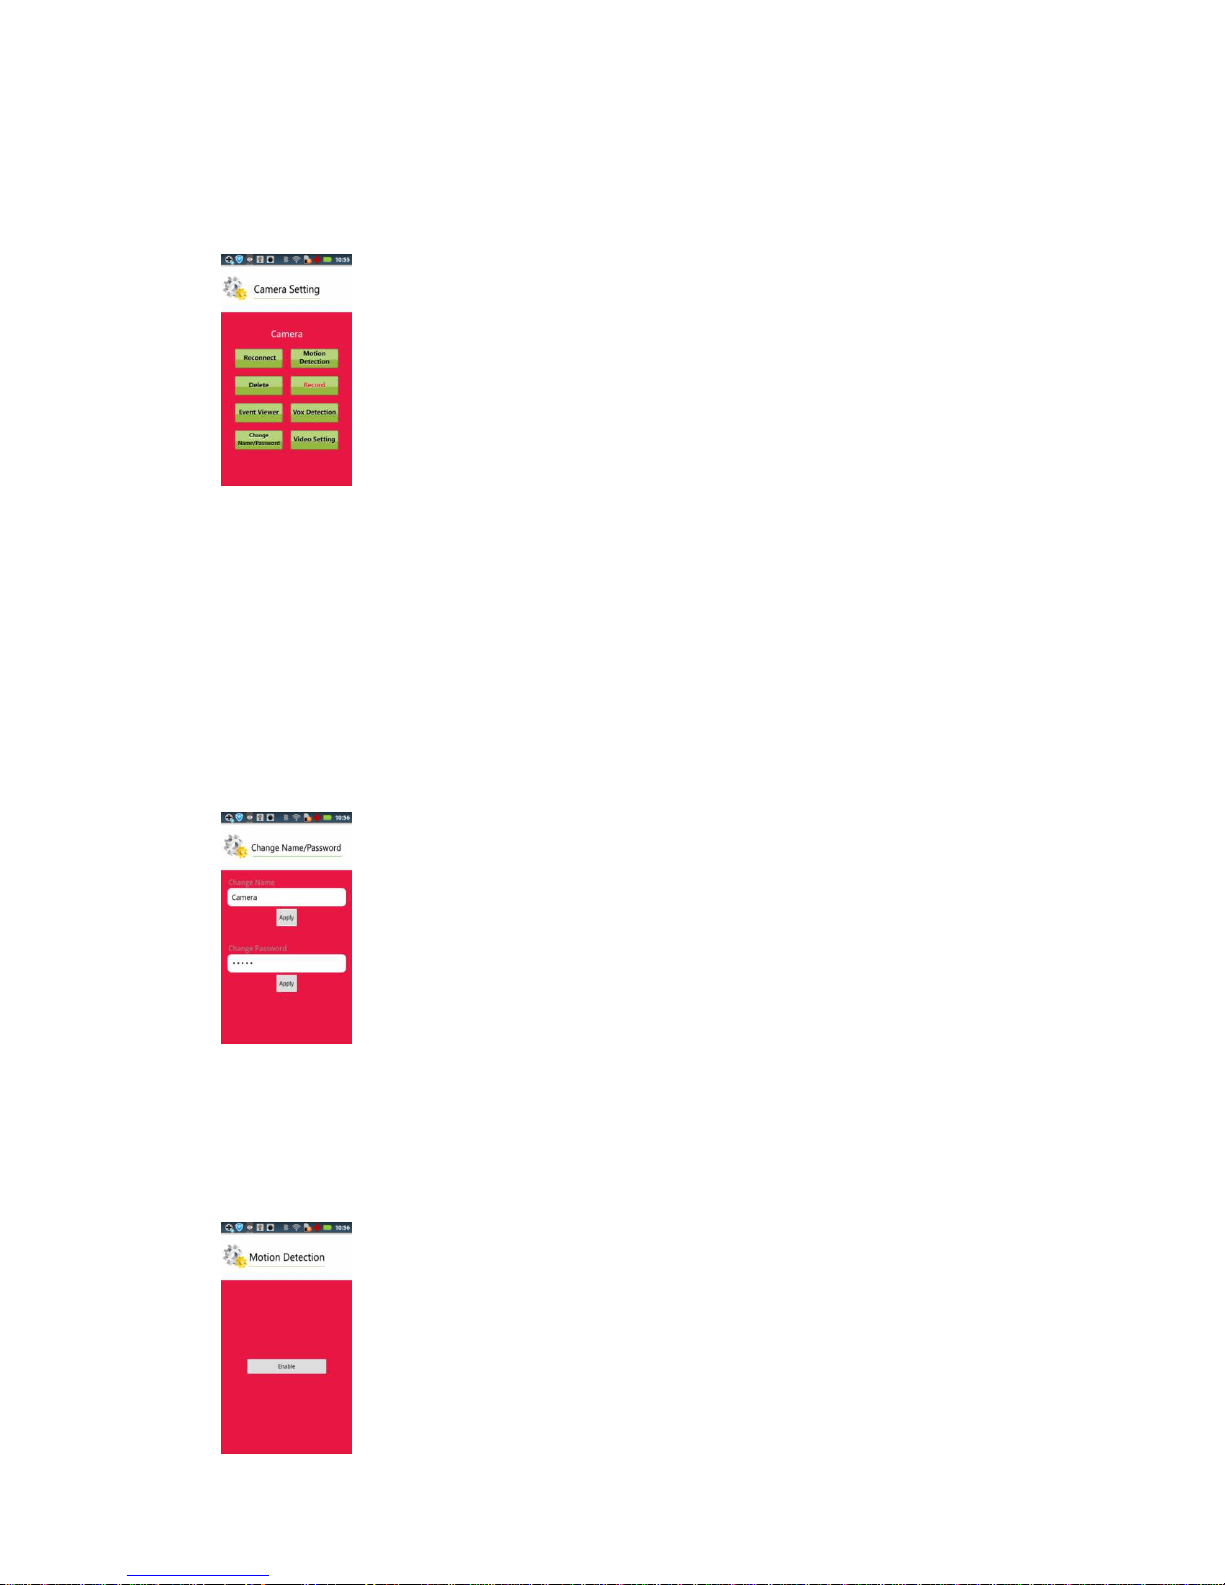
Click on the "down arrow" of right side of the camera list to open the Settings screen:
Note: the right column of setting items are not allowed when connection fails or the camera and the
device is not in the same network.
Reconnect: Reconnect to Camera
Delete: Delete Camera
Event Viewer: Event list.
Change Name/Password: Change camera name and password.
Motion Detection:
Click “Motion Detection”,you could go into video motion detection setup page. Please
enable “motion detection” first.

10
Use the finger to get the range of the motion detection area, then click the "Confirm"
button to confirm the setting of motion detection. After confirm, if Camera has
microSD inside, camera will do motion record feature automatically.
※※
Important : When motion detection is enable, make sure : disable motion detection,
then take out microSD card to protect your video file.
Setup the Email setting if the Email alarm is needed.
Fill into all the required data, then click the "Confirm" button.
Note: the port number will be different when using different Email server. Please check the
Internet for details if you are not sure which one to use.
Record
RecordRecord
Record: The setting will take effect when the camera has MicroSD Card.
When press ‘Record’ button, the camera will enable 24 hours video recording only and
Este manual sirve para los siguientes modelos
2
Tabla de contenidos
Otros manuales de Cámara de seguridad de Genius


