FoMaKo Focus Your Streaming www.fomako.net
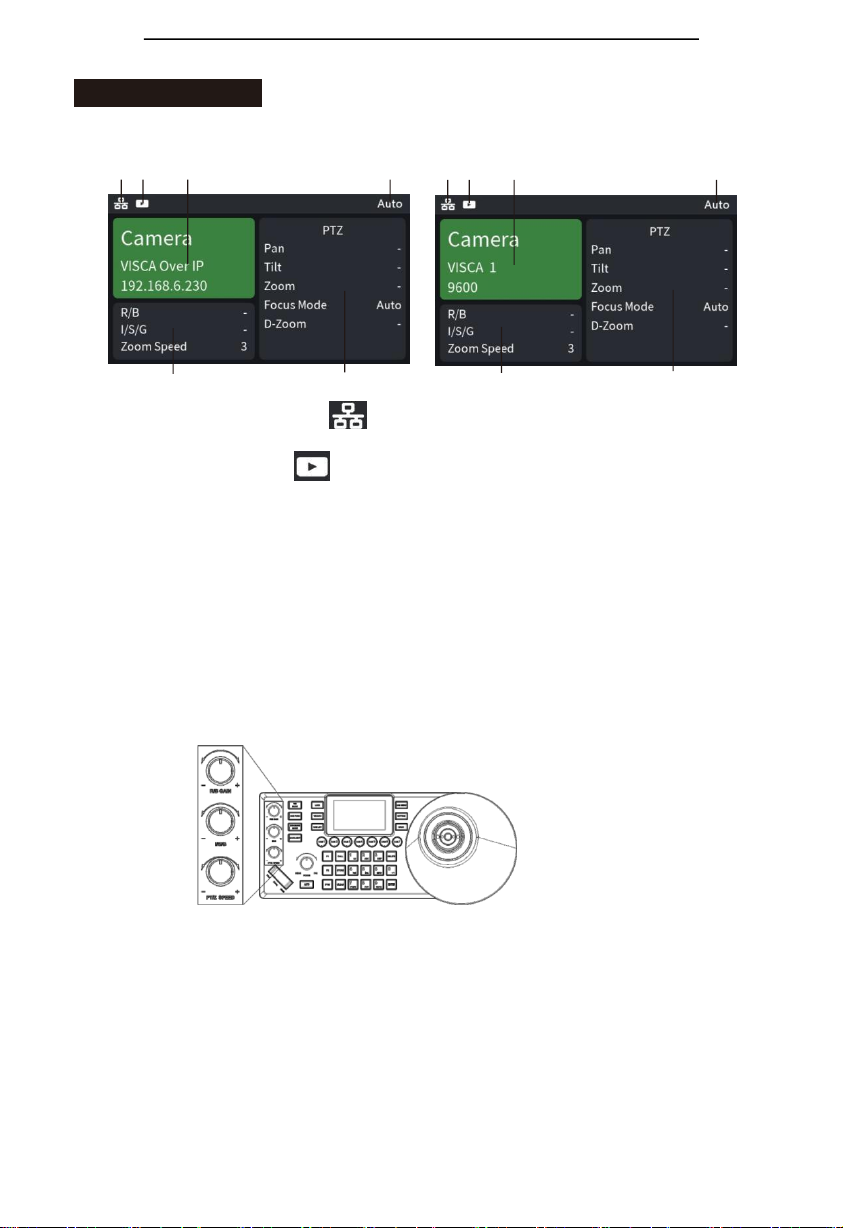
Tips
Thank you for using our products.
In order to enable you to operate this machine proficiently as soon as possible, please carefully
read the instruction manual we provide for you, from which you can obtain product safety
precautions, product introduction and product usage methods and other related knowledge.
After you have read the instruction manual, please keep it properly for future reference.
If you find any problems during the use of the product, please contact our relevant service
personnel, thank you for your cooperation.
Precautions
1.
Before connecting to the device, make sure the power supply voltage is correct. Only use the
original uncut (unspliced) power supply that came with your keyboard.
2.
If the product does not work properly, please contact your dealer. Never attempt to
disassemblethe device yourself.(Wearenotresponsible for problems caused by unauthorized repair
or maintenance.)
3.
This product is an indoor device, please do not place this product in a place with water or
humidity.
4.
When transporting, the equipment should be packed in the original packaging.
5.
Do not drop or subject the unit to physical impact.
6.
Do not use strong detergent to clean the machine, when the dust is thick, wipe gently with a
neutral detergent, and only for external cleaning.
7.
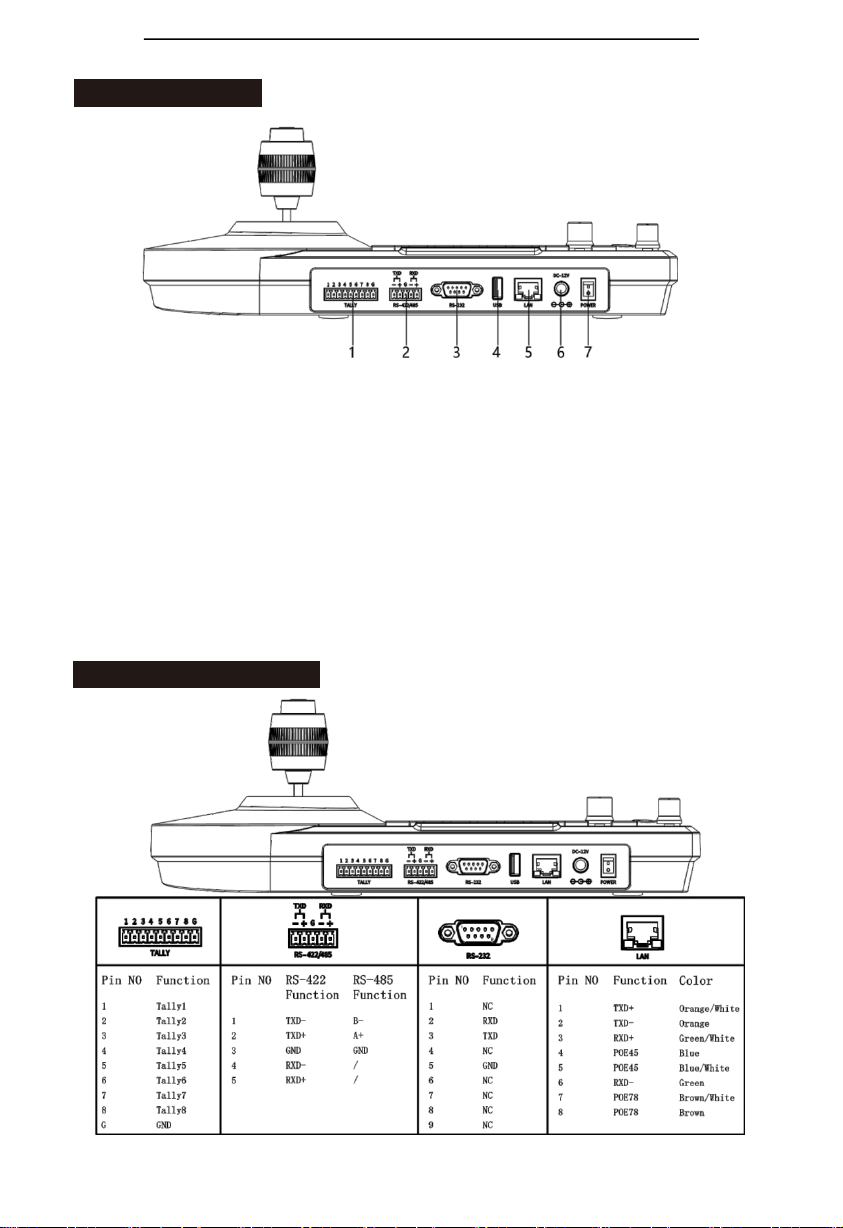
Keep RJ-45 ports free of dust and moisture.
8.
Avoid moving the machine between places that are too cold or too hot to avoid fogging inside
the machine and affect its service life.
Affirm
1.
We have done our best to complete and correct the content of this manual, but there will
inevitably be errors and omissions, and we will not be responsible for any technical or printing errors in
this manual.
2.
The appearance of the product shown in this manual is for reference only, and may differ from
the actual appearance of the device you purchased.
3.
This instruction manual guides multiple product models, so it is not intended to be used alone
for any specific product.
4.
The display interfaces in this manual, illustrations, parameters, drawings and model value ranges
may be different. Please refer to the actual product for details.
5.
The content of this manual is subject to change without prior notice.
6.
If there is a discrepancy with this manual due to software version upgrades, please refer to the
software as the standard.