PRODUCT HIGHLIGHTS
●Panasonic 1/2.8 inch 5MP sensor providing 1080P60 full HD video
●Wide angle optical lens 72.5 degree field of view, 12x optical zoom, 2x digital zoom
●NDI|HX, HDMI, 3G-SDI, USB video outputs interface
●1080p60 video over IP, H.264, H.265 encoding
●NewTek NDI v4.0 video transmission and control
●White Balance, Exposure, Focus, Iris can be adjusted automatically or manually
●Power over Ethernet (PoE) support: get video, control, tally and power supply with
one CAT5/6 cable
●Built-in tally light
●Special Focusing Algorithm: fast and precise focusing performance when zooming or
moving
●Smooth PTZ mechanical design, accurate pan tilt motor control
●128 presets supported
●Standard Sony VISCA, VISCA over IP, PELCO-P, PELCO-D control protocol; IP VISCA
over both TCP and UDP
●Daisy chain supported, max 7 cameras connected in VISCA protocol
●Image flip function, support upside-down installation
●Supplied with functional IR remote controller
●Fast video format switch: less than 3 seconds
●Supported field upgrade for ISP, ARM, FPGA and USB
●USB3.0 port compatible with USB2.0 output.
●Support RS232/RS485/UVC control
●Standard UVC1.5 protocol, seamlessly compatible with major video conferencing
software and platform
●Support IR transfer function, code of the third party remote controller can be
transferred to the host via VISCA IN port, in case client’s development
●OSD menu in English, IP address, streaming resolution and size can be set in OSD
menu
●Matte Black and White models (W)
●3 year warranty
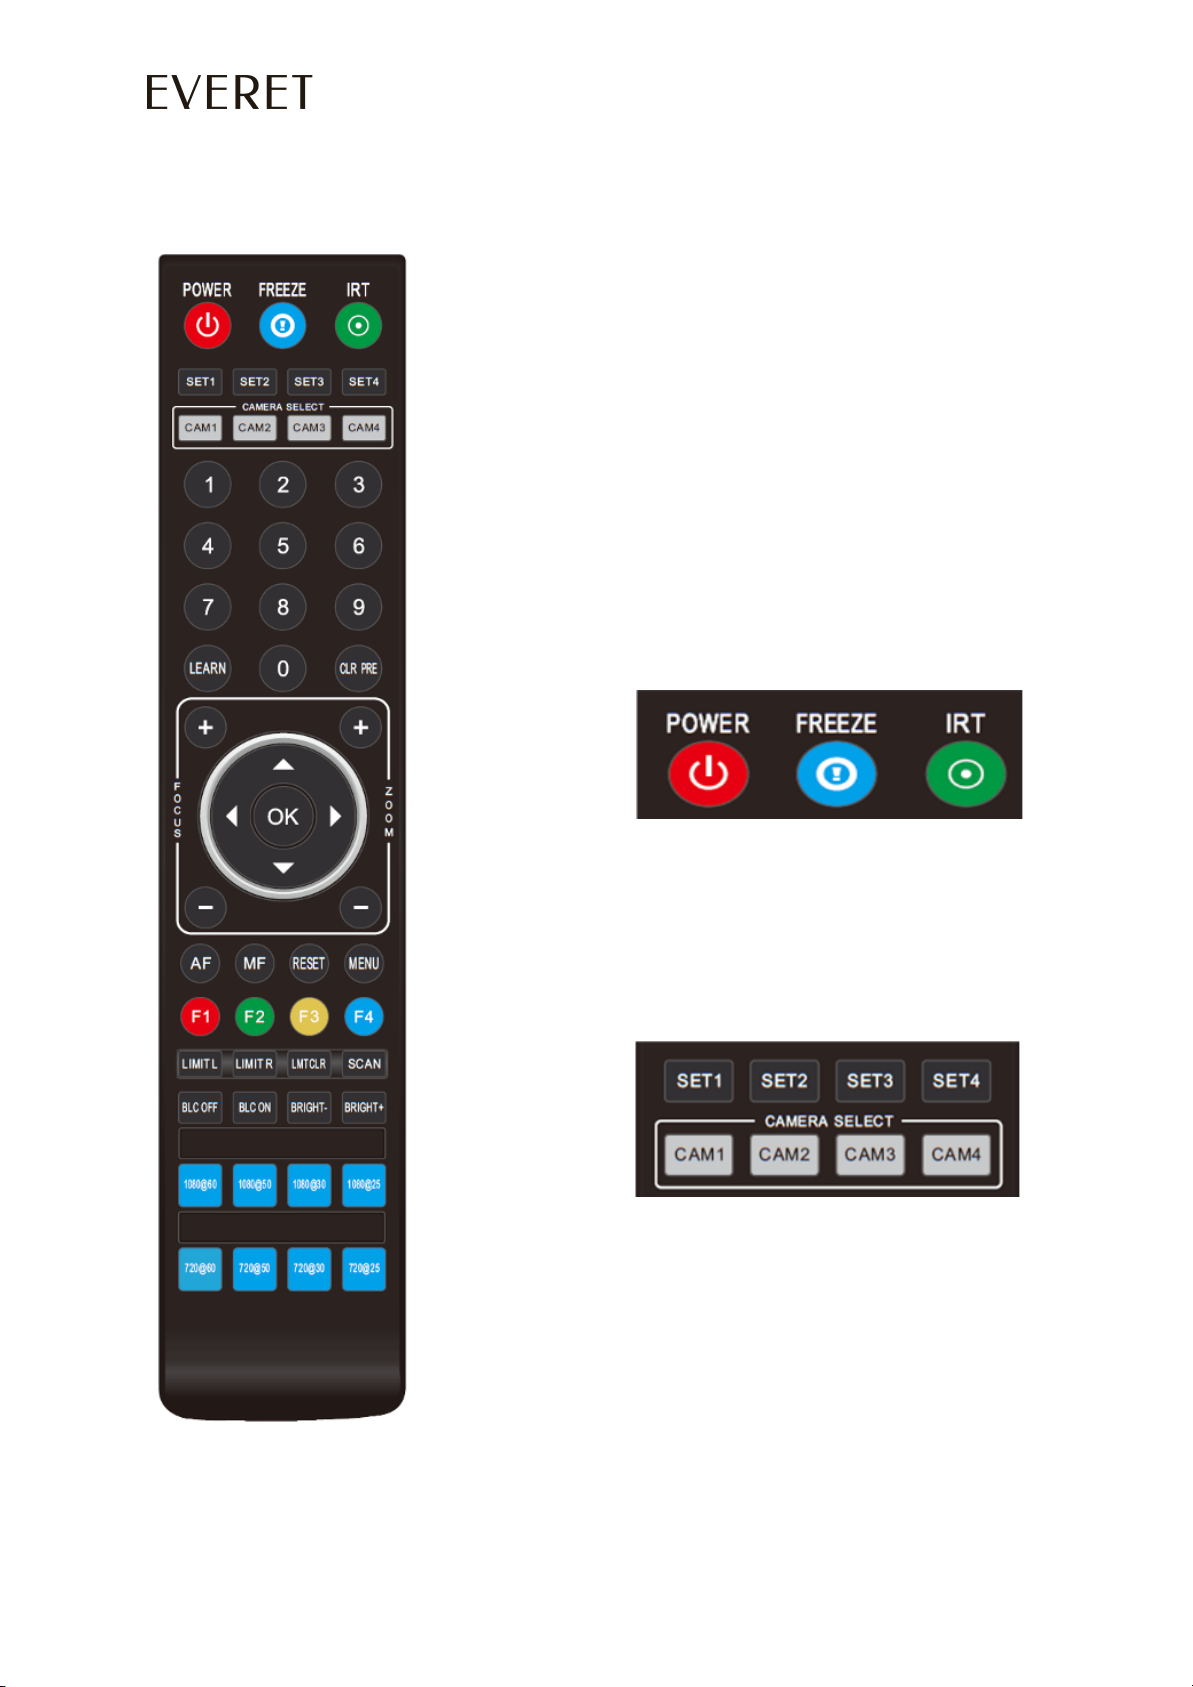
●IR remote control
5 WWW.EVERETIMAGING.COM