DiBoss LT-40H5LPH Manual de usuario

TFT / LCD TV
LT-40H5LPH
LT-40T5LPH
ENGLISH
Instruction Manual

2
Warnings
WARNING :
To prevent fire or shock hazard, do not expose the set to rain or moisture. Do not rub
or strike the Active Matrix LCD with anything hard as this may scratch, mar, or
damage the Active Matrix LCD permanently.
CAUTION:
Unauthorised tampering with the inside of the TV invalidates the warranty.
The manufacturer shall not warrant for any damage caused by improper
maintenance and repair work by third parties.
Service
Never remove the back cover of the TV, this can expose you to high voltage and
other hazards. If the TV does not operate properly, unplug it and call your dealer.
Antenna Connect the antenna cable to the connection marked Ant. (on the rear). For
best reception, use an outdoor antenna.
WARNING
RISK OF ELECTRIC SHOCK
DO NOT OPEN
WARNING :
The unit is operated at dangerous voltages. The unit may only be opened by an
authorised specialist. All maintenance and servicing work must be carried out by
an authorised company. Repairs that are carried out incorrectly could result in
fatal injuries to the user.
The lightning flash with arrowhead symbol, within an equilateral
triangle, is intended to alert the user to the presence of uninsulated
“dangerous voltage” within the product’s enclosure that may be of
sufficient magnitude to constitute a risk of electric shock to persons.
The exclamation point within an equilateral triangle is intended to alert
the user to the presence of important operating and maintenance
(servicing) instructions in the literature accompanying the appliance.

ENGLISH
3
Location
Position your TV so that no bright light or sunlight will shine directly on the screen. Do
not expose the TV to vibration, moisture, dust or heat. Also ensure that the TV is
placed in a position that allows a free flow of air. Do not cover the ventilation
openings on the back cover. You can place it on a table-top.
Cleaning
Unplug the TV before cleaning the face of the LCD Screen. Dust the TV by wiping the
screen and cabinet with a soft, clean cloth. If the screen requires additional cleaning,
use a clean, damp cloth. Do not use liquid or aerosol cleaners.
POWER
The main plug should be inserted fully into the power outlet to avoid a fire hazard.
Hold the plug firmly when unplugging. If you pull the cord, the cord may be damaged.
Prevent dust collecting on the power plug pins or outlet. And do not use too many
plugs on the Mains multi-outlet. It may result in overheating of the outlet and causes
a fire hazard.
Never touch the power plug with a wet hand. This may cause an electric shock
hazard.
Unplug the set from the wall outlet when it is left unattended and unused for long
periods of time. Accumulated dust may cause a fire or an electric shock from
deterioration or electric leakage.
Warnings

Contents
Warnings 2~3
Contents 4
Supplied Accessories 5
Installation 6
Connecting Speaker 7
Controls 8~10
Controller of panel 8
Remote controller 9~10
Basic Operation 11
On and off 11
Programme selection 11
Volume adjustment 11
P◀P11
Mute Function 11
On screen Language selection 11
On Screen Menus and Displays 12
Setting up TV Programme 13~15
Auto Programme 13
Manual Programme 14
Programme edit 15
Picture Control 16
Manual picture setup 16
Auto picture setup 16
Sound Control 17
Other functions 18~19
TV, SCART1, SCART2 and S-VIDEO mode 18
Auto sleep 18
Blue Back 19
Auto wide (Aspect Ratio Control) 19
Sleep timer 19
Sound output selection 19
PIP function 19
Programme list 20
TELETEXT 21~22
Text On/Off 21
TOP text 21
FLOF text 21
Special Text function 22
External Equipment Connection 23~24
Antenna IN 23
SCART 1/2 23
COMPONENT IN 23
HDMI IN 24
S-VIDEO IN 24
Headphone OUT 24
Sub woofer OUT 24
Connecting PC(HDMI/VGA) as monitor 25~26
Product specifications 27
Before operating the set, please read this manual carefully.
4
ENGLISH
5
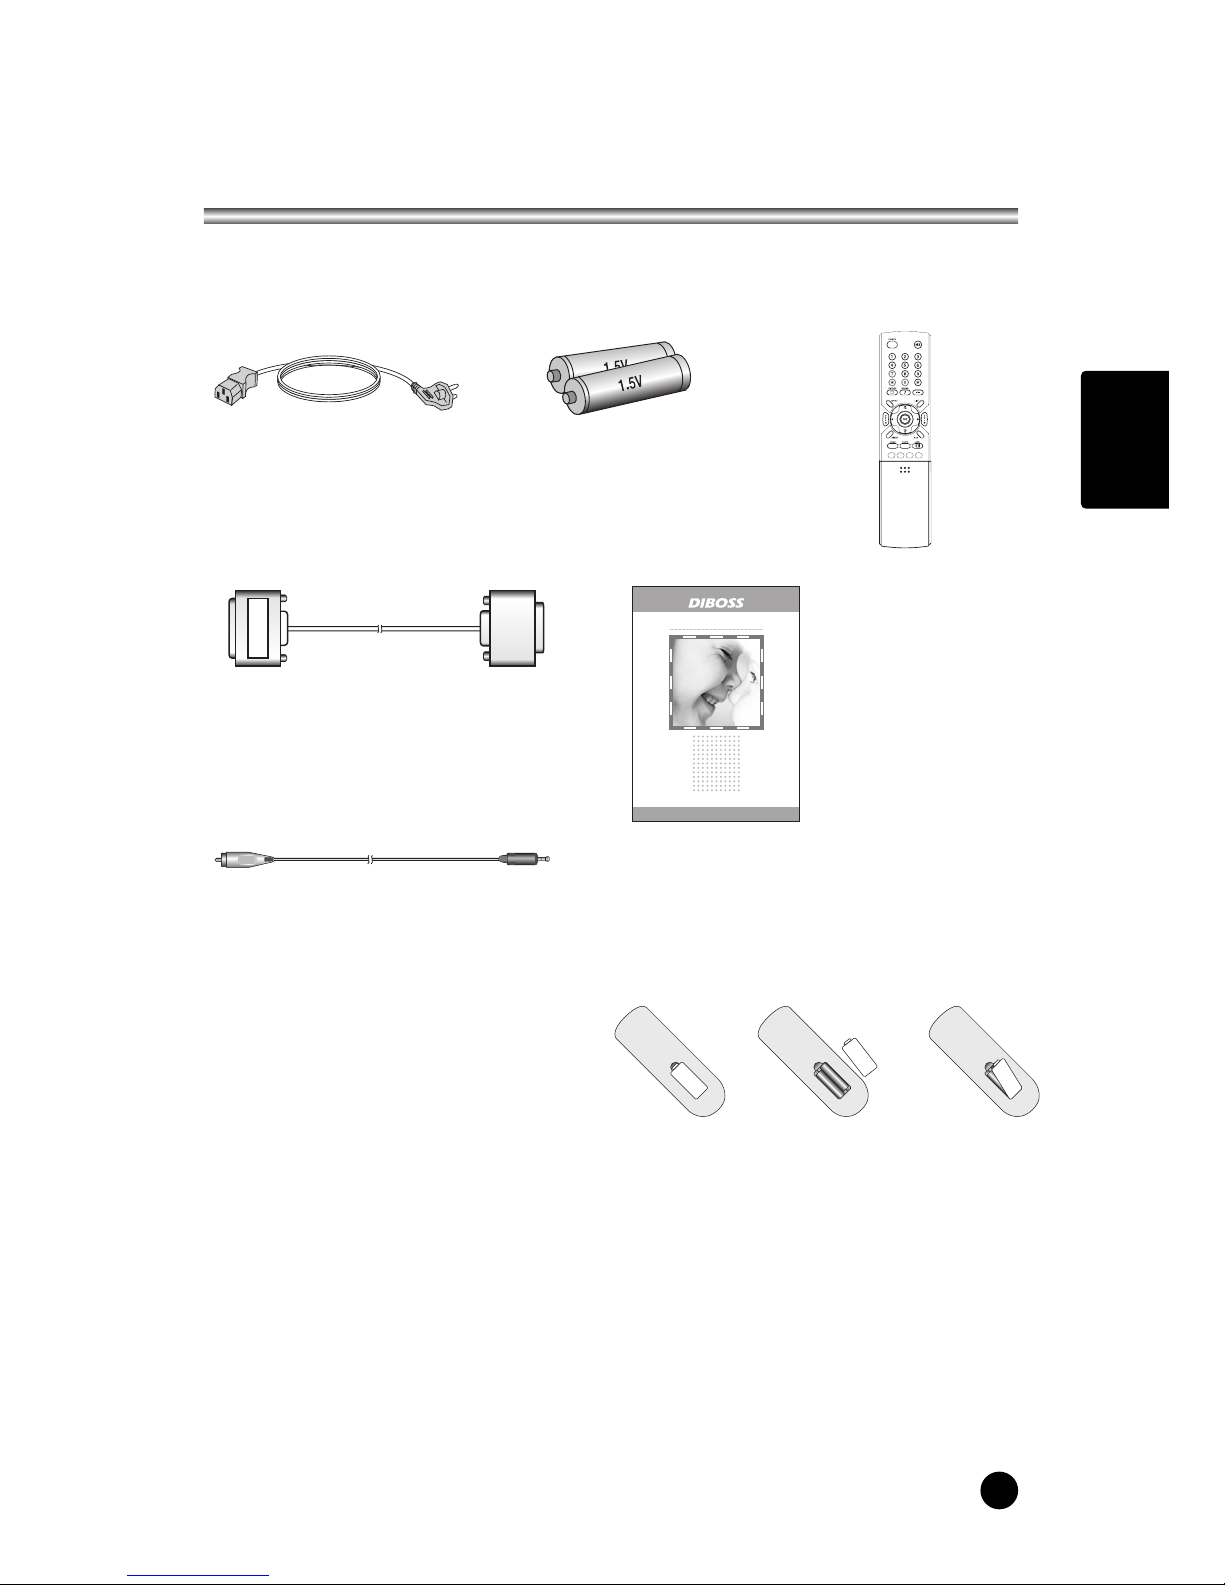
Supplied Accessories
LMake sure the following accessories are provided with Product.
3. Remote controller
5. Instruction manual
4. VGA cable
6. PC AUDIO IN cable
2. Batteries (2EA)
1. AC cord
Model:
LT-40H5LPH/40T5LPH
Owner’s Manual
40" WIDE LCD TV/MONITOR
OO
Battery installation
uInserting batteries
1. Remove the battery cover by pulling it
upward in the direction shown by the arrow.
2. Insert the batteries with correct polarity.
3. Replace the battery compartment cover.
-Install two high-quality 1.5V "AAA" alkaline batteries. Don't mix old batteries with
new batteries.
-Remove batteries when you won't use the remote controller for long time. Liquid
leakage from old batteries may cause operation failure.
uNotes for using remote controller
• Make sure there are no objects between the remote controller and its sensor.
• Don't place the remote control near a heater or in damp place. Strong impact to the
remote control may cause operation failure.
• Signal from the remote control may be disturbed by sun light or other bright light. In
this case, darken the room or move the TV.

6
Installation
Installation Options
* You can install the TV on a wall or place it on a table-like surface.
* To eliminate any risk of injury from the TV falling, it should be mounted securely.
1. Wall Installation
Caution: Do not install the TV on a
weak wall surface, like plaster etc.
When the TV is placed into a cupboard
the distance between the TV and the
wall have to leave minimum 60mm
square as below.
When the TV is mounted on the wall.,
the distance between the TV and the
wall have to leave minimum 30mm
square as below.
For detailed information, refer to the wall mount bracket instruction (not included in
delivery) supplied with wall mount bracket.
2. Desktop Installation
Installing Stand
1. Lay down the TV as pictured below.
Please ensure that the table/box has a protection sheet to avoid any scratch or
damage to the TV screen.. Please ensure that there is no pressure directly applied
to the front surface of the TV screen when laying the
product down on its face.
2. Locate the stand on its mounting position and use
the 8 supplied screws to attach the stand to the TV.
Ensure that all of them are securely tightened.
3. The TV and stand may now be placed upright, ready
for viewing.

ENGLISH
7
LConnecting TV and Speaker(LT-40T5LPH)
Connecting Speaker
1. Fix the bracket onto the guide pole located on the rear of TV and Speaker.
2. Clamp the speaker and the TV together fasten the screws.
3. Connecting the speaker audio cable to the external speaker output jack on the TV.
4. Fix the speaker audio cable on the quick clamp✽located on the rear of TV.
✽Quick clamp✽: Attach the offered quick clamp on each position
speaker joint bracket
External speaker
output jack
Speaker
input jack
Quick clamp

228
Controls
1. ON/OFF Switches TV set on or off.
2. MENU Displays a menu.
3. + PR - (Programme Up/Down)
Selects a programme or a menu item.
4. + VOL - (Volume Up/Down) Adjusts the volume./ Adjusts menu settings.
5. TV/AV Selects TV, SCART1, SCART2, S-VIDEO, COMPONENT, PC ANALOG,
HDMI./ Clears the menu from the screen.
6. Power Indicator
Illuminates in red when the TV is in standby mode./ Illuminates in green when the
TV is switched on.
7. Remote control sensor Accepts the IR signal of remote controller.
1. PC ANALOG IN (D-SUB)
2. HDMI (High Definition Multimedia Interface) IN
Connect to the HDMI jack for device with HDMI output.
3. PC AUDIO IN
Connect the audio cable from the PC to the PC AUDIO IN of the set.
4. H/P (Headphone out) Connect a headphone to this socket.
5. Sub woofer OUT
Connect the cable from the Sub woofer to the Sub woofer OUT of the set.
6. COMPONENT(Y/Pb(Cb)/Pr(Cr)) VIDEO IN
Connect the COMPONENT video output sockets of the DTV set top box to the
COMPONENT Input sockets of the set.
7. COMPONENT AUDIO(L/R) IN
Connect the audio cable from the DTV set top box to the Audio
Input sockets of the set.
8. S-VIDEO IN
Connect the output of an S -VIDEO VCR to the S-VIDEO input.
Connect the audio outputs of an S-VIDEO VCR to the Audio IN (L(MONO), R).
9. SCART2 AV2
10. SCART1 AV1
11. Ant. (Antenna input)
Model: LT-40H5LPH
*REAR PANEL
Model: LT-40T5LPH

ENGLISH
9
Controls
All the functions can be controlled with the remote controller. Some functions can
also be adjusted with the buttons on the side panel of the set.
Remote controller
Before you use the remote controller, please install the
batteries.
1. POWER
Turns the TV on from standby or off to standby mode.
2. MUTE
Turns the sound on and off.
3. NUMBER buttons
Selects programme numbers.
4. PICTURE( )
Recalls your preferred picture setting
5. SOUND( )
Recalls your preferred sound setting
6. I/II
Selects the language during dual language broadcast.
Selects the sound output.
7. MENU
Displays a main menu.
8. TV/AV
Selects TV, SCART1, SCART2, S-VIDEO, COMPONENT,
PC ANALOG, HDMI mode.
Clears the menu from the screen.
9. SLEEP
Sets the sleep timer.
10. TV/PC
Selects TV or PC mode directly.

10
Controls
11. PRx/PRy(Programme Up/Down)
Selects next programme or a menu item.
12. Ïq
Adjusts menu settings.
13. VOLÏ/VOLq(Volume Up/Down)
Adjuste the sound level.
14. ARC( )
Selects a screen mode- 16:9, 14:9, ZOOM, 1:1 and
Auto Wide.
15. TELETEXT Buttons
These buttons are used for TELETEXT.
For further details, see the ‘TELETEXT’ section.
16. LIST
Displays the programm list menu.
17. PIP( )
Displays a PIP(Picture In Picture) screen.
18. INPUT( )
Selects the AV source of sub picture in PIP mode.
19. SWAP( )
Switches a main picture for sub picture in PIP mode.
20. POSITION( )
Selects a position of PIP screen.
21. OK
Accepts your selection or displays the current mode.
22. MODE( )
Selects a PIP screen mode. – 16:1, 9:1, double
window and scan mode
23. PIP PRx/PIP PRy
Selects a programme when RF signal is displayed in
PIP mode.
24. PÏP
Returns to the previously viewed programme.
Este manual sirve para los siguientes modelos
1
Tabla de contenidos
Otros manuales de Televisor LCD de DiBoss

DiBoss
DiBoss LT-32HLFH Manual de usuario

DiBoss
DiBoss lt-23q5lfh Manual de usuario

DiBoss
DiBoss lt-23q5lfh Manual de usuario

DiBoss
DiBoss LT-40T5LPH Manual de usuario

DiBoss
DiBoss LT-32HEP Manual de usuario

DiBoss
DiBoss LT-32HTFH Manual de usuario

DiBoss
DiBoss LT-26HLFH Manual de usuario

DiBoss
DiBoss LT-40H6LVH Manual de usuario

DiBoss
DiBoss LT-15KLF Manual de usuario


