32 33
EN
SW1 Conguring the
technical unit
OFF Master
ON Extension (refer to the 'Extension option' §)
SW2 Production mode OFF Heat (boiler or non reversible heat pump)
ON Heat/Cool (reversible heat pump)
SW3 Valve actuator type
OFF Thermal 2 positions (number of outputs 8 max.)
ON Motorised 3 positions (number of outputs 4max.)
SW4 Valve control direction OFF Normally closed
ON Normally open
SW5 Override mode
(e.g: initial heating)
OFF No
ON Yes (valves and circulator active)
SW6
Heat pump change-over
communication
direction
OFF Heat pump to Technical Unit (Change-over input). The
heat pump delivers its production mode to the TU.
ON TU to heat pump (change-over output). The TU delivers
its production mode to the heat pump.
SW7 Heat pump change-over
conguration
OFF Contact closed= Heat mode
Contact open = Cool mode
ON Contact closed= Cool mode
Contact open = Heat mode
SW8
Type of 'water
monitoring'
measurement.
OFF
Absence of dew point measurement or sensor with
a Delta Dore condensation sensor (For cooling only,
shuts the system down if condensation is detected).
ON
Initial Cool or Heat temperature with CTN 10KW
sensor at 25°C (shuts the system down if the water is
too hot or too cool).
1
ON
6
5
4
32
DIP
88
7
SW5: Override mode
This mode overrides the 100% operation for initial heating. Set switch 5 to ON.
On the technical unit, the circulator LED and valve output LEDs are illuminat d. The 'Status'
LED is off.
On the room thermostat (RT) or the programmable thermostat (PRT) a
specic display indicates that initial heating is in progress.
All the switches are set to OFF by default.
HP: Heat pump TU: Technical unit
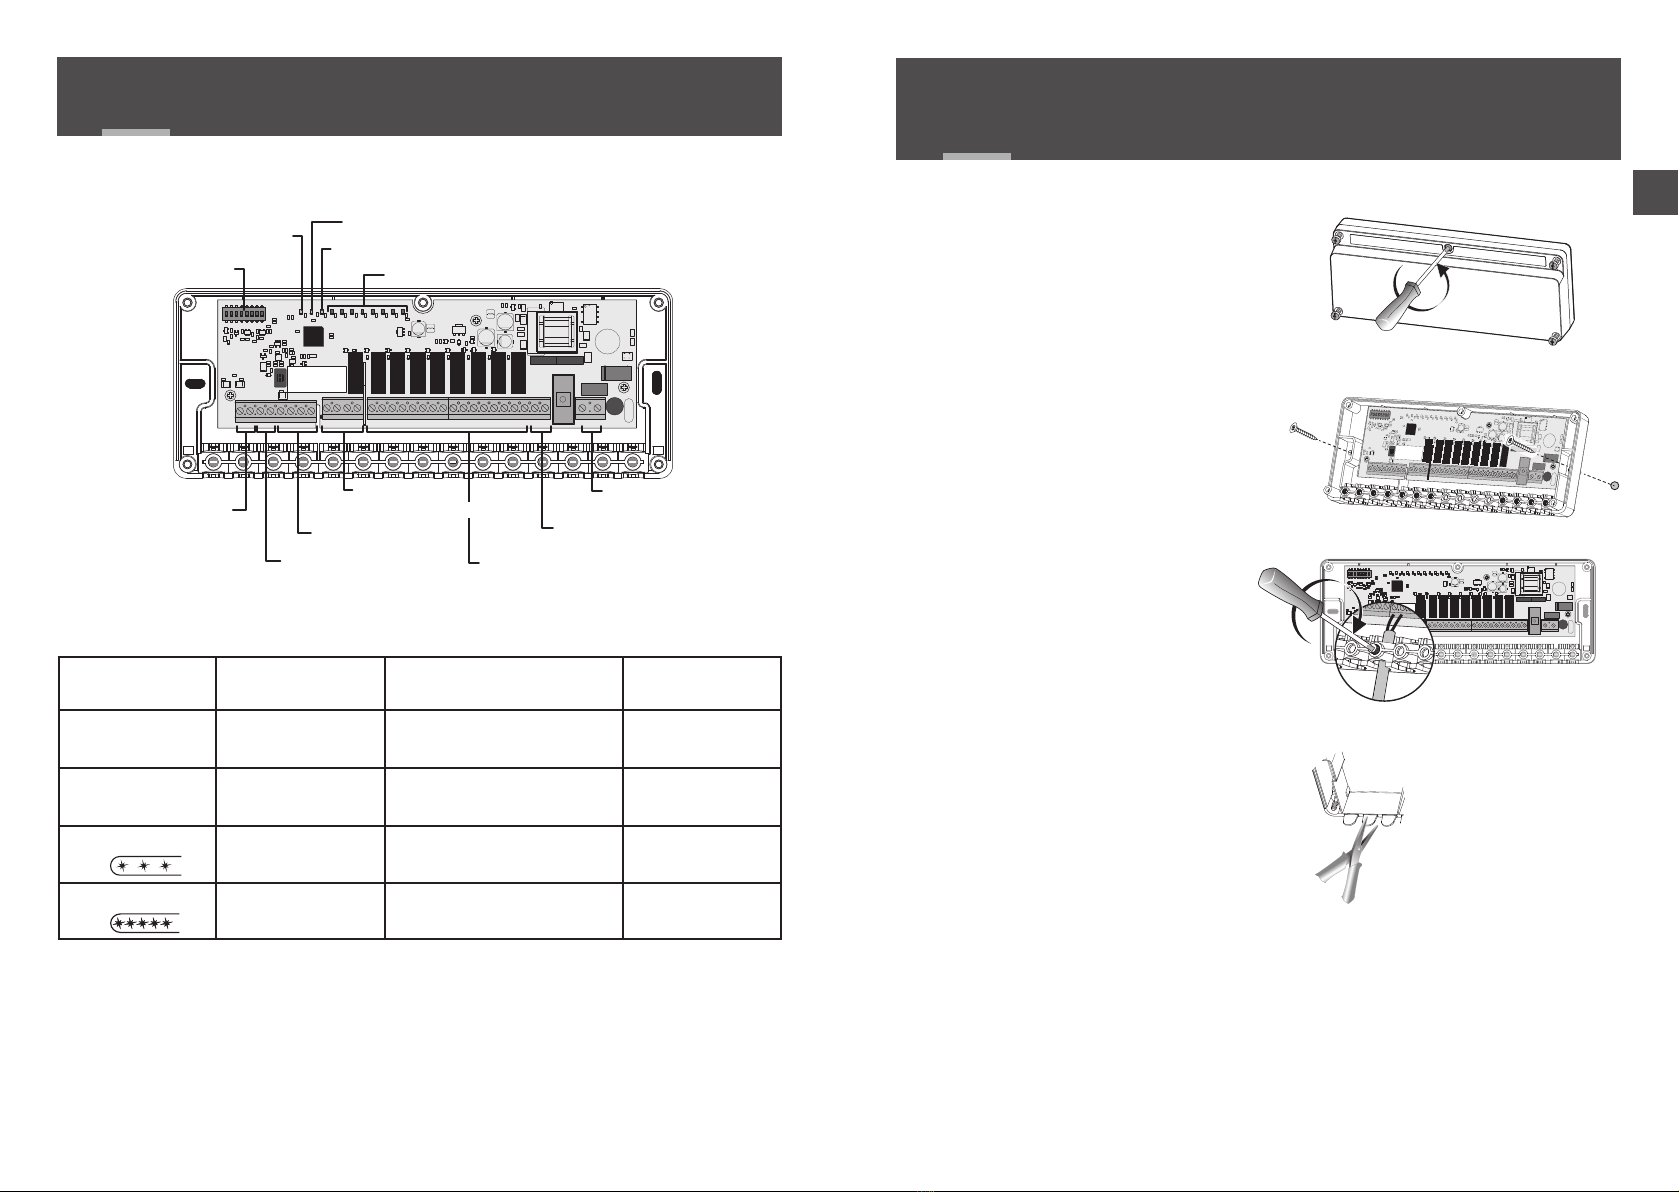
5/ SWITCH CONFIGURATION 6/ ASSOCIATING A ROOM THERMOSTAT WITH
A TECHNICAL UNIT
Example:
Associated outputs (CF20) Controlled outputs
Thermostat 1 1 Y1, Y2, Y3
Thermostat 2 4 Y4, Y5
Thermostat 3 6 Y6, Y7, Y8
Y1 N N N N N N N NY2 Y3 Y4 Y5 Y6 Y7 Y8
5 6 7 8 9 10 11 12 13 14 15 16 17 18 19 20
Th 1 Th 2 Th 3
6.1 WITH A ROOM THERMOSTAT (RT)
❶Press and hold the 1st and 4th button for 3 seconds,
then release.
❷The screen displays CF20. Press OK to open the setting,
then press + and - to select the output with which the
thermostat will be associated.
Conrm with OK.
❸The screen displays CF21.
Select the transmitter and press OK.
❹The screen displays CF05.
Select the thermostat type and press OK.
3 s
1
2
(1) Output number 1 to 16 depending on the system.
Transmitter type
0Underoor heating
1 Heater
2 Ceiling or ductable
(2) Thermostat type 0 Zone thermostat
1 Master Thermostat
(2) CF05: the Master thermostat enables the centralised use of ON/OFF and HEAT/COOL
(at least one Master thermostat is required in an installation without a programmer).