BBQ Buddy BBSMTHERM Manual de usuario

1
SMART
THERMOMETER
USER MANUAL
SEE INSIDE FOR
INSTRUCTIONS!

2
App download
Your BBQ Buddy Smart Thermometer requires the download of free app
‘SmartThermo’ through the app store or google playstore. Install app
before turning on device. Compatible with iPhone 6s or Bluetooth smart
phones models (or earlier).
Minimum software requirements are iOS 7 or Android 4.3.
READ & SAVE THESE INSTRUCTIONS
Carefully read this manual before using the BBQ Buddy smart thermometer. Make sure that
you know how to use your item. Maintain the item in accordance with the instructions to
ensure that it functions properly. If the item is to be used by a third party, this instruction
manual must be supplied.
No liability can be accepted for any damage caused by non-compliance with these instructions
or any other improper use or mishandling.
Smart
thermometer
Item Code Description Includes
BBSMTHERM Smart Thermometer
Touch key display unit with
magnetic casing, metal prong and
battery (CR2032)
These instructions are related to the following products:
FRONT VIEW BACK VIEW
1 Temperature display
2 On/Off power button
3 Unit of measure (Celsius or Fahrenheit)
4 Pairing indicator
5 Bluetooth connection
6 App connection (SmartThermo)
7 Stainless steel prong
8 Reset button
9 Battery compartment
3
BACK VIEW
PAIRING YOUR DEVICE
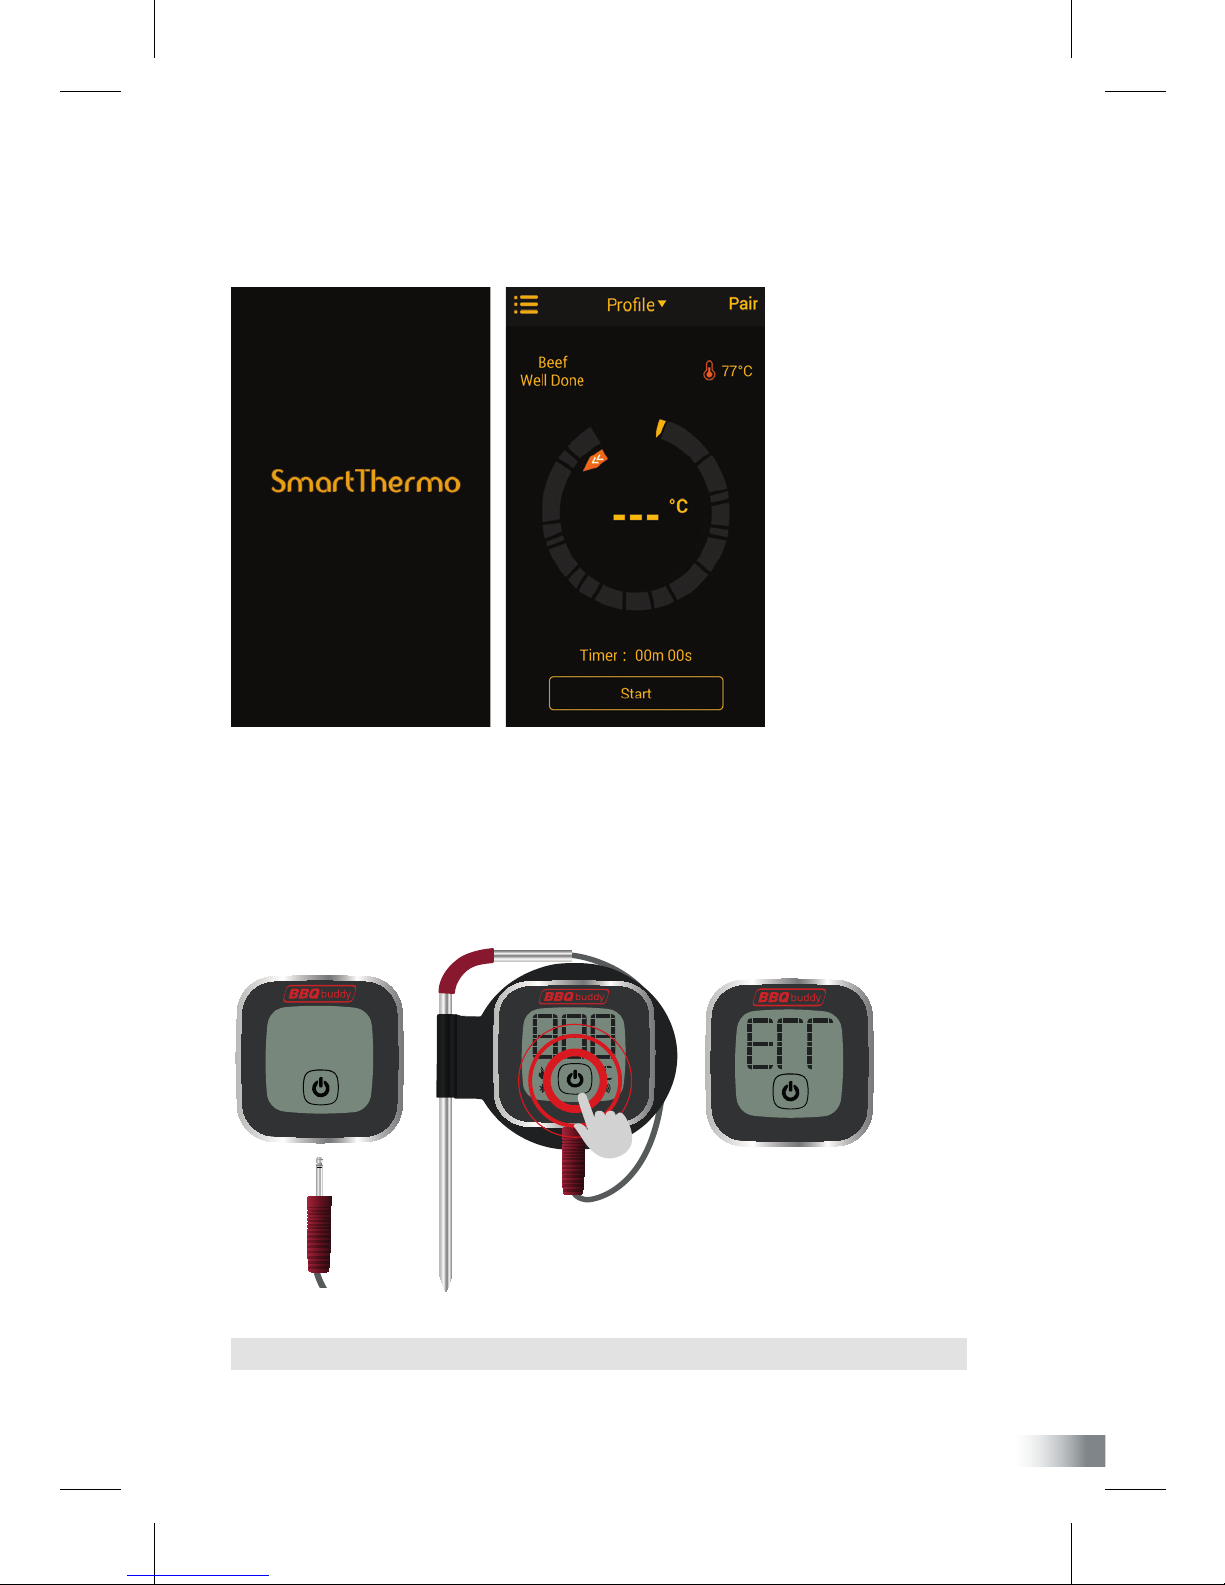
1. Download and install free app ‘SmartThermo’ to your smart phone.
Once installed, open app on your phone.
2. Remove your BBQ Buddy smart thermometer from packaging. Connect the meat
prong into the bottom of your thermometer and press the power on button, located
on the bottom of the display screen.
NOTE: The thermometer will automatically turn off if prong has not been connected.
4
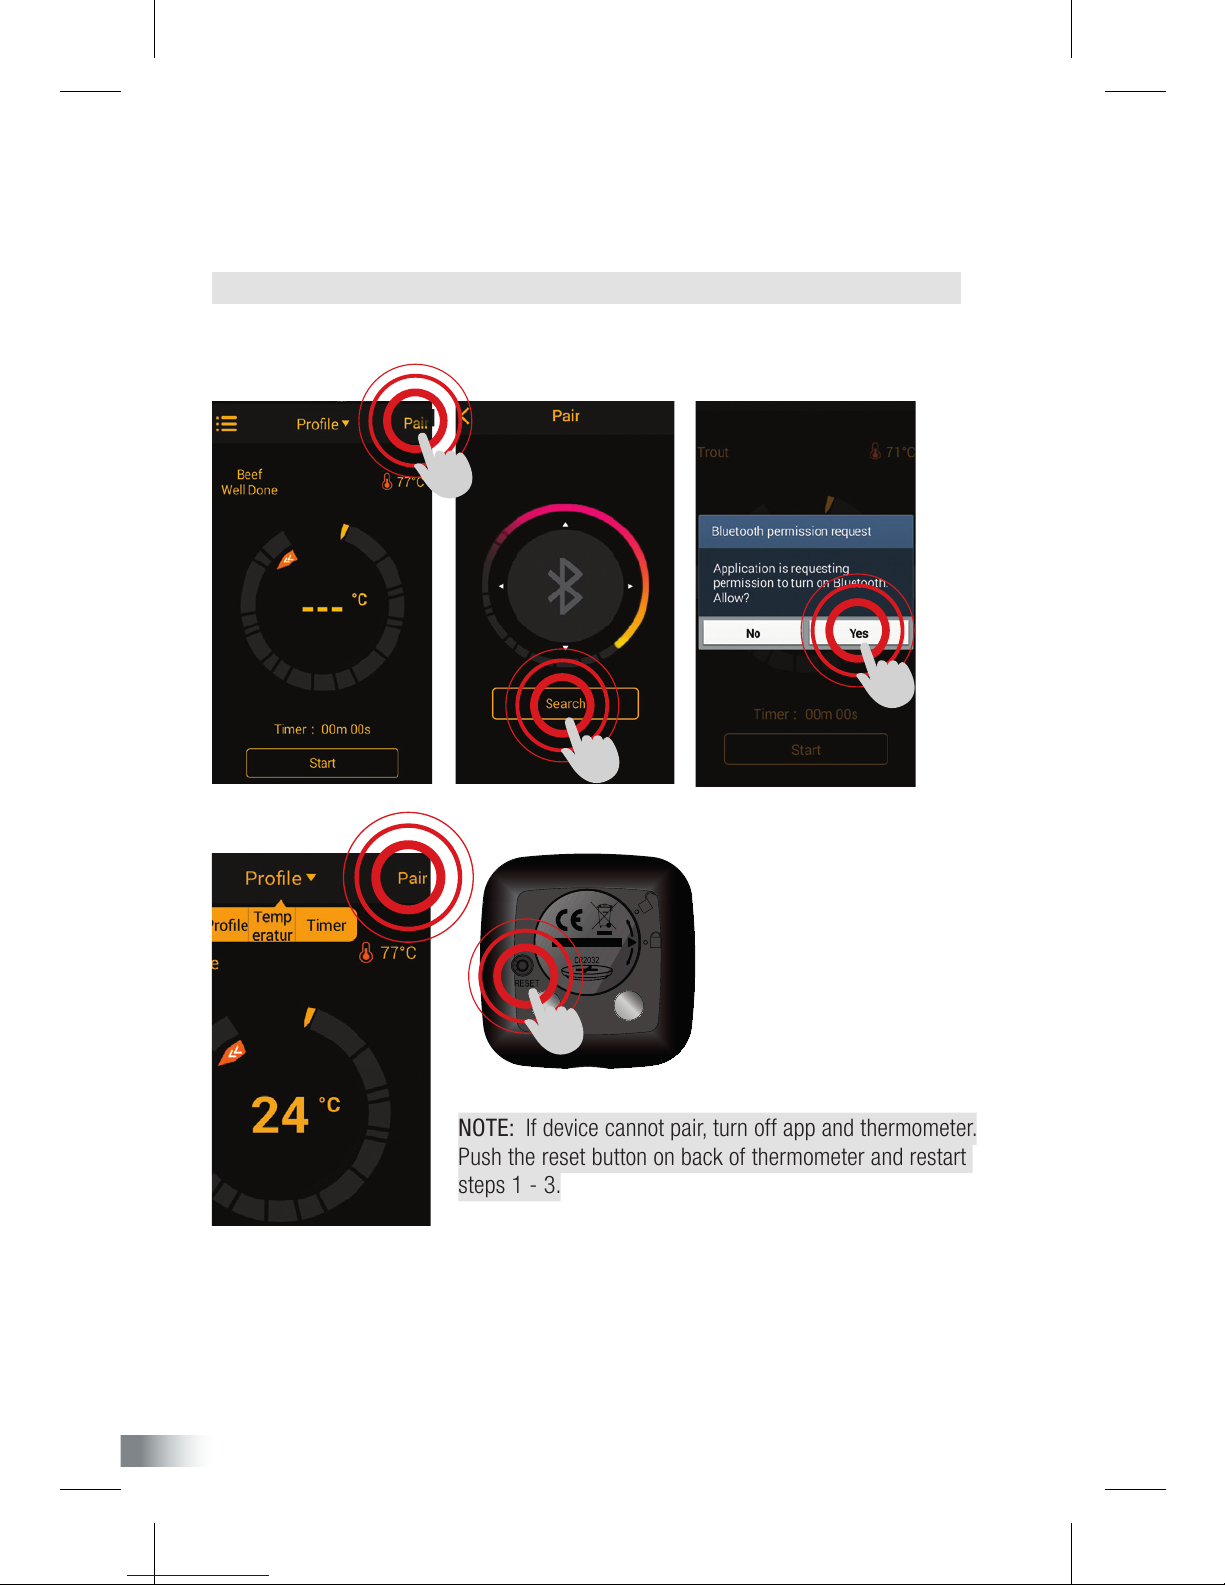
NOTE: If device cannot pair, turn off app and thermometer.
Push the reset button on back of thermometer and restart
steps 1 - 3.
3. On phone display, press the ashing ‘pair’ button located on top-right of screen.
Click search to pair your thermometer to your phone. This will prompt you to turn on your
bluetooth connection, click YES. Please wait for this process to be completed.
NOTE: Depending on your phone model, you may need to turn bluetooth on manually.
When pairing has been successful, ‘pair’ button on phone will remain on.
YOUR THERMOMETER HAS BEEN CONFIGURED.
Please follow instructions on following page to set up and use app.

5
APP overview
1 Menus, settings & support
2 Prole - Displays preset & saved options
3 Temperature - Sets alarm to temperature
4 Timer - Sets alarm to timer
5 Device pairing status
6 Meat & Taste options
7 Set temperature or time
8 Finish goal (Temperature/Time)
9 Actual temperature
10 Progress tracker
11 Timer
12 Start timer button
How to use app
1. By default, your app is set °Celsius. If you want to select Fahrenheit as your unit of
measure, click the top-left menus button, go to settings and change to °F.

6
2. To select from the preset options of meat types and taste settings, click ‘Settings’ &
‘Prole’ options.
• Select your choice of meat from 8 different settings including beef, veal, lamb, pork,
chicken, turkey, sh and hamburger.
• Then choose from 4 taste settings including well done, medium, medium rare and rare.
NOTE: These taste settings will vary depending on your type of meat. You can also adjust
up to 2 degrees from the preset temperatures. Click back to the previous screen to save.
7
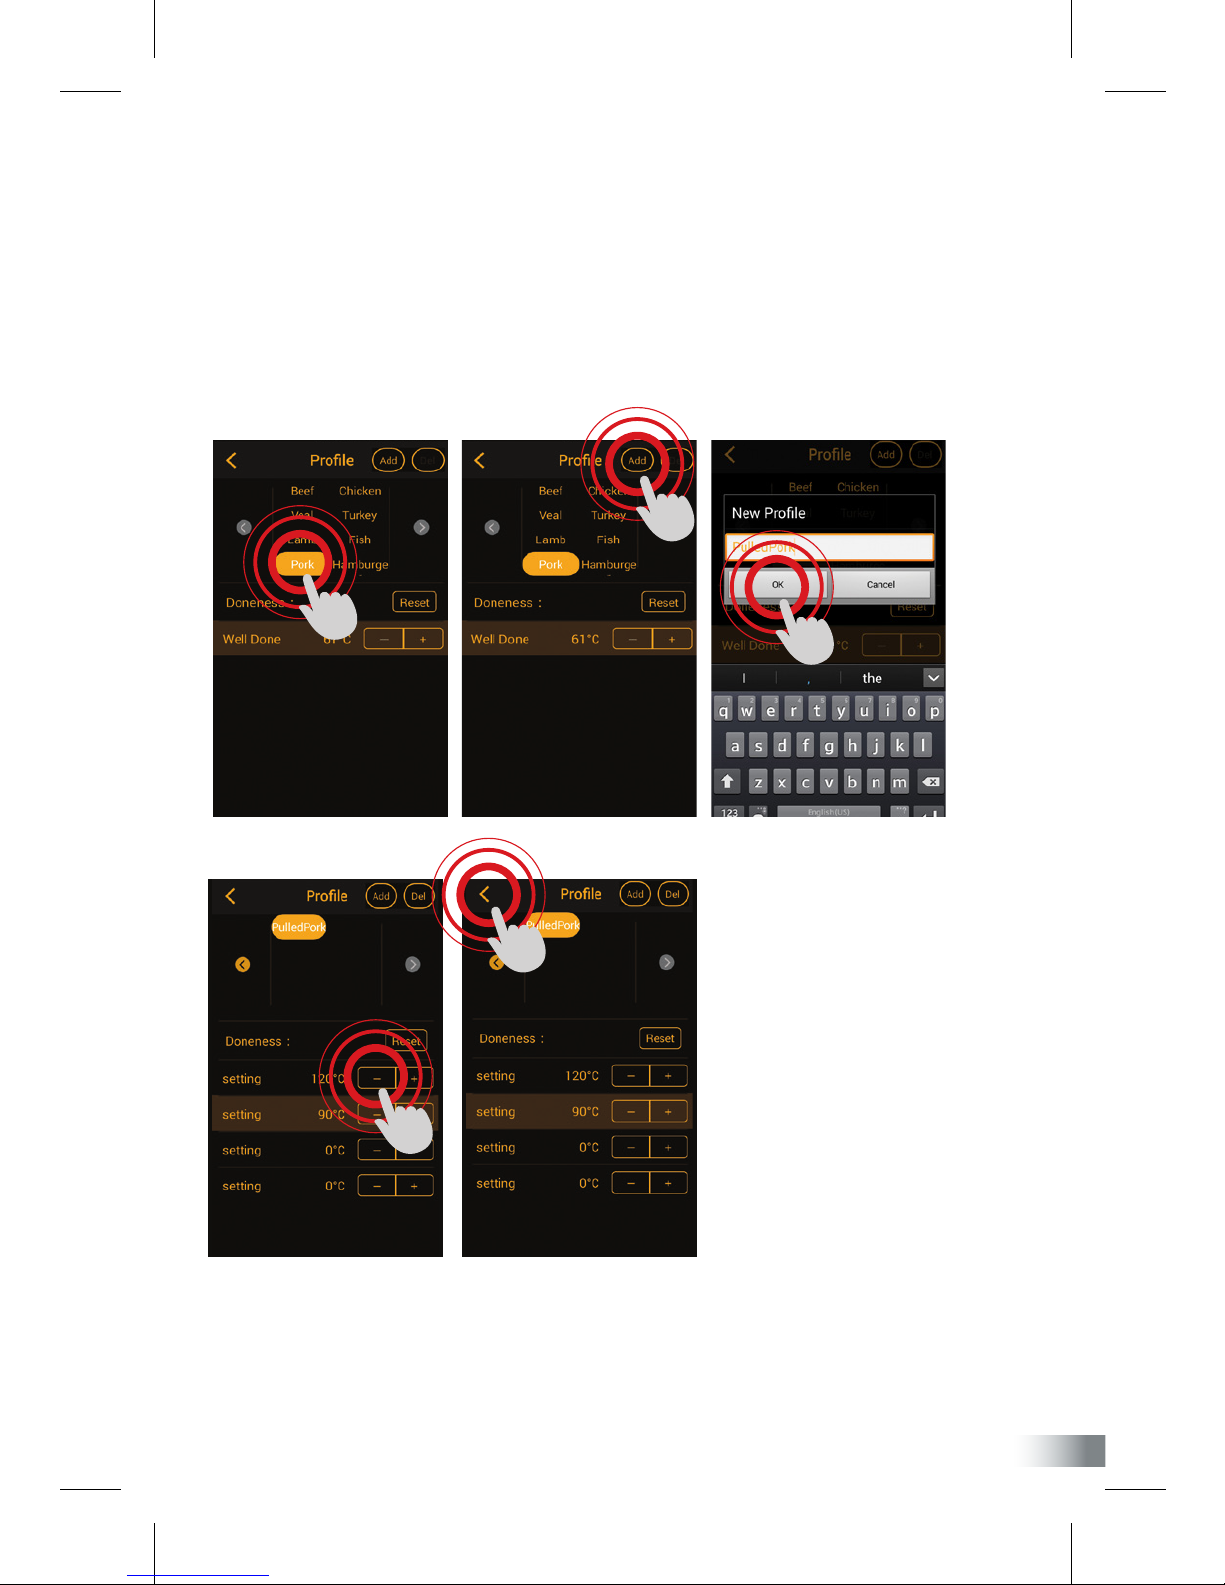
3. To have full control over your temperature settings, you will need to create a
customised prole.
• First select your meat type and click ‘Add’ on top-right of app.
• Enter your preferred name for this setting and click ‘OK’ to save option.
• Now you can adjust temperature settings from -30°C to 300°C. Click back to the
previous screen to save.

8
NOTE: As a reference guide, use the table at the end of this instruction manual to work out your
appropriate cooking time. Click back to the previous screen to save.
4. Next step is to set your alarms. This can be done in two ways, temperature and time.
Setting temperature alarm: Go to settings and click temperature to scroll through and set
a warning alarm. As a guide, this should be set 5-10°C before desired temperature as meat
will continue to cook while resting. It will also allow enough time to adjust your BBQ settings
in case it is too hot and cause the meat to dry out. Click back to the previous screen to save.
Setting timer alarm: Go to settings and click timer to scroll through and set a warning alarm.
Cooking time will depend on your meat type, weight, size and cut.

9
5. To customise your alarm ring tone, go to settings and click sound. Select your choice
of alarm from 20 different rings. Click back to the previous screen to save.
Click ‘home’ to go back to your prole page.
6. Once you have prepared your meat and ready to cook, push the ‘Start’ button on
Prole, then select Temperature and Timer from the drop down menu to set all
alarms on tracking the progress of your meal. You are now ready to barbecue!

10
7. Insert the stainless steel meat prong to the centre or thickest part of meat for an
accurate temperature reading.
NOTE: Ensure the prong is not exposed to open ames or temperature exceeding
300°C (or 572°F)
8. Once your meat has reached the ideal cooking temperature or time, the alarm will
go off and notication will show on phone.
GOOd Food? SHARE IT AROUND
Upload a photo and share your delicious BBQ through Facebook and Twitter.
1. Click the top-left menus button, go to settings and select camera to take a photo.
2. Once image is taken, select Facebook, Twitter or Email to share photo and
message.
3. Click submit to open login window. You will need to enter your login details to
open account.
Tabla de contenidos


