AVITON AZ281MA Manual de usuario

i
AZ281MA
PORTABLE NAVIGATION DEVICE
USER MANUAL

ii
Table of Contents
INTRODUCTION ................................................................................................................................................ - 1 -
COMPONENT LOCATIONS ............................................................................................................................. - 3 -
ACCESSORIES.................................................................................................................................................... - 4 -
12V/24V CAR ADAPTER CHARGER ..........................................................................................................................- 5-
USB CABLE .............................................................................................................................................................- 5 -
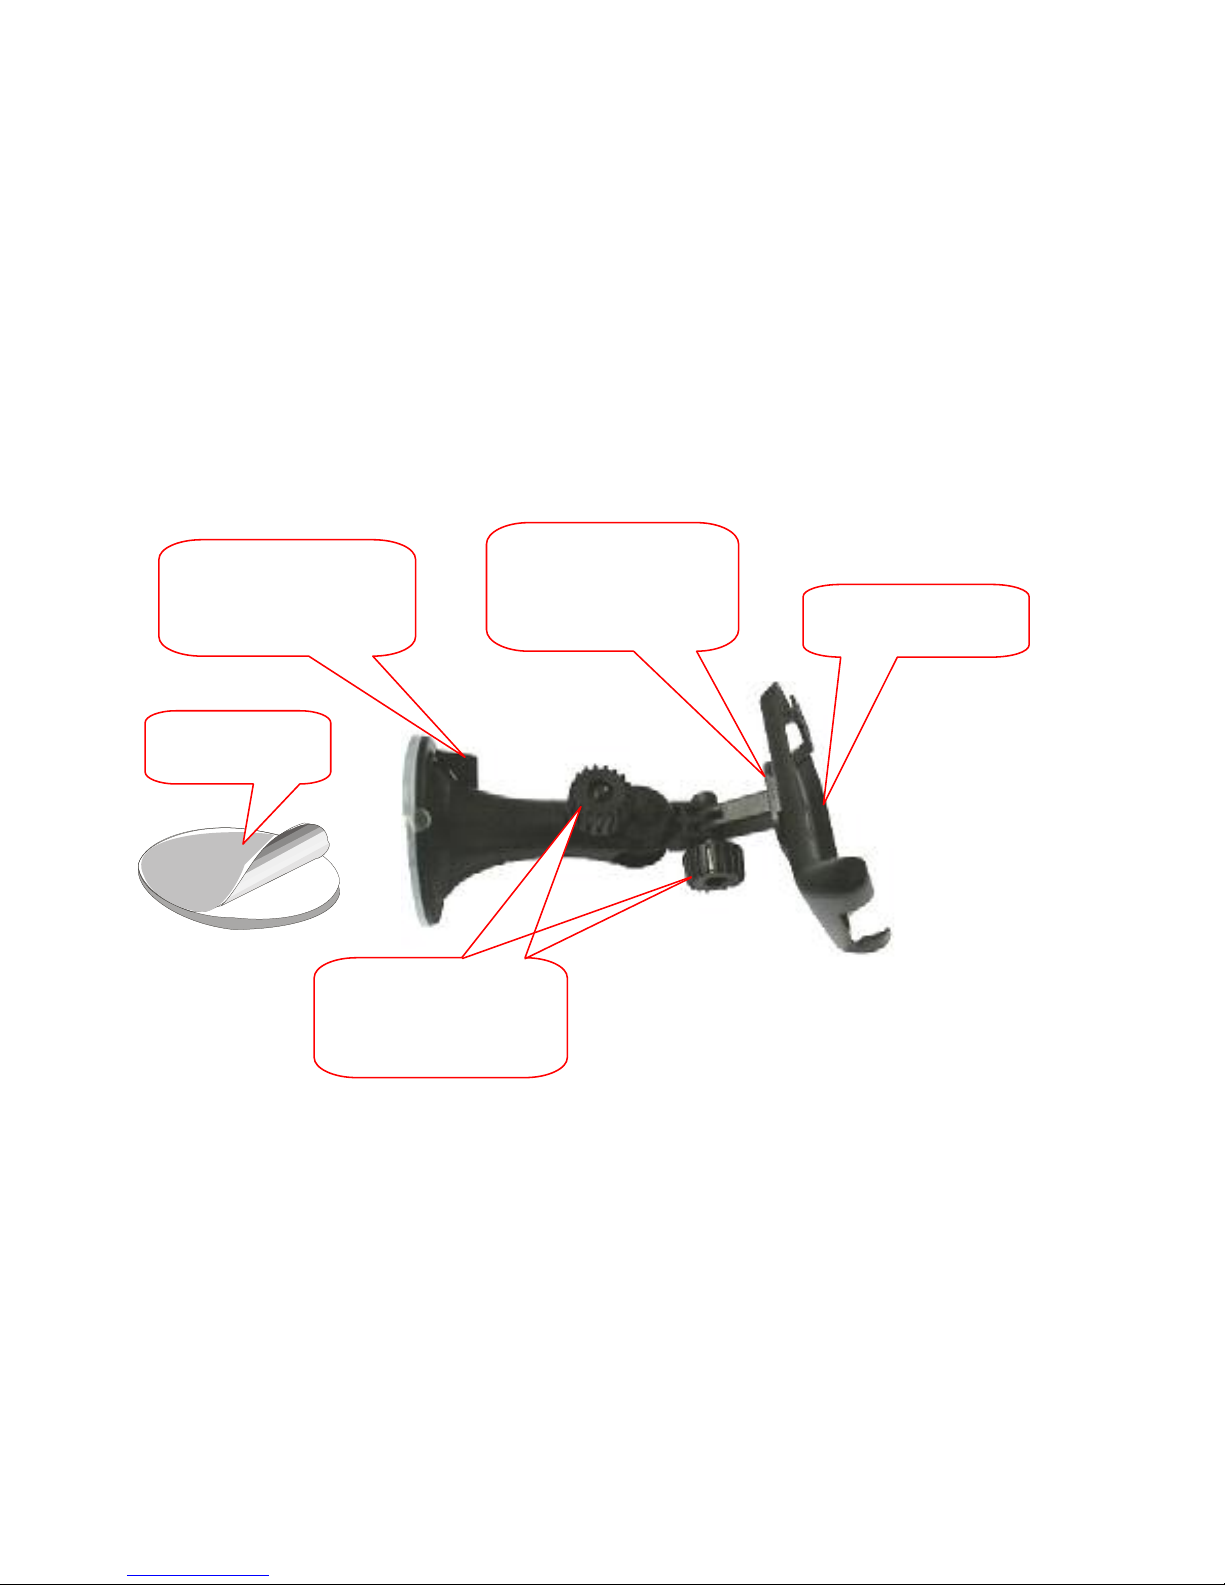
SUCTION CUP MOUNT, CRADLE AND SINGLE SIDED ADHESIVE DISC .......................................................................- 6 -
PREPARATION BEFORE USE ......................................................................................................................... - 7 -
SYSTEM OPERATIONS..................................................................................................................................... - 8 -
MAIN MENU........................................................................................................................................................ - 8 -
MENU FEATURES......................................................................................................................................................- 8 -
NAVIGATION ...................................................................................................................................................... - 9 -
NAVIGATION NOTICES: .............................................................................................................................................- 9 -
PHOTO................................................................................................................................................................ - 10 -
FUNCTION ..............................................................................................................................................................- 10 -
OPERATION STEPS ..................................................................................................................................................- 10 -
KEY INSTRUCTIONS ................................................................................................................................................- 11 -
EBOOK ............................................................................................................................................................... - 13 -
FUNCTION ..............................................................................................................................................................- 13 -
OPERATION STEPS ..................................................................................................................................................- 13 -
KEY INSTRUCTIONS ................................................................................................................................................- 14 -

iii
SYSTEM ............................................................................................................................................................. - 17 -
FUNCTION ..............................................................................................................................................................- 17 -
OPERATION STEPS ..................................................................................................................................................- 18 -
VOLUME.................................................................................................................................................................- 19 -
POWER ...................................................................................................................................................................- 20 -
BACKLIGHT ............................................................................................................................................................- 21 -
DATE AN D TIME......................................................................................................................................................- 22 -
LANGUAGE.............................................................................................................................................................- 25 -
SYSTEM INFORMATION ...........................................................................................................................................- 26 -
APPENDIX ......................................................................................................................................................... - 28 -
TROUBLESHOOTING ...............................................................................................................................................- 28 -

- 1 -
INTRODUCTION
Thank you for purchasing this high-performance GPS Navigation System. Please read this user manual
carefully before using the system, and keep it in a safe place for future reference.
Registered trademarks: all trademarks belong to their registered owners.
【NOTE】
We reserve the right to change the content of this manual at any time without notice.

- 2 -
Notes:
•The PND is used only as a navigation aid. It is not for precise measurement of direction, distance,
location or topography. The user must follow all traffic signs and local regulations along the roads.
•GPS satellite signals cannot pass through solid materials (except glass). When you are inside a
tunnel or building, GPS position is not available.
•Aminimum of 4 GPS satellite signals are needed to determine current location. Signal reception can
be affected by situations such as bad weather or dense overhead obstacles (e.g. tall buildings).
•Other wireless devices in the vehicle might interfere with the reception of satellite signals and cause
the reception to be unstable.
•If the PND does not responsive, press the small reset button on the left side.
•For your own safety, do not operate the controls of the PND while driving. Do not mount where the
driver’s field of vision is blocked
•Do not shake or hit the equipment; otherwise data loss can occur and the system may not work
properly.
•Do not expose the equipment to direct sunlight or subject it to high temperatures for prolonged
period.
•Do not expose the equipment to moisture and rain. If water enters the equipment the damage may
not be repairable.
•Do not attempt to disassemble the equipment by yourself.
•Do not expose the equipment to sand or dust.
•Do not press too hard on the LCD screen.
•Use a soft cloth to clean the touch screen.
•Please respect the copyrights of all contents. It is illegal to copy copyrighted materials without
permission from their respective owners.

- 3 -
Component Locations
Touch Screen
Speaker
Power Button
SD/MMC Slot
Earphone Jack
Mini-USB Port
Reset Button
Stylus

- 4 -
Accessories
The package contents the following items:
•Portable Navigation Device
•12V/24V Car Adapter Charger
•USB Cable
•Windshield Suction Cup Mount
•Single Sided Adhesive Disc
•Quick Start Guide
•DVD with backup copy of software and map data,
User Manual
•Warranty Card

- 5 -
12V/24V Car Adapter Charger
•Before using your PND the battery will need to
be fully charged. To maximize the life of the
battery, the first charge must be full.
•The charging indicator on the front of the unit
will turn red. When the unit is fully charged the
indicator will change to green.
•When using your PND in the car, we
recommend that you always use the car
adapter to charge the unit, especially on long
journeys.
•Plug the car adapter into the mini USB socket
on the side of the unit. Plug the other end of
the adapter into the car’s 12V accessory
socket.
•If possible, fix the power cable so that it does
not obscure instruments or controls.
USB Cable
•The USB cable is provided for system
upgrades. This USB cable will work on the
PC either with Microsoft Active Sync® or as a
mass storage media. You can select the
mode in the “System-Sys Info-USB” menu.

- 6 -
Suction Cup Mount, Cradle and Single Sided Adhesive Disc
Step 2: Rotate the
lever to lock suction
cup onto windshield
or the Adhesive Disc
Step 1: Connect the
Mount to the socket
on the back of the
Cradle
Step 4: Use the two
screws to adjust the
angle and direction
of the PND
Step3: Place PND
into the Cradle
Single Sided
Adhesive Disc

- 7 -
Preparation before Use
This high performance navigation system is ready to use right out of the box; the map data base has
been preloaded into the system and there is nothing to set up. Just use the windshield suction cup to
place the system in a suitable location, plug the car adapter into the car’s 12V/24V outlet, and press the
Power Button on the top side of the unit to turn it on. The unit is ready to take you to your destination.
Please observe the following when placing the unit on the dashboard:
1. Make sure that the suction cup is securely fixed on the windshield.
2. Make sure that the unit is not blocking the driver’s view of the road.
3. Do not set the unit on or near where the airbag is located.
4. Do not put the unit in a location that is part of the expansion area of the airbag.
5. Let the unit rest directly on the dash board to minimize the vibrations from the car.
Notice to Drivers in California and Minnesota:
State law prohibits drivers in California and Minnesota from using suction mounts on their windshields.
(see California Vehicle Code Section 26708 or Minnesota Statutes 2005, Section 169.71)
Este manual sirve para los siguientes modelos
1
Tabla de contenidos


