AutoPatch CP-10 Manual del operador

CP-10 Documentation
/CP-10 Front Panel Operation
/CP-10 Control Panel Quick Reference Guide

Contents
Chapter 1 – Introduction to the CP-10
Keys and Functions...........................................1-2
Checking Software Version....................................1-5
Technical Support ............................................1-5
Chapter 2 – Executing Switches
Chapter 3 – Verifying Signal Status
Verifying Input Status .........................................3-1
Verifying Output Status .......................................3-3
Chapter 4 – Executing Presets
Local Presets ................................................4-1
Global Presets ...............................................4-3
Chapter 5 – Installing a Remote CP-10
Rack Installation .............................................5-2
Connecting Power............................................5-3
Connecting to the System.....................................5-4
Index
CP-10 Front Panel Operation

Introduction to the CP-10
An AutoPatch Distribution Matrix is composed of one or more
enclosures. Enclosures are the structural basis of a matrix switcher. Since
AutoPatch Distribution Matrices are custom built for each installation,
factors such as control method and signal types affect the appearance and
weight of each enclosure.
An enclosure may have either a blank front panel or one of various
control panels (local front or remote panels produced by AutoPatch for
controlling the system’s switches and system attributes). Although
control panels are optional, we recommend one per system for system
verification, redundant control, and troubleshooting. Local control panels
can be removed or attached as needed; note, however, that the
enclosure’s power must be off during removal and installation of a front
panel.
This chapter describes the CP-10 Control Panel and its basic functions.
CP-10 Front Panel Operation 1-1
Introduction

Keys and Functions
A CP-10 Control Panel has 29 keys. The keys include 10 number keys
for entering digits, 4 directional arrow keys, and 1 each of the following:
Cancel, Take, Status, Level, Change, Input, Output, Preset, Program,
Backlight, Undo, and Space. The Special, Comma, and Period keys are
currently not implemented. If your system contains audio boards with the
volume and input gain control option, they can be adjusted using BCS
commands (see the Serial Control Operation section of this binder).
The keys on the CP-10 are used to choose commands and to enter values
in the fields displayed on the LCD Command screen.
1-2 CP-10 Front Panel Operation
Introduction to the CP-10
Introduction
0
SPECIAL PRESET PROGRAM
BACKLIGHT
UNDO
TAKE
CANCEL
SPACE
123
6
5
4
789
INPUT OUTPUT
STATUS LEVEL CHANGE
Figure 1: Front view of a Modula enclosure with a CP-10 Control Panel
SPECIAL PRESET PROGRAM BACKLIGHT UNDO
TAKE
123
6
5
4
789
0
INPUT OUTPUT
STATUS LEVEL CHANGE
CANCEL
SPACE
0
SPECIAL PRESET PROGRAM
BACKLIGHT
UNDO
TAKE
CANCEL
SPACE
12
3
6
5
4
789
INPUT OUTPUT
STATUS LEVEL CHANGE
Figure 2: Close up view of a CP-10 Control Panel
LCD Command Screen
Arrow Keys

Number Keys (0-9)
Use the number keys to enter level, input, output, and preset numbers,
and to enter digits for any other functions that may require numbers.
Arrow Keys
Use the arrow keys to scroll left and right through long lists of outputs.
The arrow keys are required only when an arrow graphic is displayed on
the LCD Command screen.
Cancel Key
Use the Cancel key to abort a command that is incomplete. If you make a
mistake while entering a command, press the Cancel key to return to the
Command screen and start over. The Cancel key cannot undo a
completed operation.
Take Key
The Take key is much like the Enter or Return key on a computer
keyboard. Pressing the Take key tells the system to execute the selected
or entered command.
Status Key
Use the Status key to query the system for signal routing information and
switch verification. See page 3-1 for more information on status
operations.
Level Key
The Level key prepares the system to receive a level identification
number as the next entry.
Change Key
Use the Change key to switch signals. Press the Change key and the
Change menu appears, prompting you for information about the switch
you want to perform. See page 2-1 for more information on executing
switches.
Input Key
The Input key prepares the system to receive an input (source)
identification number as the next entry.
Output Key
The Output key prepares the system to receive an output (destination)
identification number as the next entry.
CP-10 Front Panel Operation 1-3
Keys and Functions
Introduction

Preset Key
Use the Preset key to implement local and global presets. See page 4-1
for information on executing local presets. See page 4-3 for information
on programing and executing global presets.
Program Key
Use the Program key to access software version information.
Backlight Key
The Backlight key illuminates the LCD. The backlight remains
illuminated for approximately 20 seconds; however, you can turn it off
before the 20 seconds are over by pressing the key again.
Undo Key
Use the Undo key to return to the Command screen without executing a
command. The Undo key cannot undo a completed operation.
Space Key
Use the Space key to insert a space between multiple outputs or multiple
local presets when entering a command; the output and local preset
prompts are the only prompts that accept multiple entries.
Special, Comma (,), and Period (.) Keys
These keys are not implemented at this time.
The CP-10 Control Panel operations combine the following three basic
tasks:
To choose a command, press the key that corresponds with the
command you want to choose.
To select values for fields (such as level, input, output, and preset
values), use the number keys.
To execute a command, press the Take key.
1-4 CP-10 Front Panel Operation
Introduction to the CP-10
Introduction
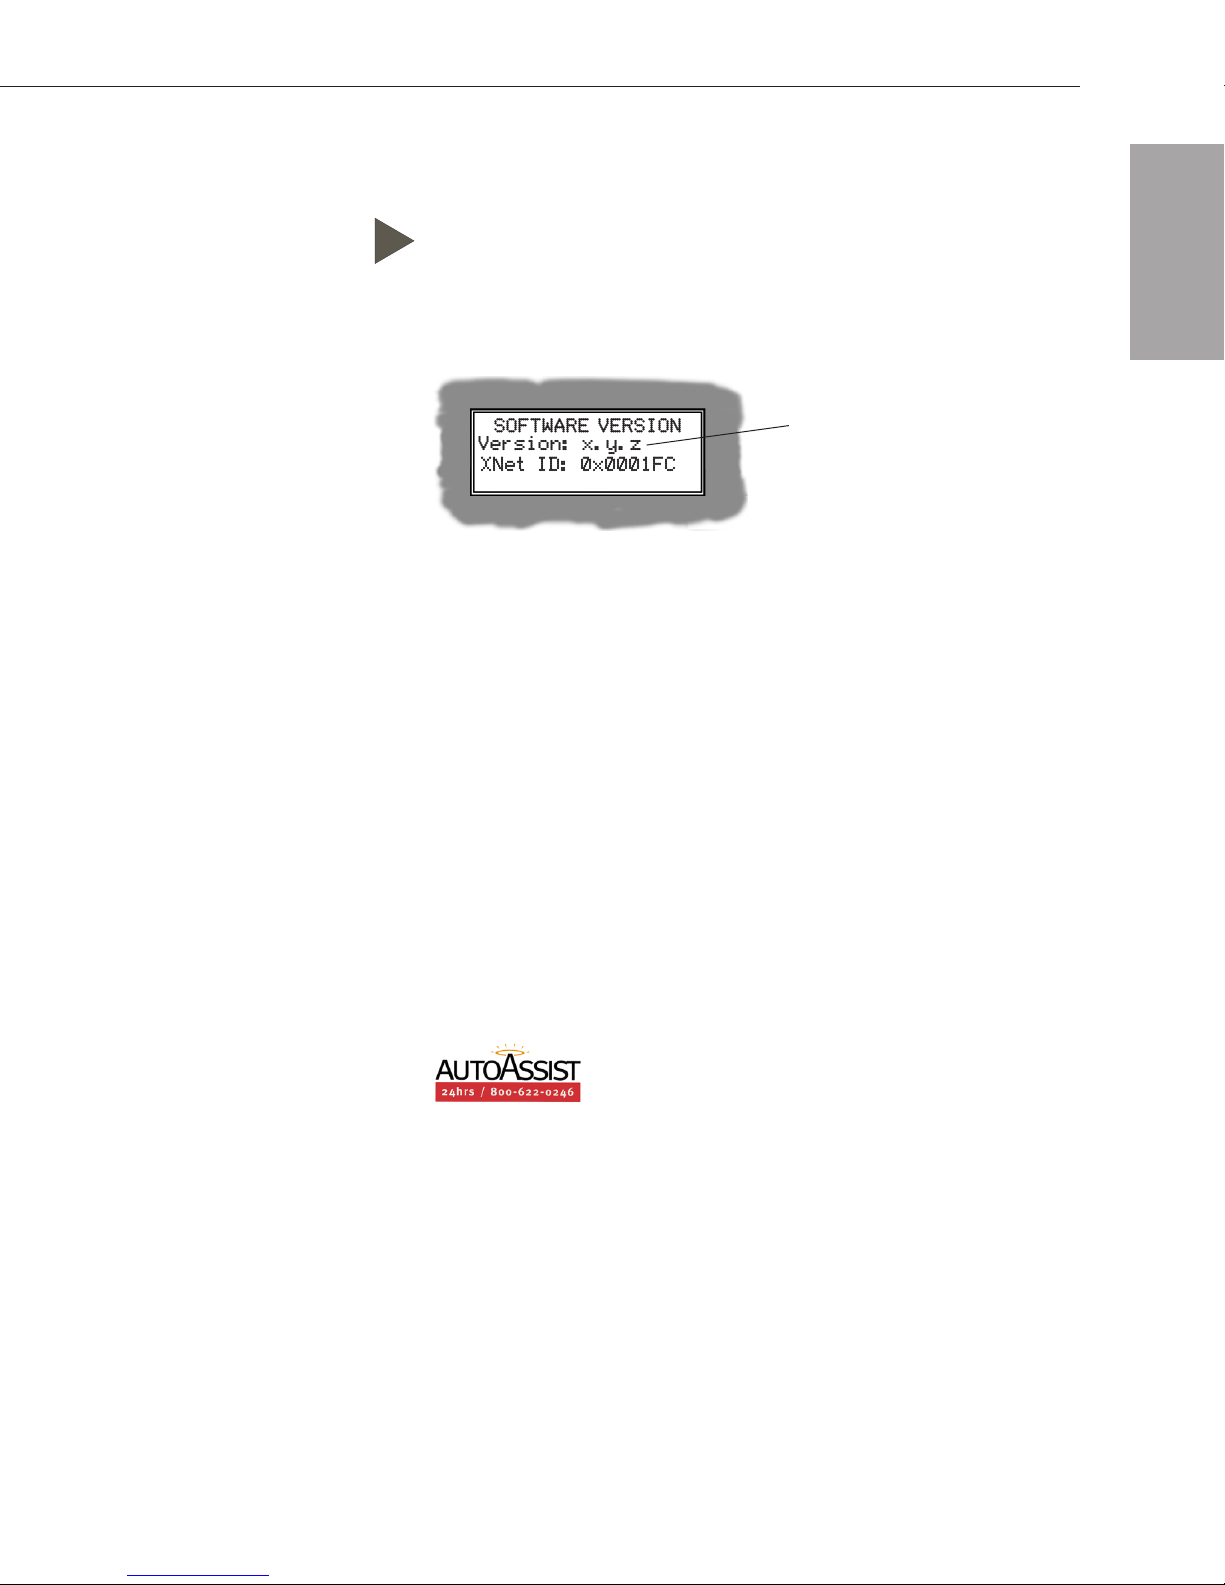
Checking Software Version
Use the following steps to check the software version of the CP-10.
To check the software version:
1. At the Command screen, press the Program key.
The Software Version screen appears.
2. Press the Cancel key to return to the Command screen.
Technical Support
AutoPatch provides technical support 24 hours a day, 7 days a week
(except for U.S. holidays). Before calling technical support with a
question, please review the information in this binder. If this binder
cannot fully answer your question, have your serial number ready (for
serial number location see Chapter 1 in the Installation & Setup section
of this binder) and call your authorized AutoPatch dealer or call
AutoPatch AutoAssist at: U.S. and Canada 800-622-0246 (toll free) or
International 509-235-2636. You can also reach us through our web site:
www.autopatch.com, or e-mail our AutoPatch Technical Support
CP-10 Front Panel Operation 1-5
Checking Software Version
Displays current version number
Introduction

Executing Switches
A switch is an active connection between a source (input) signal and one
or more destination (output) devices. The signals connected in a switch
command are individual signals or groups of signals coming through the
connectors on the rear of the enclosure. When executing a switch, you
must specify a level that has all the signals you want to route. Level
definitions reside in the configuration information in each enclosure’s
CPU.
You can execute switches from the CP-10 Control Panel by using the
steps on the following pages or by executing a preset. For information on
presets, see page 4-1.
You can return to the Command screen at any time by pressing the
Cancel key.
The following example switches input 2 to output 3 on level 0.
Note: In each switch command, you can enter multiple output signals,
but only one input signal and only one level.
CP-10 Front Panel Operation 2-1
Executing Switches

To execute a switch:
1. At the Command screen, press the Change key.
The Change screen appears.
2. Press the Level key and enter “0”.
3. Press the Input key and enter “2”.
2-2 CP-10 Front Panel Operation
Executing Switches
Executing Switches
Tabla de contenidos
Otros manuales de Conmutador de matriz de AutoPatch


