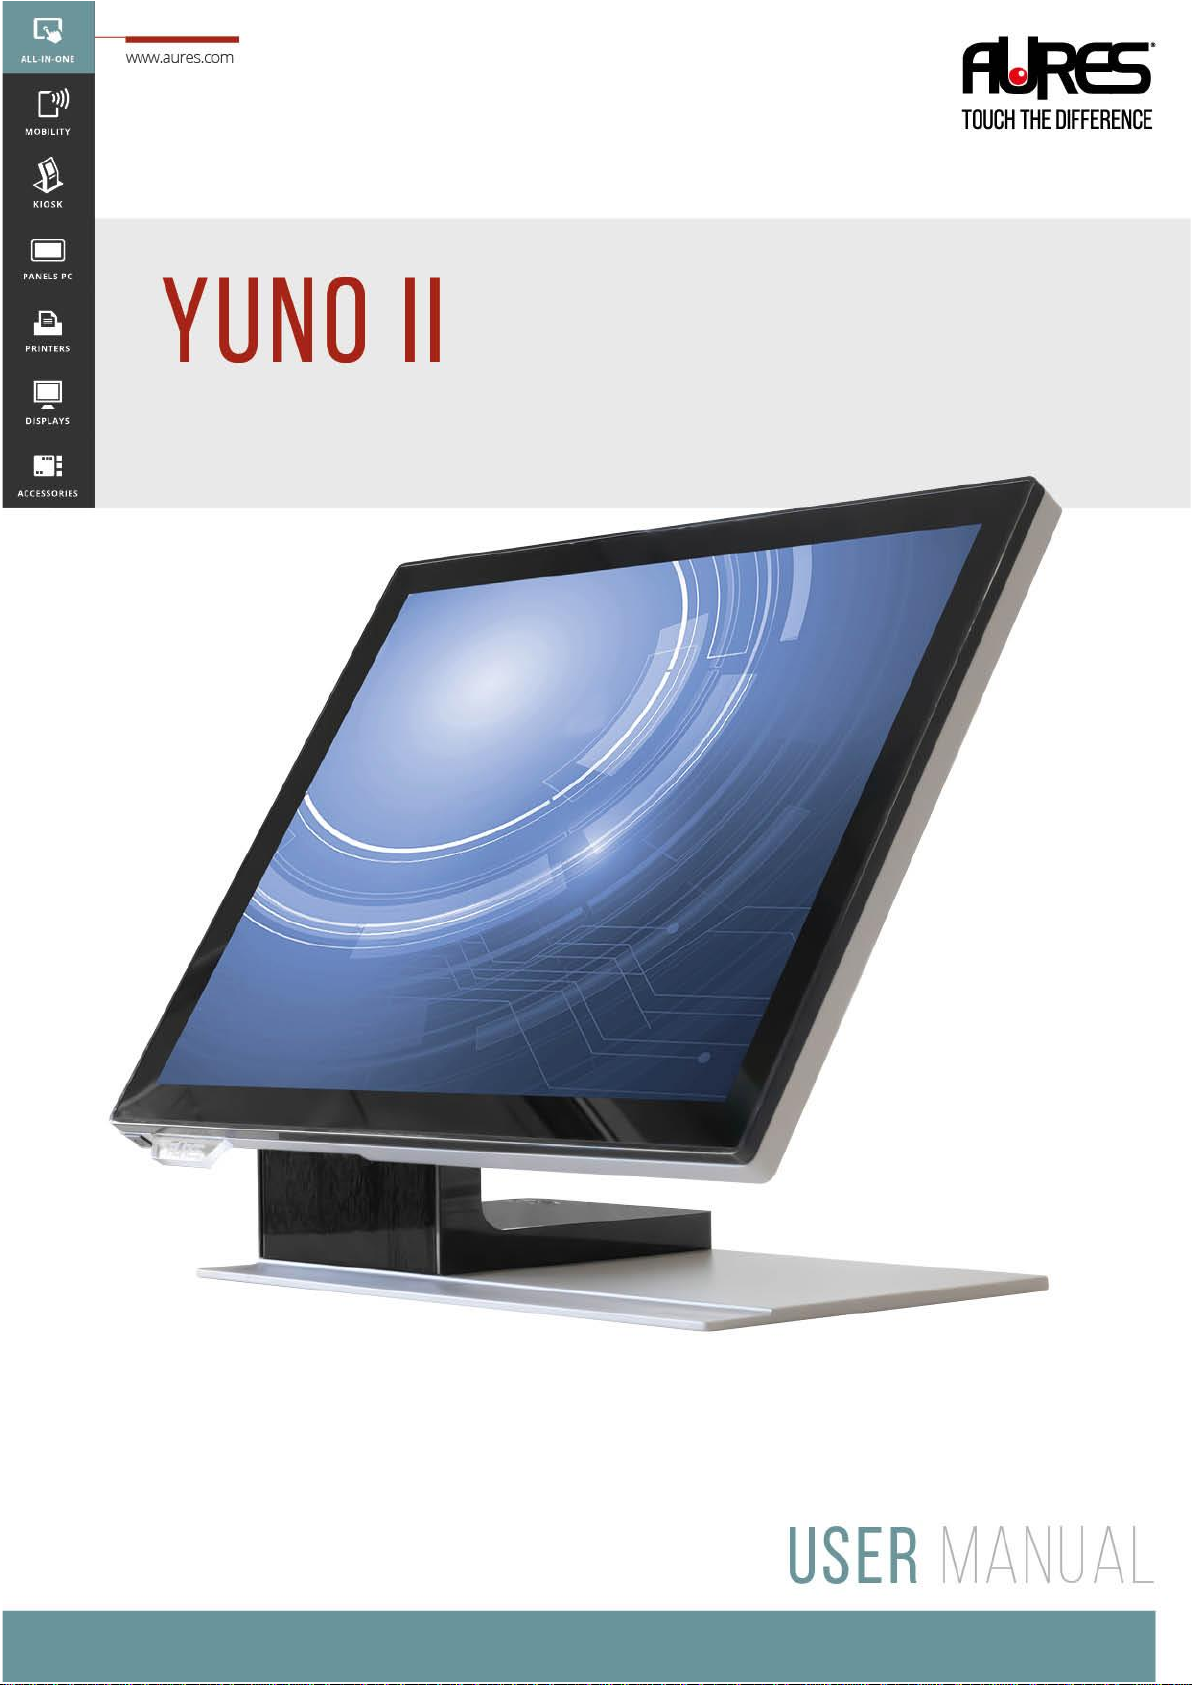
AURES YUNO II Manual de usuario

YUNO-II user manual v1.1

YUNO-II user manual v1.1
i
Copyrights
©2021 All rights reserved. The information in this
document is subject to change without prior notice in
order to improve reliability, design and function and
does not represent a commitment on the part of the
manufacturer.
This document contains proprietary information
protected by copyright. All rights are reserved. No
part of this manual may be reproduced by any
mechanical, electronic, or other means in any form
without prior written permission of the manufacturer.
All trademarks are property of their respective owners
Liability Disclaimer
In no event will the manufacturer be liable for direct,
indirect, special, incidental, or consequential
damages arising out of the use or inability to use the
product or documentation, even if advised of the
possibility of such damages.
Regulatory Information
FCC Notice
This equipment has been tested and found to comply
with the limits for a Class A digital device, pursuant to
Part 15 of the Federal Communications Commission
(FCC) Rules. These limits are designed to provide
reasonable protection against harmful interference in
a residential installation. This equipment generates,
uses, and can radiate radio frequency energy and, if
not installed and used in accordance with the
instructions, may cause harmful interference to radio
communications. However, there is no guarantee that
interference will not occur in a particular installation. If
this equipment does cause harmful interference to
radio or television reception, which can be determined
by turning the equipment off and on, the user is
encouraged to try to correct the interference by one or
more of the following measures:
• Increase the separation between the equipment and
the receiver.
• Connect the equipment into an outlet on a circuit
different from that to which the receiver is connected.
• Consult the dealer or an experienced radio or
television technician for help.
NOTE: THE MANUFACTURER IS NOT
RESPONSIBLE FOR ANY RADIO OR TV
INTERFERENCE CAUSED BY UNAUTHORIZED
MODIFICATIONS TO THIS DEVICE. SUCH
MODIFICATIONS COULD VOID THE USER'S
AUTHORITY TO OPERATE THE DEVICE.
CE Notice
This device complies with EMC Directive 2014/30/EU
“Low Voltage Directive” issued by the Commission
of the European Community.
UL Notice
This manual refers to UL certified products and
conforms to UL 62368-1, 2nd Edition, 2014-12-1,
CAN/CSA-C22.2 No. 62368-1-14 and IEC 62368-
1:2014 STANDARD FOR Information Technology
Equipment - Safety - Part 1: General Requirements.
.

YUNO-II user manual v1.1
ii
WEEE Notice
The WEEE mark applies only to countries within the
European Union (EU) and Norway.
This appliance is labeled in accordance with
European Directive 2012/19/EUconcerning waste
electrical and electronic equipment (WEEE). The
Directive determines the framework for the return and
recycling of used appliances as applicable throughout
the European Union. This label is applied to various
products to indicate that the product is not to be
thrown away, but rather reclaimed upon end of life per
this Directive.
CAUTION :
Risk of Explosion if Battery is replaced by an
incorrect Type.
Dispose of Used Batteries According to the
instructions.
Safety
IMPORTANT SAFETY INSTRUCTIONS
To disconnect the machine from the electrical Power
Supply, turn off the power switch and remove the power
cable plug from the wall socket. The wall socket must
be easily accessible and in close proximity to the
machine.
Read these instructions carefully. Save these
instructions for future reference.
Follow all warnings and instructions marked on the
product.
Do not use this product near water.
Do not place this product on an unstable cart, stand, or
table. The product may fall, causing serious damage to
the product.
Slots and openings in the cabinet and the back or
bottom are provided for ventilation; to ensure reliable
operation of the product and to protect it from
overheating. These openings must not be blocked or
covered. The openings should never be blocked by
placing the product on a bed, sofa, rug, or other similar
surface. This product should never be placed near or
over a radiator or heat register, or in a built-in installation
unless proper ventilation is provided.
This product should be operated from the type of power
indicated on the marking label. If you are not sure of the
type of power available, consult your dealer or local
power company.
Do not allow anything to rest on the power cord. Do not
locate this product where persons will walk on the cord.
Never push objects of any kind into this product through
cabinet slots as they may touch dangerous voltage
points or short out parts that could result in a fire or
electric shock. Never spill liquid of any kind on the
product.
Ensure that the device connects to a socket/outlet with
ground/earth connection.

iii
Table of Contents
Copyrights ............................................................................................................i
Liability Disclaimer...............................................................................................i
Regulatory Information........................................................................................i
FCC Notice ...........................................................................................................................i
CE Notice..............................................................................................................................i
UL Notice ..............................................................................................................................i
WEEE Notice .......................................................................................................................ii
Safety ...................................................................................................................................ii
Table of Contents ...............................................................................................iii
1. Item Checklist..................................................................................................1
1.1 Standard Items..............................................................................................................1
1.2 Optional Items ...............................................................................................................2
2. System View ....................................................................................................3
2.1 Front View......................................................................................................................3
2.2 Rear View.......................................................................................................................4
2.3 Side View .......................................................................................................................5
2.4 Dimension .....................................................................................................................6
2.5 I/O View..........................................................................................................................8
3. Specification..................................................................................................10
4. Configuration.................................................................................................13
4.1 Processor Module.......................................................................................................13
4.2 I/O Module ...................................................................................................................14
5. POS System Assembly & Disassembly .......................................................15
5.1 Open the System Cover .............................................................................................15
5.2 Install the Processor Module .....................................................................................16
5.3 Install the Power Adapter ...........................................................................................18
6. Peripherals Installation................................................................................. 22
6.1 Install the Cash Drawer ..............................................................................................22
6.2 Install the Attachment-type Customer Display (YUNO-II-LCM) and Second Display
(YUNO-II-2NDLCD10.1) .....................................................................................................34
6.3 Install other Attachment-type Peripherals ................................................................35
Appendix A: Driver Installation ........................................................................ 37

YUNO-II user manual v1.1
1
1. Item Checklist
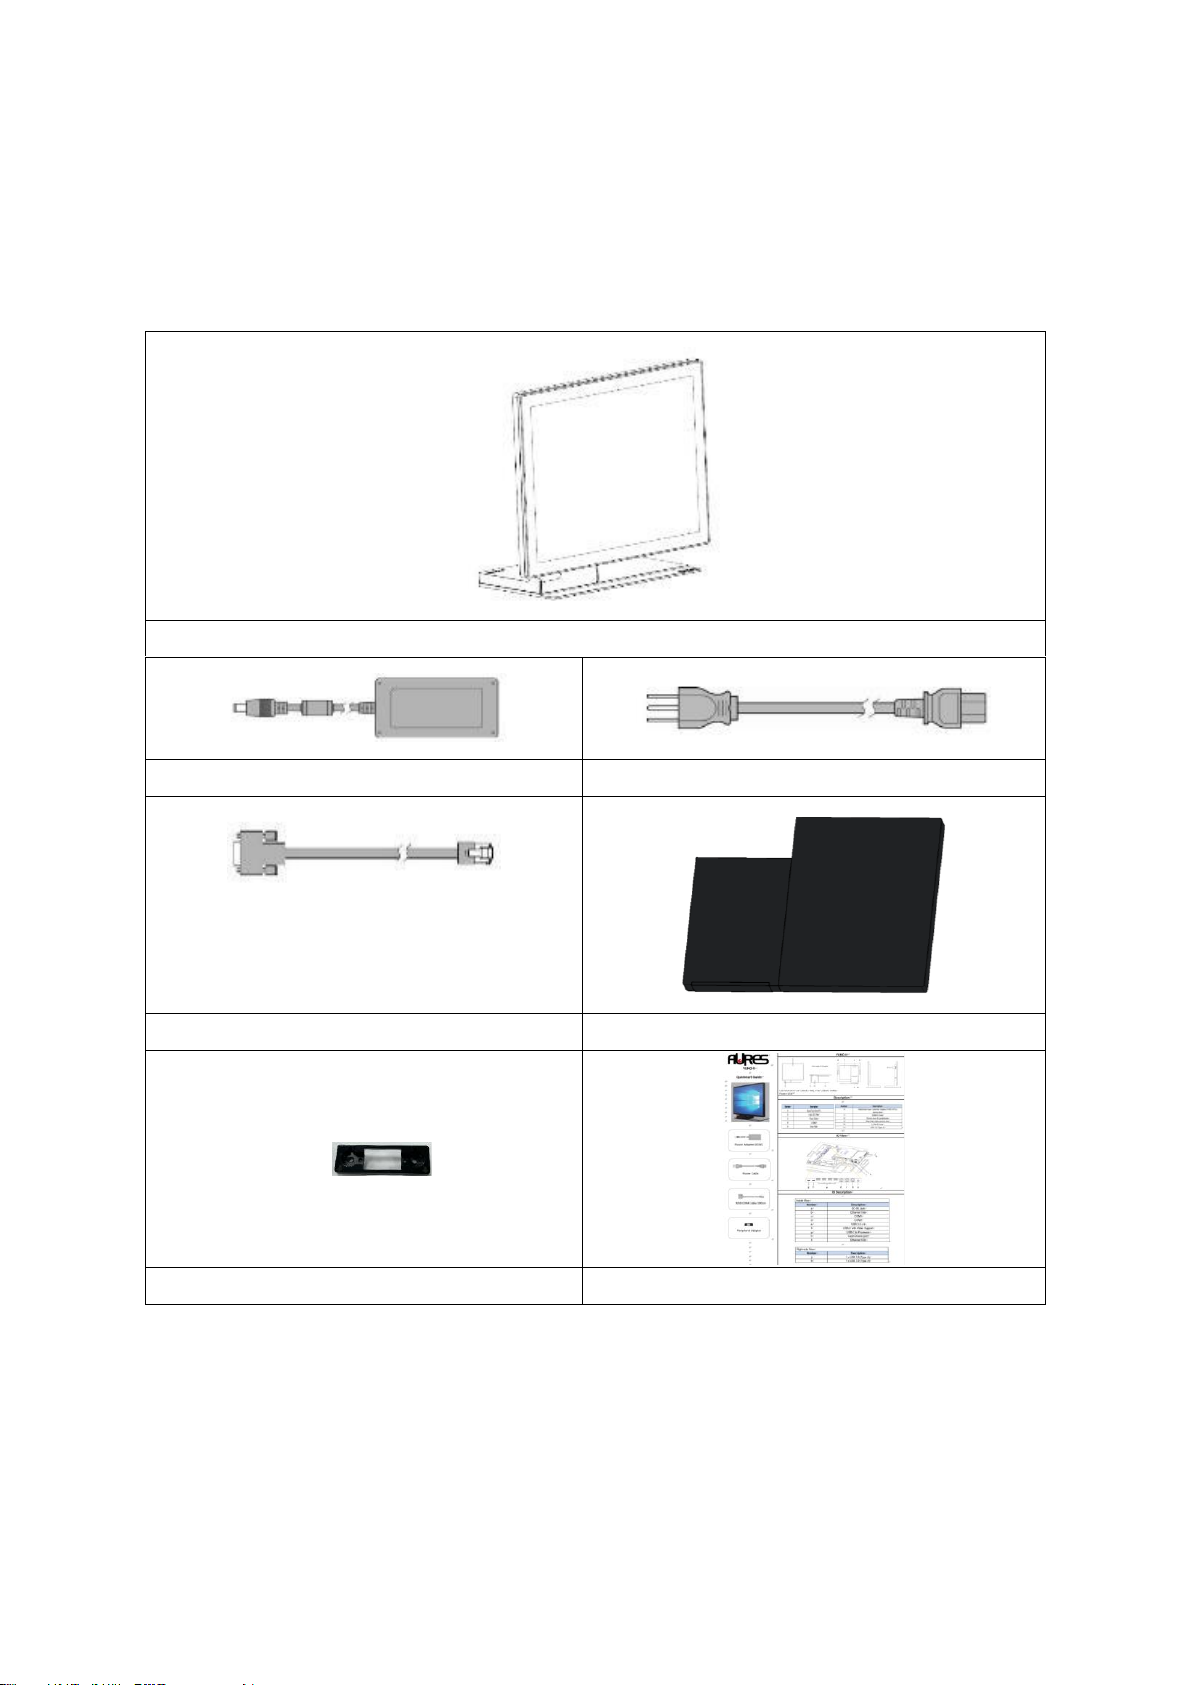
1.1 Standard Items
a. System : YUNO-II 151 & YUNO-II 156
b. Power Adapter (65W)
c. Power Cable
d. RJ50-COM Cable 100cm (x1)
e. System Cover
f. Peripheral Adapter
g. QuickStart guide

YUNO-II user manual v1.1
2
1.2 Optional Items
YUNO-II supports full range of peripherals as listed below.
Model #
Description
YUNO-II-2NDLCD10.1
USB interface
Attachment-type (integrated) Second Display
(non-Touch and Touch models)
YUNO-II-LCM
2x20 LCM
YUNO-MSRLONG
3-Track USB Keyboard HID
Attachment-type (integrated) Magnetic Stripe Reader
YUNO-SCANNER2D
USB interface
Attachment-type (integrated) 2D Scanner
YUNO-DALLAS
USB Keyboard and USB/COM interface
Attachment-type (integrated) Dallas Key Reader
YUNO-ADDIMAT
USB Keyboard and USB/COM interface
Attachment-type (integrated) Addimat Key Reader
YUNO-ALIM-11/36V
DC/DC Switching Power Adapter
Input Voltage : 36Vdc
Output Voltage : 19Vdc
FINGERPRINT
READER
FINGERPRINT READER
YUNO-MSR-RFID
YUNO-MSR-RFID

YUNO-II user manual v1.1
3
2. System View
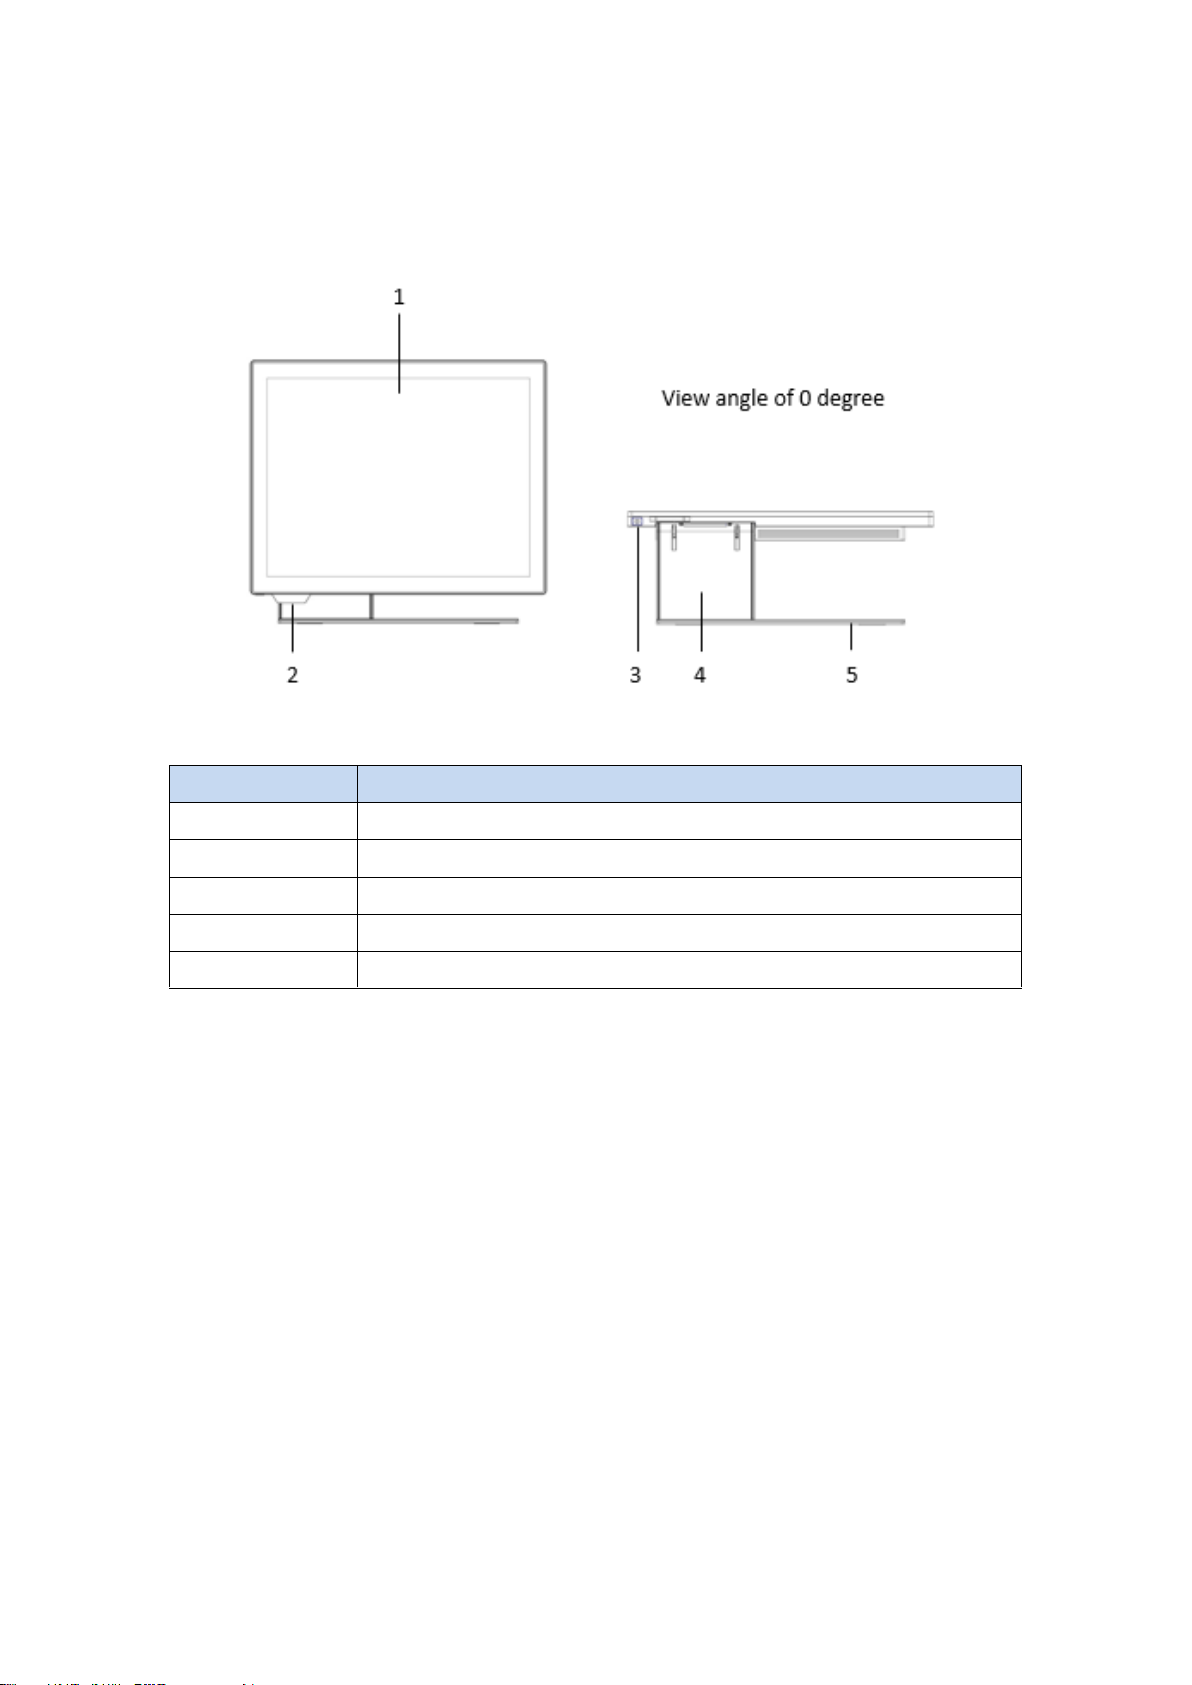
2.1 Front View
Number
Description
1
Bezel Free Panel PC
2
Logo LED Plate
3
Power Button
4
L-Stand
5
Base Plate

YUNO-II user manual v1.1
4
2.2 Rear View
Number
Description
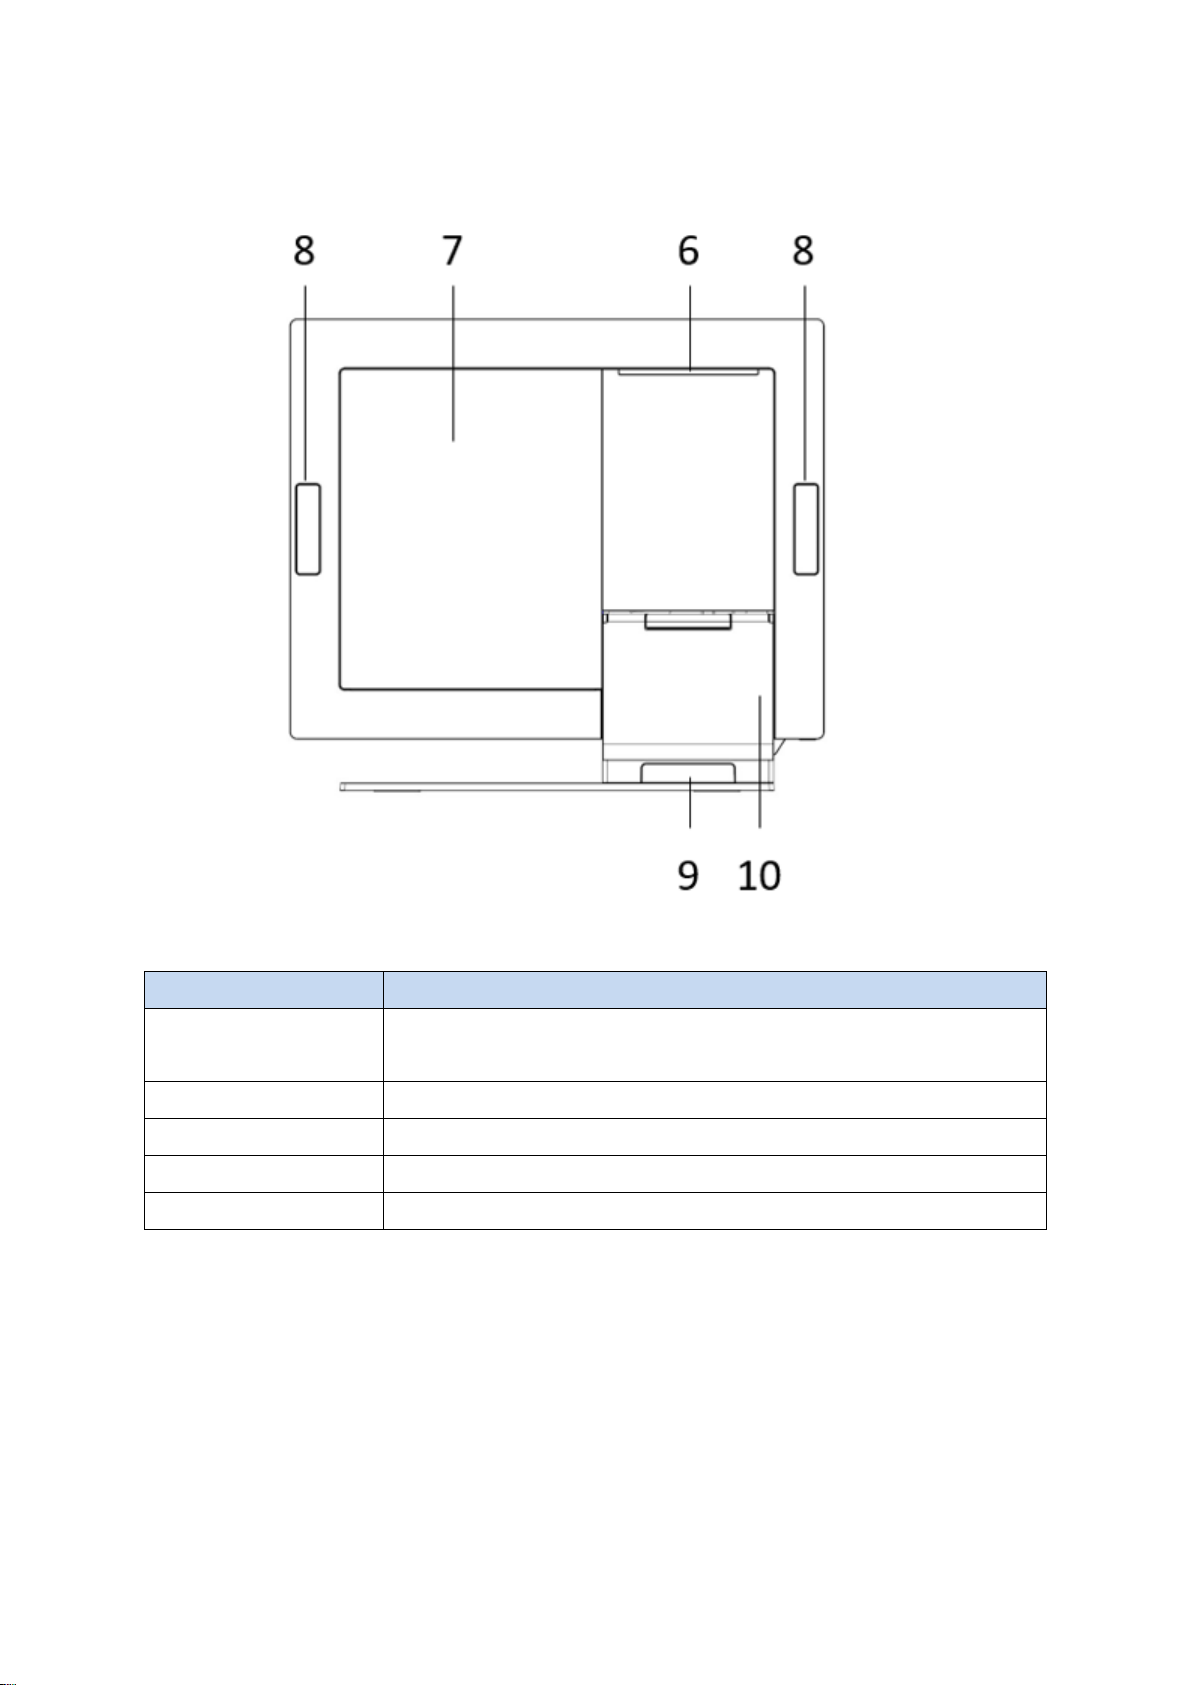
6
Attachment-type Customer Display (YUNO-II LCM & 10")
service door
7
System Cover
8
Service door for peripherals
9
Rear Side Cable service door
10
L-Stand Cover

YUNO-II user manual v1.1
5
2.3 Side View
Number
Description
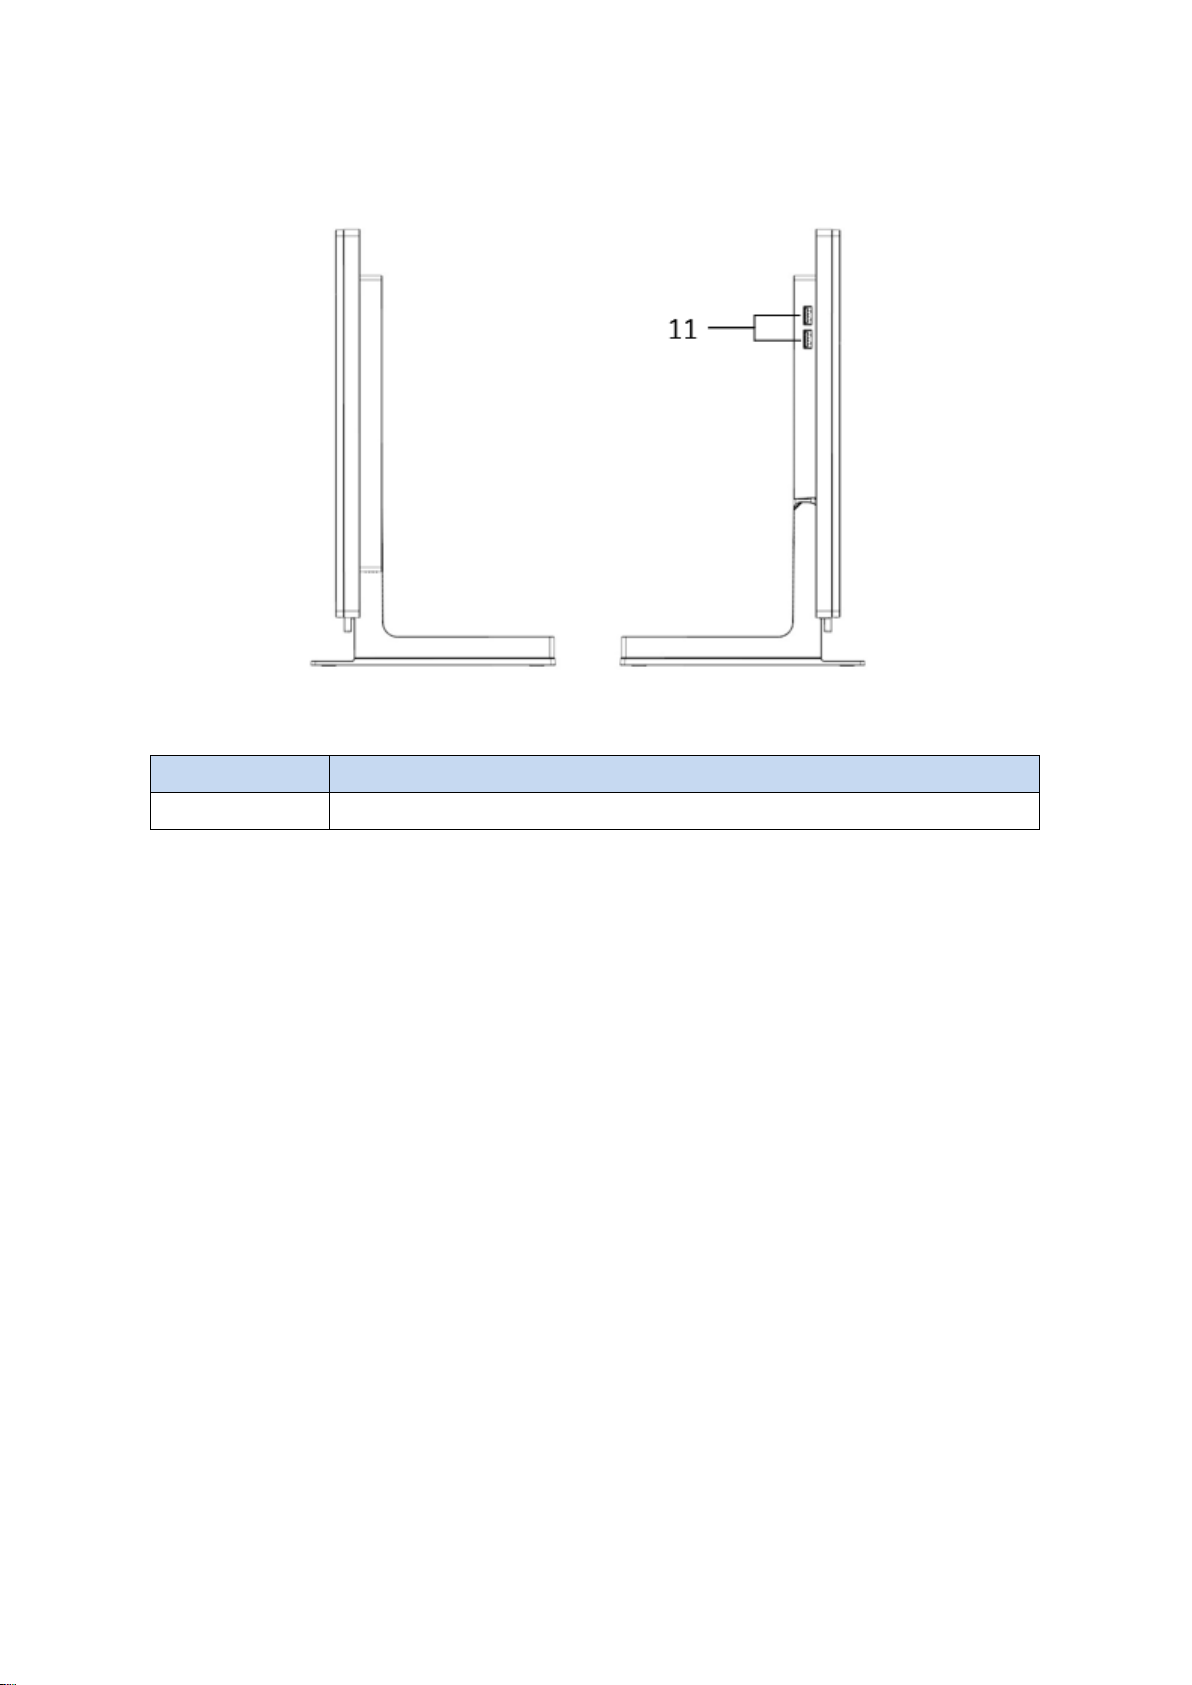
11
USB 3.0 (Type A)

YUNO-II user manual v1.1
6
2.4 Dimension
For YUNO-II151,
Este manual sirve para los siguientes modelos
2
Tabla de contenidos
Otros manuales de Terminal táctil de AURES

AURES
AURES Odysse II Manual de usuario

AURES
AURES JAZZ-BASE151 Manual de usuario

AURES
AURES TWIST-MB-1900 Manual de usuario

AURES
AURES TRX 3000 Manual de usuario

AURES
AURES TRX 3000 Manual de usuario

AURES
AURES YUNO-K170-BLACK Manual de usuario

AURES
AURES TMC 7000 Guía de solución de problemas

AURES
AURES YUNO-151 Manual de usuario

AURES
AURES TMC 7200 Manual de usuario

AURES
AURES NINO II Manual de usuario