Akaso EK7000 Manual de usuario

USER MANUAL
AKASO EK7000 Pro Action Camera
V2.0

What's in the Box
Your EK7000 Pro
Getting Started
Overview of Modes
Customizing Your EK7000 Pro
Conncting to the App
Offloading Your Content
Playing Back Your Content
Deleting Videos and Photos on Your EK7000 Pro
Reformatting Your microSD Card
Maintenance Your Camera
Maximizing Battery Life
Battery Storage and Handling
Remote
Mounting Your Camera
Contact Us
1
2
4
5
8
12
12
13
14
14
15
15
16
17
19
21
CONTENTS

1
WHAT'S IN THE BOX
Mount 6
Mount 3Mount 5Mount 4
Mount 7Mount 8 Mount 9
Lens Cloth
Tethers
Mount 2
Bandages
BatteryCharger
USB Cable
AKASO EK7000 Pro Mount 1
Remote Quick Start Guide
Quick Start Guide
AKASOEK7000 Pro Action Camera
Helmet Mounts
Handle Bar/
Pole Mount
Waterproof
Housing
Protective
Backdoor

2
YOUR EK7000 PRO
1
2
3
4
5
6
7
10
11
9
8

3
12
Shutter/Select Button
Working/Wifi Indicator
Power/Mode/Exit Button
MicroSD Slot
Micro USB Port
Micro HDMI Port
Lens
Touch Screen
Up Button
Speaker
Down/Setting Button
Battery Door
Note: Camera does not record sound when it is in the waterproof case.
1
2
3
4
5
6
7
8
9
10
11
12

4
GETTING STARTED
Welcome to your new EK7000 Pro. To capture video and photos, you need a microSD
card (sold separately).
microSD CARDS
Use brand name memory cards that meet these requirements:
• microSD, microSDHC, or microSDXC
• Class 10 or UHS-I rating
• Capacity up to 64GB (FAT32)
Note:
1. Please format the microSD card first in this camera before using. To keep your
microSD card in good condition, reformat it on a regular basis. Reformatting
erases all of your content, so be sure to offload your photos and videos first.
2. FAT32 format microSD card stops recording when the storage of each file is over
4GB and starts to record again on a new file.
POWERING ON + OFF
To Power On:
Press and hold Mode button for three seconds. The camera beeps while the camera
status light is on. When information appears on the display or the camera status
screen, your camera is on.
To Power Off:
Press and hold the Mode button for three seconds. The camera beeps while the
camera status light is off.
SWITCHING MODE:
To Switch Mode:
Press the Mode button after you turn on the camera, you can switch the mode.
To Exit Mode:
Press the Mode button to exit mode.

5
TURNING ON/OFF Wifi
To Turn On Wifi
Turn on camera, press and hold Down button for three seconds to turn on Wifi.
To Turn Off Wifi
Press Down button to turn off Wifi.
There are 5 modes: Video, Photo, Burst Photo, Time Lapse Photo and Setting.
OVERVIEW OF MODES
VIDEO MODE
Video Mode is the default mode when you turn on the camera.
In Video Mode, press Shutter button, the camera starts recording video.
Press Shutter button to stop recording video.
00:00:00 | 06:02:04
1080/60
Video
Mode
Video Photo Burst Photo
Time Lapse
Video Time Lapse
Photo
Wifi
Tap here
00:00:00 | 06:02:04
1080/60
Video
6
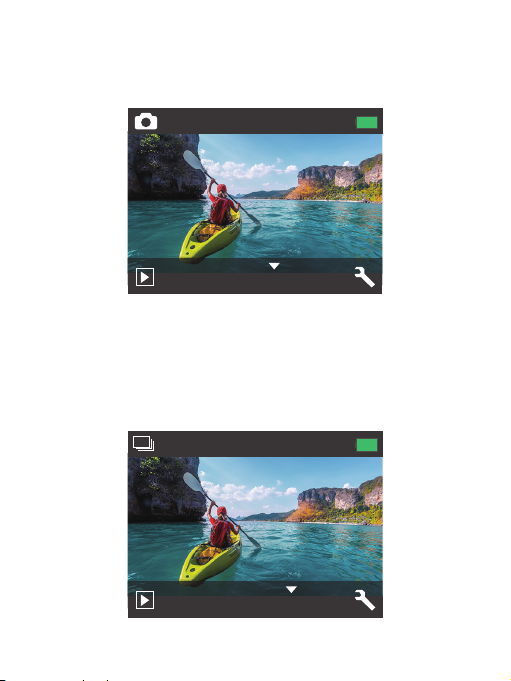
Photo Mode
Press Mode button once to switch to Photo Mode after you turn on camera.
In Photo Mode, press Shutter button, the camera takes a photo.
Burst Photo Mode
Press Mode button twice to switch to Burst Photo Mode.
In Burst Photo Mode, press Shutter button, the camera takes 3 photos per second.
0 | 3206
16M
Photo
0 | 3206
16M
Burst Photo

7
Setting Mode
Press Down button to switch to Setting Mode.
00:00:00 | 06:02:04
1080/60
Video
Tap here
Time Lapse Photo Mode
Press Mode button several times to switch to Time Lapse Photo Mode.
In Time Lapse Photo Mode, press Shutter button, the camera takes a serial of
photos at 2s/3s/5s/10s/20s/30s/60s intervals.
0 | 3206
16M
Time Lapse Photo
Video Resolution
Image Stabilization
Angle

8
Video & Photo Setting
1. Video Resolution: 1080P 60fps, 1080P 30fps, 720P 120fps, 720P 60fps, 4K 25fps,
2.7K 30fps
Default setting is 1080P 60fps.
Note: If you turn on image stabilization, then select 4K 25fps or 2.7K 30fps video
resolution,
image stabilization will be turned off automatically.
2. Image Stabilization: Off / On
Default setting is Off.
This setting adjusts the footage to offset for motion during capture. The result is
smoother footage, especially in activities with relatively small but fast motion
including cycling, motorcycling, and handheld uses.
Note: Image stabilization is disabled if you select 4K 25fps or 2.7K 30fps video
resolution.
3. Angle: Super Wide/Wide/Medium/Narrow
Default setting is Super Wide.
The angle refers to how much of the scene can be captured through the camera lens.
Wide angle captures the largest amount of the scene, while Narrow angle captures
the least.
4. Diving Mode: Off/On
Default setting is Off.
Turn on Diving Mode, it can compensate for the lack of red light in underwater scenes.
Diving Mode is designed to be used in tropical and blue water, optimized for use
between 10 and 80 feet.
5. Loop Recording: Off/1min./3min./5min.
Default setting is off.
Using Loop Recording, you can continuously record video, but save only the
moments that you want. For example, if you select a 5-minute interval, only the
previous 5 minutes are saved when you press the Shutter button to stop recording.
CUSTOMIZING YOUR EK7000 PRO
Otros manuales para EK7000
13
Tabla de contenidos


