Zebra-Tech MPM-100 Manual de usuario

MPM-100
MOBILE PAYMENT MODULE
QUICK REFERENCE GUIDE
QRG.fm Page 1 Friday, October 14, 2011 3:24 PM
PRELIMINARY

2 MPM-100
Motorola reserves the right to make changes to any product to improve reliability, function, or design.
Motorola does not assume any product liability arising out of, or in connection with, the application or use
of any product, circuit, or application described herein.
No license is granted, either expressly or by implication, estoppel, or otherwise under any patent right or
patent, covering or relating to any combination, system, apparatus, machine, material, method, or
process in which Motorola products might be used. An implied license exists only for equipment, circuits,
and subsystems contained in Motorola products.
Service Information
If you have a problem using the equipment, contact your facility’s Technical or Systems Support. If there
is a problem with the equipment, they will contact the Motorola Enterprise Mobility Support at:
http://www.motorola.com/enterprisemobility/customersupport.
For the latest version of this guide go to: http://supportcentral.motorola.com.
QRG.fm Page 2 Friday, October 14, 2011 3:24 PM
PRELIMINARY

Quick Reference Guide 3
Introduction
This Quick Reference Guide explains how to setup, use and maintain the MPM-100 Mobile Payment
Module.
Unpacking
Carefully remove all protective material from around the device and save the shipping container for later
storage and shipping.
Verify that you received all equipment listed below:
• MPM-100
• Lithium-ion battery (2400 mAh)
• Battery door
• Quick Start Guide.
Inspect the equipment for damage. If you are missing any equipment or if you find any damaged
equipment, contact the Motorola Enterprise Mobility Support immediately. See Service Information for
contact information.
QRG.fm Page 3 Friday, October 14, 2011 3:24 PM
PRELIMINARY

4 MPM-100
Features
LED State Description
Contactless Notification LEDs
On During a Contactless transaction, LEDs light from left to right indicating transaction
is in process.
Power
Flashing Green MPM-100 is in sleep mode.
Slow Flashing Red Battery is low.
Bluetooth LED
Power LED
Battery Door
Power Button
USB Port
Smart Card Slot
Keypad
Mag Stripe Slot
Contactless Area
Display
Contactless Notification LEDs
Charging Contacts
Bluetooth MAC Address
Bar Code
QRG.fm Page 4 Friday, October 14, 2011 3:24 PM
PRELIMINARY

Quick Reference Guide 5
Keypad
Use the numeric keypad for entering data.
Fast Flashing Red Battery voltage is low.
Slow Flashing Red Battery voltage is very low.
Slow Flashing Orange Battery is charging.
Solid Orange A charging timer fault occurred.
Solid Green FIrmware upgrade in process.
Bluetooth
Single Blue Flash Active SPP connection with mobile device.
Double Blue Flash After a power on, the MPM-100 is resuming pair relationship with mobile device.
Off MPM-100 is in discoverable mode.
LED State Description
Numeric Keys
Cancels the
current
Transaction
Clears the
entered data
Submits the
entered data
QRG.fm Page 5 Friday, October 14, 2011 3:24 PM
PRELIMINARY

6 MPM-100
Getting Started
To start using the MPM-100, install one or two Security Access Module (SAM) cards (if required), install
the battery and then charge the MPM-100.
Installing SAM Cards
To install a SAM card:
1. Place the MPM face-down on a flat surface.
2. Lift the manufacturing label.
3. Slide a SAM card holder to the right to unlock and then lift.
4. Insert the SAM card into the holder in the orientation shown above.
5. Close the SAM card holder.
6. Slide the SAM card holder to the left to lock.
7. Repeat for the second SAM card, if required.
8. Place the label over the SAM card holders.
NOTE An SAM card is not required for all applications. If using one SAM card, place the card in
either holder.
QRG.fm Page 6 Friday, October 14, 2011 3:24 PM
PRELIMINARY

Quick Reference Guide 7
Installing the Battery
1. Place the battery, contacts first, into the battery compartment.
2. Ensure that the battery is laying flat in the compartment.
3. Align the battery door with the battery compartment.
4. Secure the battery door to the MPM-100 using four screws.
Contacts
QRG.fm Page 7 Friday, October 14, 2011 3:24 PM
PRELIMINARY

8 MPM-100
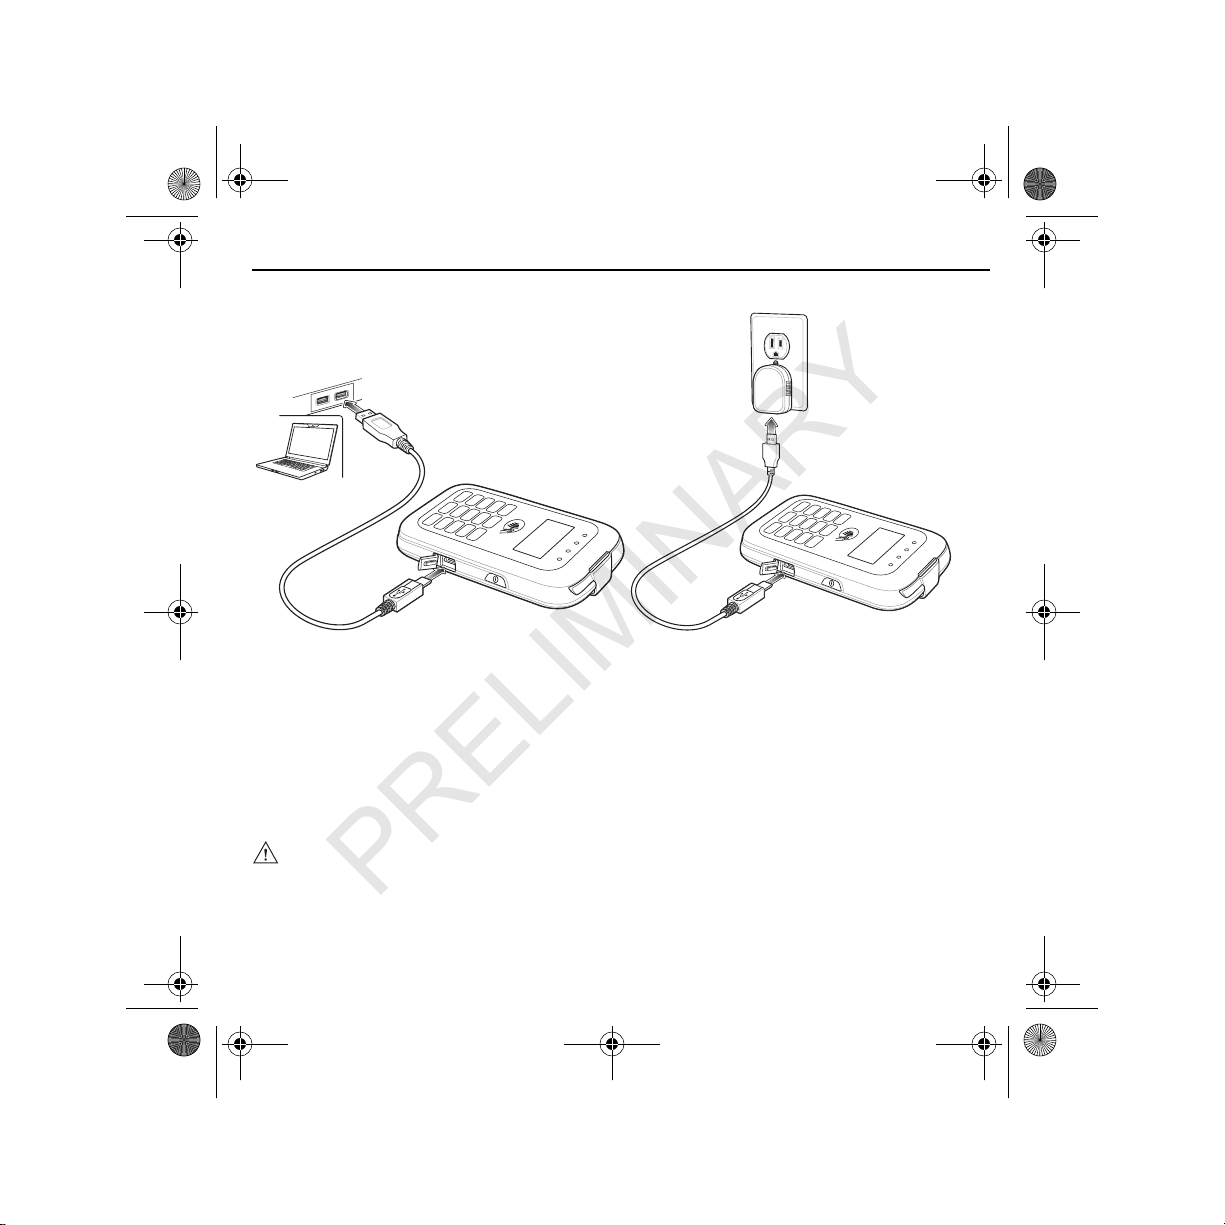
Charging the MPM-100
Using Cradle
Place the MPM-100 into a slot in the cradle. Ensure that the MPM-100 is seated properly. Failure to do so
can cause the MPM-100 to not charge properly. The MPM-100 Power LED indicates that the MPM-100 is
charging.
Using USB Cable or Power Supply
To charge the MPM-100 using a USB cable:
1. Connect the micro USB A connector of the USB cable to the USB port on the MPM-100.
2. Connect other end of the USB cable to a host computer or to the power supply.
QRG.fm Page 8 Friday, October 14, 2011 3:24 PM
PRELIMINARY
Quick Reference Guide 9
Turning On / Off
To turn on the MPM, press and hold the Power button until Verix Terminal Manager2 appears on the
display.
To turn off the MPM press and hold either the Power button or the Cancel key until SHUTTING DOWN
appears on the display.
Bluetooth Communication
To use the MPM-100 with a mobile device, pair the mobile device and the MPM.
NOTE Bluetooth pairing and communication may vary depending upon the mobile device being
used. Refer to the mobile device’s User Guide for more information.
If the mobile device supports the Scan and Pair Bluetooth pairing feature, scan the
Bluetooth MAC Address bar code on the back of the MPM-100 to pair the mobile device
and the MPM-100.
QRG.fm Page 9 Friday, October 14, 2011 3:24 PM
PRELIMINARY
10 MPM-100
1. On the mobile device, enable Bluetooth.
2. Turn on the MPM-100. The Bluetooth LED flashes blue.
3. On the mobile device, perform a Bluetooth discovery.
4. Select the MPM-100 (VFI-PWN-sRDA-xx).
5. Enter PIN (0000).
6. Complete connection.
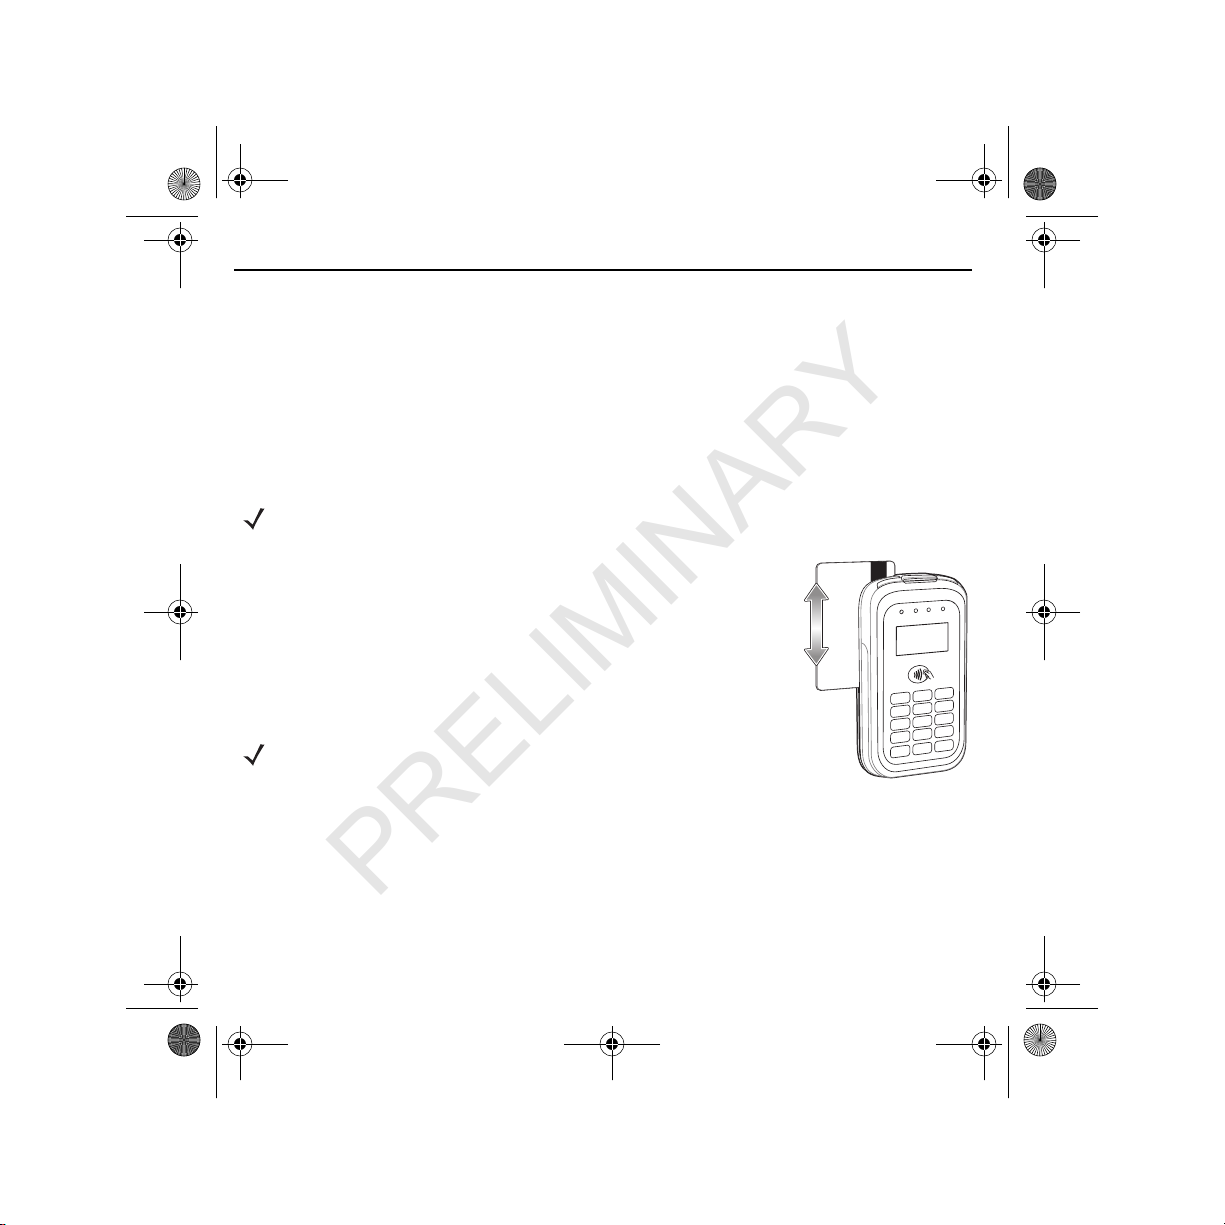
Magnetic Stripe Transactions
Launch a transaction application on the mobile device and initiate a credit or
debit transaction.
On the MPM-100, swipe the credit or debit card through the magnetic stripe
reader (MSR) slot, orienting the magnetic stripe as shown.
For credit transaction the customer may need to sign on the mobile device
screen. For debit transactions, the customer enters a PIN on the MPM-100
keypad following the instructions on the display.
NOTE Credit and debit transactions will not function without an encryption key injected or if a
tamper event occurs.
NOTE Swipe the card in either direction. For best results, gently pull up
on the card while swiping to ensure contact with the top of the
slot.
QRG.fm Page 10 Friday, October 14, 2011 3:24 PM
PRELIMINARY
Tabla de contenidos
Manuales populares de Terminal de pago de otras marcas


Ingenico
Ingenico iWL250B Manual de usuario

Optimum
Optimum M4230 Manual de usuario

Triton
Triton RL5000 Manual de usuario

Ingenico group
Ingenico group Lane/8000 Manual de usuario

Gilbarco
Gilbarco FlexPay IV CRIND Manual de instalación y operación

Infinite Peripherals
Infinite Peripherals Infinea Tab Lite Manual de usuario


