U-Line H-2526 Manual de usuario

PAGE 1 OF 18 0517 IH -2526
πH-2526
ZEBRA DESKTOP DUAL
BARCODE PRINTER
1-800-295-5510
uline.com
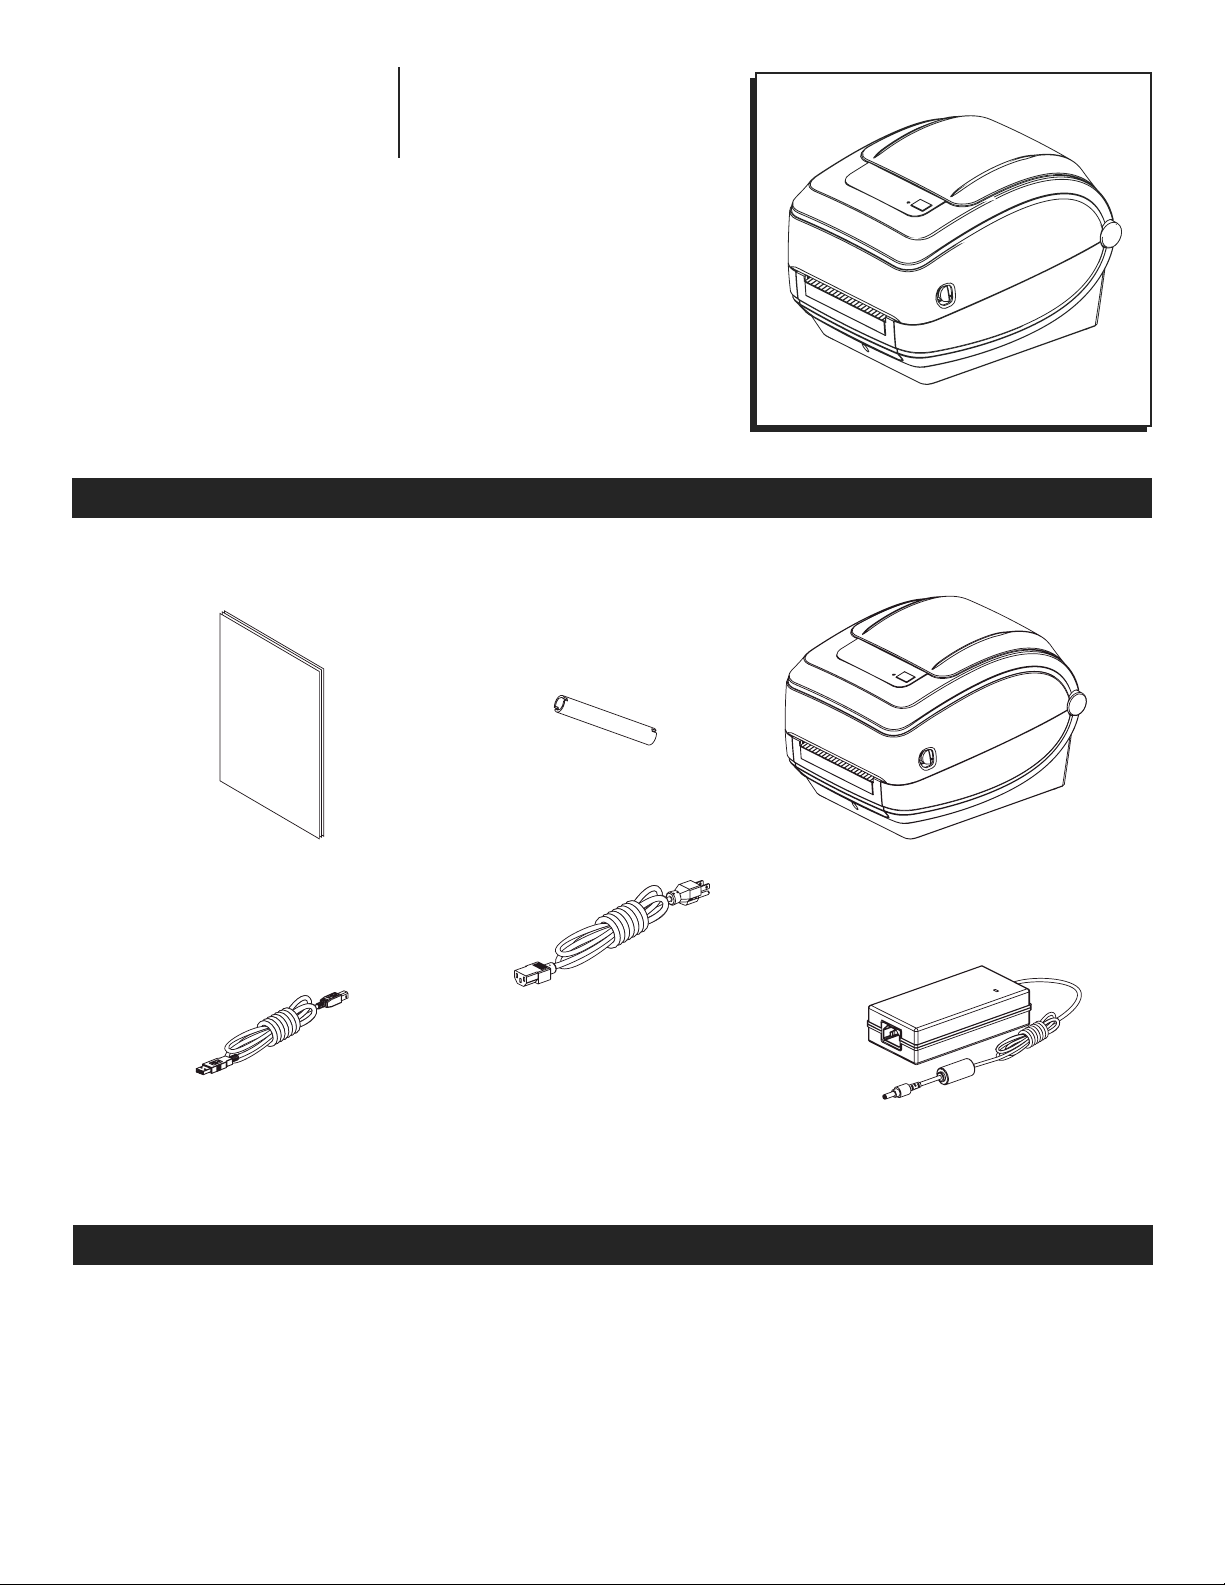
PARTS
Documentation
Ribbon Core
Printer
USB Cable
Power Cord (Varies by Region)
Power Supply
SET-UP
UNPACK AND INSPECT THE PRINTER
When you receive the printer, immediately unpack it
and inspect for shipping damage.
If you discover shipping damage upon inspection:
• Contact ULINE customer service at 1-800-295-5510.
• Keep all packaging material for possible return.
ZEBRA MODEL NO. GK420T
Para Español, vea páginas 7-12.
Pour le français, consulter la pages 13-18.

PAGE 2 OF 18 0517 IH -2526
ASSEMBLY
GETTING STARTED
1. Make sure the power switch is in the OFF position
(down). (See Figure 1)
2. Insert the AC power cord into the power supply.
(See Figure 1)
3. Plug the other end of the cord into an appropriate
AC electrical outlet.
Note: The active power light will go on if power
is on at the AC outlet. (See Figure 1)
4. Insert the power supply's power connector into the
printer's power receptacle. (See Figure 1)
Power Receptacle
Printer
Power Switch
Power Connector
Plug (Varies by Country)
AC Power Cord
IEC 60320 C-13
Power Supply
Active Power Light
Figure 1
LOADING THE PRINTER
1. Open the printer. Pull the release latch levers toward
the front of the printer. (See Figure 2)
2. Open the media roll holders. Pull the media guides
open with your free hand and place the media roll
on the roll holders and release the guides.
(See Figure 2)
3. Orient the media roll so that its printing surface will
face up as it passes over the platen roller.
(See Figure 2)
Media Roll Holders
Release Latch Levers
Platen Roller
Figure 2
Media Roll

PAGE 3 OF 18 0517 IH -2526
ASSEMBLY CONTINUED
4. Pull the media so that it extends out of the front of
the printer. Verify the roll turns freely. The roll must not
sit in the bottom of the media compartment.
(See Figure 3)
5. Verify the media's printing surface is facing up.
(See Figure 3)
Figure 3
6. Push the media under both of the media guides.
(See Figure 4)
7. Close the printer. Press down until the cover snaps
closed.
Figure 4
Media Guides

PAGE 4 OF 18 0517 IH -2526
ASSEMBLY CONTINUED
LOADING RIBBON
1. With the printer open, place a new roll of ribbon on
ribbon supply spindles. (See Figure 5)
2. Rotate the roll until the notches align and lock into
the left side of the supply hub. (See Figure 5)
3. Place an empty ribbon core on the take-up spindles.
Rotate the ribbon core until the notches align and
lock into the left side of the take-up hub.
(See Figure 6)
4. The first ribbon take-up core is located in the
packing box. Subsequently, use the empty supply
core to take up the replacement roll of ribbon.
5. Pull the transfer ribbon's leader off the roll and
attach it with the adhesive strip on the leader to the
empty ribbon core on the take-up spindle.
(See Figure 7)
6. Center the ribbon on the ribbon core. (See Figure 7)
Figure 6
Figure 5
Ribbon Supply Spindles
Take-Up Spindles
Adhesive Strip
Figure 7

PAGE 5 OF 18 0517 IH -2526
LOADING RIBBON CONTINUED
7. Rotate the thumb wheel on the left side of the
take-up spindle towards the rear of the printer until
the ribbon is pulled tight across the printhead.
(See Figure 8)
8. Verify that the media is loaded and ready to print
and close the printer cover.
9. Press the Feed button to have the printer feed a
minimum of 10 cm (4 inches) of media to remove
slack and ribbon wrinkle and to align the ribbon on
the spindles.
10. Change the print mode setting from direct thermal
printing to thermal transfer to set the printer's
temperature profiles for thermal transfer media. This
can be done with the printer driver, application
software or printer programming commands. Your
printer is now ready to print.
PRINTING
PRINTER CONFIGURATION LABEL
1. Before connecting the printer to your computer,
make sure the printer is in proper working order. This
can be done by printing a configuration status label.
2. Made sure the media is properly loaded and the
top cover of the printer is closed. Turn the printer
power on. If the printer initializes with the status light
blinking green (pause mode), press the Feed button
once to set the printer to Read (to print) mode.
3. Press the Feed button two to three times to allow
the printer to calibrate the printer for the installed
media. The printer may feed several labels during
this process.
4. When the status light is solid green, press and hold
the Feed button until the status light flashes once.
5. Release the Feed button. A configuration label will
print. (See Figure 9)
Figure 9
Figure 8

PAGE 6 OF 18 0517 IH -2526
ADDITIONAL INFORMATION
INSTALLING ZEBRA SOFTWARE
Zebra Set-up Utilities software is included with the GK420t. Insert the disk and follow the prompts to install the utilities.
ADDITIONAL SOFTWARE
No other software is necessary to use the GK420t, although many people do use some form of label-making software
to allow for more robust designs. Uline does offer Bartender (H-2527) which provides a rich variety of additional design
options.
CONNECTING THE PRINTER TO A COMPUTER
Most Windows operating systems now automatically detect the printer when it is connected to the PC via a USB cable.
The operating system automatically starts a "Add new hardware" wizard when connecting the printer to the PC for the
first time.
ADDITIONAL INFORMATION
This guide is designed to provide basic steps to allow a user to quickly set up the printer and use it immediately. The
Zebra line of printers are designed to have many features and can support additional communication links beyond
the USB connection. For a complete manual detailing all the features and operations of the GK420t please visit
Zebra's website (www.zebra.com) and select the GK420t model.
This site will allow you to download any printer updates, see in-depth troubleshooting options and provide detailed
information regarding the components of the printer.
πCHICAGO • ATLANTA • DALLAS • LOS ANGELES • MINNEAPOLIS • NYC/PHILA • SEATTLE • MEXICO • CANADA
1-800-295-5510
uline.com
PAGE 7 OF 18 0517 IH -2526
πH-2526
ZEBRA IMPRESORA
DUAL DE CÓDIGO
DE BARRAS PARA
ESCRITORIO
01-800-295-5510
uline.mx
PARTES
Documentación
Núcleo de Cinta
Impresora
Cable USB
Cordón de Potencia
(Varía según la región)
Suministro de Electricidad
CONFIGURACIÓN
DESEMPAQUE E INSPECCIONE LA IMPRESORA.
Cuando reciba la impresora, desempáquela
inmediatamente e inspecciónela por si se han
producido daños durante el envío.
Si descubre daños ocurridos durante el envío durante
la inspección:
• Contacte con Servicio a Clientes de ULINE llamando
al 01-800-295-5510.
• Guarde todos los materiales de empaque por si la
tiene que devolver.
MODELO NO. GK420T DE ZEBRA

PAGE 8 OF 18 0517 IH -2526
ENSAMBLE
COMENZAR
1. Asegúrese de que el interruptor de energía esté
(hacia abajo) en la posicion OFF (APAGADO) .
(Vea Diagrama 1)
2. Conecte el cable eléctrico AC a la fuente de
alimentación. (Vea Diagrama 1)
3. Enchufe el otro extremo del cable a un
tomacorrientes eléctrico AC apropiado.
NOTA: La luz activa de encendido se prenderá
si hay corriente en el tomacorriente AC.
(Vea Diagrama 1)
4. Inserte el conector de potencia en la fuente de
alimentación en el receptáculo de alimentación.
(Vea Diagrama 1)
Receptáculo de Alimentación
Impresora
Interruptor de Encendido
Conector de Potencia
Enchufe (Varía por País)
Cable Eléctrico AC
IEC 60320 C-13
Fuente de
Alimentación
Luz Activa de Encendido
Diagrama 1
CARGAR LA IMPRESORA
1. Abra la impresora. Jale las palancas de liberación
de pestillo hacia la parte delantera de la impresora.
(Vea Diagrama 2)
2. Abra los soportes para el rollo de papel. Jale las
guías para papel para abrirlas con su mano libre
y coloque el rollo de papel en los soportes para el
rollo y libere las guías. (Vea Diagrama 2)
3. Oriente el rollo de papel de forma que la superficie
de impresión mire hacia arriba cuando pase por
encima del rodillo de impresión. (Vea Diagrama 2)
Soportes para el Rollo
de Papel
Palancas de
Liberación
de Pestillo
Rodillo de
Impresión
Diagrama 2
Rollo de Papel

PAGE 9 OF 18 0517 IH -2526
CONTINUACIÓN DE ENSAMBLE
4. Jale el papel de forma que salga por la parte
delantera de la impresora. Verifique que el rollo
gira libremente. El rodillo no debe apoyarse en
la parte inferior del compartimento del papel.
(Vea Diagrama 3)
5. Verifique que la superficie de impresión del papel
mire hacia arriba. (Vea Diagrama 3)
Diagrama 3
6. Empuje el papel por debajo de ambas guías para
papel. (Vea Diagrama 4)
7. Cierre la impresora. Ejerza presión descendente
hasta que la cubierta se cierre.
Diagrama 4
Guías para Papel

PAGE 10 OF 18 0517 IH -2526
CONTINUACIÓN DE ENSAMBLE
CARGAR LA CINTA
1. Con la impresora abierta, coloque un nuevo rollo
de cinta en los rodillos de suministro de la cinta.
(Vea Diagrama 5)
2. Gire el rollo hasta que las muescas se alineen y
se aseguren en el lado izquierdo del centro de
suministro. (Vea Diagrama 5)
3. Coloque un núcleo de cinta en los rodillos de
tensión. Gire el núcleo de cinta hasta que las
muescas se alineen y se aseguren en el lado
izquierdo del centro de presión. (Vea Diagrama 6)
4. El primer núcleo de presión de cinta está ubicado
en la caja de empaque. Posteriormente, utilice el
núcleo de suministro para sacar el rollo de cinta
de repuesto.
5. Jale del rollo el extremo principal de la cinta de
transferencia y fíjelo con la tira adhesiva a la guía
del núcleo vacío de la cinta sobre los rodillos de
tensión. (Vea Diagrama 7)
6. Centre la cinta en el núcleo de cinta.
(Vea Diagrama 7)
Rodillos de
Suministro de Cinta
Rodillos de Tensión
Tira Adhesiva
Diagrama 7
Diagrama 6
Diagrama 5
Otros manuales para H-2526
1
Tabla de contenidos
Idiomas:
Otros manuales de Impresora de U-Line

U-Line
U-Line DYMO LABELWRITER 450 TURBO H-1265 Manual de usuario

U-Line
U-Line ZEBRA ZD410 Manual de usuario

U-Line
U-Line Zebra QLN320 Manual de usuario

U-Line
U-Line DYMO LABELWRITER 550 Manual de usuario

U-Line
U-Line H-8093 Manual de usuario

U-Line
U-Line H-4601 Manual de usuario

U-Line
U-Line BROTHER P-TOUCH D400AD Manual de usuario


