Treyco 3000 Manual de usuario

TreycoModel3000
InstructionManual

Page1
TABLEOFCONTENTS
SafetyandUnpackMachine2
FeaturesofModel30003
Assembly6
Chargehoningdisc7
SharpeningA‐5StyleClipperBlades9
BladeCharts14
HoningDiscReplacement15

Page2
SAFETY PRECAUTIONS
Wear safety glasses and dust mask when operating Treyco Model 3000.
Do not operate machine with loose fitting clothing that can catch in moving parts.
Keep hair pulled back to avoid contact with moving parts.
Do not modify speed of machine.
Use only TREYCO replacement parts and honing disc resurfacing.
Keep work area clean.
Keep children and visitors away from machine while in use.
Do not operate machine until instruction manual is fully read and understood.
Read Material Safety Data Sheets
UNPACK MACHINE
Machine is shipped in three cartons as follows:
One large carton contains assembled machine.
Second carton contains honing disc.
Third carton contains loosely packed accessories as follows:
1# jar honing powder
Powder dispenser (salt shaker)
Atomizer sprayer with oil
Wood charging stick
Metal removal gauge
Instructional DVD
Instruction manual
Allen wrench 5/32
Rabbit pelt

Page3
FEATURESOFMODEL3000
Brakeforquickstoppingofhoningdisc
Linearballbushingslidecompletely
sealedwithrubberbellows
Magneticholdersthatrequirenoadjustments
whensharpeningvarioussizeblades

Page4
TWOSPEEDHONINGDISC
Model3000isequippedwitha2‐speeddrive,machinearrivessetonlowspeed.
Tochangetohighspeedmoveorangebeltfromupperpulleygrooveondrive
platetolowerpulleygroovethenmovebeltfromupperpulleygrooveonmotor
tolower.
Toreturntolowspeedreverseabovedirections.
Lowspeedsetting
Highspeedsetting
Page5
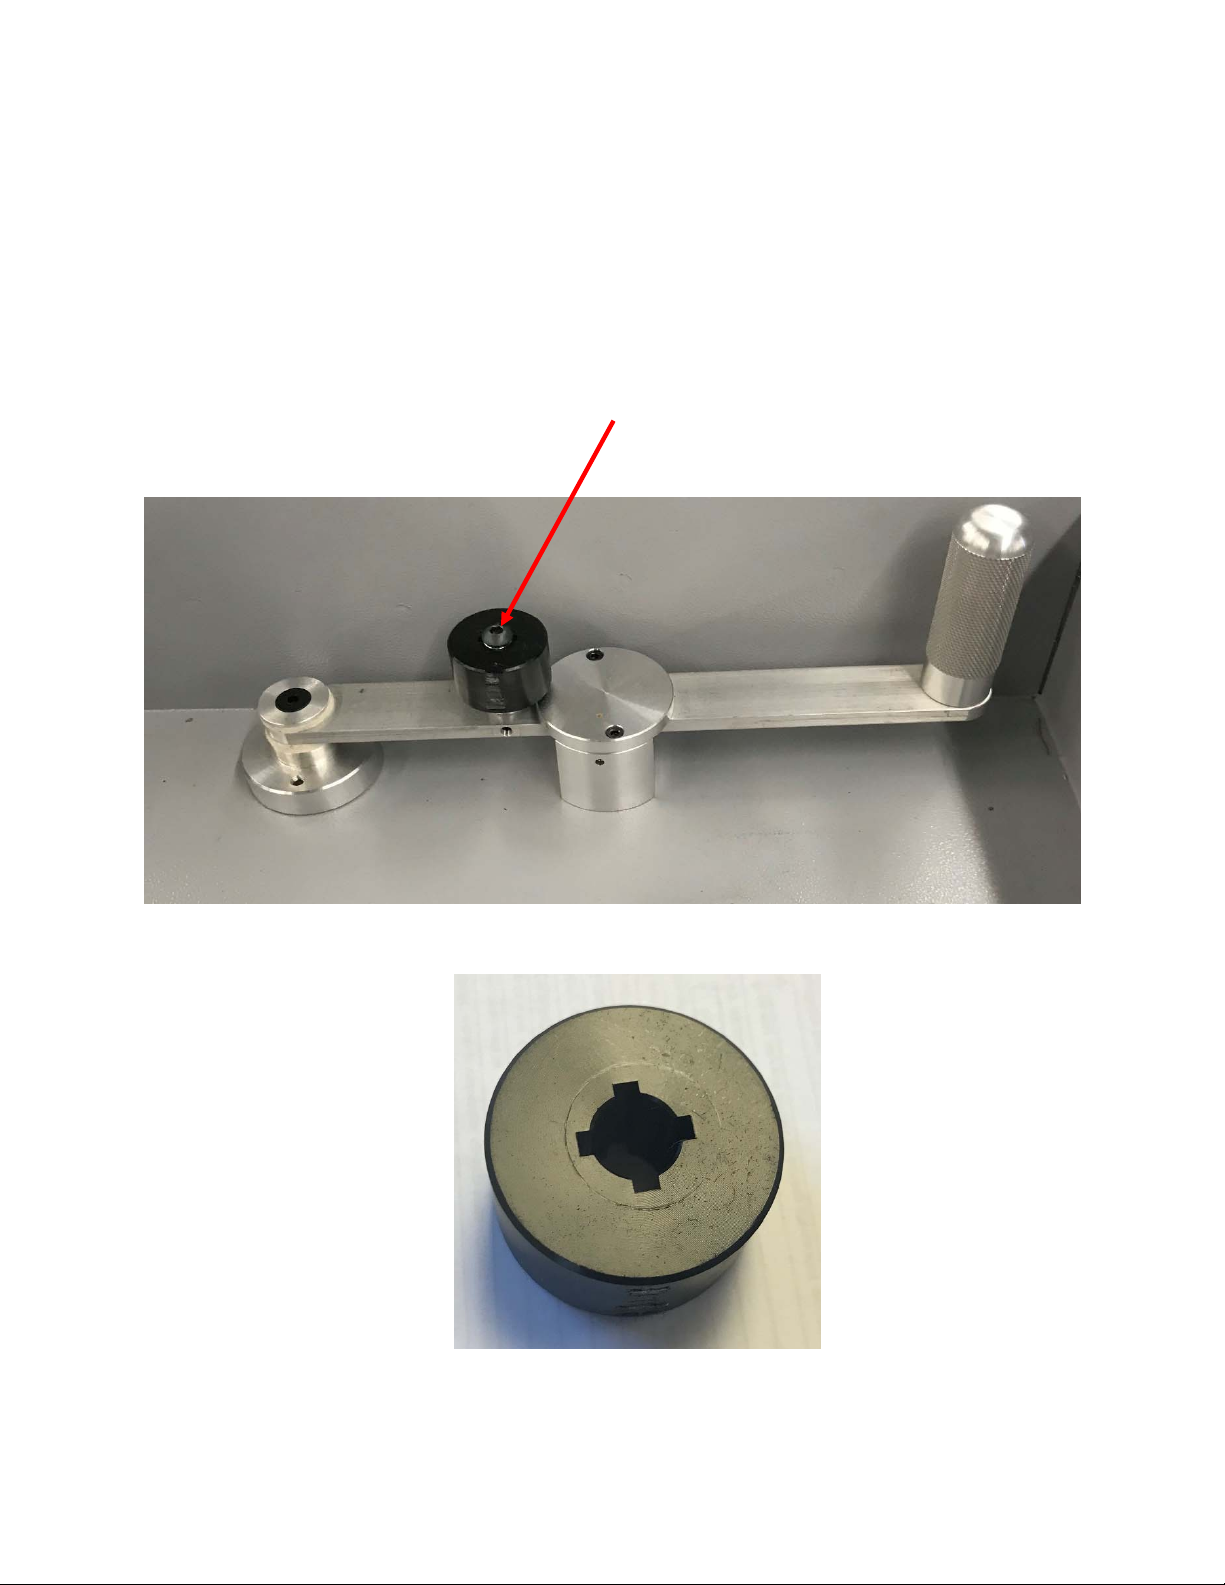
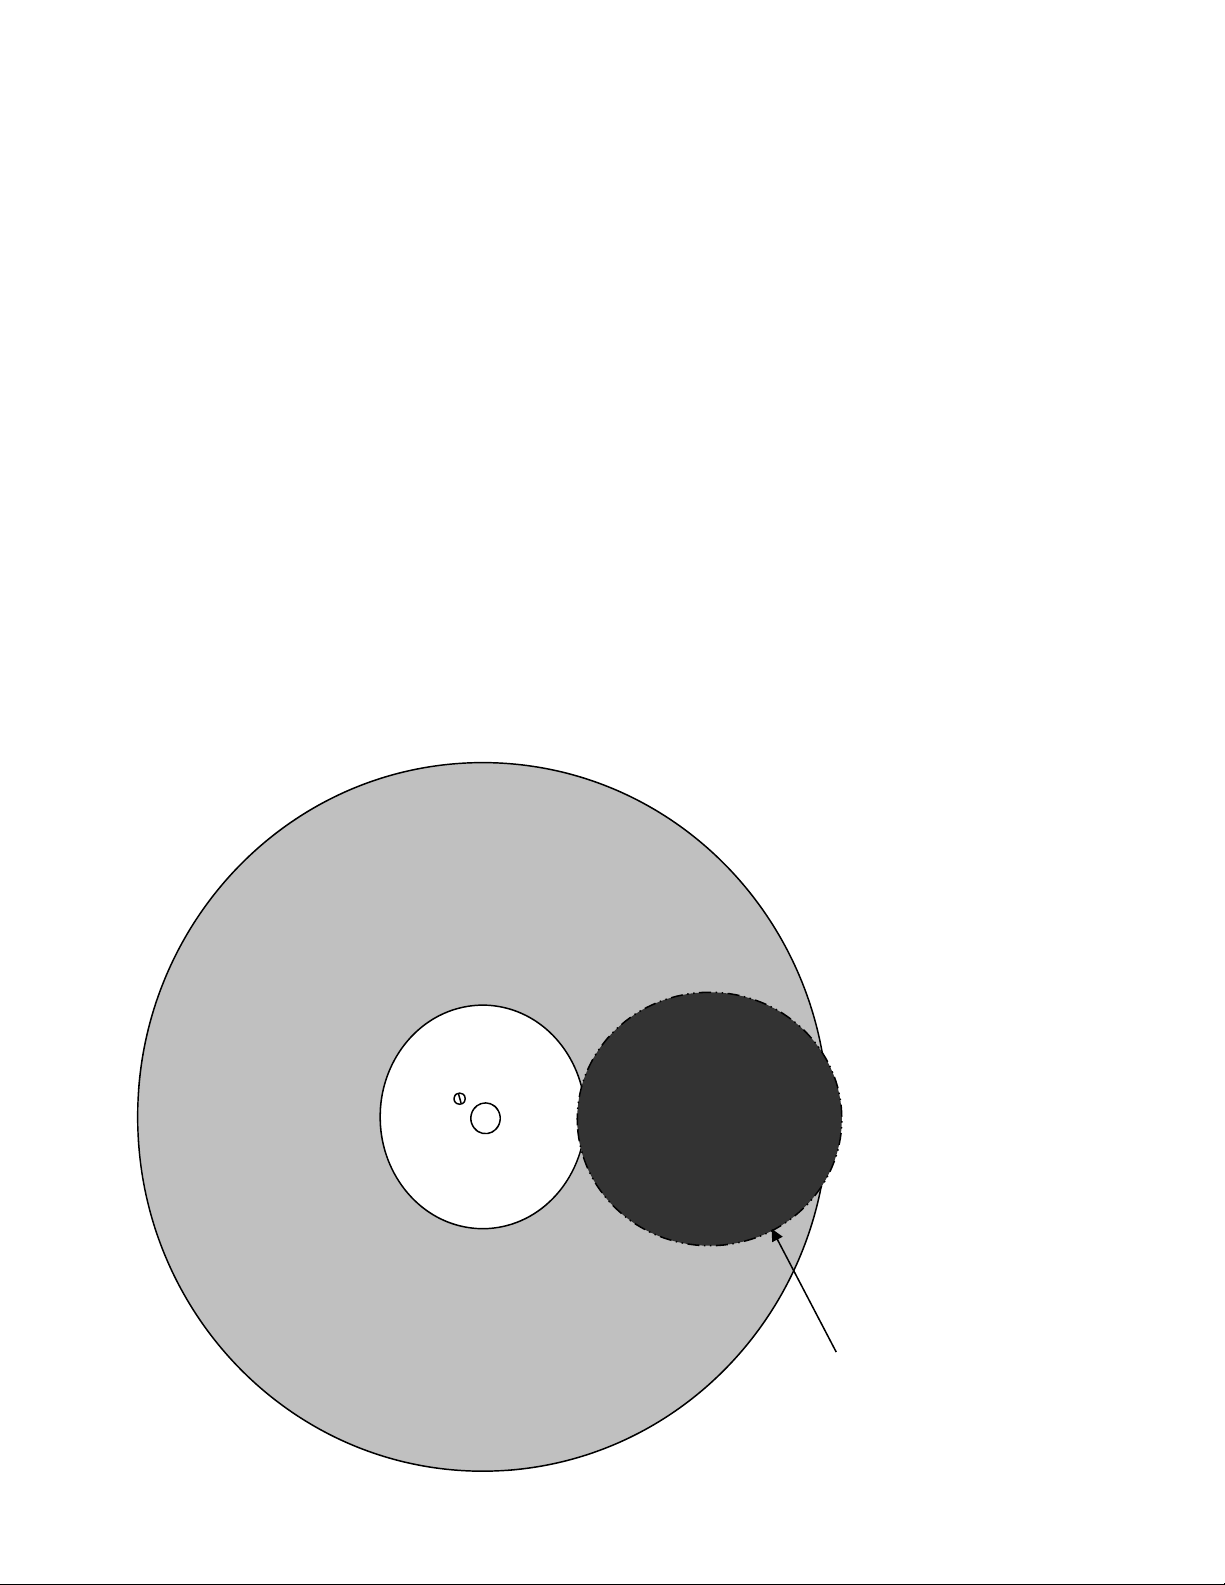
HONINGDISCBRAKE
Machinefeaturesabrakeforstoppingthehoningdiscquickly,thebrakepadthat
pressesontheouteredgeofthediscwillwearandwhenthishappensremove
thescrewontopofpadandliftpadoffandindextoadifferentkeywayand
reattachwithscrew.
Removescrewtoliftoffbrakepad
Brakepadwith4keyways

Page6
ASSEMBLY
Machine is received fully assembled with the exception of mounting the honing disc and preparation of the disc
for sharpening as follows:
STEP 1:
Place machine on sturdy table or bench.
STEP 2: WASH HONING DISC
Wash both sides of honing disc with warm water and mild dish washing detergent (suggest Dawn Dish soap,
DO NOT use detergent for automatic dishwashers).
Scrub disc with soap solution and soft bristle brush.
Rinse in warm water.
Let disc air dry only, DO NOT dry with towel as this will leave lint or fabric on disc.
STEP 3: DISC IDENTIFICATION
Disc is double sided, and stamped in center recess for identification.
“H” side (HOLLOW GROUND) is used for small animal and human hair.
“F” side (FLAT GROUND) is used for large animal blades.
STEP 4: INSTALL HONING DISC
Remove ¼” screw from drive plate and install honing disc onto machine by placing large center hole in disc
onto spindle while aligning the threaded hole in drive plate with small hole in honing disc.
Insert ¼” screw through small hole in honing disc and tighten.
Cover large center hole in disc with a piece of adhesive (duct) tape to prevent honing powder from getting onto
spindle.
Placetapeoverendofspindleshaft Attachdisctospindlewithsuppliedscrew
Page 7
CHARGING HONING DISC
STEP 1
Atomizer spray bottle comes already filled with honing oil, you must pressurize the
bottle with air. This can be done the same as filling a car tire with air or use a
bicycle tire pump. Fill to 50 – 90 pounds air pressure.
Add honing powder into supplied powder dispenser (salt shaker).
STEP 2
Before using a new or resurfaced honing disc you must first do an initial charging
of honing oil and honing powder. Machine is shipped on low speed setting please
leave it on low speed for the initial charging.
1. Spin honing disc by hand.
2. Hold atomizer 8 to 10 inches above disc.
3. Apply a fine spray of honing oil on disc by a 1-2 second burst from atomizer,
honing oil should fall on honing disc as shown below as disc is slowly
revolving.
Fine mist of oil to fall
on disc in this area as
disc s
p
ins slowl
y
.

Page 8
4. Apply honing powder evenly on disc with supplied shaker covering the disc
lightly (approximately 1-2 teaspoons).
5. Place wooden charging stick on honing disc in line with center of disc and
narrow edge of stick on honing disc. Make two revolutions around honing disc
with charging stick to evenly distribute honing powder. Apply light down
pressure on charging stick. This will fill the fine grooves on disc with powder.
6. Mount Oster comb blade size 10 or 15 on holder engraved OSTER COMB.
7. Turn on honing disc and automatic arms.
8. Lower comb blade only gently onto honing disc placing it down when blade is
centered between outer edge and inner edge (do not set blade down at inner or
outer edges of disc).
9. Let blade make 4-6 complete strokes across disc.
10. Lift blade to upright position.
11. Repeat this process FIVE more times.
12. After repeating this process, the entire surface of disc should be a uniform dull
gray in color.
CHARGING STICK

Page9
SHARPENINGA‐5BLADES
STEP1:SETMETALREMOVALGAUGE
1. Disassemblebladesetandwipeoffanydirt,furorhair.
2. Placesideofcombbladetobesharpenedonmetalremovalgaugewiththe
2pinsongaugefaceenteringthe2screwholesoncombblade.
3. Whileholdingcombtighttogaugerotatedialofindicatorsoneedlepoints
tozero.
Pinsthescrewholes
incombbladefiton
Holdcombblade
tighttogaugeand
rotatedialtozero
Aftersharpening
needleshouldbe2
linesfromzero
Tabla de contenidos


