TITAN ARMY P27A2R Manual de usuario

P27A2R


Precautions Before using this product, please read this User Manual carefully and keep it well
Please use a reliable grounded socket, Do not overload the socket, or it may cause fire or
electric shock.
Do not cover or block the vent hole in the rear casing, and do not use the product on a bed,
sofa, blanket or similar objects.
The range of the supply voltage of the monitor is printed on the label on the rear casing.
If it is impossible to determine the supply voltage, please consult the distributor or local
power company.
If the monitor will not be used for a long period, please cut o the power supply to avoid
electric shock in rainy days and damage due to abnormal supply voltage.
Keep the monitor away from water sources or damp places, such as bath rooms, kitchens,
basements and swimming pools.
Make sure the monitor is placed on a flat surface. If the monitor falls down, it may cause
human injury or device damage.
Store and use the monitor in a cool, dry and well ventilated place, and keep it away from
emission and heat sources.
Do not put foreign matters into the monitor, or it may cause short circuits resulting fire or
electric shock.
Do not disassemble or repair this product by self to avoid electric shock. If faults occur,
please contact the after-sales service directly.
Do not pull or twist the power cable forcedly.
There is a polarizer layer (not a protective film) on the surface of the screen. Do not peel
it o, or the product may be damaged and the warranty will be invalid.

M4x6 Mount hexagon irons x 4
Monitor Stand stemBase
Power adapterDP signal cable Power cable
User Manual
Package Content
Packing list
Please check that the package of the monitor contains all parts. If any part is lost, please contact
the distributor.
The color and shape of parts may vary with models. Figures in this User Manual are for reference only.
Cables supplied may vary with purchased products. Figures in this User Manual are for reference only.

Installation of base
Installation
1. Open the package to take out foams and put them on a at tabletop.
3. Take out the base and stand, and use the thumb screw of the base to lock the stand.
Stand stem
Base
Lower foam cover
Monitor
2. Remove the upper foam cover and put it aside, take out the monitor lm bag and put the monitor in the lower
foam cover.
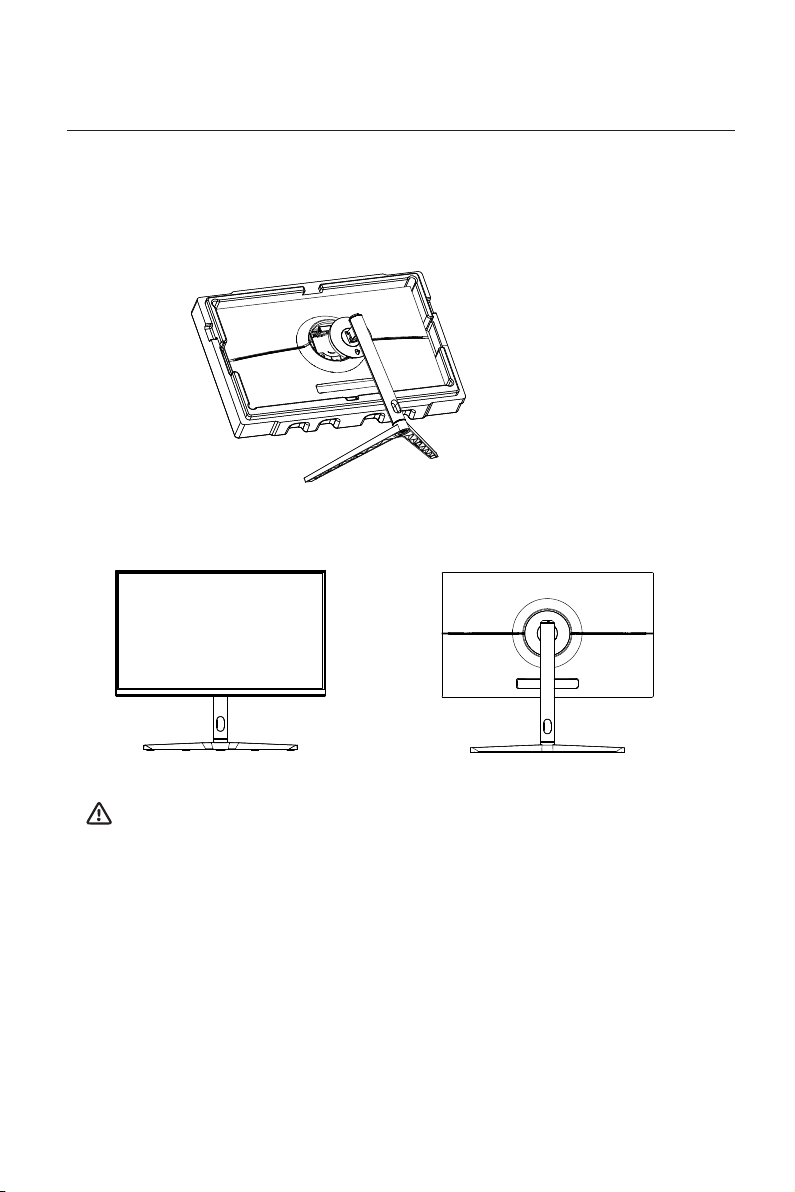
4. Align the base and stand components assembled in Step 3to the slot of the machine and clip them. (Note: Slide
the quick disassembly button up with ngers to take out the base and stand components)
5. Simply hold the stand with hand to stand the monitor upright.
Note: During standing of the whole monitor, do not press the liquid crystal screen with hand to avoid
damage to the screen.

Installation of mount
1. Open the package, take out the product with foam still attached, and gently place it on a desktop or table.
Remove the extra parts and the foam covering the monitor. If the monitor was already attached to the stand,
remove the stand.
2. Take out the four hexagon irons from the accessory bag. Assemble them in the middle of the whole machine
and lock them with a screwdriver. Do not take the screen out from the foam to avoid damage to the screen.
Mount (not supplied)
Note: In order to prevent the monitor from falling when it is used on the wall, please install it properly
and do safety protection. Do not place or hang any objects on the wall bracket, and the wall height
should be within 2 meters.
Mount hexagon irons x 4
3. Note: Hang the assembled product on a hard wall. Do not pinch the screen with your hands during the
hanging process to avoid damaging the screen.

Adjustment of monitor
-20° 20°
-5° 20°
120mm
Tilting angle
-5.0°(±2.0°)- +20°(±2.0°)
Height angle
0-120mm(±5.0mm)
Vertical angle
-90°- +90°
Rotation angle
-20°(±2.0°)- +20°(±2.0°)
90°-90°

Instructions for use
Up rocker button: Quickly enter the contextual mode.
Left rocker button:Press to return to the previous menu/ Exit.
Down rocker button: The rocker is used to quick enter the Game Crosshair menu.
Rocker switch button: Press to turn on/o the monitor.
Right rocker button: Press to enter sub-menus/ quickly enter the main menu.
Button Function
1
2
3
4
5
6
32 4 5
1
Explanation of indicators
Description of buttons
6. Indicator: Steady blue light indicates that power is on and the monitor is operating normally. A red light indicates
no video source, no horizontal or vertical signal detected or low voltage. No light indicates a shutdown condition.
Make sure your computer is turned on and that all video cables are fully plugged in and/or connected.

Please connect the power
adapter to the power cable,
connect the power adapter
plug to the corresponding
power port of the monitor,
and then connect the
power cable to a properly
grounded power outlet.
Cable connection:
with products.
* Note: If the power cable or signal cable is damaged, you must replace it
with special soft cables or special components purchased from the
manufacture or maintenance department.
Use the HDMI cable to connect the HDMI IN interface
of the product to the HDMI OUT interface of a PC.
HDMI interface
Use the HDMI-DVI cable to connect the HDMI IN interface
of the product to the DVI OUT interface of a PC.
(In general, PCs do not transfer video signals to the
monitor through the DVI OUT interface , and it is
necessary to connect a loudspeaker box additionally to
play sounds of PCs.)
DP interface DC interface
AUDIO OUT
OR
Use the DP cable to
connect the DP IN interface
of the product to the DP
OUT interface of a PC.
Connect audio outputting
devices such as earphones
to the AUDIO OUT
interface.
Tabla de contenidos
Otros manuales de Monitor de TITAN ARMY


