Technotape HPM.MFS.350.002 Manual de usuario
INSTRUCTION MANUAL
HANDLEIDING
MULTIPURPOSE
MUG PRESS
MULTIFUNCTIONELE
MOKKENPERS

CONTENTS
PRODUCT OVERVIEW2
3
7
4
5
6
PRESSING MUGS
REPLACING THE HEAT MATS
AVAILABLE HEAT ELEMENTS
HOW TO SET TIME & TEMPERATURE
FAQ
SELECTION & SETTINGS
SETTINGS GUIDE
Product lay-out
Create printed mugs with ease
Step by step
Different heat mat attachments
Getting started
Frequently Asked Questions
Button lay-out
Settings for different materials
Specications

2
INHOUD
PRODUCT OVERZICHT9
10
14
11
12
13
MOKKEN BEDRUKKEN
HITTEMATTEN VERVANGEN
VERKRIJGBARE HITTEMATTEN
TIJD & TEMPERATUUR INSTELLEN
FAQ
INSTELLINGEN
INSTELLINGEN GIDS
Product overzicht
Maak mokken met de mooiste prints
Stap voor stap
Verschillende vormen & maten
Aan de slag
Veel gestelde vragen
Button lay-out
Instellingen voor verschillende materialen
Specicaties

3
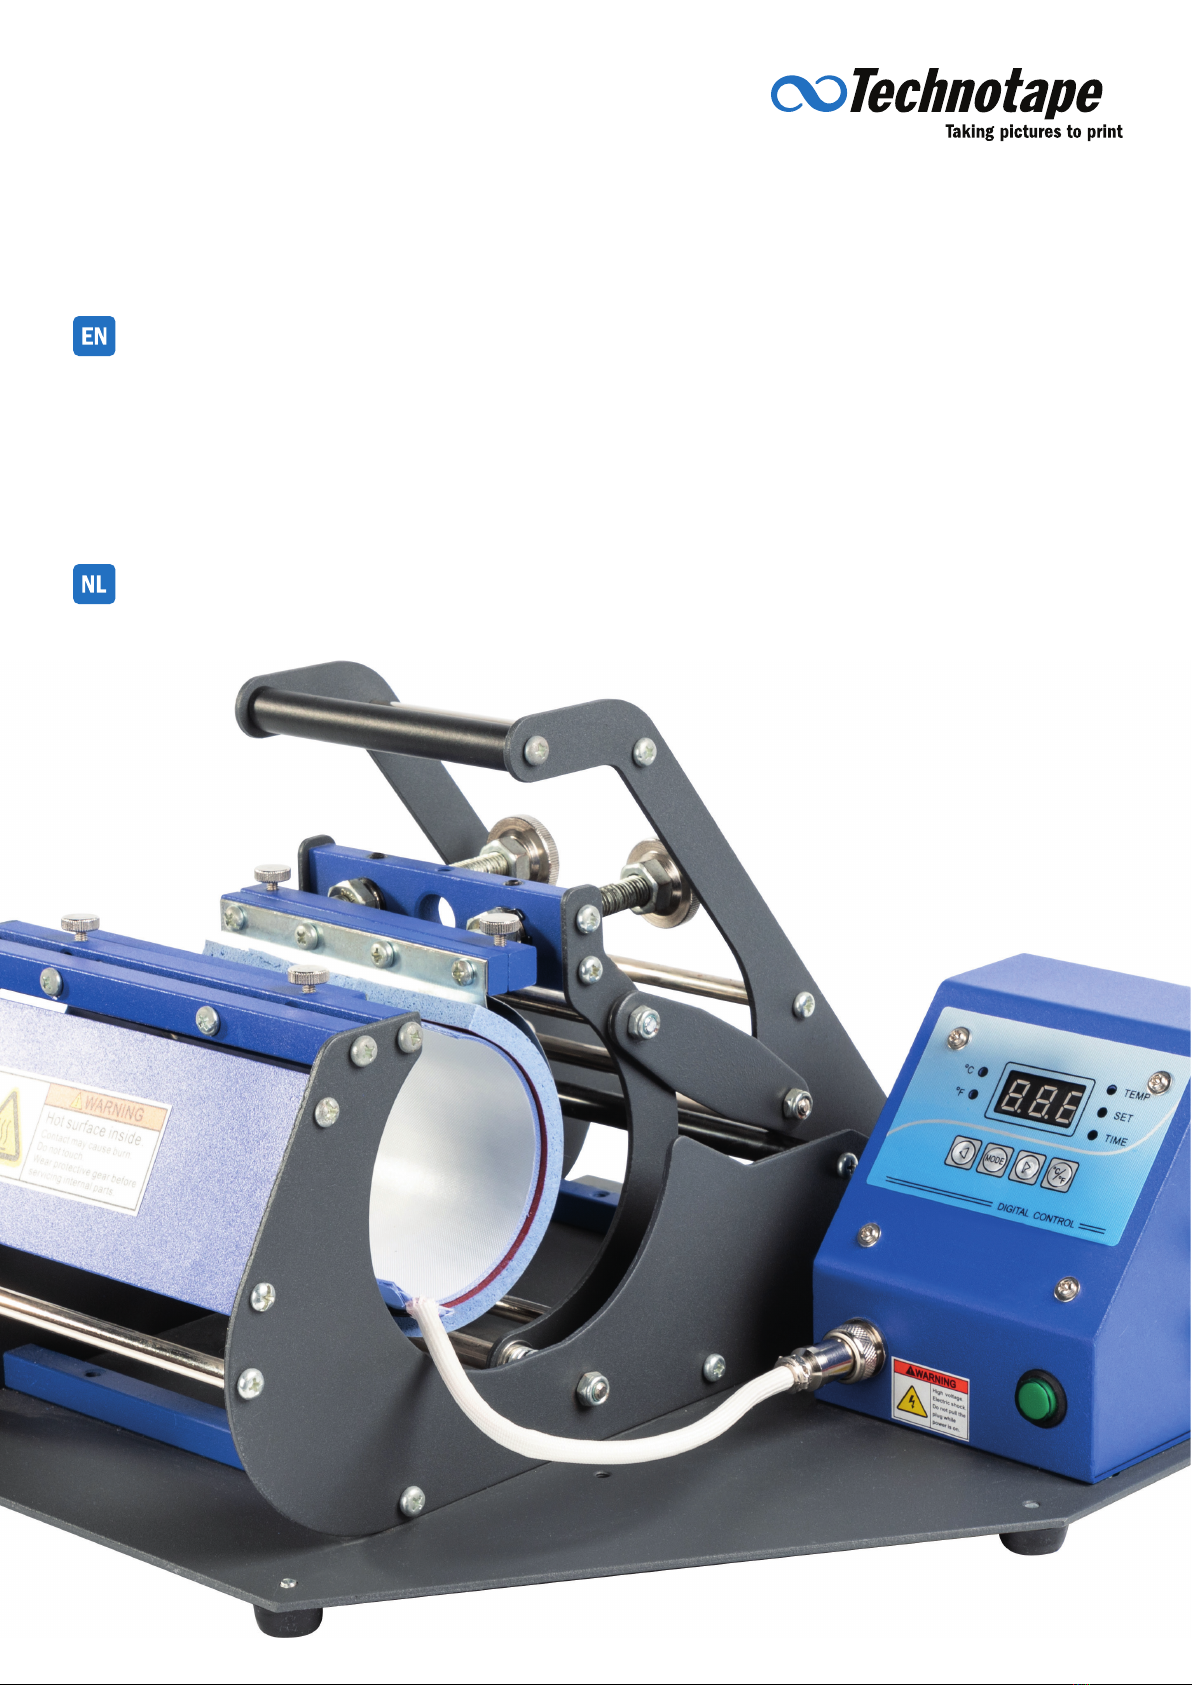
PRODUCT OVERVIEW
MUG PRESS
Pressure Handle Heat Mat Connection Port
Pressure Knob Power Switch
Heat Element Start Button
Digital Control Meter Safety Button
SPECIFICATIONS
Power 450 W
Voltage 220 V - 110 V
Temp. System Celsius & Fahrenheit
Temp. Range 0 - 250 °C
Time Range 0 - 999 seconds

4
Press “ “ and “ “ to change
the printing time.
Press “ “ to save the printing time.
Press “ “ and “ “ to change the
lowest temperature.
Press “ “ and “ “ to change
the printing temperature.
Press “ “ to save the lowest
temperature and to enter the printing
temperature mode. The “ “
light is now switched on.
Press “ “ to save the printing
temperature and to enter the printing
time mode. The “ “ light is now
switched on.
Press “ “ to switch the temperature
mode to Celsius or Fahrenheit.
Press “ “ to set the lowest
temperature mode, the “ “
light is now turned on.
OPERATING THE PRESS
SELECTION & SETTINGS
HOW TO SET THE TIME & TEMPERATURE
Button lay-out
Getting started
Celsius Indicator
Switch Temp. Unit Button
Fahrenheit Indicator
Lowest Temperature Indicator
Adjustment Button
Printing Temperature Indicator
Mode Setting Button
Time Indicator

5
OPERATING THE PRESS
PRESSING MUGS
Create printed mugs with ease
Choose your favorite image, place it
on the mug and secure it using heat
tape.
Set the lowest temperature, printing
temperature and printing time
Remove the paper and tape to reveal
the printed mug!
When the machine is heating up to
the lowest temperature, place a mug
in the press and close it.
Release the handle when the time
is up. Be careful when removing the
mug. It’s hot!
Press the Start Button. The press
will start heating up from the
lowest temperature to the printing
temperature and then count down.
Adjust the pressure by turning the
pressure regulator. Close the press to
nd the best setting.
Switch on the Multipurpose Mug
Press.
PRODUCTION TIPS
For the best result, dip the
product immediately into cold
water after sublimation.
To release the Heat Transfer
Tape easily, double fold one end
of the tape.
Use clean products only to
prevent dust and dirt to obstruct
a clear transfer process.

6
OPERATING THE PRESS
REPLACING HEAT MATS
Step by step
Turn off the press, loosen the screw
and remove the connection cable.
Hold and press the heat element
to release it from the screws. Use
both hands on the two sides of the
element.
Line up the four screws with the four
holes, and place the heat element.
Tighten the four screws. Connect the cable to the controller by
inserting it and fastening the screw
Fix the cable with the rubber hook. Now you have installed a different
heat element so you can print mugs
with a different size or shape.
Loosen the four screws above the
heat element.
Slowly remove the heat element.
Unlock the hook and remove the
cable.
Hold and press the heat element you
want to place. Use both hands on the
two ends to place it.
7
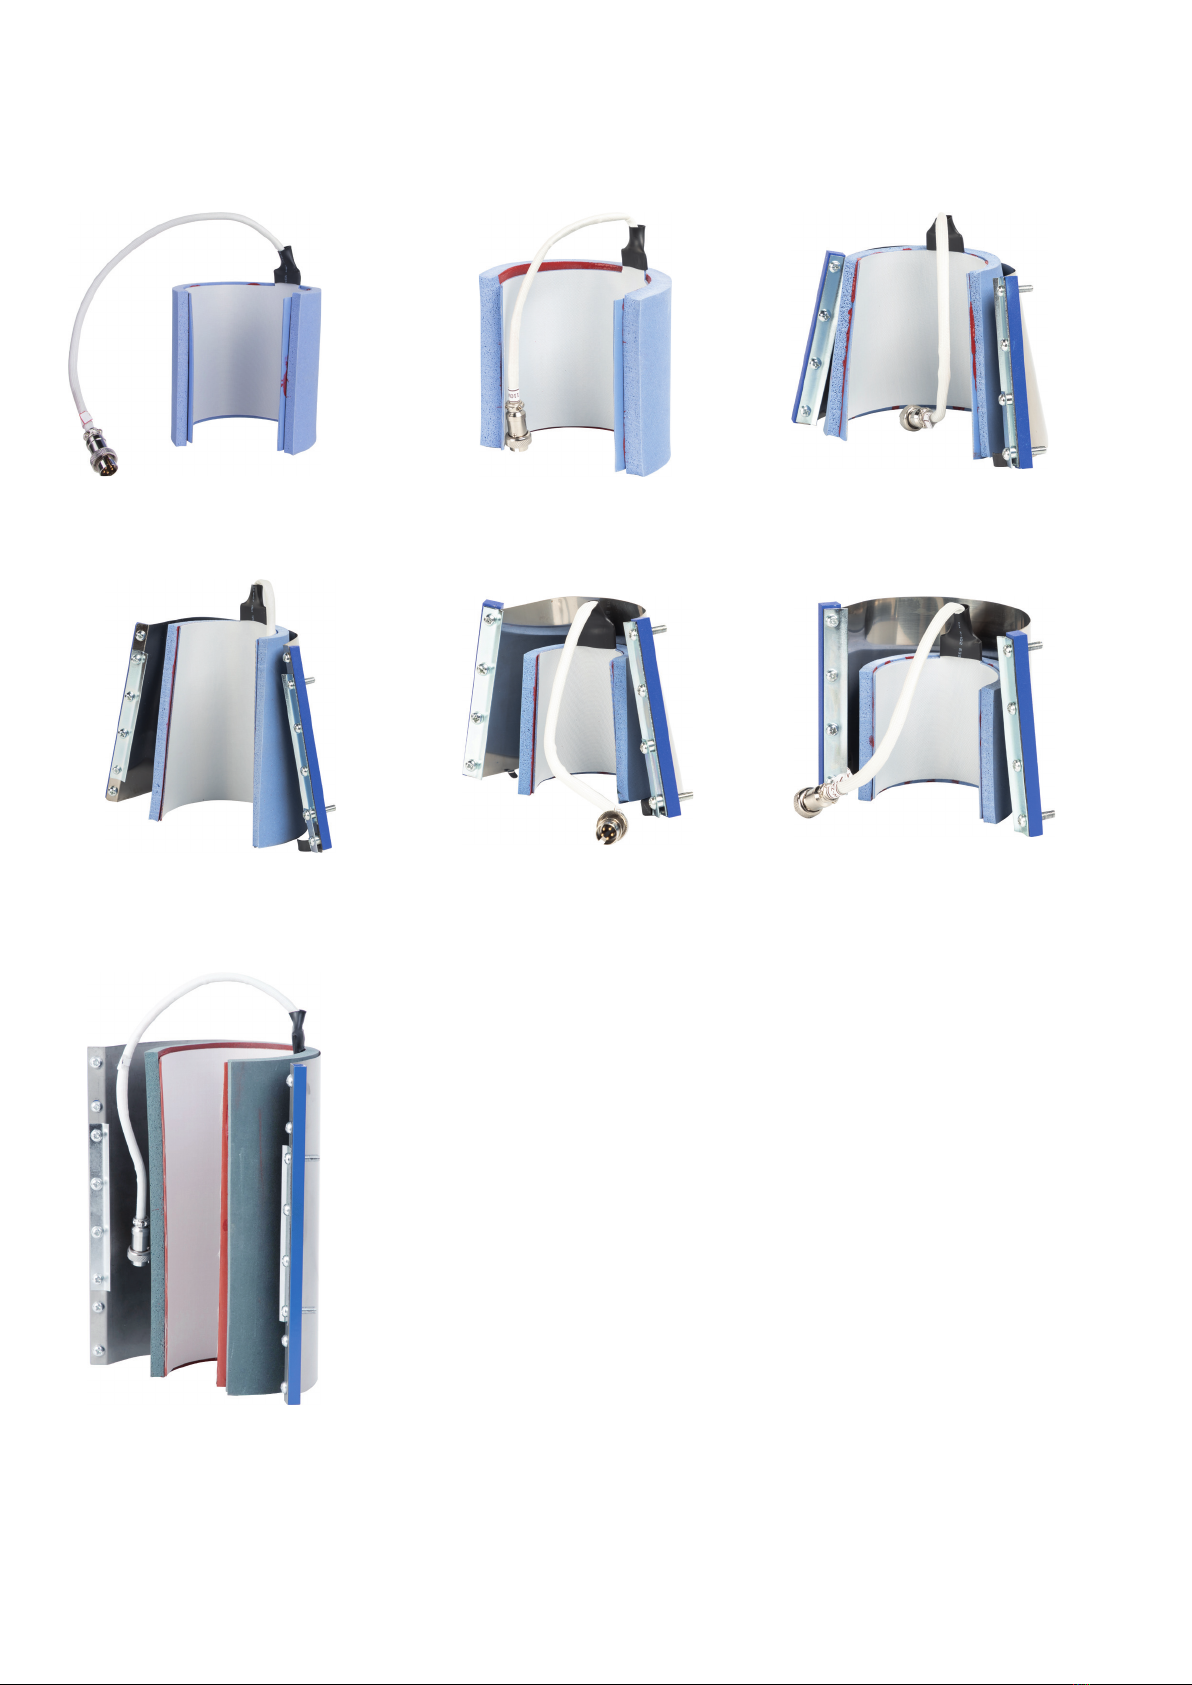
DIFFERENT HEAT MAT ATTACHMENTS
AVAILABLE HEAT ELEMENTS
STRAIGHT HEAT ELEMENT
CONICAL HEAT ELEMENT
STRAIGHT HEAT ELEMENT
SMALL HEAT ELEMENT
STRAIGHT HEAT ELEMENT
CONICAL HEAT ELEMENT
SMALL HEAT ELEMENT
For 11 - 15oz Mugs
For 17oz Latte Mugs
For 6 - 10oz Mugs
For 2oz Shot Glasses
For straight mugs and tumblers with a
max. height of 20 cm or 8 inches.
For 12oz Latte Mugs
For 3oz Mini Mugs

8
SETTINGS FOR DIFFERENT MATERIALS
SETTINGS GUIDE
Ceramic/Glass Mug 180 °C
360 °F 120 sec. 1. Print on suitable sublimation paper.
2. Place the mug in the correct orientation to avoid breaking the handle.
Water Bottle
(Aluminum or Stainless Steel)
180 °C
360 °F
35 - 45
sec.
1. Print on suitable sublimation paper.
2. Take off the the lid before pressing.
3. Use low pressure settings.
Plastic Mug 170 °C
340 °F 120 sec. 1. Print on suitable sublimation paper.
2. Use low pressure settings.
Material Temp. Time Notes
WARNING!
The following settings are for reference only. Please,
always test your materials before production to nd
the correct settings suited for your product.
Technotape International +31 (0)35 541 80 94
Tolweg 7 +31 (0)35 541 18 17
3741 LM Baarn ofce@technotape.com
The Netherlands www.technotape.com
First, lengthen the sublimation time. If that doesn’t work, raise the
temperature with 3°C. The last option is to give the press more
pressure.
Reduce the sublimation time with 10 seconds.
Reduce the pressure or reduce the temperature.
The temperature is either too high or the sublimation paper is of
poor quality.
Reduce the sublimation time with 20 seconds.
The sublimation paper did not make contact with the product
completely. Usually this means that the surface of the product is
not completely smooth.
F.A.Q.
The transferred image is a little too light.
The transferred image is a little too vague.
The transferred image is not brilliant.
The paper is sticky.
The edges of the mug color brown.
The transferred image is partial vague.

9
PRODUCT OVERZICHT
MOKKENPERS
Hendel Stroomkabel hittemat
Drukregelaar Aan-/uitknop
Hittemat Startknop
Bedieningspaneel Veiligheidsknop
SPECIFICATIES
Vermogen 450 W
Voltage 220 V - 110 V
Temperatuur Celsius & Fahrenheit
Bereik Temp. 0 - 250 °C
Bereik Tijd 0 - 999 seconden
Tabla de contenidos
Idiomas:
Otros manuales de Herramientas eléctricas de Technotape


