Tactacam Bone Collector Solo Manual de usuario

INSTRUCTION
MANUAL

WWW.TACTACAM.COM
BONE COLLECTOR™ SOLO
TACTACAM QUICK START GUIDE
CONGRATULATIONS ON YOUR NEW TACTACAM!
This is a Quick Start Guide to show you the basics of your new Tactacam.
Tactacam™ Bone Collector™ SOLO was designed for hunters and outdoorsmen
using the best electronics. The Bone Collector™ SOLO is compatible with the
Tactacam App which allows you to connect to your camera from your smart phone,
view photos and videos, and transfer them to your device for easy sharing with
your friends or on social media. Easy to use, one-touch operation with vibration
indication allows you to hunt, and then share your hunt. This small hunting video
camera was built with an ultra high quality lens and low light sensor. Instead of
using a sh-eye lens, which pushes the images away, Tactacam™ uses a unique
lens design, providing a view similar to what we see with the human eye. 20 yard
shots no longer look like a 100 yard shot thanks to the camera’s 3x Zoom lens.
Visit Tactacam.com for the most up-to-date info about your Tactacam.
Please make sure you register your camera within 10 days of purchase at:
https://www.tactacam.com/warranty-registration/
Follow us on Facebook, Instagram and Twitter for the latest updates from the
Tactacam team:
https://www.facebook.com/tactacam
https://www.instagram.com/tactacam
https://twitter.com/tactacam
Submit your videos at: https://www.tactacam.com/share/ for a chance to win
some amazing prizes throughout the year.
(844) 482-2822
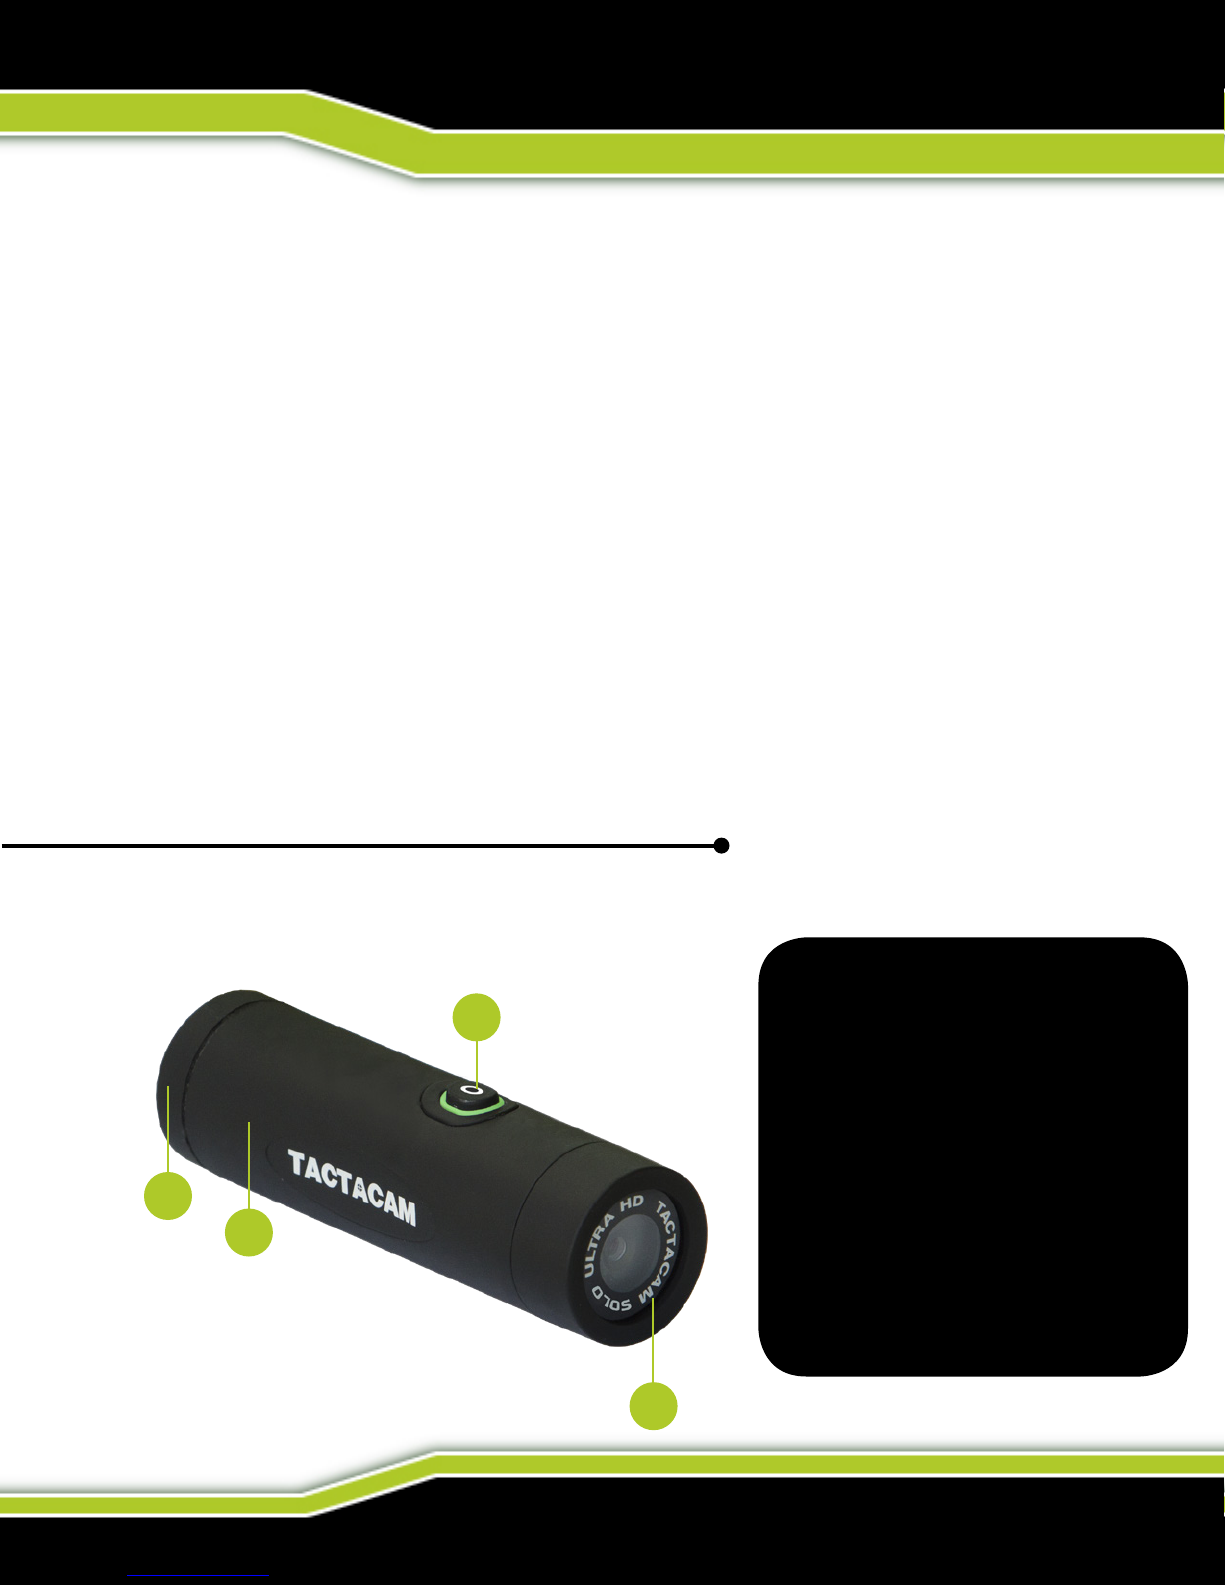
BONE COLLECTOR™ SOLO FEATURES & BENEFITS
GET TO KNOW YOUR TACTACAM
1. External waterproof mic
2. 2.5 hour record time on
a single charge
3. Power/Wi-Fi button
4. TrueVision™ Full HD
1080p
3
12
TACTACAM SOLO
Bone Collector™
FEATURES
4
• Attachments included for BOW and CROSSBOW
• 3X Closer than the Leading Competitor
• Low-Light sensor records in Full HD 1080p-30fps
• 1 touch Power on Auto Record with Vibration Indication
• Tactacam App Wi-Fi compatible
• Ultra Sharp Lens optimized for Bow, Crossbow and Gun (No Fisheye)
• Shock Resistant; 50 cal tested and approved
• Rechargeable Lithium Battery Provides up to 2.5 hours of record time
(Extra batteries available)
• Charging USB 2.0 and 110-120 volt AC outlet
• USB 2.0 connection to Mac and PC
• Video Aspect Ratio: 16:9 Format H.264 for Facebook and YouTube
• Storage: Micro SD Card up to 64GB (not included)
• 1 year Warranty
WWW.TACTACAM.COM
BONE COLLECTOR™ SOLO
TACTACAM QUICK START GUIDE
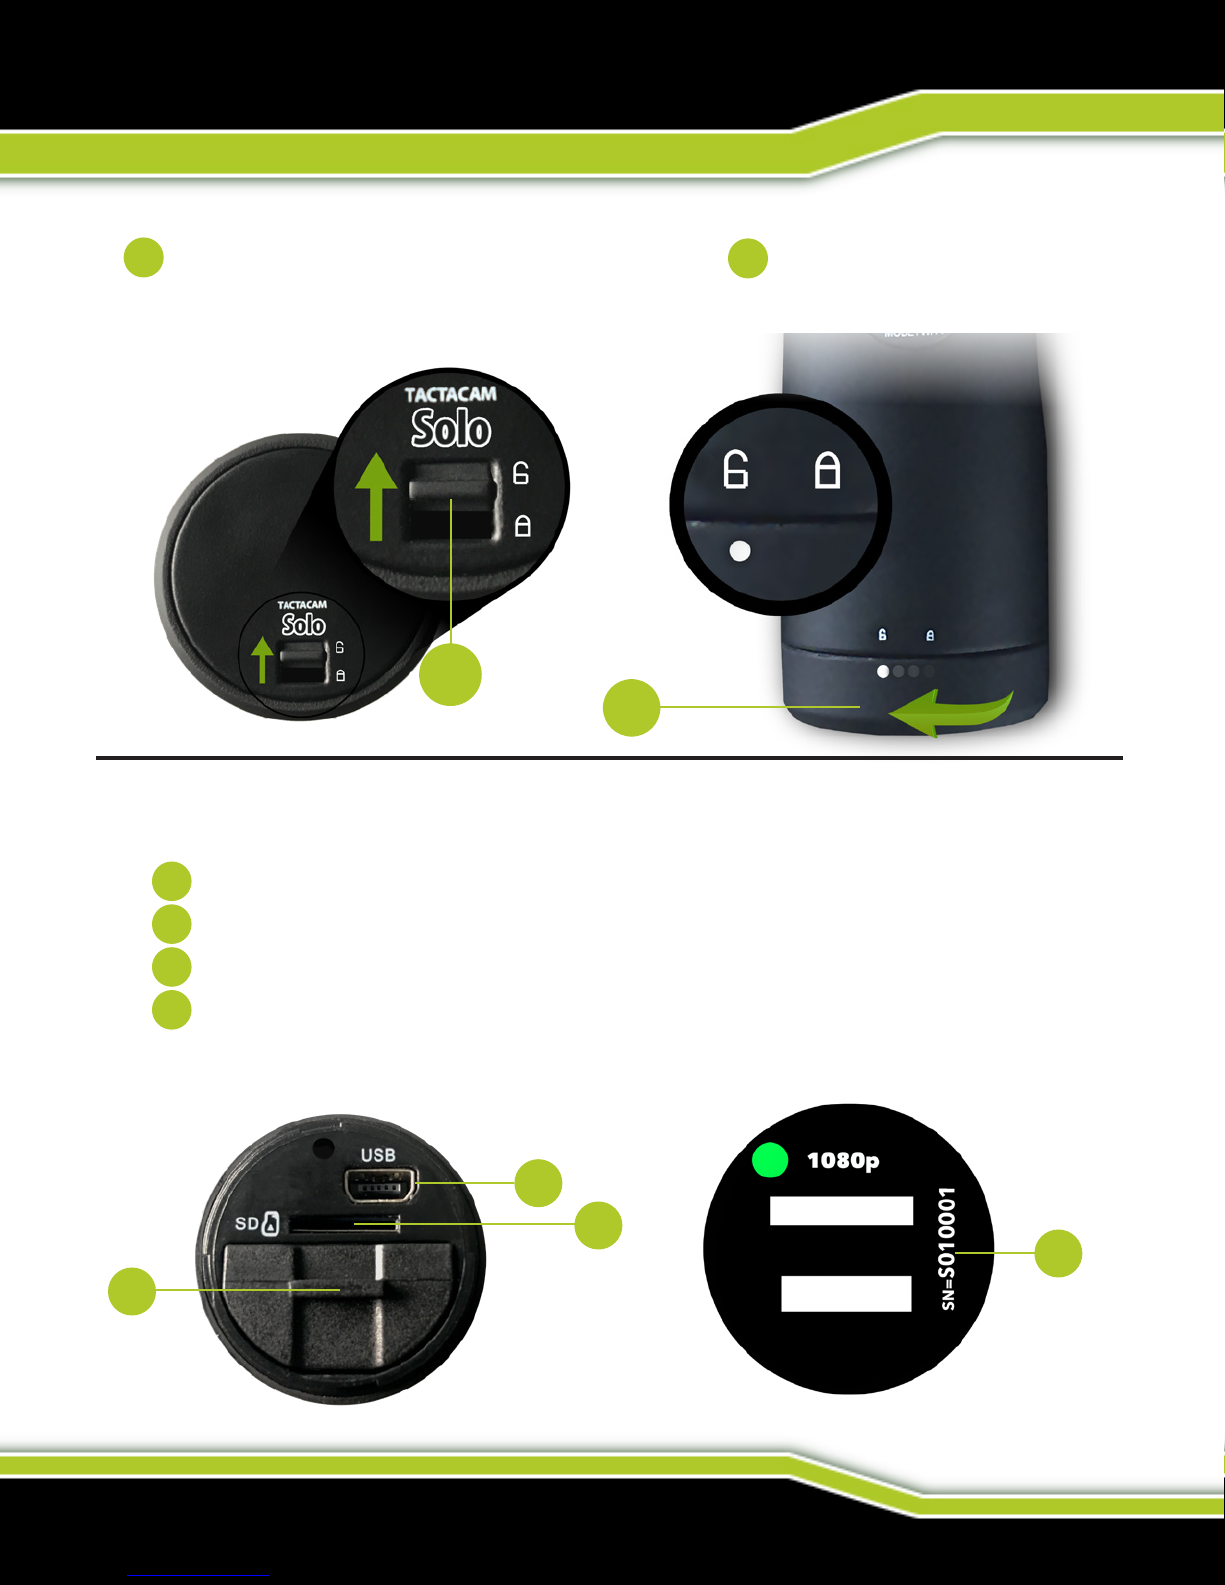
Before you start lming, charge yourTactacam completely.
On the rear of the camera unlock the back cap and then twist counter
clockwise to the unlock position to access the rear of the camera.
You should see the following.
SD Card slot
USB port (Charging and Downloading)
Removable battery (Up to 2.5 hours continuous recording time)
YourTactacam’s serial number.
12
1
2
4
3
12
1
2
3
4
(844) 482-2822
CHARGE YOUR TACTACAM
BONE COLLECTOR™ SOLO
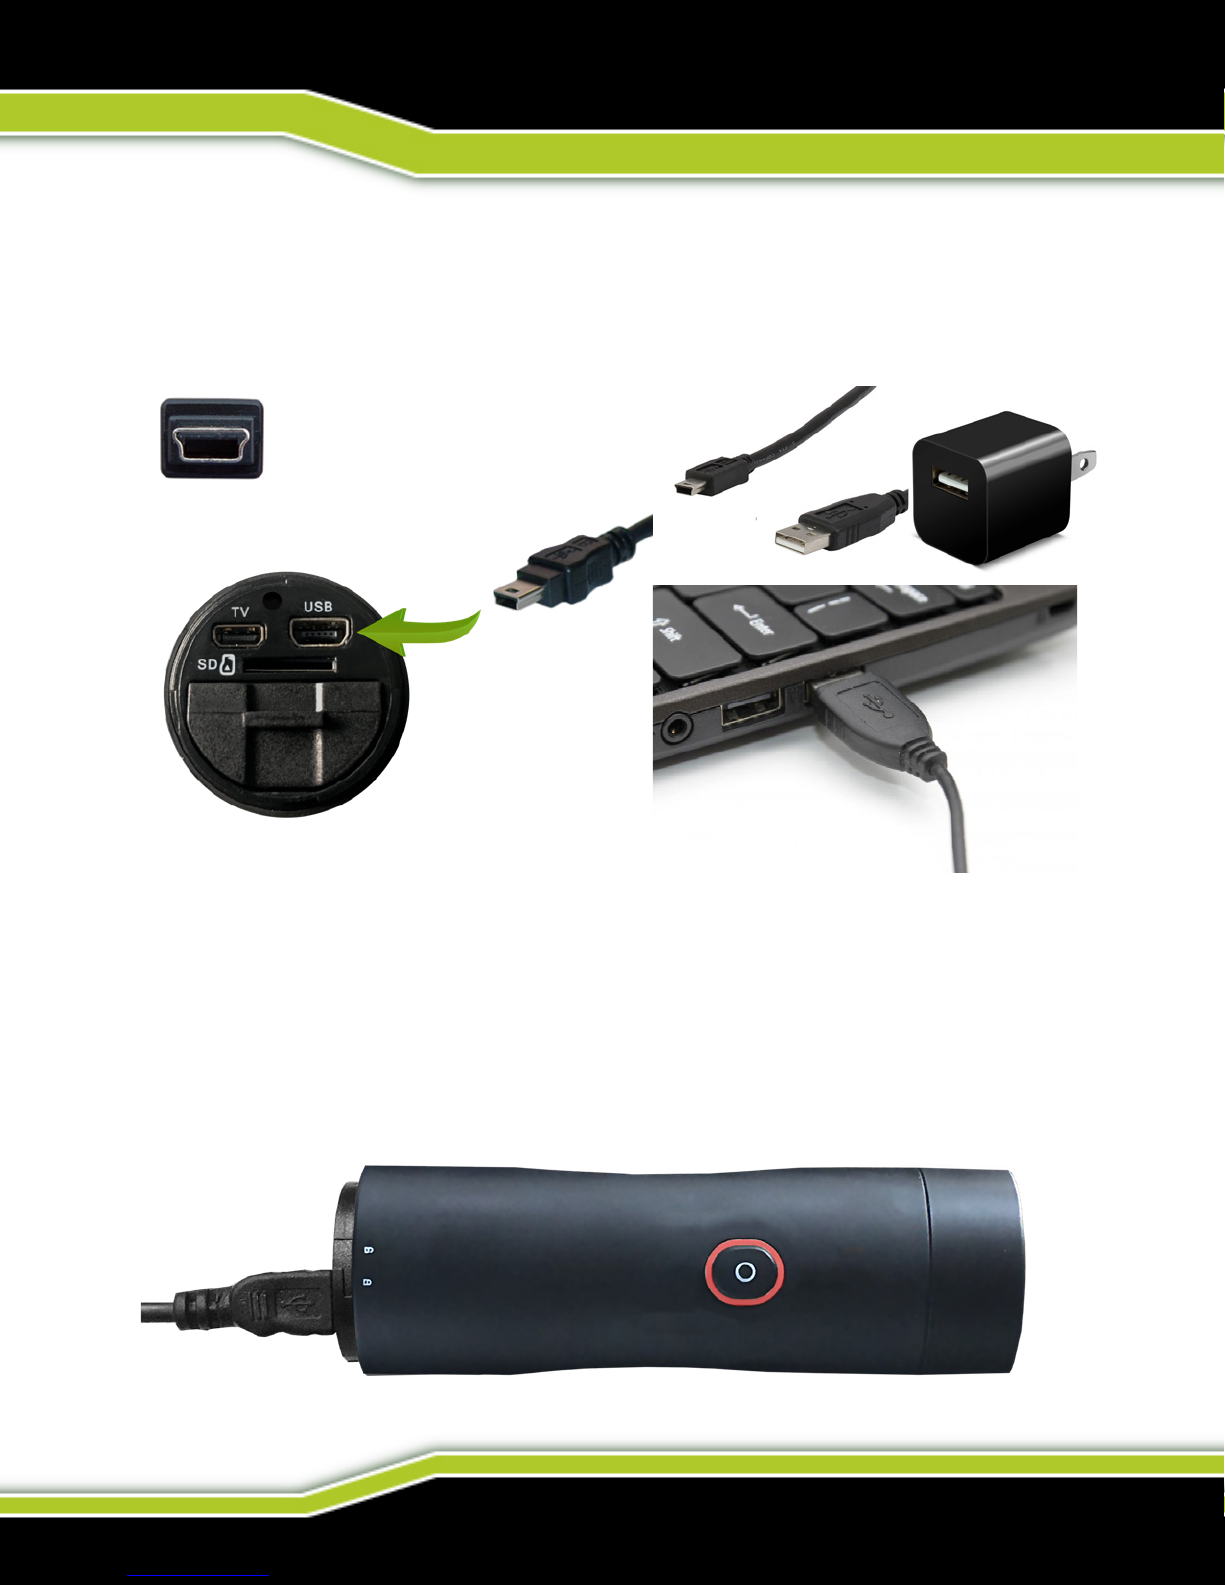
With the back cap removed you will see the USB charging port and
the SD Card slot. Using the included USB cord, plug your Tactacam
into the included wall charger.
You will see the solid red light illuminate on your Tactacam and it will
remain lit until your camera is fully charged. When the light has shut
off you can unplug your Tactacam.
You can also charge your Tactacam Batteries with the Tactacam
External Battery Charger (sold separately).
Mini USB

WWW.TACTACAM.COM
CONNECTING YOUR TACTACAM
TO YOUR COMPUTER
NOTE: You should always format your SD Cards before using in your
Tactacam for the rst time or after it has been installed in any other device.
Only use high quality class 10 micro SD Cards recommended by Tactacam.
Tactacam SD Card(s), Lexar, or SanDisk Ultra Extreme are good choices.
Using the provided USB cord, connect your Tactacam to your computer.
Power on your camera to allow the computer and camera to communicate.
You will see an icon on your computer desktop (usually named TACTACAM).
Any videos taken with your Tactacam will be in the Video folder.
OR
Insert your Micro SD Card into the micro SD Card adapter, allowing you to
use your computer to access the les.
(844) 482-2822
POWERING ON AND RECORDING
GETTING TO KNOW YOUR TACTACAM:
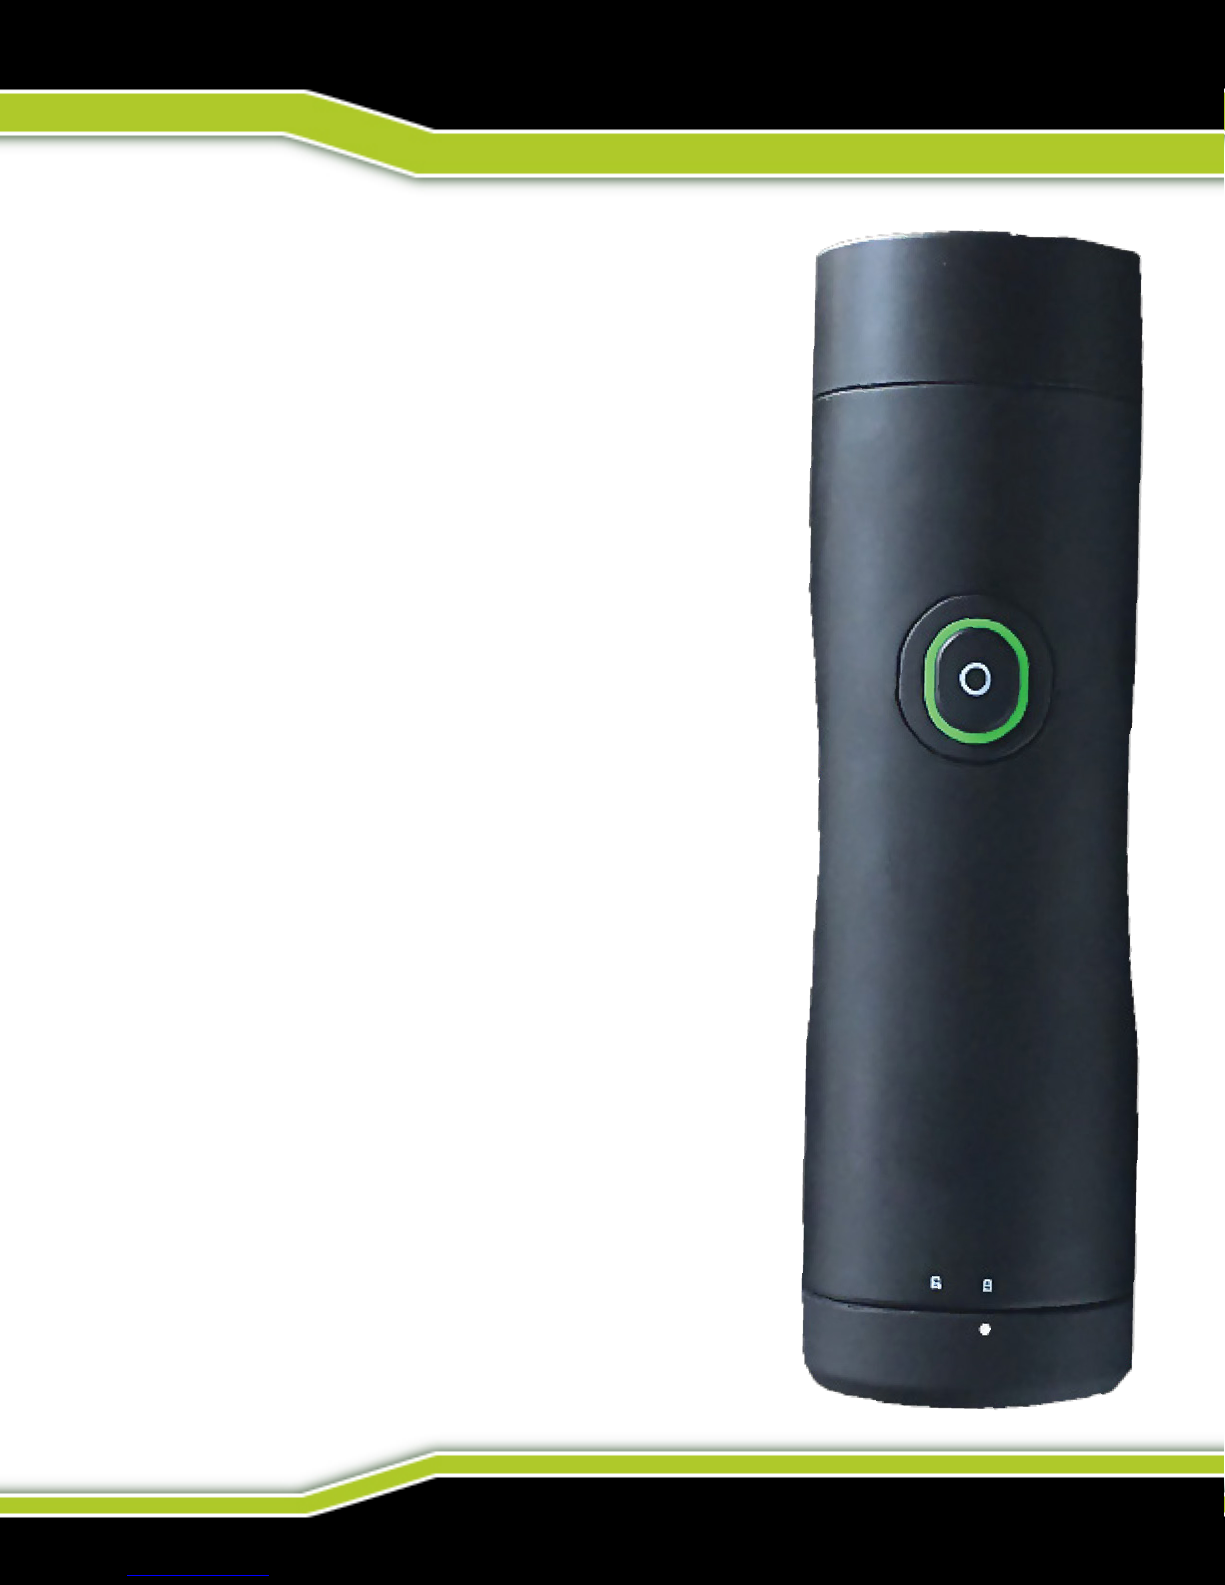
1. Push the Rec/Power button. You will
feel the camera vibrate 2 times and see a
blinking green light coming from the
Rec/Power button. The green LED must
be blinking for the camera to be recording.
The process takes approximately 3 seconds.
Note: If light does not begin to ash, make
sure your SD Card is installed, formatted,
and not lled with videos
2. To pause your recording quickly push
the Rec/Power button. The camera will
vibrate 1 time and the green light will go
solid.
3. While paused, push and hold the
power button for 3 seconds to turn on the
Wi-Fi Push and hold the power button for 3
seconds when the Wi-Fi is ON to turn off the
Wi-Fi.
4. To power your camera completely off,
just push and hold for 5 seconds to power
camera off.
5. The camera will automatically power
off to save battery when not recording
(left in pause mode) after 3 minutes.

WWW.TACTACAM.COM
REFORMATTING YOUR CARD
GETTING TO KNOW YOUR TACTACAM:
Always use a recommended SD Cards for your camera. You will need
a Class 10, 32 or 64 GB micro SD Cards from your local retailer
Note:You should always format your SD Cards before using in
your Tactacam for the rst time or after it has been installed in any
other device. Only use high quality class 10 or higher micro SD
Cards. Tactacam SD Cards, Lexar, or SanDisk Ultra Extreme are
recommended.
Please see more info on SD Cards at tactacam.com/support

(844) 482-2822
REFORMATTING YOUR CARD
GETTING TO KNOW YOUR TACTACAM:
Insert the microSD Card adapter into your computer which will allow
you to use the standard SD Card reader on your computer to access
the les.
Next, reformat your SD Card before use. When you reformat a SD
Card it erases all data on the card. If you need assistance reformatting
your card see the following:
For a Mac:
Visit tactacam.com/support and to see video “SD Card
Reformat on a Mac Computer” for full detailed instructions
For a PC:
Visit tactacam.com/support and to see video “HSD Card
Reformat on a Windows Computer” for full detailed instructions
Notes: It is best to format your SD Cards before using and only
use SD Cards approved by Tactacam for Tactacam cameras.
When formatting your SD Card use ExFAT. For a list of the
recommended microSD Cards, visit tactacam.com/support
Use care when handling memory cards. Avoid liquids, dust, and
debris. As a precaution, power off the camera before inserting or
removing the card. Check manufacturer guidelines regarding use in
acceptable temperature ranges.

WWW.TACTACAM.COM
CONNECTING TO WI-FI
DOWNLOADING THE TACTACAM APP
Note: Your camera functions can only be controlled by your phone when your are
connected to Wi-Fi. This setting lets you connect your camera to the Tactacam App for
mobile remote connection. When wireless is on, a blue LED shows around the power
button. The blue wireless LED will blink when not connected for 1 min then power itself
off. Once connected the blue LED will go solid. The Wi-Fi will remain on throughout
the lifetime of the battery.
1. Download the Tactacam App
Download and open the Tactacam APP from your App store on your Phone or
Tablet. Follow the App’s on-screen instructions.
2. Connect to your Tactacam
To turn on your Tactacam Wi-Fi: While your Tactacam is in pause mode push and
hold the Mode Button for 2 seconds. You will see the blue LED indicator light turn
on and start blinking.
3. From your mobile device select the Tactacam Wi-Fi.
(There is no default password for your Tactacam Wi-Fi.)
4. Open the Tactacam App and connect to your Tactacam.
Android users: You will need to download a video player for your device.
We recommend MX Media player you can nd it in the Android App store.
5. Turn Wi-Fi Off - Press and hold the Wi-Fi/Mode button for 4 seconds. This will turn
off your Wi-Fi and disconnect you from your mobile device.
For complete pairing instructions, visit tactacam.com/support.
Tabla de contenidos
Otros manuales de Cámara de acción de Tactacam


