SVS Prime Tower Manual de usuario
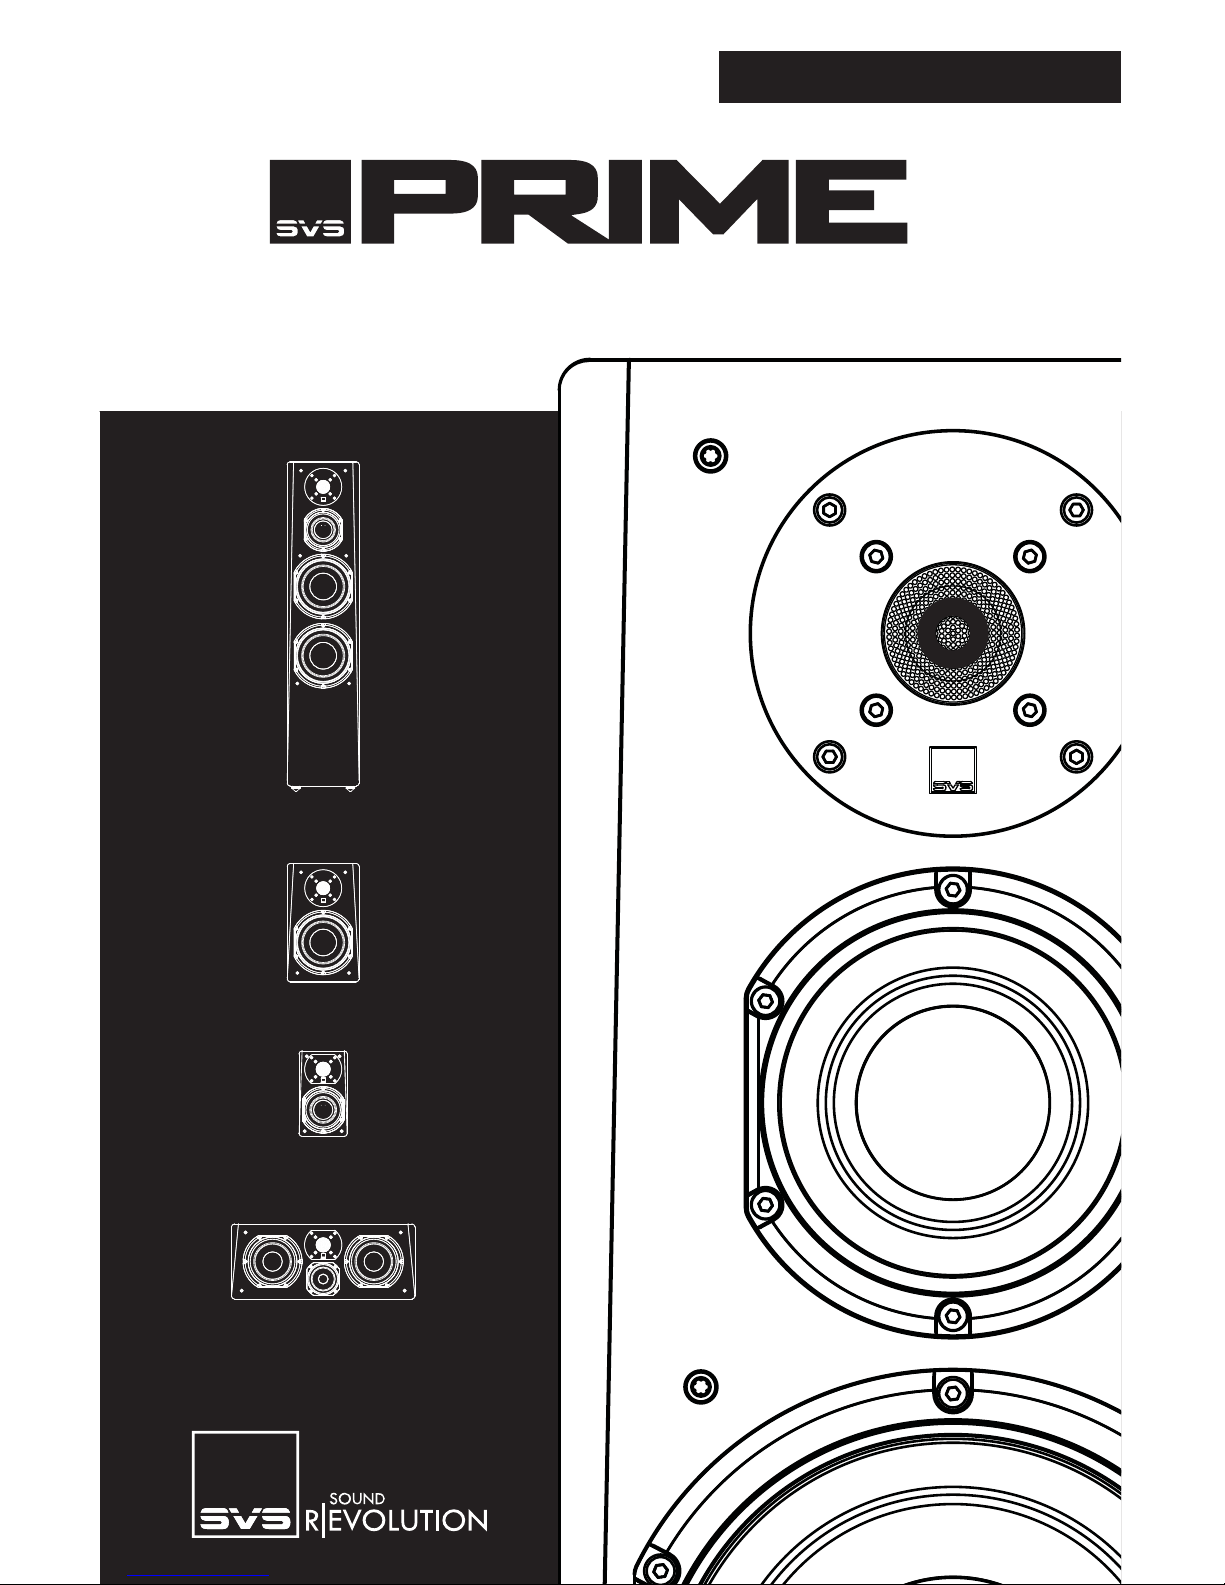
SPEAKERS
PRIME TOWER
PRIME BOOKSHELF
PRIME SATELLITE
PRIME CENTER
OWNER’S MANUAL


Thank you, and congratulations on purchasing your
new SVS Prime Speaker!
All it takes is one listen to the Prime Speakers to understand just how
much passion SVS poured into the development of this new family of
loudspeakers. Leveraging design and technology from the SVS Ultra
Speaker family, the Prime Speakers feature premium drivers and
high-quality crossover components simply not found anywhere else at
this level. We’re proud to say that you won’t find speakers with better
sound quality or performance value at this price.
If you ever have any questions about your SVS product, or need help
setting them up, feel free to contact us directly.
owner’s manual v.1.1_08192014 1

TABLE OF CONTENTS
SETTING UP YOUR PRIME SPEAKERS 3
FOOT OPTIONS 3
ACOUSTICS & ROOM PLACEMENT 4
ROOM PLACEMENT 6
SPEAKER MOUNTING 8
SPEAKER CONNECTION 9
CARING FOR YOUR PRIME SPEAKERS 10
WARRANTY 10
SHARE YOUR THOUGHTS 10
FEATURES & SPECIFICATIONS 11
PRIME TOWER 11
PRIME BOOKSHELF 12
PRIME CENTER 13
PRIME SATELLITE 14
2
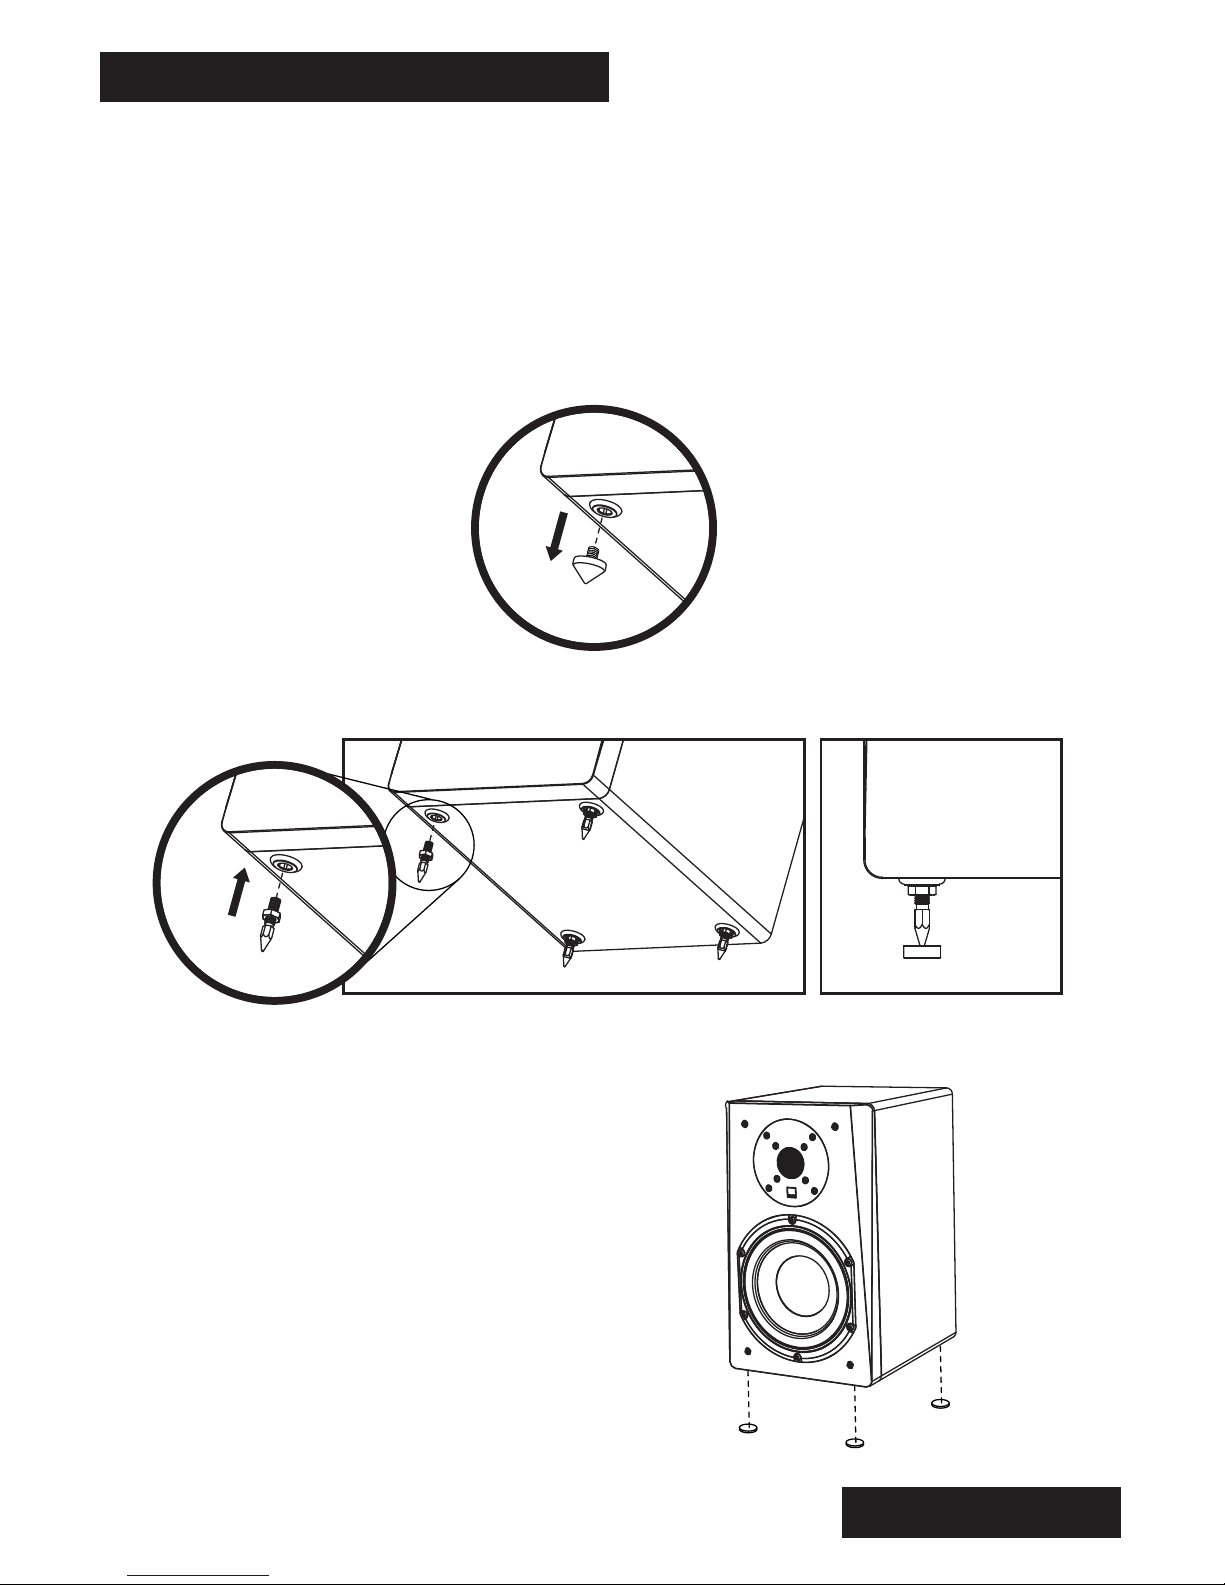
SETTING UP YOUR PRIME SPEAKERS FOOT OPTIONS
The Prime Tower speakers come packaged with two sets of foot support
options that allow optimal placement on a variety of floor substrates. The
Elastomer Isolation feet that come pre-installed on the Prime Towers can be
removed (unscrew to remove) and replaced with the included Threaded Metal
Spike kit. Both sets of feet are threaded to allow easy leveling of the Prime
Towers if they should stand on an uneven surface.
Elastomer Isolation Feet
Threaded Metal Spikes
The Prime Bookshelf, Prime Center and
Prime Satellite also include stick-on
bumper kits that can be attached to the
bottom of your speakers to protect them
when placed on speaker stands and
other surfaces.
3

SETTING UP YOUR PRIME SPEAKERS ACOUSTICS & ROOM PLACEMENT
Front Left/Right Loudspeaker Placement and Room Acoustics:
Proper placement of the front left/right speakers is essential to achieve the
smoothest frequency response, optimal stereo imaging and the most spacious,
three-dimensional soundstage.
Stereo imaging and soundstage are affected by loudspeaker location and the
listening position, relative to each other and room boundaries. Moving the
loudspeakers away from room boundaries will tend to improve stereo imaging and
spaciousness by attenuating and delaying boundary reflections, thus optimizing
direct sound and helping to preserve spatial information in the recording.
The amount of exposed glass, drywall and bare flooring in the room will increase
the amount of reflected sound and exacerbate problems like slap echo and ringing.
Conversely, furnishings like carpeting, drapes and upholstered furniture will reduce
the amount of reflected sound in the room. The ratio of direct-to-reflected sound
and the decay characteristics of the listening environment will have a large
influence on the ultimate sound quality of any loudspeaker system. Dedicated
room treatments like absorbers, diffusers and bass traps can greatly improve the
sound quality of any listening environment, and are encouraged to extract the
absolute best performance from any high-end loudspeaker system.
SVS recommends starting with the front loudspeakers located 30-degrees to the
left and right (i.e., a 60-degree total window) of the listening position.
4
25-30˚
SETTING UP YOUR PRIME SPEAKERS ACOUSTICS & ROOM PLACEMENT
5
Toeing-in the loudspeakers 5-10 degrees can often improve imaging, however this
is also a function of the distance from nearby boundaries and the ratio of direct-
to-reflected sound, so experimentation with toe-in is recommended to obtain
optimal results.
The location of the front loudspeakers relative to nearby boundaries will excite
various room modes (a complex pattern of standing waves with associated peaks
and nulls), which will affect the bass response of the loudspeakers. Generally,
placing the loudspeakers closer to room boundaries (particularly corners) will
increase the bass response. Conversely, moving the loudspeakers away from
boundaries and corners will reduce the bass response. Due to the complex
interaction of the loudspeakers with nearby boundaries/corners and your listening
position, significant changes to the bass response can occur with very small
changes in either loudspeaker location or listening position, so experimentation
with both placement and listening position is recommended to obtain optimal
results.
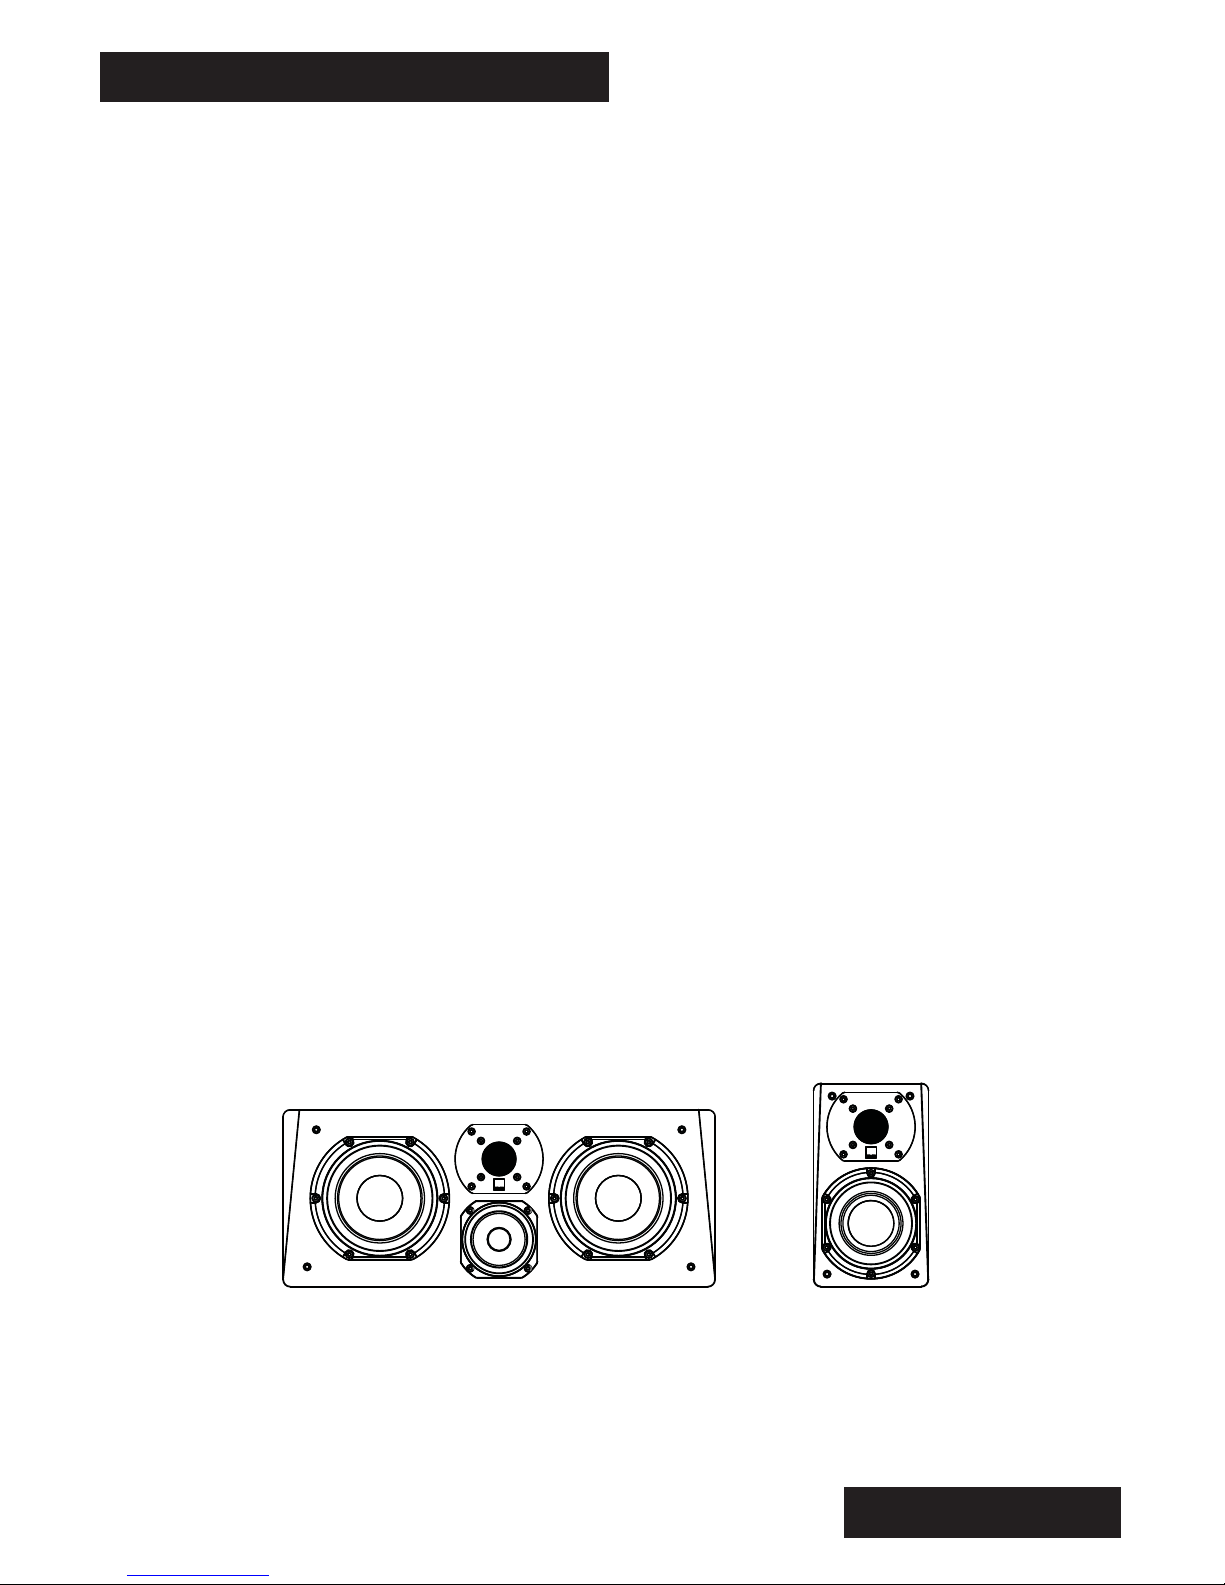
Center Channel Placement
The center channel should be placed directly on-axis, relative to the primary
seating position. As with the main front speakers, placing the tweeter at/near
head level when seated is optimal. But depending on the placement of the video
display or projection screen, this is not always possible.
If the center channel must be located below head level, then an upward tilt of the
speaker is recommended to improve mid/high frequency response and dialogue
intelligibility.
Note: When purchased as a matching surround package, the versatile Prime
Satellite functions as all channels of the system, including the center channel.
Prime Center Prime Satellite
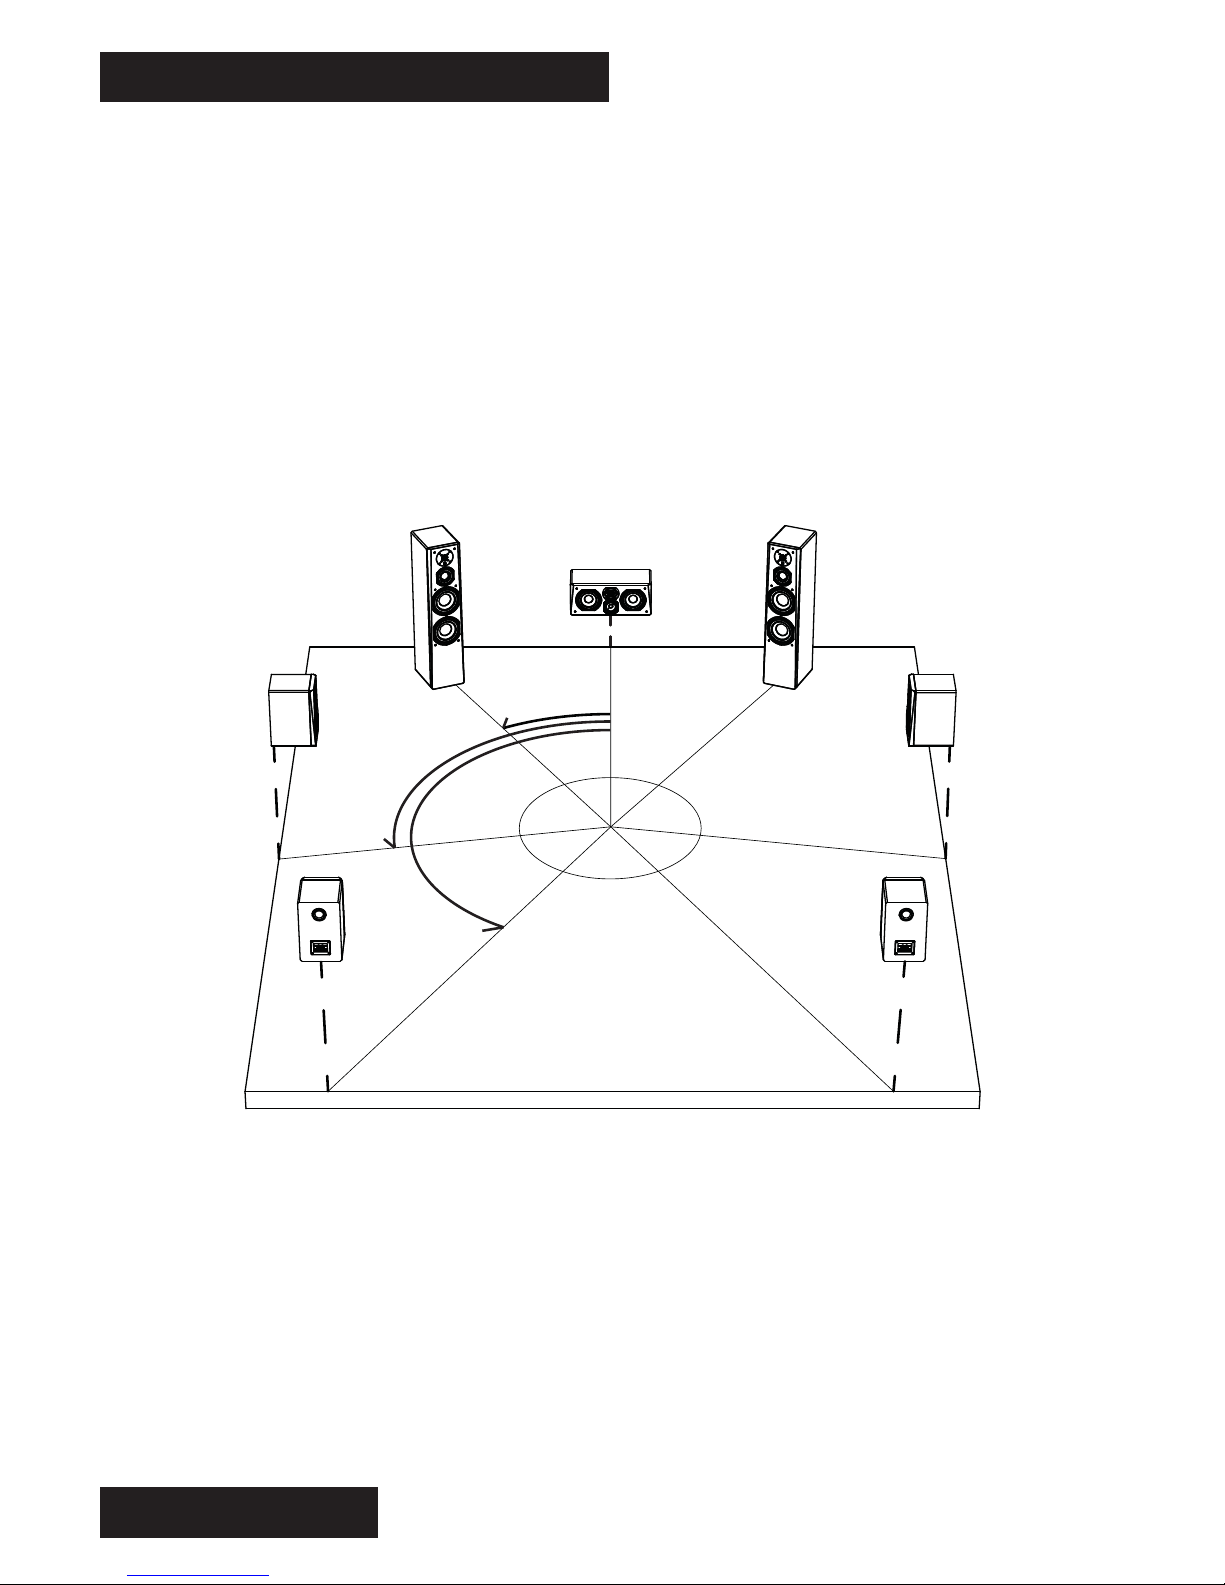
SETTING UP YOUR PRIME SPEAKERS ROOM PLACEMENT (cont’d)
Surround Speakers
In a 5-channel system, the side surround speakers should be located 90-110
degrees off-axis. For the best sense of spaciousness, the tweeter height
should be about 2 feet above ear level.
In a 7.1 system, dedicated rear surround speakers are placed behind the
primary seating position for enhanced rear panning effects.
Place the rear surround speakers at 135-150 degrees off-axis, relative to the
primary seating position. As with the side surround speakers, position the
rear surround tweeters about 2 feet above head level when seated.
9.1 and 11.1 Systems
The recent development of 9 and 11 channel surround sound processors
brings Wide and Height ‘presence’ channels into the system to even further
enhance sound stage spaciousness and immersion.
Since native Blu-ray formats are currently only available in 7.1, the use of
Wide or Height speakers requires the use of an upconverting algorithm in the
surround sound processor - like Audyssey DSX, DTS Neo:X and Dolby
ProLogic IIz.
6
25-30˚
90-110˚
135-150˚
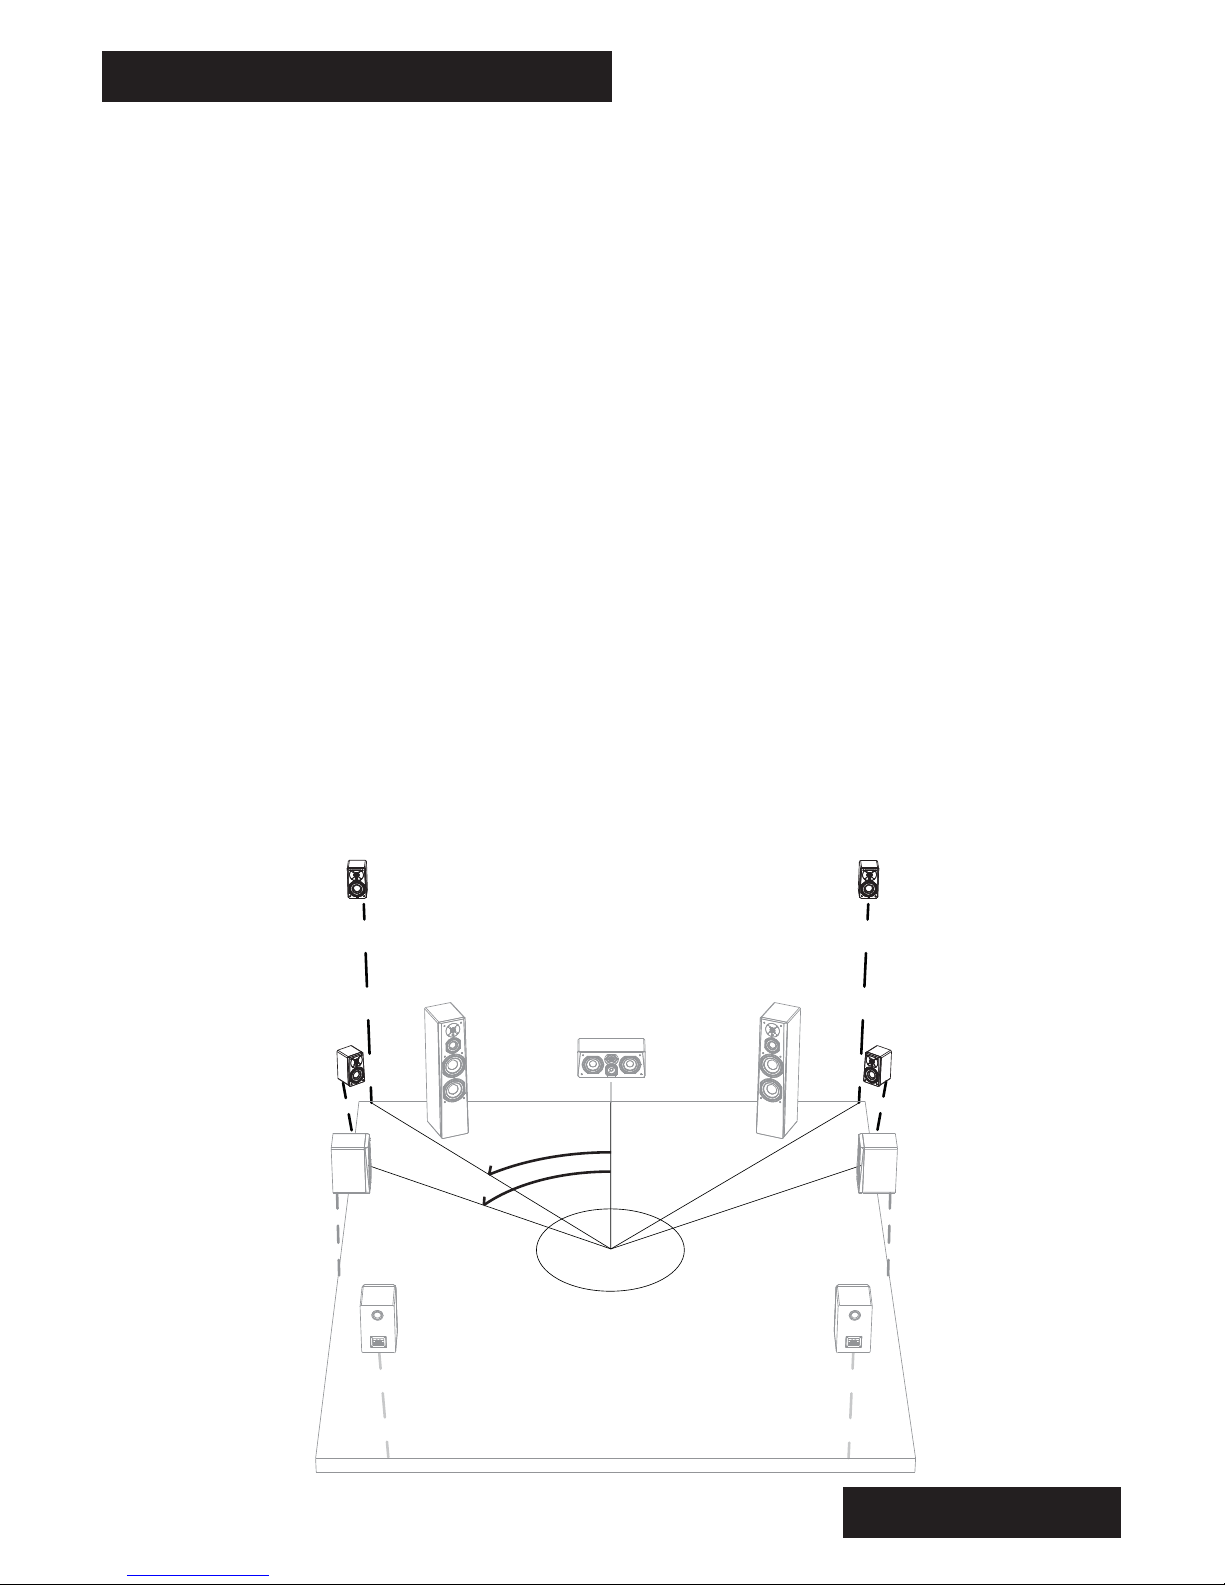
SETTING UP YOUR PRIME SPEAKERS ROOM PLACEMENT (cont’d)
7
40-45˚
60˚
Wide Speaker Channels
The wide speaker channels are intended to be placed between the main front
speakers and the side surround speakers. The goal of the wide speaker is to
minimize any gaps in panning and imaging between the front main speakers
and the side surround speakers and provide an additional sense of envelop-
ment.
The optimal location for the wide speakers is about 60 degrees off-axis,
relative to the primary seating position. Audyssey recommends that the wide
speakers be placed at head level when seated.
Height Speaker Channels
The height speaker channels should be placed in the upper left/right corners
of the front stage. Typically this will be 40-45 degrees off-axis and about 8
feet in height. A downward tilt of the speaker will improve mid/high
frequency response and reduce ceiling bounce reflections.
The height speakers enhance imaging in the vertical plane, and can even be
used to create sound effects which seem to come from directly above the
listening position, which provides total immersion into the surround sound
experience.

The mounted height of your surround
speakers is important to consider
when locating the optimal position for
you Prime Satellites. For the best
sense of spaciousness, we recom-
mend that the tweeter height of your
speaker should be about 24-36 inches
above ear level at the listening
position.
Please contact our Sound Experts if
you have any questions or concerns
about wall mounting your Prime
Satellite.
SETTING UP YOUR PRIME SPEAKERS SPEAKER MOUNTING
8
24”- 36”
Wall-Mounting Your Prime Satellites
Each Prime Satellite comes from the factory ready to be wall-mounted. The
pre-installed keyhole bracket makes hanging your Prime Satellite a simple
and convenient process. Simply attach a screw to your wall at the desired
mounting location, and insert the keyhole bracket of the speaker over the
head of the screw until the speaker rests
securely in place. Before hanging, be sure
to attach a set of the included rubber
bumpers to each lower back corner of the
Prime Satellite. These will help keep the
speaker level, and prevent spinning on the
wall.
When attaching the screw to your wall, it is
best to attach it directly into a structural
part of the wall, like a stud. If mounting
directly to a stud is not a viable option,
using drywall or masonry anchors rated to
support weights of 10 pounds or more will
be sufficient.
Este manual sirve para los siguientes modelos
4
Tabla de contenidos
Otros manuales de Oradores de SVS

SVS
SVS Ultra tower Manual de usuario

SVS
SVS Prime Wireless Pro Manual de usuario

SVS
SVS Prime Center Manual de usuario

SVS
SVS Prime Wireless Pro Manual de usuario

SVS
SVS SBS-01 Manual de usuario

SVS
SVS Prime Center Manual de usuario

SVS
SVS PB16-ULTRA Manual de usuario

SVS
SVS SB16-ULTRA Manual de usuario

SVS
SVS prime elevation Manual de usuario

SVS
SVS Prime Pinnacle Series Manual de usuario


